Search Results
1108 results found with an empty search
- "Decadent Dessert Delight: A Heavenly Banoffee Pie Recipe"
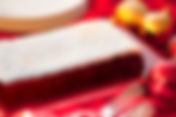
Banoffee Pie, a classic English dessert, is a symphony of flavors and textures that has captured the hearts of sweet tooths around the world. This no-bake delight consists of a vanilla layer crust, a rich toffee filling, fresh bananas, and a decadent chocolate mousse, all topped with a unique coffee whipped cream. Its history dates back to the 1970s at The Hungry Monk Restaurant in East Sussex, and since then, the pie has undergone various transformations and has been celebrated in popular culture. Whether you're a seasoned baker or a curious foodie, Banoffee Pie is a tantalizing treat that promises to impress. Key Takeaways Banoffee Pie was invented in 1971 at The Hungry Monk Restaurant in East Sussex, UK. The dessert's signature layers include a vanilla crust, toffee filling, bananas, chocolate mousse, and coffee whipped cream. Variations such as Banoffee Pie with Salted Chocolate offer a twist on the classic recipe. The pie is best served at room temperature, after being stored in the fridge for freshness. Banoffee Pie is accessible to different dietary needs with adaptations like gluten-free or vegan alternatives. The Sweet History of Banoffee Pie The Invention at The Hungry Monk Restaurant The story of Banoffee Pie begins in the early 1970s, within the walls of The Hungry Monk restaurant. This quaint establishment, located in the picturesque East Sussex village, became the birthplace of a dessert that would captivate the taste buds of many. The pie's creation was a result of experimentation and a desire to offer something uniquely delightful to patrons. As the pie gained fame, its recipe was shared and adapted, leading to various interpretations that still honor the original's spirit. The Hungry Monk may no longer be in operation, but its legacy lives on through the enduring love for Banoffee Pie. The Evolution of Banoffee Pie From its inception at The Hungry Monk Restaurant in the early 1970s, Banoffee Pie has undergone a remarkable transformation. Initially a simple combination of bananas and toffee, the dessert has since incorporated various layers and flavors, each adding a new dimension to the classic treat. The original recipe's popularity spurred a wave of creativity among chefs and home bakers alike. Here's a brief timeline of its evolution: 1971: The birth of Banoffee Pie at The Hungry Monk Restaurant. Mid-1970s: Introduction of the chocolate mousse layer. 1980s: Coffee whipped cream becomes a trendy topping. 1990s: The addition of Heath bar bits for a crunchy texture. 2000s: Variations with salted chocolate begin to emerge. Today, Banoffee Pie is not just a dessert; it's a canvas for culinary expression. Whether it's the addition of salted chocolate for a modern twist or the substitution of ingredients to cater to dietary restrictions, the pie continues to evolve, ensuring its place in the hearts of dessert lovers for years to come. Banoffee Pie in Popular Culture Banoffee Pie has not only delighted taste buds but also captured the hearts of many, making frequent appearances in popular media. Its presence on television shows and in baking competitions underscores its cultural significance. For instance, the beloved dessert has been featured in challenges on 'The Great British Bake Off', a testament to its enduring popularity in the UK. Banoffee Pie's versatility allows it to be a canvas for creativity, leading to numerous variations and interpretations that keep it trending. Whether it's the addition of salted chocolate or a coffee whipped cream twist, these innovations continue to spark interest and conversation among dessert enthusiasts. Decoding the Layers of Flavor The Vanilla Layer Crust The foundation of any great Banoffee Pie is its crust, and the vanilla layer crust offers a delicate balance of sweetness and texture. The choice of vanilla wafers as the base ingredient provides a subtle flavor that complements the rich toffee and banana layers above. To create this essential layer, you'll need vanilla wafer crumbs, powdered sugar, and unsalted butter. The process is straightforward: combine the crumbs and sugar, then mix in the melted butter until the mixture is well-coated and can be pressed firmly into your pan to form the crust. Here's a quick reference for the crust ingredients: 2 cups vanilla wafer crumbs (215 grams) 1/4 cup powdered sugar (35 grams) 6 tablespoons unsalted butter (90 grams) Remember, the quality of the crust sets the stage for the layers that follow, so take your time to perfect this first step. Toffee Filling: The Heart of Banoffee The toffee filling is what gives Banoffee Pie its distinctive, indulgent flavor. A rich blend of butter, sugar, and condensed milk, this layer caramelizes into a smooth, golden toffee that is both sweet and slightly buttery. Crafting the perfect toffee filling requires attention to detail and the right ingredients. Here's a simple breakdown of the toffee filling components: 4 tablespoons unsalted butter (60 grams) 1/3 cup light brown sugar (65 grams) 2 tablespoons corn syrup 12 ounce can condensed milk 1 teaspoon vanilla Once combined and cooked to perfection, the toffee filling becomes the heart of the Banoffee experience, complementing the other layers and creating a symphony of flavors with the bananas and the crust. The Role of Bananas in Banoffee Pie Bananas play a pivotal role in the unique taste profile of Banoffee Pie, providing a soft, sweet contrast to the rich toffee filling. Their natural sweetness and creamy texture are essential to balancing the dessert's flavors. When selecting bananas for your Banoffee Pie, aim for those that are ripe but still firm to ensure they hold their shape and complement the other layers. Choose ripe but firm bananas Slice bananas evenly for consistent texture Layer bananas directly on the toffee filling Bananas not only contribute to the taste but also to the pie's visual appeal. Evenly sliced bananas create a pleasing aesthetic when layered upon the golden toffee, making each slice a delight for the eyes as well as the palate. Remember, the bananas should be layered directly on the toffee filling to prevent them from browning and to preserve their fresh flavor. Chocolate Mousse and Heath Bar Bits The chocolate mousse layer in a Banoffee Pie is not just about indulgence; it's a symphony of textures and flavors that elevates the entire dessert. Be sure to use real chocolate for the mousse, as its quality profoundly affects the final taste. When preparing the mousse, remember that the toffee's smoothness is paramount. A little corn syrup can prevent the sugar from becoming grainy, ensuring a velvety consistency. Always opt for a heavy bottom saucepan for the toffee filling, and maintain constant stirring to avoid burning the condensed milk. For those who plan ahead, the mousse can be made several days in advance and refrigerated. Just bring it to room temperature before using. After layering, the pie should be refrigerated to set, ensuring each slice is perfect. This nutritional breakdown provides a glimpse into the indulgent nature of Banoffee Pie, with its rich flavors and satisfying textures. Coffee Whipped Cream: A Unique Twist The addition of coffee whipped cream to Banoffee Pie is not just a garnish; it's a flavor enhancer that brings a unique twist to the dessert. Dissolving instant coffee in vanilla before whipping it with heavy cream and powdered sugar creates a rich and aromatic topping that complements the sweetness of the toffee and bananas. For those sensitive to caffeine or preferring a milder taste, the coffee can be adjusted to suit individual preferences. Here's a simple guide to the proportions: 2 teaspoons instant coffee (adjust to taste) 1 teaspoon vanilla extract 1 rac14 cups heavy cream rac14 cup powdered sugar (35 grams) Remember, the coffee whipped cream should be piped around the pie's edge for a professional finish. Allow the pie to sit at room temperature for 20 to 30 minutes before serving to ensure the best flavor profile. Creating Your Own Banoffee Masterpiece Gathering the Ingredients Before embarking on the journey of creating your own Banoffee masterpiece, it's essential to have all the ingredients at hand. Gathering the right ingredients is the first step towards a perfect Banoffee Pie. Here's what you'll need for the base recipe: Unsalted butter Caster sugar Eggs at room temperature Pineapple juice (unsweetened) Vegetable oil All-purpose flour Baking powder Baking soda Once you have all the ingredients ready, you're set to move on to the next phase of assembly. Remember, the quality of ingredients can make or break your dessert, so choose them wisely. Step-by-Step Assembly Instructions Once you have all your components ready, the assembly of your Banoffee Pie is a delightful process that promises a delicious outcome. Begin by layering the vanilla crust in your chosen dish, ensuring it's evenly spread and firmly packed. Next, pour the rich toffee filling over the crust, smoothing it out to create a seamless layer. Proceed by arranging the banana slices atop the toffee layer; their natural sweetness and texture are crucial to the pie's character. If you're adding chocolate mousse or heath bar bits, now is the time to sprinkle them over the bananas. Finally, top everything with a generous dollop of coffee whipped cream, swirling it to perfection. For those who prefer a visual guide, the 'Banoffee Pie - The Cooking Collective' offers helpful tips, step-by-step photos, and FAQs to help you achieve the best possible results. As they suggest, it's best to wait to assemble the pie until just before serving to maintain the freshness and integrity of each layer. Expert Tips for the Perfect Pie Achieving the perfect Banoffee Pie is an art that requires attention to detail and a few insider secrets. Ensure your crust is golden and crisp by pre-baking it until it reaches just the right color. This provides a sturdy base that complements the creamy filling. When layering your pie, consistency is key. For the toffee layer, aim for a smooth, even spread to avoid lumps that can disrupt the texture. As for the bananas, slice them uniformly to ensure each bite is as delightful as the last. Finally, don't rush the chilling process. A well-chilled pie sets properly, allowing the flavors to meld beautifully. Here's a quick checklist to help you along: Pre-bake the crust until golden Spread the toffee evenly Slice bananas uniformly Chill the pie thoroughly before serving Banoffee Pie Variations to Explore Banoffee Pie with Salted Chocolate Introducing a delightful twist to the classic, the Banoffee Pie with Salted Chocolate combines the sweetness of bananas and toffee with a hint of savory from the salted chocolate. This variation not only adds a complex flavor profile but also caters to those who appreciate a balance of sweet and salty in their desserts. Begin with the standard Banoffee base of a vanilla layer crust and toffee filling. Layer sliced bananas as you would in the traditional recipe. Instead of plain chocolate, melt salted chocolate and pour it over the banana layer. Allow the chocolate to set slightly before adding the final touches of whipped cream and any additional toppings. For those looking to experiment further, consider sprinkling a little sea salt over the chocolate layer or incorporating salted caramel into the toffee for an even more indulgent experience. Alternative Toppings and Twists While the classic Banoffee Pie is a delight, experimenting with alternative toppings and twists can elevate this dessert to new heights. Boldly venture beyond the traditional by incorporating a variety of toppings that complement the pie's rich flavors. Sweetened whipped cream adds a light, airy touch to the dense toffee and banana layers. For a tangy twist, consider a dollop of lemon or lime-infused whipped cream. Drained maraschino cherries can serve as vibrant, flavor-packed garnishes. Chopped pecans offer a crunchy contrast, though they can be omitted for those with nut allergies or preferences. Remember, the key to a successful twist is ensuring that the additional elements harmonize with the pie's foundational flavors without overpowering them. Explore and enjoy the endless possibilities! Dietary Adaptations: Making Banoffee Pie Accessible Banoffee Pie, a beloved dessert, can be adapted to suit various dietary needs, ensuring everyone can indulge in its sweet delight. Adapting the classic Banoffee Pie to cater to different dietary restrictions has become increasingly popular. Whether it's for health reasons or personal preferences, there are numerous ways to modify the traditional recipe. Vegan: Substitute dairy ingredients with plant-based alternatives like coconut milk or almond cream. Gluten-free: Use gluten-free biscuits for the crust or opt for a crustless version. Dairy-free: Opt for dairy-free chocolate and use margarine instead of butter. Egg-free: Most Banoffee Pie recipes don't require eggs, but always double-check your toffee and mousse ingredients. Paleo: Choose unrefined sweeteners and a grain-free crust to comply with paleo guidelines. For those looking to explore international twists, the Barbadian Banoffee Pie offers a fusion of flavors, incorporating local ingredients and dietary considerations into the traditional recipe. Serving and Storing Banoffee Pie The Ideal Serving Temperature To fully appreciate the rich flavors and textures of Banoffee Pie, serving it at the ideal temperature is crucial. Bring the pie to room temperature before adding the bananas to ensure the perfect consistency and taste. This allows the toffee filling to soften slightly, enhancing its caramel-like qualities. For the best experience, serve the pie soon after assembly. If refrigerated, allow the pie to sit at room temperature for about 20 to 30 minutes before serving. This step ensures that the pie is not too firm and the flavors are more pronounced. Remember, the key to a delightful Banoffee Pie experience lies not just in the quality of ingredients but also in how it is served. Savor each bite at the perfect temperature for a truly indulgent dessert. Storing Tips for Freshness Ensuring your Banoffee Pie remains as delectable as the moment it was assembled requires proper storage techniques. Wrap your pie tightly in plastic wrap to maintain moisture and prevent the absorption of odors from your refrigerator. For optimal freshness, consume the pie within 3 days of preparation. Here's a simple guide to help you remember the key points: Wrap the pie tightly in plastic wrap. Store in the refrigerator, away from strong odors. Consume within 3 days for best taste and texture. If you must store it longer, freezing is an option, though texture may be affected upon thawing. Remember, the fresher the pie, the better the experience. So, aim to indulge in your Banoffee masterpiece as soon as possible for that perfect blend of sweetness and texture. Pairing Suggestions for a Complete Dessert Experience After indulging in the rich layers of a Banoffee Pie, selecting the perfect beverage or side to complement its flavors can elevate the entire dessert experience. A well-chosen pairing can balance the sweetness and add a new dimension to your palate. For a harmonious combination, consider these suggestions: A robust espresso or a cup of strong black coffee can cut through the sweetness and provide a contrasting flavor that enhances the pie. Dessert wines such as a sweet sherry or a tawny port can match the intensity of the toffee and the richness of the cream. For a non-alcoholic option, a spiced chai latte with its aromatic blend of spices can be a cozy and fitting choice. Remember, the goal is to create a balance that allows each component of your dessert course to shine without overpowering the others. Experiment with different pairings to discover what delights your taste buds the most. Conclusion In conclusion, Banoffee Pie stands as a testament to the ingenuity of British dessert-making, with its delightful combination of bananas, toffee, and a touch of coffee whipped cream. This no-bake wonder, which originated from The Hungry Monk Restaurant in 1971, has since captured the hearts of dessert lovers worldwide. Its simplicity in preparation, coupled with the richness of flavors, makes it a perfect treat for any occasion. Whether you follow the classic recipe or add a twist with salted chocolate, the result is always a crowd-pleaser. Remember to use ripe but not overripe bananas, real chocolate for the mousse, and to let the pie sit at room temperature for a bit before serving to ensure the best taste experience. As we've explored various recipes and tips, it's clear that Banoffee Pie is more than just a dessert; it's a celebration of sweet indulgence that continues to evolve and inspire. Frequently Asked Questions What is the origin of Banoffee Pie? Banoffee Pie was invented in Britain at The Hungry Monk Restaurant in East Sussex by owner Nigel Mackenzie and his chef, Ian Dowding, in 1971. How is the toffee filling in Banoffee Pie made? The toffee filling, also known as dulce de leche, is made by caramelizing condensed milk, which undergoes the Maillard reaction when heated to the proper moisture level. Can I boil a can of condensed milk to make the toffee filling? Yes, boiling a can of condensed milk is a common method to create the toffee filling, but it must be done carefully to avoid bursting the can. What are the essential layers in a Banoffee Pie? A classic Banoffee Pie consists of a vanilla layer crust, a toffee filling, bananas, chocolate mousse with Heath bar bits, and a coffee whipped cream topping. How should Banoffee Pie be stored for freshness? Banoffee Pie should be stored in the refrigerator, but it's best to let it come to room temperature for about 20 to 30 minutes before serving for the best taste. Are there variations of Banoffee Pie I can try? Absolutely! You can explore variations such as Banoffee Pie with salted chocolate or try different toppings and twists like alternative whipped cream flavors or chocolate shavings.
- 1. "Decadent Cheesecake Recipes to Satisfy Your Sweet Tooth"
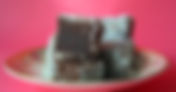
Cheesecake is a beloved dessert that has captivated the hearts and taste buds of many. This decadent treat, known for its rich and creamy texture, comes in various flavors and styles, making it a versatile choice for any occasion. From crafting the perfect base to exploring a world of toppings and serving techniques, this article delves into the art and science of creating the ultimate cheesecake experience. Key Takeaways Cheesecake is a classic dessert that can be customized with a variety of toppings and flavors, making it perfect for any event. Achieving a velvety smooth texture is crucial for the perfect cheesecake and can be accomplished with the right recipe and techniques. Cheesecakes can be stored in the refrigerator for up to 4 days or frozen for longer preservation without sacrificing quality. Festive cheesecake variations like Chocolate Peppermint and Crème Brûlée Cheesecake offer delightful twists for holiday celebrations. With simple ingredients and steps, anyone can make a gourmet-style cheesecake that rivals those from high-end bakeries. The Art of Crafting the Perfect Cheesecake Velvety Smooth Texture Achieving a velvety smooth texture in cheesecake is a testament to the precision and care put into its creation. The key lies in the quality of ingredients and the finesse in mixing—overbeating can introduce too much air, leading to a less than perfect consistency. To ensure the ideal texture, consider the following points: Use full-fat cream cheese for a richer mouthfeel. Incorporate eggs one at a time, mixing just enough to blend. Bake in a water bath to promote even cooking and prevent cracking. Remember, the perfect cheesecake texture doesn't happen by chance; it's the result of meticulous attention to detail throughout the baking process. Classic and Versatile The beauty of cheesecake lies in its classic and versatile nature, making it a beloved dessert for any occasion. Whether you're looking for a simple treat or an elaborate centerpiece, cheesecake can be adapted to suit your needs. Its ability to pair with a myriad of flavors and toppings allows for endless creativity in the kitchen. Vanilla Chocolate Strawberry Lemon Pumpkin Remember, the best cheesecake is made with simple and rich ingredients, ensuring a luxurious experience with every bite. Embrace the versatility of cheesecake and make it your own. Perfect Cheesecake Recipe Embarking on the journey to create the ultimate New York-style cheesecake begins with quality ingredients and precision. The foundation of this indulgent dessert is a creamy blend of room temperature cream cheese, sugar, a pinch of salt, and vanilla extract. The smoothness of the mixture is paramount, achieved by adding one large egg at a time, ensuring each is fully incorporated before introducing the next. For those seeking a foolproof method, consider the alternative of using oven or slow cooker bags to safeguard your creation from the perils of a torn foil during the water bath stage. The result is a luxuriously smooth cheesecake that is both rich and light, capable of delighting a crowd. Remember, the perfect cheesecake is not rushed. It requires patience, from the careful mixing of ingredients to the gradual cooling and necessary chilling time. Allow your masterpiece to set for at least four hours to achieve the desired texture and flavor that makes every slice worth the wait. Tantalizing Toppings and Accompaniments Berry Sauce Variations The versatility of berry sauces makes them a delightful addition to any cheesecake. A simple raspberry sauce can transform your dessert from ordinary to extraordinary. Start by mashing raspberries with sugar and water in a saucepan, then heat the mixture until it thickens. This process is not only easy but also quick, ensuring you have a delicious topping in no time. For those who enjoy a bit of creativity, consider experimenting with different berry combinations or adding unique ingredients like lemon zest or almond extract. Here's a list of popular berry sauce variations to inspire your next cheesecake topping: Raspberry sauce Strawberry sauce Blueberry sauce Mixed berry sauce Mango sauce (for a tropical twist) Remember, a well-made berry sauce not only complements the cheesecake but can also serve as a delicious pie filling or an accompaniment to other desserts. Indulgent Chocolate and Caramel The combination of chocolate and caramel in cheesecake is a match made in heaven. Rich, indulgent layers of velvety chocolate are perfectly complemented by the sweet and slightly salty notes of caramel. For those who adore this pairing, the Salted Caramel Cheesecake from Butternut Bakery is a must-try. It's described as the best cheesecake recipe ever, with its silky smooth texture and homemade salted caramel sauce. Here's a list of some popular chocolate and caramel cheesecake variations: Cognac Truffle: Gold cake with white chocolate truffle mousse Banana Cream: Chocolate or gold cake with banana and chocolate mousse Pina Colada: Gold cake with strawberries, pineapple, coconut, and white chocolate mousse Lemon Raspberry: Gold cake with layers of lemon and raspberry mousse Triple Berry: Chocolate or gold cake with a trio of berries and white chocolate mousse Each variation offers a unique twist on the classic dessert, ensuring there's a flavor combination to satisfy every palate. Fresh and Fruity Options When it comes to elevating the humble cheesecake to a dessert of epic proportions, fresh and fruity options stand out as a refreshing choice. Whether you're spooning a vibrant berry sauce over your slice or decorating it with a rainbow of fresh fruit, these toppings not only add a burst of natural sweetness but also a visually stunning appeal. Chantilly Cream Strawberry Compote Fresh Fruits e.g., raspberries Dried rose petals Crushed Cookies e.g., Biscoff Each option offers a unique texture and flavor that can complement or contrast with the rich creaminess of the cheesecake. For instance, the lightness of Chantilly Cream or the tangy sweetness of a Strawberry Compote can balance the dessert's density. Meanwhile, the addition of fresh fruits like raspberries not only provides a juicy burst of flavor but also introduces a delightful pop of color. Storing and Serving Cheesecake Refrigeration and Shelf Life Proper refrigeration is crucial for maintaining the freshness and quality of cheesecake. According to the USDA's Food Keeper App, cheesecake should be consumed within 5 to 7 days of refrigeration. This timeframe ensures that the cheesecake remains safe to eat and retains its optimal flavor and texture. For longer storage, cheesecake can be frozen. Here's a simple guideline for freezing and thawing your cheesecake: Wrap the cheesecake tightly in plastic wrap or aluminum foil. Place the wrapped cheesecake in a heavy-duty freezer bag or airtight container. Cheesecake can be stored in the freezer for up to two weeks. To thaw, transfer the cheesecake to the refrigerator and allow it to defrost slowly, preferably overnight. Freezing Techniques Cheesecakes are known for their ability to freeze well, making them a convenient dessert to prepare in advance. To ensure the best results when freezing cheesecake, it's important to let the cheesecake cool completely after baking. Once cooled, wrap it tightly in plastic wrap, followed by aluminum foil, and place it in an airtight container. This method helps to prevent freezer burn and preserve the cheesecake's texture and flavor. Remember to label your cheesecake with the freezing date. Here's a simple guide to follow: Wrap in plastic wrap Wrap in aluminum foil Place in an airtight container Label with the freezing date Thaw in the refrigerator overnight Tips for Serving Your Cheesecake When it comes to serving your cheesecake, presentation is key. A chilled cheesecake not only slices more cleanly but also offers the ideal texture and flavor. Here are a few tips to ensure your cheesecake is served to perfection: Allow the cheesecake to chill thoroughly before serving. This step is crucial for achieving that velvety, silky texture. For a flawless release, run a knife along the edge of the cheesecake before removing the springform sides. Consider the temperature at which you serve your cheesecake. While it's traditionally served chilled, some prefer it at room temperature or even slightly warmed, especially if accompanied by a warm sauce. To complement your cheesecake, offer a variety of toppings and sauces. Here's a simple list to inspire your accompaniments: Berry sauce (raspberry, strawberry, blueberry) Fruit curd (lemon, passionfruit) Salted caramel sauce Whipped cream Chocolate ganache Toasted coconut Fresh fruit Lastly, ensure your cheesecake is stored properly before serving. Keep it refrigerated in an airtight container, and if you're planning ahead, remember that a cheesecake can be prepared up to three days in advance. Holiday Specials: Festive Cheesecake Creations Chocolate Peppermint Cheesecake The Chocolate Peppermint Cheesecake is a holiday favorite that combines the rich indulgence of chocolate with the refreshing zing of peppermint. This no-bake delight is perfect for festive gatherings and is sure to impress both children and adults alike. To create this dessert masterpiece, start with a base of crushed Oreo cookies mixed with melted butter to form a firm crust. The filling, a blend of room temperature cream cheese, sweetened condensed milk, and peppermint extract, is then poured over the crust and allowed to set. A layer of semisweet chocolate tops the cheesecake, adding that essential chocolatey goodness. For a final touch, garnish with candy toppings or sugared cranberries to add a pop of color and texture. The result is a dessert that not only tastes like the richest chocolate truffle but also captures the spirit of the season. Mississippi Mud Cheesecake The Mississippi Mud Cheesecake is a decadent dessert that marries the classic flavors of the Southern dessert with the creamy richness of cheesecake. The chocolate, pecan, and marshmallow combination is a creamy, irresistible delight, ensuring that each bite is a journey through a symphony of textures and tastes. For those eager to recreate this masterpiece at home, here's a simplified breakdown of the components: Chocolate crust as the base Rich chocolate cheesecake filling Pecan pieces for a nutty crunch A layer of gooey marshmallow A final drizzle of chocolate ganache Each layer contributes to the overall experience, making it a favorite for those who appreciate a dessert that's as visually appealing as it is delicious. Whether it's for a special occasion or a weekend treat, the Mississippi Mud Cheesecake is sure to impress. Crème Brûlée Cheesecake The Crème Brûlée Cheesecake is a sublime fusion of two classic desserts, delivering a symphony of textures and flavors. The base of this culinary masterpiece begins with a buttery graham cracker crust, providing a firm foundation for the layers to come. Above this lies the heart of the dessert: a rich cheesecake filling, peppered with the distinctive speckles of vanilla bean, offering a creamy contrast to the crisp base. The crowning glory of the Crème Brûlée Cheesecake is its signature top layer—a delicate blanket of caramelized sugar, which cracks satisfyingly at the tap of a spoon, revealing the velvety cheesecake beneath. This dessert is not just a treat for the palate but also a visual delight, with the caramelized top glistening invitingly, beckoning dessert lovers to indulge in its exquisite combination of textures. Cheesecake Variations for Every Occasion Dreamy Lemon Cheesecake The Dreamy Lemon Cheesecake lives up to its name with an ultra-smooth texture that lingers in your memory. Its zesty lemon flavor is both refreshing and indulgent, making it a standout dessert for any occasion. For those who wish to recreate this delightful treat, here's a simple list of key ingredients: Cream cheese Granulated sugar Eggs Fresh Meyer lemon juice Lemon zest Vanilla extract Graham cracker crust Each component plays a vital role in achieving the perfect harmony of flavors. Remember, the quality of ingredients can make a significant difference in the final product, so choose them wisely. Cheesecake Cookies Cheesecake cookies offer a delightful twist on the traditional cheesecake, combining the creamy richness of cheesecake with the convenience of a cookie. These treats are perfect for sharing at gatherings or enjoying as a personal indulgence. For those who love the warm, comforting flavors of cinnamon, the Cinnamon Roll Cheesecake Cookies are a must-try. The recipe calls for a harmonious blend of butter, sugar, vanilla extract, and a precise combination of leavening agents to create a soft, chewy base that complements the cheesecake filling. If you're planning to bake a batch for your next event, here's a simple ingredient list to get you started: 226 grams butter 200 grams granulated sugar 1 egg 6 grams vanilla extract 330 grams All-Purpose Flour 4 grams baking soda 2 grams baking powder 100 grams of your favorite add-ins (chocolate chips, nuts, fruit, etc.) Remember, the key to perfect cheesecake cookies lies in the balance of flavors and the quality of ingredients. Happy baking! More Favorite Cheesecake Recipes The quest for the ultimate cheesecake recipe collection is never-ending. Cheesecake enthusiasts rejoice as we delve into a treasure trove of flavors and styles that cater to every palate and occasion. Whether it's the zest of a Key Lime Cheesecake or the indulgent layers of a Turtle Cheesecake, the variety is boundless. For those who prefer a no-fuss approach, No-Bake Cheesecake offers simplicity without compromising on taste. Meanwhile, the adventurous can explore the unique presentation of Raspberry Cheesecakes in Jars or the convenience of Pressure Cooker Cheesecake. Here's a glimpse at some of the favorites: Pumpkin Cheesecake Chocolate Chip Cheesecake Bars Crème Brûlée Cheesecake Dreamy Lemon Cheesecake Cheesecake Cookies Each recipe promises a delightful experience, ensuring that your dessert table is always the center of attention. Conclusion In the world of desserts, cheesecake stands out as a versatile and beloved treat. Whether you're indulging in a slice of velvety smooth classic cheesecake, experimenting with flavors like Chocolate Peppermint or Crème Brûlée, or enjoying the convenience of cheesecake cookies and jars, there's a style to satisfy every palate. The ease of preparation and the ability to make it ahead of time only add to its appeal, making cheesecake a perfect choice for any occasion. With a myriad of topping options and serving tips, you can elevate your cheesecake experience to new heights. Remember to store it properly, and don't hesitate to freeze it for future cravings. Cheesecake is more than just a dessert; it's a canvas for creativity, a comfort food, and a testament to the simple joy of baking. Frequently Asked Questions What are some popular toppings to serve on cheesecake? Popular toppings include berry sauce (like raspberry, strawberry, and blueberry), pie filling, fruit curd, salted caramel sauce, whipped cream, chocolate ganache, toasted coconut, and fresh fruit. How should I store cheesecake and how long will it last? Store cheesecake in an airtight container in the refrigerator for up to 4 days. You can enjoy it chilled or let it sit at room temperature for up to 1 hour for a softer texture. Can I freeze cheesecake? Yes, cheesecake can be frozen. Wrap it tightly in plastic wrap or aluminum foil, or place it in a freezer-safe container. It can be frozen for several months. Thaw in the refrigerator before serving. What makes the texture of cheesecake velvety smooth? The velvety smooth texture is achieved by carefully blending the ingredients to create a creamy consistency that melts in your mouth, and by baking the cheesecake at the right temperature. Are there any cheesecake recipes that are especially good for the holidays? Yes, there are many festive cheesecake recipes such as Chocolate Peppermint Cheesecake and Mississippi Mud Cheesecake that are perfect for the holiday season. What are some easy cheesecake variations I can make for any occasion? Some easy and favorite cheesecake variations include Pumpkin Cheesecake, No-Bake Cheesecake, Chocolate Chip Cheesecake Bars, Pressure Cooker Cheesecake, and Raspberry Cheesecakes in Jars.
- "5 Delicious Matcha Green Tea Cake Recipes to Try at Home"
Embark on a culinary journey with the Matcha Green Tea Cake, a delightful dessert that marries the unique bitterness of matcha with the classic sweetness of cake. This article will guide you through the nuances of creating the perfect matcha cake, from understanding its distinct flavor profile to mastering the recipe, and finally, presenting a stunning cake that's sure to impress. Whether you're a seasoned baker or a curious novice, this guide will help you craft a cake that's as visually appealing as it is delicious, complete with tips for those with dietary restrictions and answers to common baking questions. Key Takeaways High-quality matcha powder is crucial for achieving the vibrant color and unique flavor profile of the cake. The natural coloring properties of matcha add a beautiful green hue to the cake, making it visually striking without artificial dyes. Matcha's earthy taste pairs exceptionally well with complementary flavors such as vanilla, lemon, and fruits like raspberries. Cooling the cake properly before frosting is essential to prevent the frosting from melting and to ensure a smooth finish. Gluten-free options are available for those with dietary restrictions, without compromising the balance of matcha, lemon, and vanilla flavors. The Art of Matcha Green Tea Cake Understanding the Unique Flavor Profile Matcha is a unique green tea with a complex flavor profile, often described as earthy, grassy, and sweet. Its distinct taste is a result of the careful shading of the tea plants before harvest, which increases chlorophyll levels and boosts the production of amino acids, particularly L-Theanine. This amino acid is responsible for matcha's characteristic umami flavor, which is savory and deeply satisfying. When baking, matcha imparts a subtle yet distinct taste that pairs exceptionally well with other flavors such as vanilla, lemon, and various fruits. It also adds a natural green color to cakes, making them visually appealing without the need for artificial dyes. Understanding and harnessing this flavor profile is key to creating a matcha green tea cake that is both delicious and visually stunning. Selecting the Right Matcha Powder The selection of matcha powder is crucial to the success of your Matcha Green Tea Cake. Ceremonial grade matcha is often recommended for its fine texture and superior flavor, which is ideal for cakes and other delicate desserts. On the other hand, culinary grade matcha is designed for cooking and baking, offering a stronger tea flavor that can hold up against other ingredients. When choosing matcha, consider the following: Color: Vibrant green indicates freshness and quality. Origin: Japanese matcha is traditionally preferred. Texture: It should be fine and silky, not coarse. Taste: A balance of sweetness and umami is key. Finally, organic matcha might be a priority for those seeking a product free from synthetic fertilizers and pesticides. While it may come at a higher price point, the peace of mind and potential health benefits make it a worthy consideration for your Matcha Green Tea Cake. The Role of Matcha in Cake Color and Taste Matcha is not just a trendy ingredient; it's a powerhouse of flavor and color that transforms any cake into a visual and gustatory delight. The vibrant green hue of matcha is its signature, lending a natural and appealing look to your baked goods without the need for artificial dyes. This green tea powder infuses cakes with a unique taste profile that balances sweetness with a distinct, mellow bitterness, often described as 'earthy' or 'hearty'. When it comes to the taste of matcha in cakes, the flavor is subtle yet impactful. It pairs exceptionally well with other ingredients such as vanilla, lemon, and various fruits, creating a harmonious blend that elevates the overall dessert experience. High-quality matcha powder is key to achieving the desired intensity of flavor and color. Remember, the amount of matcha used can be adjusted to suit your taste preferences. Whether you're looking for a subtle hint or a bold matcha presence, this versatile ingredient can cater to your desired outcome. Just be sure to allow your cake to cool completely before frosting to ensure the best texture and flavor development. Mastering the Matcha Cake Recipe Essential Ingredients for the Perfect Sponge The foundation of a flawless matcha sponge cake lies in the selection of high-quality ingredients. Fresh egg whites, at room temperature, are crucial for a voluminous meringue base, with granulated sugar providing the necessary structure. Optional stabilizers such as cornstarch or cream of tartar can be added to ensure the meringue holds its shape. When it comes to matcha, the grade is important. For baking, culinary grade matcha is typically used, but for a more vibrant color and flavor, one might opt for a higher grade. Here's a basic list of ingredients you'll need: Fresh egg whites Granulated sugar Matcha powder Vanilla extract Flour (consider almond flour for a nutty twist) Baking powder Salt Achieving the right consistency and stability in your egg whites is paramount. A stand mixer can aid in creating a stable, glossy foam, but a hand mixer can suffice with careful attention. Once the base is ready, the rest of the ingredients can be incorporated with precision to create a cake that's as delightful to the eyes as it is to the palate. Step-by-Step Baking Instructions Once you've gathered your ingredients and prepped your baking station, it's time to dive into the actual baking process. Follow these steps carefully to ensure your Matcha Green Tea Cake turns out perfectly. Preheat your oven to the temperature specified in your recipe. This is usually around 325°F (163°C) for a loaf pan or 190°C for a traditional heat setting. Prepare your baking pan by spraying with non-stick baking spray or lining with parchment paper. In a small bowl, whisk together the dry ingredients like flour, salt, and baking soda. In another bowl, combine the wet ingredients such as eggs, sour cream, and vanilla extract. Beat the butter in a large bowl until smooth, then gradually add sugar and continue beating until the mixture is light and fluffy. Bake for the time specified, which could range from 1 hour 25 minutes to 1 hour 35 minutes for a loaf, or according to your specific recipe's instructions. Remember to adjust the baking time and temperature if you're using a different type of pan or making adjustments for altitude. Always test for doneness by inserting a toothpick into the center of the cake; it should come out clean when the cake is ready. Cooling and Prepping for Frosting Once your matcha cake has emerged from the oven, exuding its unique aroma, the temptation to immediately start frosting can be overwhelming. However, patience is key. Allowing your cake to cool completely in the fridge for at least an hour is crucial; it ensures that the frosting will adhere properly and not melt away. Here's a simple guide to ensure your cake is ready for that perfect finish: Remove the cake from the oven and let it sit for a few minutes. Transfer the cake to a wire rack to cool for about 10-15 minutes. Once the cake is cool to the touch, wrap it in plastic wrap and place it in the fridge. Chill the cake for at least one hour; this will make it firmer and easier to work with. Remember, the cooler the cake, the better the results when it comes to frosting and adding those final touches that make your matcha green tea cake a masterpiece. Decorating Your Matcha Cake Frosting Techniques for a Stunning Finish Achieving a stunning finish on your matcha green tea cake is all about the finesse in frosting techniques. Proper preparation of your frosting tools is crucial to creating a visually appealing cake. Begin by ensuring your pastry bag is correctly filled to avoid any air pockets that could disrupt the smooth flow of frosting. Here's a simple guide to get you started: Start with a clean, dry pastry bag. Insert the desired piping tip and fill the bag with your chosen frosting. Twist the open end of the bag to secure the frosting inside. Practice piping on a plate or parchment paper before moving to the cake. Once you've mastered filling and handling the pastry bag, you can begin to decorate your cake. Use a variety of tips to create different textures and designs. For a matcha cake, consider a light dusting of matcha powder to complement the frosting and add a subtle flavor boost. Adding Fruits and Edible Decorations Once your Matcha Green Tea Cake is frosted to perfection, it's time to add a burst of color and flavor with fruits and edible decorations. Carefully select fruits that complement the delicate taste of matcha and arrange them artistically on top of the cake. Here's a simple guide to get you started: Begin with a layer of vanilla frosting as a base for the fruits. Mash a cup of raspberries and spread them over the frosting for a tangy contrast. Place halved strawberries, sliced kiwifruit, and whole blueberries in a visually appealing pattern. For a festive touch, sprinkle pomegranate seeds or cherries to add a pop of color. Remember to pat the fruits dry before placing them on the cake to prevent any excess moisture from compromising the frosting. After decorating, use a strainer to dust the top with a fine layer of matcha powder, giving your cake a sophisticated finish. Presentation Tips for Special Occasions When presenting your Matcha Green Tea Cake for special occasions, the visual appeal is just as important as the taste. A beautifully decorated cake can become the centerpiece of your celebration, drawing the eyes and exciting the palate of your guests. Consider the theme of the event and choose decorations that complement it. Use a cake stand that elevates the cake, making it a focal point on the table. Plan the placement of candles or toppers to ensure they enhance rather than detract from the cake's appearance. Remember, the way you present your cake can make a lasting impression. Whether it's a birthday, anniversary, or holiday gathering, a well-presented Matcha Green Tea Cake will not only be a feast for the eyes but will also add to the festivity of the occasion. Gluten-Free Matcha Lemon Vanilla Cake Delight Adapting the Recipe for Dietary Restrictions Creating a gluten-free Matcha Lemon Vanilla Cake requires thoughtful substitutions to ensure the integrity of the flavor and texture is maintained. Selecting the right gluten-free flour blend is crucial, as it will serve as the foundation for your cake. Look for blends that are designed to mimic the properties of wheat flour, often containing a mix of rice flour, potato starch, and xanthan gum to provide structure and elasticity. When it comes to the wet ingredients, non-dairy milk and vegan butter can replace their dairy counterparts without compromising the cake's richness. It's important to note that some non-dairy milks can introduce unwanted flavors, so opt for neutral-tasting options like almond or soy milk. For those looking to avoid eggs, flaxseed or chia seed mixtures can be used as binders. These not only help to keep the cake together but also add a slight nuttiness that complements the matcha. Lastly, ensure all additional ingredients, such as baking powder and vanilla extract, are gluten-free to avoid any cross-contamination. The Balance of Flavors: Lemon, Vanilla, and Matcha The Gluten-Free Matcha Lemon Vanilla Cake is a symphony of flavors that tantalizes the palate. The subtle earthiness of matcha pairs exquisitely with the zesty tang of lemon and the sweet, aromatic essence of vanilla. This trio creates a cake that is not only visually appealing with its vibrant green hue but also offers a complex flavor profile that is both refreshing and indulgent. When preparing the cake, it's essential to balance these key ingredients to achieve the perfect harmony. Here's a simple guide to the proportions used in the recipe: Matcha: 2 packets (or 1 tsp), whisked in hot water Lemon zest: 2 tsp, for a bright citrus note Vanilla extract: According to package instructions, for a warm depth of flavor Remember to reserve a small amount of matcha powder for dusting the top of the cake, adding a final touch of elegance and a hint of matcha's mellow flavor. This cake is sure to impress, leaving a lasting impression with its unique and sophisticated taste. Decorating with Health-Conscious Toppings When it comes to adorning your gluten-free Matcha Lemon Vanilla Cake, selecting health-conscious toppings is key to maintaining both the cake's integrity and its nutritional profile. Opt for natural and fresh ingredients to enhance the cake's appeal without compromising on health. A popular choice is a light spread of vanilla frosting made from wholesome brands like Simple Mills or Miss Jones, which offer a cleaner ingredient list. Fresh raspberries Light dusting of matcha powder Edible flowers Dark chocolate shavings These toppings not only add a burst of color and texture but also introduce subtle flavors that complement the matcha's earthy tones. For a touch of elegance, consider arranging the raspberries around the cake's edge and using a strainer to evenly dust the matcha powder on top. Edible flowers and dark chocolate shavings can serve as the final flourish, offering a visually stunning and palate-pleasing experience. Addressing common questions, such as how to substitute ingredients without losing the cake's essence, is crucial. For those looking to explore more, a variety of baked goods and sweet treats like Paleo Pecan Pie Bars or Tahini Chocolate Chunk Cookies can offer further inspiration for health-conscious dessert lovers. Navigating Common Matcha Cake Questions Addressing Matcha Baking Challenges Baking with matcha can be as rewarding as it is challenging. Understanding the unique properties of matcha is key to successful baking. Its distinct flavor, described as a blend of savory and grassy notes, can be difficult to balance. When incorporating matcha into cake recipes, it's important to ensure that it dissolves completely to avoid a gritty texture. To address common issues, consider the following tips: Dissolve matcha in a small amount of hot water before adding it to the batter. Use high-quality matcha powder for a more vibrant color and richer flavor. Be mindful of the baking time as matcha can brown quickly. Lastly, cooling cakes sufficiently before frosting is crucial to prevent the frosting from melting. This step also allows the flavors to settle, resulting in a more cohesive taste experience. Recipe Substitutions for Varied Tastes When crafting a Matcha Green Tea Cake, personal taste preferences and dietary needs can lead to the exploration of various substitutions. The key to successful modifications lies in maintaining the balance of flavors and textures. For those looking to adapt the recipe to their own preferences, here's a list of common substitutions: Instead of traditional white flour, try almond flour or coconut flour for a gluten-free option. Dairy milk can be replaced with almond milk, soy milk, or coconut milk to cater to vegan or lactose-intolerant individuals. If you're not a fan of overly sweet cakes, reduce the sugar and add a touch of honey or maple syrup for natural sweetness. Experimenting with different brands of vanilla-flavored cake mix and icing can also lead to delightful variations. Whether you opt for a store-bought mix or make your icing from scratch, the choice is yours to create a cake that resonates with your palate. Storing and Serving Your Matcha Cake Proper storage is crucial to maintain the freshness and flavor of your matcha cake. Matcha Cake that is iced with whipped cream must be kept in the refrigerator until serving and will stay fresh for up to 4 days wrapped loosely. This ensures that the delicate flavors and moist texture are preserved. For those who prefer a vegan option, the same storage guidelines apply to the Vegan Matcha Cake Recipe. When serving your matcha cake, allow it to sit at room temperature for about 15-20 minutes before slicing. This brief period lets the cake soften slightly, making it easier to cut and enhancing the overall taste experience. Here's a quick guide to serving your cake: Slice with a sharp, thin-bladed knife. Clean the knife after each cut to ensure neat slices. Serve on plates that complement the cake's vibrant green color. For those interested in the longevity of their cake, here's a simple table outlining the expected freshness: Always ensure your cake is covered to prevent it from absorbing any odors from the fridge and to avoid drying out. Conclusion In conclusion, the Matcha Green Tea Cake is a delightful fusion of traditional Japanese flavors and modern baking techniques. The high-quality matcha powder not only imparts a vibrant color and a unique, earthy taste to the cake but also infuses it with health-boosting antioxidants. Whether you're an avid baker or a matcha enthusiast, this cake is sure to impress with its balance of sweetness and the subtle bitterness of green tea. The addition of fresh raspberries and a dusting of matcha powder on top makes it not only a treat for the palate but also a feast for the eyes. Perfect for any celebration or as a sophisticated dessert option, this Matcha Green Tea Cake is a must-try recipe that combines indulgence with a touch of wellness. Frequently Asked Questions What gives Matcha Green Tea Cake its vibrant color? High-quality matcha powder is responsible for the vibrant green color of the cake. It acts as a natural food coloring while also adding a unique flavor. Can I make a gluten-free version of Matcha Green Tea Cake? Yes, you can use a gluten-free cake mix, such as Simple Mills Almond Flour Vanilla Cupcake & Cake Baking Mix, and ensure all other ingredients are gluten-free. How does matcha powder affect the flavor of the cake? Matcha powder adds a sweet yet mildly earthy flavor to the cake, which pairs well with other flavors such as vanilla, lemon, and fruits. Why does the cake need to cool before frosting and decorating? Cakes need to cool completely to prevent the frosting from melting. Refrigerating the cake for about an hour helps in setting the cake structure for easier frosting and decoration. Are there any health benefits to using matcha in a cake? Matcha is high in antioxidants and incorporating it into a cake adds a nutritious element to the dessert, alongside other antioxidant-rich ingredients like raspberries and lemons. How can I decorate my Matcha Cake to enhance its appearance? You can frost the cake with vanilla frosting, add fresh raspberries around the edge, and dust the top with leftover matcha powder for a beautiful and appetizing finish.
- "Delicious and Easy Hummingbird Cake Recipe: A Sweet Treat for Any Occasion"
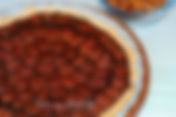
The Hummingbird Cake is a classic southern dessert that has captivated palates with its unique combination of flavors and textures. Known for its moist crumb and tropical flair, the cake traditionally includes bananas, pineapple, toasted pecans, and a hint of spice, all smothered in a tangy cream cheese frosting. With its origins shrouded in mystery and its name as whimsical as the bird it's named after, this cake has become a beloved treat for special occasions and casual gatherings alike. Key Takeaways The Hummingbird Cake is a Southern classic with key ingredients like banana, pineapple, toasted pecans, and a blend of warm spices. Its name is charming yet misleading, as no hummingbirds are involved in the recipe; instead, it's thought to be so sweet that it attracts hummingbirds. The cake has remained popular over the years due to its moist texture, rich flavor profile, and versatility in variations and adaptations. Achieving the perfect Hummingbird Cake involves careful selection of ingredients, spice balance, and baking techniques to ensure a moist result. The cake can be adapted to modern baking trends by incorporating healthier alternatives, seasonal twists, and pairing suggestions for beverages. The Origins and Lore of Hummingbird Cake The Southern Roots The Hummingbird Cake, a confection that whispers the essence of the South, is more than just a dessert; it's a symbol of hospitality and warmth. Originally hailing from Jamaica, this cake made its way to the Southern United States, where it became a cherished favorite. Its adoption into Southern cuisine is a testament to the region's rich tapestry of culinary influences. In the South, the Hummingbird Cake is often associated with community gatherings and family celebrations. The cake's sweetness and richness are reflective of the generous spirit found at these events. It's not uncommon to see this cake gracing the tables at church potlucks, weddings, and even casual Sunday brunches. Paula Deen, with her Southern roots, is among the many who have embraced and popularized the Hummingbird Cake. Her rendition of the recipe pays homage to the traditional elements while adding her own signature twist. The Name: Why 'Hummingbird'? The Hummingbird Cake, a dessert that has fluttered into the hearts of many, owes its name to the sweet nectar that attracts its namesake bird. The cake's tropical flavors are said to be as irresistible to humans as nectar is to hummingbirds. Originating in Jamaica, the cake was named after the island's national bird, also known as the Doctor Bird Cake, a nickname for the swallow-tailed hummingbird. The cake's journey to the American South is marked by its publication in Southern Living magazine in the late 1970s, which catapulted it to fame as a Southern classic. Its key ingredients—pineapple, banana, pecans, and cinnamon—combine to create a taste that is both unique and comforting. While the cake is completely free of actual hummingbirds, its delightful combination of fruit and spice, crowned with tangy cream cheese frosting, has made it a beloved staple in Southern cuisine. Popularity and Variations The Hummingbird Cake has soared in popularity, becoming a beloved dessert for various occasions, from family gatherings to festive holidays. Its versatility is showcased through numerous variations that cater to different tastes and dietary preferences. For instance, some bakers opt for a gluten-free version, while others infuse the cake with seasonal fruits to give it a fresh twist. The table below highlights some of the popular variations and their unique features: Each variation maintains the cake's signature moisture and spice, ensuring that the essence of the original recipe is preserved, even as it evolves to suit contemporary palates. Crafting the Perfect Hummingbird Cake Selecting the Right Ingredients The foundation of a remarkable Hummingbird Cake lies in the quality and harmony of its ingredients. A classic southern recipe, it combines the sweetness of pineapple and banana with the warmth of cinnamon and the crunch of nuts, all enveloped in a tangy cream cheese frosting. To ensure your cake is as delightful as the one that earned its title: Hummingbird Cake: Out of this world flavors!, it's crucial to select fresh and ripe fruits. When it comes to the dry ingredients, precision is key. Flour, sugar, and leavening agents must be measured accurately to achieve the desired texture. Here's a basic list of what you'll need: Ripe bananas Fresh pineapple All-purpose flour Granulated sugar Baking soda Ground cinnamon Chopped nuts (typically pecans or walnuts) Remember, the secret to a moist and flavorful Hummingbird Cake is not just in the ingredients, but in the experimentation to get the right proportions. For best results, make the recipe as written, without substitutions that could alter the delicate balance of flavors and textures. The Importance of Spice Balance Achieving the perfect spice balance in a Hummingbird Cake is crucial for its distinctive taste. The right mix of spices can elevate the cake from good to unforgettable. Spices like cinnamon and allspice are not just mere additions; they are essential in creating the cake's signature warmth and complexity. When measuring spices, precision is key. A little too much can overpower the delicate flavors of the other ingredients, while too little can result in a bland cake. Here's a quick guide to the spice measurements for a standard Hummingbird Cake recipe: Cinnamon (1 and 1/2 tsp): Adds warmth to the cake. Allspice (1/2 tsp): A spice mix for a unique flavor. Salt (1/2 tsp): Balances the overall taste. While the classic recipe calls for specific amounts, don't be afraid to adjust to your taste. However, it's advisable to follow the recipe closely the first time before making any changes. Experimentation is welcome, but the original proportions are a tried and true starting point for that authentic Southern charm. Baking Tips for a Moist Cake Achieving a moist and tender Hummingbird Cake requires a watchful eye and a gentle hand. It's crucial to avoid overbaking, which can lead to a dry texture. Instead, monitor your cake closely as it bakes, looking for that perfect moment when the center is springy to the touch and a toothpick inserted comes out clean or with a few moist crumbs. Here are a few additional tips to ensure your cake remains moist and delicious: Use ripe bananas and well-drained crushed pineapple to infuse the cake with natural sweetness and moisture. Incorporate sour cream for a rich flavor and to maintain moisture. Remember to grease and line your cake pans with parchment to prevent sticking, and measure your ingredients precisely for consistent results. Decoding the Hummingbird Cake Recipe Ingredient Breakdown The Hummingbird Cake is a delightful confection that's as rich in flavor as it is in history. The key to its unique taste lies in the combination of sweet fruits and aromatic spices. An ingredient breakdown reveals the cake's complexity and why it's cherished by so many. Flour: The base of the cake, providing structure. Sugar: Granulated sugar sweetens the cake, while brown sugar adds a hint of molasses. Leavening Agents: Baking soda and baking powder ensure a light and fluffy texture. Spices: Cinnamon and nutmeg offer warmth and spice. Eggs: Bind the ingredients together and add richness. Oil: Keeps the cake moist; vegetable or canola oil is commonly used. Vanilla Extract: Enhances the overall flavor profile. Bananas: Mashed bananas contribute to the cake's moisture and sweetness. Pineapple: Crushed pineapple adds a tropical twist and additional moisture. Nuts: Chopped pecans or walnuts provide a crunchy contrast. Step-by-Step Instructions Following the ingredient breakdown, the next step is to dive into the actual baking process. The key to a successful Hummingbird Cake lies in the precision of following the step-by-step instructions. Begin by preheating your oven to the right temperature, as an accurate oven temperature is crucial for the cake to rise and bake evenly. Proceed by preparing your cake pans, ensuring they are well-greased and floured to prevent sticking. Work in the soft butter until the mixture resembles damp sand, then carefully mix in the eggs one at a time to avoid a lumpy batter. Puree the bananas until smooth, which will add both moisture and flavor to your cake. Finally, combine the dry and wet ingredients, stirring just enough to blend them together without overmixing. Pour the batter into the prepared pans and bake until a toothpick inserted into the center comes out clean. Allow the cake to cool completely before frosting. Adapting for Bundt Pans When adapting the Hummingbird Cake recipe for a Bundt pan, it's crucial to consider the unique shape and depth of the pan. A standard Bundt pan should hold between 10 to 12 cups of batter. The batter's thickness is key; it should be dense enough to maintain the intricate design of the Bundt pan without losing definition during baking. Here's a quick guide to help you adjust the recipe: Preheat your oven to 350°F (175°C). Mix the dry ingredients in a large basin and blend well. Combine eggs and oil separately, then add to the dry mix to moisten. Stir in vanilla, pineapple, pecans, and bananas. Pour the batter into the Bundt pan and bake. Start checking for doneness at 50 minutes, inserting a toothpick until it comes out clean or with a few crumbs. Remember, due to the variance in Bundt pan designs, the baking time may need slight adjustments. Begin checking at 50 minutes and continue every few minutes as needed. Most Hummingbird Cakes in a Bundt pan take around 58 minutes to bake perfectly. Frosting and Finishing Touches Cream Cheese Frosting Mastery The crowning glory of any Hummingbird Cake is its luscious cream cheese frosting. Achieving the perfect consistency and flavor is crucial for complementing the cake's rich texture and spices. Begin with high-quality ingredients: full-fat cream cheese and butter should be at room temperature to ensure a smooth blend. For a standard batch, you'll need: 16 ounces of cream cheese 1 to 1 1/2 cups of butter (salted or unsalted based on preference) 5 to 6 cups of powdered sugar 1 to 2 teaspoons of pure vanilla extract A pinch of salt to balance the sweetness Once combined, beat the mixture until it's light and fluffy, but be careful not to overmix as this can introduce air bubbles. If the frosting is too thin, a tablespoon of cornstarch or meringue powder can help stiffen it without altering the taste. For a Southern touch, garnish with toasted chopped pecans, adding both texture and a nutty flavor to your Hummingbird Cake. Decorating with a Southern Flair Embellishing your Hummingbird Cake with a Southern touch not only enhances its visual appeal but also pays homage to its roots. Incorporate finely chopped pecans around the base of the cake for a traditional look that adds texture and nutty flavor. The frosting should be applied in a rustic manner, avoiding the need for crisp edges or intricate piping, which aligns with the cake's homestyle charm. For a truly Southern finish, consider adding pineapple flowers as a nod to the tropical ingredients within the cake. Here's a quick guide to the decorative elements: Cream Cheese Frosting: Whips up stiff enough to pipe, but can be applied rustically. Chopped Pecans: Encrust the base while the frosting is still tacky. Pineapple Flowers: A delicate and sweet addition that complements the cake's flavors. Remember, the slightly chilled butter and cream cheese can make the frosting process easier, and sifting your powdered sugar, though not critical, can help avoid lumps for a smoother finish. Serving Suggestions After the final swirls of cream cheese frosting have set, presenting your Hummingbird Cake is the last step in the dance of dessert perfection. Serve your cake at room temperature to ensure the flavors are at their peak. A Hummingbird Cake's rich and fruity profile pairs wonderfully with a variety of beverages and occasions. Coffee or Tea: The bitterness of coffee or the subtle warmth of tea complements the sweetness of the cake. Dessert Wines: A sweet Moscato or Riesling can enhance the cake's fruit notes. Holidays: Tailor your presentation to the season, whether it's a Christmas holly garnish or a vibrant Easter table setting. When considering portion sizes, a standard Hummingbird Cake serves about 12 people. However, this can vary based on the size of the slices. For a large gathering, consider preparing two cakes to ensure there's enough to go around. The cake's moistness, attributed to ingredients like bananas and pineapple, makes it a hit at any gathering. Hummingbird Cake in Modern Baking Healthier Alternatives In the quest for a healthier Hummingbird Cake, bakers are turning to creative substitutions that maintain the cake's delectable charm while reducing its calorie and sugar content. Using natural sweeteners like honey or maple syrup in place of refined sugar can add nuanced flavors as well as nutritional benefits. Similarly, avoiding gluten by opting for almond or coconut flour not only caters to those with dietary restrictions but also introduces new textures to the cake. Incorporating nut butters into the recipe is a clever way to add richness and moisture without relying on excessive amounts of oil or butter. These tweaks not only make the cake healthier but also open up a realm of new flavors to explore. Below is a list of ingredient swaps that can be made to create a healthier Hummingbird Cake: Replace refined sugar with natural sweeteners like honey or pure maple syrup. Use gluten-free flours such as almond flour or coconut flour for a different twist. Substitute some of the oil with nut butters like almond or cashew butter. Add in extra fruits and vegetables, such as mashed bananas or grated zucchini, to increase the nutrient content. Incorporating Seasonal Twists The versatility of the Hummingbird Cake allows for delightful seasonal adaptations, making it a perfect dessert for any occasion. Spring brings the opportunity to infuse the cake with lighter, floral notes, such as lavender or rose water, complementing the traditional flavors of banana and pineapple. During the summer months, consider adding a zesty twist with citrus fruits like lemon or orange zest, which can brighten the rich cake. For fall, spices such as cinnamon, nutmeg, and clove can be adjusted to bring a warm and cozy feel to the cake, aligning with the season's ambiance. Winter calls for indulgence, and what better way to achieve this than by incorporating richer elements like rum-soaked raisins or a layer of chocolate ganache beneath the cream cheese frosting. Each season offers a unique opportunity to tailor the Classic Hummingbird Cake to the tastes and moods of the moment. Pairing with Beverages The rich flavors of a Hummingbird Cake make it a delightful dessert that pairs wonderfully with a variety of beverages. Selecting the perfect drink to accompany your cake can enhance the overall dining experience. For a classic Southern touch, sweet iced tea offers a refreshing contrast to the cake's sweetness. Coffee enthusiasts might prefer a robust cup of black coffee to cut through the richness, while a glass of milk is a comforting choice for many. When considering alcoholic beverages, a dessert wine such as a Riesling or Moscato can complement the fruity notes of the cake. For those who enjoy spirits, a bourbon or rum on the rocks can echo the cake's warm spices. Below is a suggested pairing list to help guide your beverage selection: Sweet Iced Tea: A Southern staple that refreshes the palate. Black Coffee: Offers a bold counterpoint to the cake's richness. Milk: A classic and comforting pairing. Dessert Wine (Riesling/Moscato): Elevates the cake's fruity flavors. Bourbon/Rum: Harmonizes with the warm spices in the cake. Conclusion In conclusion, the Hummingbird Cake stands as a testament to the rich culinary traditions of the South, offering a delightful blend of tropical flavors and comforting spices. With its moist crumb packed with banana, pineapple, and toasted pecans, and topped with a luscious cream cheese frosting, it's no wonder this cake has become a beloved classic. Whether you're a seasoned baker or trying your hand at this recipe for the first time, the Hummingbird Cake is sure to exceed expectations and become a cherished addition to any dessert table. So, gather your ingredients and get ready to indulge in a slice of Southern hospitality at its finest. Frequently Asked Questions What is a Hummingbird Cake? Hummingbird Cake is a classic southern dessert known for its moist crumb and tropical flavors, featuring ingredients like banana, pineapple, toasted pecans, and spices, all topped with a tangy cream cheese frosting. Why is it called a Hummingbird Cake? The name 'Hummingbird Cake' is thought to originate from the cake's sweetness, which is said to be so appealing that it attracts people like hummingbirds to nectar. No actual hummingbirds are involved in the recipe. What are the key ingredients in a Hummingbird Cake? The main components of a Hummingbird Cake include ripe bananas, crushed pineapple, toasted pecans, a blend of warm spices such as cinnamon and nutmeg, and cream cheese icing. How do you ensure a moist Hummingbird Cake? To ensure a moist Hummingbird Cake, use ripe bananas and do not overmix the batter. Baking at the right temperature and checking for doneness without overbaking are also crucial steps. Can I make a Hummingbird Cake in a Bundt pan? Yes, you can adapt the classic layer cake recipe to bake in a Bundt pan. The baking time may need to be adjusted, and minimal decorating is required due to the shape of the Bundt pan. What are some tips for the best Hummingbird Cake? Some tips for the best Hummingbird Cake include selecting the right balance of spices, using fresh ingredients, and not skimping on the cream cheese frosting. For added texture and flavor, toast the pecans before adding them to the batter.
- "Secrets to Perfecting Your Victoria Sponge Cake Recipe"
The Victoria Sponge Cake, a quintessential British teatime treat, has charmed dessert lovers since the 19th century. Named after Queen Victoria, who favored this sweet delight during her tea times, the cake is renowned for its simplicity and elegance. Over time, it has evolved, incorporating various flavors and ingredients, yet the classic recipe remains a beloved staple. Let's delve into the key components and techniques that make the perfect Victoria Sponge Cake, from selecting the right ingredients to mastering the baking process. Key Takeaways The Victoria Sponge Cake is a timeless British classic, known for its delicate flavor and association with Queen Victoria's teatime. Authentic Victoria Sponge Cake relies on the quality of simple ingredients like flour, sugar, eggs, and vanilla extract, with the traditional recipe calling for equal weights of eggs, sugar, butter, and flour. Modern interpretations of the cake often include brown sugar and fruit elements, such as strawberries, to enhance moisture and flavor. The cake's texture is paramount, achieved by thorough mixing to triple the volume of eggs and sugar, and careful baking to ensure a springy, light sponge. Creative variations and serving suggestions, like adding raspberry curd and passionfruit icing, can transform the Victoria Sponge into a contemporary dessert while maintaining its classic charm. The History and Evolution of Victoria Sponge Cake Origins in the 19th Century The Victoria Sponge Cake, a quintessential part of British baking culture, has its roots deeply embedded in the 19th century. This classic cake was named in honor of Queen Victoria, who is said to have enjoyed a slice with her afternoon tea. While the exact origin is not documented, it is believed that the advent of baking powder in the 1800s played a crucial role in the cake's development, allowing it to rise to new heights of fluffiness. The original recipe called for basic components—eggs, flour, sugar, and butter—which are still used today. Eggs: To create a light and airy texture Flour: For structure and softness Sugar: To sweeten and add volume Butter: For richness and moisture These ingredients, combined in just the right proportions, are the foundation of what has become a beloved treat across generations. Queen Victoria's Teatime Favorite The Victoria Sponge Cake, a simple yet elegant dessert, became a staple at Queen Victoria's afternoon tea. Her fondness for this cake solidified its place in British culinary history. It is said that the cake was often served at her teatime, a tradition that has endured through the centuries. While the cake itself is unpretentious, consisting of a basic sponge jazzed up with jam and sometimes buttercream, it has been subject to many personal interpretations. Whether it's the Women's Institute's standards or a home baker's cherished recipe, the Victoria Sponge remains a beloved treat. The following table outlines the typical components of a Victoria Sponge Cake and their roles in creating the perfect teatime indulgence: As we continue to cherish this timeless classic, we also embrace the various modern twists that have been added over the years, ensuring that Queen Victoria's favorite cake remains a favorite for many. Modern Twists on a Classic Recipe The Victoria Sponge Cake, a timeless classic, has been reimagined in countless ways to suit contemporary tastes and trends. One such delightful variation is the Persian Victoria sponge cake, which infuses traditional flavors with a Middle Eastern twist. This version incorporates the zest of lemon and the crunch of pistachios, offering a unique sensory experience. Lemon zest adds a refreshing citrus note. Pistachios provide a nutty contrast to the soft sponge. Raspberries bring a tart sweetness that complements the floral notes of rose. The table below showcases some popular modern variations of the Victoria Sponge Cake, each bringing its own distinctive flair to the beloved dessert: These innovative takes on the Victoria Sponge Cake demonstrate how a simple recipe can be transformed into a gourmet experience, blending the old with the new to create something extraordinary. Essential Ingredients for Authentic Victoria Sponge Choosing the Right Flour and Sugar The foundation of a Traditional Victoria Sponge Cake lies in the careful selection of its flour and sugar. Self-raising flour is the cornerstone for achieving the cake's iconic rise and tender crumb. It's essential to sieve the flour to incorporate air and ensure an even distribution throughout the batter. For the sugar, caster sugar is preferred for its fine granules that dissolve easily, contributing to a light and fluffy texture. When measuring ingredients, consistency is key. A useful tip is to weigh the eggs first and then use the same weight for the butter, sugar, and flour. This balance is crucial for the cake's structure and can make the difference between a good and a great sponge. Choosing quality ingredients will not only enhance the flavor but also the overall success of your cake. Vanilla extract adds a subtle depth, but use it sparingly to not overpower the delicate taste of the sponge. The Role of Eggs in Achieving the Perfect Texture Eggs are the cornerstone of a Victoria Sponge Cake, providing structure, moisture, and the delicate crumb that is so characteristic of this classic dessert. The proportion of eggs to other ingredients is critical; too few can result in a dense cake, while too many can make it overly eggy or rubbery. When preparing your Victoria Sponge, it's essential to weigh your eggs first. This traditional method ensures that the quantities of butter, sugar, and flour are perfectly balanced with the egg weight. Here's a simple guideline to follow: Weigh the eggs in their shells Use the same weight for butter, sugar, and self-raising flour This approach accommodates the natural variation in egg sizes, which can differ by up to 10g. If your eggs weigh less than the recipe calls for, resist the temptation to add extra beaten egg. Instead, adjust the other ingredients to match the weight of your eggs, maintaining the harmony of the recipe. The Importance of Quality Vanilla Extract The choice of vanilla extract can make a significant difference in the flavor profile of your Victoria Sponge Cake. Purity is crucial; you want an extract that is free from additives, colors, or GMOs, ensuring a product that is as natural as possible. The aroma of the vanilla should be rich and evocative, hinting at the depth it will add to your cake. It's also worth noting that the quantity of vanilla extract used should be balanced. Too little, and the cake may lack depth; too much, and it may overpower other delicate flavors. Here's a simple guideline to follow: Use 1 teaspoon of vanilla extract for every 4 eggs Adjust according to taste and the size of the cake Remember, the quality of your vanilla extract can elevate a good cake to a great one, so choose wisely. Step-by-Step Guide to Making Victoria Sponge Preparing Your Ingredients and Tools Before embarking on the creation of a Victoria Sponge Cake, it's essential to have all your ingredients measured and at room temperature. This ensures that they will mix together more evenly, resulting in a smoother batter. Start by sifting the self-rising flour to aerate it, which can help achieve a lighter sponge. Add a pinch of baking powder and salt as per the Bero Victoria Sponge recipe for that extra lift and balance of flavors. Gather your equipment, which should include two 15cm/6-inch shallow round cake tins, lined with baking parchment circles. If your tins are not non-stick, lightly grease them with butter to prevent the cake from sticking. Preheating your oven to the correct temperature is crucial; for a Victoria Sponge, this is typically around 190°C (375°F). A splatter lid can be handy to keep your oven clean from any potential batter splashes. Lastly, organize your workspace by laying out all the ingredients and tools you'll need. This not only saves time but also helps to avoid any last-minute rushes that could disrupt the delicate balance of your cake batter. Mixing and Baking Techniques Achieving the perfect Victoria Sponge requires careful attention during the mixing and baking stages. Ensure all ingredients are at room temperature before beginning to facilitate better mixing. Start by preheating your oven to the correct temperature, as an accurate oven temperature is crucial for even baking. When combining your ingredients, add the caster sugar, softened butter, beaten eggs, self-raising flour, baking powder, and milk into a mixing bowl. It's essential to mix these ingredients until you have a smooth and homogenous batter. However, be cautious not to overmix, as this can lead to a dense cake. Once baked, remove the cakes from the oven and allow them to cool in the tins for a few minutes before transferring them to a wire rack to cool completely. This step is vital to prevent the cakes from breaking when they are removed from the tins. Cooling and Assembling the Layers Once your Victoria Sponge has been baked to a golden perfection, it's crucial to let it cool properly before assembly. Begin by allowing the cakes to cool in their tins for about 5 minutes. Then, transfer them onto a wire rack to cool completely. This prevents the sponge from becoming soggy and maintains its light and airy texture. When the cakes are cool, choose the layer with the flattest bottom as your base. Spread an even layer of jam, followed by a generous dollop of whipped cream. Gently place the second layer on top, taking care not to press down too hard to maintain the cake's delicate structure. Finally, if you're adding any toppings like fresh berries or a dusting of powdered sugar, do so just before serving to keep them fresh and vibrant. Remember to let any glaze set for about 20 minutes before slicing to ensure clean cuts and a stunning presentation. Variations and Serving Suggestions Incorporating Fruits and Curds Adding fruits and curds to your Victoria Sponge can transform this classic dessert into a delightful symphony of flavors and textures. Fresh raspberries or pomegranate seeds can introduce a tart contrast to the sweet sponge, while a homemade raspberry curd adds a layer of rich, fruity intensity. To create a sumptuous raspberry curd, begin by melting butter and combining it with raspberries, egg yolks, and sugar. The mixture should be cooked until thickened and able to coat the back of a spoon. Once strained and chilled, it's ready to be layered between your sponge cakes. For those who enjoy a citrus twist, lemon curd paired with the sponge offers a zesty flavor that's hard to resist. Chocolate lovers might opt for a decadent chocolate ganache, while the addition of poppyseeds can provide an unexpected crunch. Remember, the key to a memorable Victoria Sponge is in the balance of flavors and the quality of your ingredients. Creative Icing and Decoration Ideas The art of decoration takes your Victoria Sponge from delightful to dazzling. A simple yet effective technique is to utilize an icing bag for precision. This tool is especially useful for creating thick, symmetrical drips of glaze that can elevate the presentation of your cake. Remember, the cake must be completely cool before you start decorating; a stint in the fridge can ensure both easier cutting and a perfectly set icing. For a touch of whimsy, consider incorporating fresh berries or even poppyseeds into your icing for a burst of flavor and color. Feedback from cake enthusiasts like Sam and Michele highlights the transformative power of a piping bag in achieving a professional look. Lastly, the debate between caster sugar and icing sugar for the final sprinkle is one of personal preference. Whether you opt for the crunch of caster sugar or the softness of icing sugar, it's the joy of making it your own that truly counts. Pairing with Teas and Beverages The perfect Victoria Sponge can be elevated to new heights with the right tea or beverage pairing. A well-chosen tea can complement the light, airy texture and sweet flavors of the cake, creating a harmonious balance on the palate. Here are some classic pairings to consider: Black tea: A robust English Breakfast or Earl Grey can stand up to the sweetness of the cake. Green tea: A delicate Sencha or Jasmine tea can provide a refreshing contrast. Herbal tea: Chamomile or Peppermint teas offer a soothing accompaniment. Coffee: A medium roast coffee provides a rich flavor that pairs well with the buttery cake. Remember, the goal is to enhance the eating experience without overpowering the subtle flavors of the Victoria Sponge. Experiment with different teas and beverages to find your perfect match. Tips and Tricks for the Perfect Victoria Sponge Common Pitfalls and How to Avoid Them Achieving the perfect Victoria Sponge can be a delightful experience, but it's not without its challenges. Avoid common pitfalls by paying attention to the details that make a difference. For instance, one of the most frequent mistakes is not preheating the oven. A properly preheated oven ensures even baking and helps your cake rise perfectly. Skipping the preheating: Ensure your oven is preheated to the correct temperature before placing the cake inside. Overmixing the batter: This can lead to a dense and tough cake. Mix just until the ingredients are combined. Measuring ingredients inaccurately: Use a scale for precision, as this can dramatically affect the texture of your cake. Making a Moist and Fluffy Sponge Achieving a moist and fluffy sponge is the cornerstone of a perfect Victoria sponge cake. The key lies in the methodical mixing and careful folding of ingredients. Start by beating the eggs, caster sugar, and vanilla extract until the mixture is pale and has tripled in volume. This incorporates air, which is crucial for a light, airy texture. When combining the dry ingredients, sift the flour and baking powder together multiple times to ensure even distribution and to introduce more air. Gently fold the flour mixture into the egg mixture in two batches to prevent deflating the batter. Finally, melted butter is folded in, adding richness and contributing to the cake's tender crumb. Baking at the right temperature is also essential. A moderate oven (160°C fan-forced) allows the cake to rise evenly without forming a crust too quickly. Once baked, let the cakes cool in the tins for a short period before transferring them to a wire rack. This prevents the sponge from becoming too dry. Storing and Serving Your Cake After enjoying the delightful taste of your freshly baked Victoria Sponge Cake, proper storage is key to maintaining its quality. Store your cake in an airtight container to keep it moist and fresh. If you're not serving the cake immediately, you can keep it at room temperature for a couple of days. For longer storage, the fridge is your best bet, especially if your cake has perishable fillings or frosting. Here are some additional tips for storing and serving your Victoria Sponge Cake: The un-iced cakes can be frozen for up to a month, making it convenient for unexpected guests or future cravings. Before slicing, let any glaze or icing set to avoid a sticky mess. Use a sharp knife dipped in hot water for clean cuts that showcase the cake's layers. Make sure your oven is properly calibrated when baking, as this affects the cake's texture. An inexpensive oven thermometer can help you gauge the accuracy of your oven's temperature. Conclusion The Victoria Sponge Cake, with its classic simplicity and delightful flavors, stands as a testament to timeless baking traditions. Embraced by Queen Victoria in the 19th century, this cake continues to captivate with its light, airy sponge layers filled with the sweetness of jam and the richness of cream. Whether you follow the traditional recipe or experiment with variations like Claire Ptak's brown sugar twist, the Victoria Sponge remains a beloved centerpiece for teatime and celebrations alike. Its versatility allows for creative adaptations, such as the Lemon Drizzle Cake, while maintaining the essence of what makes this cake a cherished classic. As we've seen, the key to a perfect Victoria Sponge lies in the quality of ingredients and the care taken in its preparation, ensuring that each slice offers a bite of history and a taste of pure comfort. Frequently Asked Questions What is a Victoria Sponge Cake? The Victoria Sponge is a classic British two-layer cake filled with jam and cream, known for being a favorite of Queen Victoria in the 19th century. It's characterized by its simple yet delicious combination of ingredients, typically including flour, sugar, butter, eggs, and vanilla extract. How can I make my Victoria Sponge Cake moister? One way to make a moister Victoria Sponge Cake is to use brown sugar instead of white, as suggested by chef Claire Ptak. Brown sugar can add more moisture to the cake and pairs well with fruit ingredients like strawberries. What are the key ingredients for a Victoria Sponge Cake? The key ingredients for a Victoria Sponge Cake include equal weights of eggs, caster sugar, butter, and self-raising flour, along with baking powder, vanilla extract, and a pinch of salt. What are some variations of the traditional Victoria Sponge Cake? Common variations include adding different fruits like raspberries, incorporating curds such as raspberry curd, or creating a passionfruit icing. These can add new flavors and textures to the traditional recipe. How long should I beat the eggs, sugar, and vanilla extract when making the sponge? When making the sponge for a Victoria Sponge Cake, you should beat the eggs, caster sugar, and vanilla extract on high speed for about 12-15 minutes until the mixture triples in volume and becomes thick and pale in color. What are some tips for assembling a Victoria Sponge Cake? For assembling, place one sponge cake on a serving plate, spread generously with vanilla cream, and drizzle with raspberry curd. Add the second sponge layer and top with icing, fresh raspberries, and pomegranate seeds. Serve immediately for best taste.
- "5 Easy Steps to Perfecting Your Homemade Chocolate Lava Cake"
Dive into the decadent world of Chocolate Lava Cakes, a beloved dessert that combines the richness of chocolate with a gooey, molten center that oozes out with each delicious bite. This article will decode the secrets behind the perfect lava cake, provide essential baking tips, and inspire you with creative variations and serving suggestions. Whether you're a seasoned baker or new to the kitchen, you'll find everything you need to create irresistible chocolate lava cakes that are sure to impress. Key Takeaways Chocolate lava cakes, with their molten centers, can be achieved through careful underbaking or by inserting a melty filling like a chocolate truffle. Choosing high-quality bittersweet or dark chocolate with 60% to 70% cacao is crucial for a rich and balanced flavor in lava cakes. The base ingredients for chocolate lava cakes are simple, usually involving chocolate, butter, eggs, sugar, and flour, with optional flavor enhancers. Creative variations of lava cakes include adding flavors like liqueur, citrus zest, or spices, and experimenting with different chocolate types or fillings. When baking lava cakes, it's important to avoid common pitfalls such as overbaking, and to focus on presentation for an impressive dessert experience. Decoding the Lava Cake What is a Lava Cake? At its core, a lava cake is a decadent dessert that captivates with its contrasting textures: a spongy cake exterior encasing a rich, flowing molten chocolate center. This delightful contrast is achieved by baking the cake at a high temperature for a brief period, ensuring the outer layer is fully set while the interior remains deliciously fluid. While some variations, like the Domino's version, use a fudge topping to simulate the molten effect, the traditional lava cake relies on the precise balance of baking time and temperature to create its signature liquid center. The versatility of lava cakes extends to their serving options, which can range from a simple dusting of powdered sugar to a lavish pairing with ice cream or fresh berries. Traditional lava cake: Baked exterior, unset batter center Domino's lava cake: Crunchy exterior, fudge center Serving suggestions: Ice cream, whipped cream, fresh berries The Secret to the Molten Center The allure of the chocolate lava cake lies in its rich, flowing center, a feature that seems almost magical upon first taste. Achieving this molten core is simpler than it appears, hinging on precise timing and temperature. Bake the cakes until the edges set, but the center remains soft, allowing for a slight setting as they cool. For those seeking a fail-safe method, consider the 'plug' technique: insert a chocolate truffle or a frozen dollop of ganache into the batter before baking, ensuring a gooey center even if slightly overbaked. To cater to different preferences and dietary restrictions, various fillings can be used to create the desired molten effect. Here's a quick guide: Chocolate Truffle: Classic and decadent Caramel: A sweet and gooey alternative Nutella or Peanut Butter: For a nutty twist Fruit Compotes: A lighter, tangy option Remember, the quality of chocolate is paramount. Opt for the finest you can find to ensure a dessert that's as indulgent as it is impressive. Comparing Traditional and Modern Variations The evolution of the chocolate lava cake is a tale of culinary innovation. Traditional recipes often hinge on tried-and-true methods, using ingredients like high-quality chocolate and real butter to achieve that classic taste and texture. In contrast, modern variations are not afraid to experiment, incorporating unique flavors or even altering the fundamental components for dietary needs. Traditional: High-quality chocolate, real butter, and precise baking times. Modern: Alternative ingredients, dietary adaptations, and bold flavor infusions. The texture and taste of a chocolate cake can vary significantly depending on the ingredients and techniques used. A cake made without baking soda, for example, might have a different texture and taste compared to a traditional recipe that includes it. This principle applies to lava cakes as well, where the molten center is the star of the show. Whether you prefer the classic or are eager to try something new, understanding these differences can enhance your appreciation and baking of this beloved dessert. Mastering the Basics Ingredients for Chocolate Lava Cakes The foundation of a sumptuous Chocolate Lava Cake lies in its simple yet precise list of ingredients. At the heart of this dessert are bittersweet chocolate and butter, which combine to form the rich, flowing center that gives the lava cake its name. Eggs, powdered sugar, and flour round out the essentials, providing structure and sweetness to the cake. Vanilla and salt are key for enhancing the deep chocolate notes, while a hint of espresso powder can elevate the intensity of the chocolate flavor, although it's optional. For those looking to experiment, the type of chocolate can be varied. While bittersweet is standard, white, milk, or extra dark chocolate offer delightful variations. Flavorful touches such as liqueurs, citrus zests, or spices can be incorporated into the batter, and for those cautious about achieving the perfect molten center, a 'plug' of chocolate truffle can ensure a gooey heart even if slightly overbaked. Choosing the Right Chocolate Selecting the ideal chocolate for your lava cake is crucial to its success. The quality of chocolate you use will directly influence the flavor and texture of your dessert. Higher-quality chocolate bars, which contain more cocoa butter, will provide a smoother melt and a more luxurious mouthfeel. It's essential to enjoy the taste of the chocolate on its own, as it will be the star of your cake. When it comes to the type of chocolate, bittersweet varieties are often recommended. A chocolate with 60% to 70% cacao content strikes the perfect balance between rich, dark flavor and a touch of bitterness to counter the sweetness of the cake. However, you can experiment with white, milk, or extra dark chocolate to put a unique twist on the classic. Here's a simple guide to help you choose the right chocolate for your lava cakes: Bittersweet Chocolate (60-70% cacao): Ideal for a classic lava cake with a deep chocolate flavor. Milk Chocolate: Offers a sweeter, creamier taste. White Chocolate: Provides a delicate, subtle flavor and can be paired with fruits or nuts. Extra Dark Chocolate (above 70% cacao): For those who prefer an intense chocolate experience. The Role of Eggs in Achieving the Perfect Texture Eggs play a pivotal role in creating the signature texture of chocolate lava cakes. The precise handling of eggs is crucial for the cake's structure and molten center. When eggs are beaten, they trap air, which expands in the oven, contributing to the cake's rise. The yolks add richness and help to emulsify the batter, ensuring a smooth and creamy texture. To achieve the perfect consistency, it's important to follow these steps: Beat the eggs, egg yolks, sugar, vanilla, and salt until thickened and pale. Fold the chocolate mixture into the egg mixture in batches, being careful not to deflate the air that's been whipped into the eggs. Gently fold in the flour just until combined, maintaining the batter's glossy appearance. Remember, the consistency of your batter directly affects the outcome of your lava cakes. A well-emulsified batter will ensure a delicate crust that gives way to the luscious, flowing center that makes these cakes so irresistible. Creative Twists on the Classic Variations for Chocolate Lava Cakes While the classic chocolate lava cake is a crowd-pleaser, exploring variations can elevate this dessert to new heights. Consider the following ideas to add a twist to your next batch: Peanut butter: For a nutty, creamy surprise, add a dollop of peanut butter to the center before baking. Raspberry: A spoonful of raspberry preserves can offer a tart contrast to the rich chocolate. Red velvet: Transform your lava cake with a red velvet batter, maintaining the gooey center that everyone loves. Remember, the type of chocolate you choose can greatly influence the final taste. From bittersweet to white chocolate, each variety brings its own character to the dessert. Enhancing the batter with liqueurs, citrus zests, or spices can also introduce an unexpected twist that will delight your taste buds. Innovative Filling Ideas Exploring new filling options can transform your chocolate lava cake into an even more irresistible dessert. Incorporating unconventional fillings not only adds a surprise element but also personalizes each bite to your taste preferences. Plug the center: A simple yet effective method is to insert a 'plug' into the center of your cake. This could be anything from a truffle to a frozen dollop of Nutella or peanut butter. It ensures a gooey center, even if the cake stays in the oven a bit too long. Sauces: Drizzle or serve your lava cake with a variety of sauces. Options like chocolate ganache, berry coulis, caramel sauce, or crème anglaise can elevate the flavor profile. Remember, the key to a successful filling is to ensure it doesn't seep into the batter during baking. Techniques such as freezing the filling beforehand or using a 'plug' can help maintain the integrity of the molten center. Serve your innovatively filled lava cake with a scoop of vanilla ice cream for a classic yet elevated dessert experience. Flavor Enhancements and Substitutions Exploring different flavor enhancements and substitutions can transform a classic chocolate lava cake into a unique dessert experience. Incorporating a dash of vanilla extract or a pinch of salt can subtly alter the taste, bringing out the richness of the chocolate. For those looking to experiment further, consider the following additions: Espresso powder: Deepens the chocolate flavor without overwhelming. Sweetened whipped cream: Offers a light, creamy contrast to the dense cake. Alternative flours: Whole wheat, all-purpose, or gluten-free blends cater to dietary preferences. Remember, the balance of sweetness and flavor is crucial; too much of any additive may overpower the essential chocolatey essence of the lava cake. For instance, while a fruity twist can be delightful, be mindful of its sweetness and how it integrates with the overall profile of the dessert. Baking Tips and Techniques Tips for the Best Chocolate Lava Cakes Achieving the perfect chocolate lava cake is an art that requires attention to detail and a few key techniques. Ensure your eggs are at room temperature before you begin; this small step makes a significant difference in the consistency of your batter. To avoid the common mistake of overbaking, which can lead to a cakey texture rather than molten, keep a close eye on your cakes in the oven. They should be removed when the edges are firm but the center is still soft to the touch. Here's a quick checklist to follow: Use high-quality chocolate, preferably bittersweet or dark with 60-70% cacao. Consider the type of chocolate for a unique twist; white, milk, or extra dark varieties can offer new flavors. Flavor enhancements like liqueur, citrus zest, or spices can elevate your cake. For added insurance against overbaking, insert a chocolate truffle into the center before baking. Avoiding Common Pitfalls When striving for the perfect chocolate lava cake, it's crucial to avoid common mistakes that can alter the dessert's iconic texture and taste. Here are some tips to help you achieve lava cake perfection: Don't overbake: The difference between a gooey center and a solid cake can be a matter of minutes. Keep a close eye on the baking time. Release gently: After baking, let the cakes rest for a moment. Then, carefully flip them onto the plate to maintain their delicate structure. Whip patiently: The texture of your lava cake relies heavily on the eggs. Whip them until they are thick and pale for a stable batter. Use a scoop: For even cooking, divide the batter equally among ramekins using a portion scoop. Serving and Presentation Suggestions The moment of unveiling your chocolate lava cake is as crucial as the baking process itself. Presentation is key to creating that wow factor. Begin by carefully transferring the cake onto a serving plate. A warm cake will release without trouble, ensuring a smooth transition from ramekin to plate. For a touch of elegance, garnish with a light dusting of powdered sugar or a sprig of mint. If you're serving for a special occasion, consider a drizzle of raspberry coulis or a scoop of vanilla ice cream to complement the rich chocolate flavor. Finally, serve your chocolate lava cake promptly to savor the molten center at its best. The contrast between the warm, flowing chocolate and the cooler accompaniments will be a delightful experience for your guests. Beyond the Cake Pairing with Other Chocolate Delights When indulging in the rich decadence of a chocolate lava cake, pairing it with the right beverage or side can elevate the entire experience. Ruby port is a classic choice, its sweet and intense flavors complementing the bitterness of dark chocolate perfectly. Beyond beverages, consider these delightful accompaniments: Amazing Chocolate Chip Cookies Chocolate Peanut Butter Swirl Fudge Coffee Chocolate Chip Blondies Dark Chocolate-Dipped Macaroons Favorite Hot Chocolate Remember, the key to a successful pairing is balance. The goal is to enhance, not overshadow, the star of the show - your molten-centered masterpiece. Mini Lava Cakes for Two Creating the perfect mini lava cakes for two is an intimate and delightful way to end a romantic meal. These personal-sized desserts are rich, decadent, and surprisingly simple to make. No special equipment is needed—just a standard muffin tin. For a flawless finish, consider a light dusting of powdered sugar. To elevate the experience, accompany your cakes with a scoop of vanilla or strawberry ice cream and a handful of fresh berries. The contrast of warm cake and cool ice cream is sublime. Here's a quick glance at the preparation time: Remember, these cakes are best enjoyed freshly baked, so time your preparation to coincide with the end of your meal. With a little practice, you'll find that making mini lava cakes for two is a sweet and simple way to express affection. Getting Feedback: Share Your Experience After indulging in the decadent pleasure of a chocolate lava cake, sharing your experience can be just as satisfying. Your feedback is invaluable, not only to us but to fellow dessert enthusiasts. Whether it's a tale of success or a lesson learned, your insights contribute to the collective wisdom of the chocolate lava cake community. If you've discovered a handy trick or encountered a common pitfall, your advice could be the key to someone else's perfect dessert. For those who have reheated their lava cakes, share which method brought your dessert back to its glorious, molten state. As a reminder, here's a snippet from a helpful resource: Title: How to Reheat Lava Cakes - The Nessy Kitchen Snippet: Next time you have some leftover molten chocolate lava cakes, use one of these reheating methods to restore them to their just-baked state. Your stories of shared desserts and saved relationships, or even how you improvised without ramekins, are all welcome narratives that enrich our understanding and appreciation of this beloved treat. Conclusion As we've explored the delightful world of Chocolate Lava Cakes, it's clear that this dessert is not only a crowd-pleaser but also a versatile canvas for culinary creativity. From the classic bittersweet chocolate to inventive variations like peanut butter and raspberry, there's a lava cake to satisfy every palate. Remember to use high-quality chocolate and consider our tips for achieving that perfect molten center. Whether you're baking for a special occasion or simply indulging in a chocolatey treat, these cakes are sure to impress. Don't forget to share your baking adventures in the comments, and if you're craving more chocolate goodness, check out our other recommended treats. Happy baking! Frequently Asked Questions What exactly is a lava cake? Also known as molten chocolate cakes, lava cakes feature a molten chocolate center, achieved by underbaking the cake or by adding a melty filling like a chocolate truffle. What is the secret to creating the molten center in a lava cake? The molten center in a lava cake can be created by carefully timing the baking process to underbake the center or by inserting a melty filling such as a chocolate truffle or fudge. Can I use different types of chocolate for lava cakes? Yes, while bittersweet chocolate is commonly used for its balanced flavor, you can experiment with white, milk, or extra dark chocolate for a unique twist. What are some creative variations for chocolate lava cakes? You can explore variations like peanut butter, raspberry, and red velvet lava cakes, or add liqueur, citrus zest, or spices to the batter for extra flavor. How can I ensure the best results when making chocolate lava cakes? For the best results, use high-quality bittersweet or dark chocolate, be cautious with baking times, and consider using a plug like a truffle if worried about overbaking. What are some serving suggestions for chocolate lava cakes? Chocolate lava cakes pair well with vanilla ice cream, fresh berries, or a dusting of powdered sugar. For a personal touch, try mini lava cakes for an intimate dessert experience.
- "Decadent Devil's Food Cake: A Sinfully Delicious Recipe You Need to Try"
Devil's Food Cake is the epitome of indulgent desserts, a rich and moist chocolate cake that has captivated the palates of sweet-toothed aficionados for generations. This article delves into the storied history of this beloved treat, offers a treasure trove of decadent recipes, shares essential baking tips and tricks, discusses nutritional aspects and dietary variations, and explores the cultural impact of Devil's Food Cake on communities and social media. Key Takeaways Devil's Food Cake is a historic dessert with a significant rise in popularity, often contrasted with its counterpart, Angel Food Cake. Recipes like Classic Devil's Food, Death by Chocolate, and Chocolate Cherry Dump Cake cater to various tastes and occasions. Baking the perfect Devil's Food Cake requires attention to moisture, decoration, and avoiding common pitfalls. Nutritional information is important for those indulging responsibly, with gluten-free and vegan options available for dietary restrictions. The cake's community impact is seen through high customer ratings, social media recipe sharing, and its presence in grocery rankings. The Rise of Devil's Food Cake Historical Significance The origins of Devil's Food Cake are as rich and mysterious as its flavor. Emerging in the United States in the early 20th century, this chocolate cake quickly became a staple at celebratory events and family gatherings. Unlike its ethereal counterpart, Angel Food Cake, which gained popularity in the late 19th century, Devil's Food Cake was lauded for its moist, airy texture and deep chocolate taste. While the exact date of its inception remains unclear, early recipes began surfacing in cookbooks and newspapers, solidifying its place in American dessert culture. The table below outlines key milestones in the cake's history: As Devil's Food Cake continued to evolve, it embraced various forms, from simple homemade versions to elaborate creations in high-end bakeries. Its adaptability and rich flavor have ensured its enduring presence in the culinary world. Popularity in Modern Cuisine The allure of Devil's Food Cake has not waned over the years, maintaining its status as a beloved dessert across generations. Its rich, chocolatey goodness continues to captivate the palates of sweet-toothed enthusiasts everywhere. The cake's name has sparked much curiosity and debate, with some suggesting that its sinfully good flavor is the reason behind the moniker. In the culinary world, this dessert has seen a resurgence, particularly in the realm of gourmet baking and artisanal presentations. The following list highlights some key moments in its modern culinary journey: 1970s – Devil's food cake's popularity decreases following the linkage of red food dye to cancer. Present – A staple in bakeries and households, it remains a top choice for celebrations and indulgent treats. Comparison with Angel Food Cake When it comes to contrasting the decadent Devil's Food Cake with its ethereal counterpart, Angel Food Cake, the differences are as stark as their names suggest. Angel Food Cake is renowned for its light and airy texture, a result of its unique composition that eschews fats like butter and oil in favor of whipped egg whites. This not only gives it a distinctive fluffiness but also makes it a lower-fat option compared to most other cakes. In terms of ingredients, Angel Food Cake relies on a simple mix of pantry staples, but its preparation is notoriously tricky. Achieving the perfect consistency requires precise beating of the egg whites to stiff peaks, a process that can make or break the cake's signature texture. Here's a quick comparison of the two cakes: Angel Food Cake: Egg whites, sugar, cake flour, cream of tartar, and sometimes vanilla or orange extract. Devil's Food Cake: Cocoa, flour, butter or oil, eggs, and typically a leavening agent like baking soda. Decadent Recipes for Chocolate Lovers Classic Devil's Food Cake The Classic Devil's Food Cake is a timeless favorite that has captivated the taste buds of chocolate aficionados for generations. Its rich, moist texture paired with a deep chocolate flavor makes it a staple in any baker's repertoire. Inspired by baking legends like Flo Braker, this cake is a testament to the art of chocolate cake making. To achieve the quintessential devil's food cake experience, one must pay attention to the quality of ingredients and the precision of the baking process. Here's a basic outline of the steps involved: Preheat your oven and prepare your baking pans. Sift together the dry ingredients to ensure a smooth batter. Cream the butter and sugar, then add eggs one at a time. Alternate adding dry ingredients and milk, beginning and ending with dry ingredients. Mix in the cocoa and hot water to create a rich chocolate mixture. Bake until a toothpick inserted into the center comes out clean. When it comes to customer satisfaction, the Classic Devil's Food Cake often ranks highly. Its popularity is reflected in the ratings and reviews across various platforms, indicating its beloved status among dessert lovers. Death by Chocolate Cake The Death by Chocolate Cake is a true testament to chocolate indulgence. This recipe transforms a simple devil's food cake mix into a rich and sumptuous dessert that's sure to satisfy even the most intense chocolate cravings. With the addition of instant chocolate pudding and sour cream, the cake achieves an unparalleled moistness that makes each bite a heavenly experience. For those who prefer a less intense chocolate experience, the recipe can be easily modified. As suggested by Amy Hanten, you could leave out the chocolate chips for a subtler flavor. However, for the true chocolate aficionados, this cake is a dream come true, often described as a 'go-to' recipe for a quick and satisfying chocolate fix. Chocolate Cherry Dump Cake The Chocolate Cherry Dump Cake combines the richness of devil's food cake with the tartness of cherries for a dessert that's as easy to make as it is to enjoy. With a prep time of just 15 minutes and a total time of an hour, this cake is perfect for those who want a delicious treat without the hassle of complex baking procedures. Here's a quick glance at the nutritional content per serving: To share this delightful recipe with friends, simply copy the link or share it on social media platforms like Twitter, Facebook, and Pinterest. It's a surefire hit for occasions like Valentine's Day or any day when you crave a sweet and satisfying dessert. Baking Tips and Tricks Achieving the Perfect Moistness The quest for the perfect moistness in a Devil's Food Cake is akin to finding the holy grail of baking. Moisture in cakes is not just about the wet ingredients; it's a delicate balance that starts with the right choice of ingredients and ends with precise baking techniques. Here are some tips to ensure your cake is as moist as it is flavorful: Grease the pan properly to prevent sticking and to allow for even baking. Avoid overmixing the batter, as it can lead to gluten development and a less tender cake. Bake the cake just until it springs back to touch and a toothpick inserted comes out clean, avoiding overbaking which can dry out the cake. Consider using a thermometer when making frostings or syrups to ensure they reach the correct temperature without overcooking. For those who are looking for a cake that's not just moist but also packed with chocolate flavor, the Dark chocolate cake mix can be a great base for your Devil's Food Cake. It's a favorite among chocolate lovers, including those who swear by the 'The BEST Chocolate Overload Cake - The Life Jolie'. Decorating Your Devil's Food Cake Once your Devil's Food Cake has cooled, the real fun begins: decoration. The key to a stunning presentation is in the details. Start by ensuring your cake is on a sturdy base, such as a cake turntable or a flat plate, to make the decorating process smoother. For a classic look, you can't go wrong with a rich chocolate ganache drizzle and a sprinkle of chocolate shavings. If you're feeling adventurous, try piping intricate designs with buttercream frosting or creating a themed cake with fondant shapes. Remember, the goal is to complement the deep chocolate flavor, not overpower it. Here's a simple guide to get you started: Prepare your tools: Gather piping bags, tips, spatulas, and any other decorating tools you might need. Choose your icing: Whether it's buttercream, cream cheese, or ganache, pick a frosting that will hold up well and taste great with chocolate. Add a personal touch: Use decorations like edible glitter, fresh fruit, or even candy to make your cake unique. Lastly, don't forget to consider the occasion. A birthday cake might call for more playful decorations, while a dinner party dessert could benefit from elegant simplicity. And if you're short on time, a dusting of powdered sugar and a few berries can be just as effective. Common Mistakes to Avoid When baking Devil's Food Cake, certain missteps can turn your decadent dessert into a disappointing disaster. Greasing the pan properly is crucial; a well-greased and floured pan, or the use of 'cake goop,' can mean the difference between a cake that releases smoothly and one that sticks and breaks apart. Overmixing the batter is another common error; it can lead to a tough, rubbery texture instead of the desired moist and tender crumb. Here's a quick checklist to help you avoid these pitfalls: Grease and flour the pan, or use cake goop for easy release. Mix dry ingredients and cream just enough to combine, avoiding overmixing. Scrape the bowl gently to ensure even distribution of ingredients. By paying attention to these details, you can ensure that your Devil's Food Cake will be as sinfully good as it should be. Nutritional Information and Dietary Considerations Caloric Content and Serving Sizes Understanding the caloric content of Devil's Food Cake is crucial for those who monitor their dietary intake. A typical homemade slice can range significantly in calories depending on the ingredients used. For instance, a slice containing 560kcal may also have a substantial amount of fat, including 12g of saturated fat, and sugars amounting to 36g. When considering pre-packaged cake mixes, the caloric content can be more consistent. For example, a serving of Duncan Hines Devil's Food Cake Mix contains 170 calories per package mix (43g). It's important to note that these values represent the mix alone, without additional ingredients like eggs, oil, or frosting. Below is a table summarizing the nutritional content of a typical serving of Devil's Food Cake: Remember, the actual values can vary based on the specific recipe and serving size. Gluten-Free and Vegan Variations Adapting the classic Devil's Food Cake to meet dietary restrictions doesn't mean compromising on taste. Gluten-free flours such as almond, coconut, or a pre-mixed gluten-free blend can be used to create a cake that's just as indulgent as the original. For those following a vegan diet, egg substitutes like flaxseed or chia mix, and dairy alternatives such as almond milk and vegan butter, ensure the cake remains moist and flavorful. Here's a quick guide to some common substitutes: Flour: Use gluten-free all-purpose flour or a mix of rice, potato, and tapioca flours. Eggs: Replace with applesauce, mashed bananas, or commercial egg replacers. Milk: Opt for non-dairy milk like soy, almond, or oat milk. Butter: Vegan butter or coconut oil can be used in place of traditional butter. Remember, when making substitutions, it's important to measure accurately and be aware that textures and flavors may vary slightly from the original recipe. Balancing Indulgence with Health Indulging in a slice of Devil's Food Cake is a delightful experience, but it's important to balance the pleasure with health considerations. Moderation is key when enjoying rich desserts. To maintain a healthy diet, consider the nutritional content of each serving and how it fits into your daily caloric intake. Calories: 560kcal per slice Carbohydrates: 56g Protein: 7g Fat: 36g Fiber: 4g These figures are approximate and can vary based on the specific recipe and serving size. Remember that while Angel Food Cake may have fewer calories per slice due to its lack of fat, Devil's Food Cake contains more protein per serving, which can be beneficial for muscle repair and growth. Always consult with a nutritionist or use online calculators to better understand how a slice of Devil's Food Cake can fit into your balanced diet, especially if you have specific dietary goals or restrictions. Community and Culture Customer Reviews and Ratings The community's voice is a pivotal aspect of any product's success, and Devil's Food Cake mixes are no exception. Customer reviews and ratings offer invaluable insights into the quality, taste, and overall satisfaction that consumers experience. For instance, the Betty Crocker Gluten Free Devil's Food Cake Mix has garnered an impressive average rating, reflecting its popularity among those with dietary restrictions. These figures not only demonstrate the product's reception but also guide potential buyers in making informed decisions. It's clear that the majority of customers find the mix to be of high quality, offering great value and ease of use. Despite the glowing reviews, it's important to acknowledge that opinions on certain aspects like texture and dryness can differ. This serves as a reminder that while customer feedback is crucial, personal taste ultimately dictates one's own culinary journey with Devil's Food Cake. Sharing Recipes on Social Media The digital age has transformed the way we share and discover recipes. Social media platforms have become a hub for food enthusiasts to exchange their favorite devil's food cake variations. For instance, The Cooking Mom boasts a following of over 30,000 across various platforms, offering a plethora of recipes to her audience. Platforms like Instagram and Pinterest are particularly popular for sharing visually appealing food content, while Facebook groups cater to community discussions and recipe swaps. Here's a snapshot of where you can follow The Cooking Mom: Instagram Facebook Pinterest YouTube TikTok Moreover, the trend of sharing recipes online has led to a surge in the popularity of certain dishes. The title 'Frosted Devil's Food Chocolate Cake (Gluten Free)' has been a recent favorite, with many praising its rich, chocolatey, and decadent qualities. This cake is just one example of how a single recipe can ignite a widespread craving among dessert lovers. Cake Mixes in the Market Rankings In the realm of convenience and quality, certain cake mixes have risen to prominence, becoming staples in pantries across the globe. Betty Crocker's Super Moist Cake Mix stands out, not only for its ease of preparation but also for its consistent results, earning it the 'Amazon's Choice' label in the cake mix category. The market rankings reveal a preference for mixes that deliver on both taste and texture. Customer reviews often highlight the importance of a cake mix that can produce a moist and flavorful outcome, which is a testament to the product's reliability. The following table summarizes the rankings and customer ratings for popular devil's food cake mixes: Consumers also value the economic aspect of these mixes, with many expressing that the affordability does not compromise the quality. Positive feedback frequently mentions the good flavor and moist texture, while negative comments are relatively few, often related to pricing rather than the product quality itself. Conclusion Devil’s Food Cake stands as a testament to the indulgent pleasures of chocolate, with its rich and moist texture captivating the palates of dessert lovers. From the convenience of cake mixes like Betty Crocker's Super Moist Cake Mix to the joy of creating a 'Death by Chocolate Cake' from scratch, this cake variety has earned its place in the hearts and kitchens across the globe. Whether it's paired with whipped cream and fresh berries or enjoyed in its pure, unadorned glory, Devil’s Food Cake remains a beloved classic. As we've explored its versatility and the various ways it can be enjoyed, it's clear that this chocolatey delight is more than just a dessert—it's a celebration of flavor that continues to be a favorite in the realm of sweet treats. Frequently Asked Questions What makes Devil's Food Cake different from other chocolate cakes? Devil's Food Cake is known for its rich chocolate flavor, moist texture, and darker color. It typically includes cocoa powder, coffee or hot water to enhance the chocolate taste, and a leavening agent like baking soda to create a fluffier texture. Is Devil's Food Cake the same as Angel Food Cake? No, they are quite different. Devil's Food Cake is a dense, moist chocolate cake, while Angel Food Cake is a light, airy cake made with egg whites and no fat. They represent opposite ends of the cake spectrum in terms of texture and flavor. Can I make a gluten-free version of Devil's Food Cake? Yes, you can make a gluten-free Devil's Food Cake by substituting the regular flour with a gluten-free flour blend. Ensure that all other ingredients used are also gluten-free. What are some common mistakes to avoid when making Devil's Food Cake? Common mistakes include overmixing the batter, which can lead to a tough cake, not measuring ingredients accurately, and not following the recommended baking time and temperature, which can result in an undercooked or burnt cake. How can I decorate my Devil's Food Cake? Devil's Food Cake can be decorated with a variety of frostings like chocolate ganache or buttercream. You can also add toppings such as chocolate chips, fresh berries, or whipped cream for extra indulgence. Are there any tips for achieving the perfect moistness in a Devil's Food Cake? To achieve the perfect moistness, make sure to use ingredients like sour cream or buttermilk in the batter, avoid overbaking by checking for doneness towards the end of baking time, and let the cake cool properly before frosting.
- 1. "How to Make the Perfect Lemon Drizzle Cake: A Step-by-Step Recipe Guide"
The Lemon Drizzle Cake is a delightful treat that combines the tangy zest of lemon with the sweetness of a soft, moist cake. This article dives into the craft of making the perfect Lemon Drizzle Cake, exploring various recipes and techniques, including those from renowned chefs like Gordon Ramsay. From selecting the best ingredients to mastering the baking process and exploring innovative variations, this guide is a comprehensive resource for both novice and experienced bakers looking to perfect this classic dessert. Key Takeaways The perfect Lemon Drizzle Cake requires high-quality ingredients, including fresh lemons for zest and juice, and the right balance of sugar and flour. Technique is crucial: creaming butter and sugar until light and fluffy, and carefully folding in flour to achieve a tender crumb. Variations like the Lemon Bundt Cake with Glaze or innovative twists can offer exciting new takes on the traditional recipe. Baking tips such as achieving the ideal consistency and ensuring even baking are essential for a successful Lemon Drizzle Cake. Proper storage, including tips for freshness and freezing, ensures that the Lemon Drizzle Cake remains delicious for days after baking. The Art of Crafting the Perfect Lemon Drizzle Cake Understanding the Basics The journey to a perfect Lemon Drizzle Cake begins with a solid foundation. Understanding the basics is crucial for any baker, whether you're a novice or a seasoned pro. The key components of this delightful treat are simple: a fluffy sponge cake infused with the zest and juice of fresh lemons, and a tangy lemon syrup that soaks into the cake post-baking. Ingredients: Start with high-quality flour, sugar, eggs, butter, and, of course, lemons. Proportions: The right balance of wet to dry ingredients ensures a moist yet airy texture. Mixing: Over-mixing can lead to a dense cake, so mix just until the ingredients are combined. Remember, the lemon syrup should be poured over the cake while it's still warm, allowing it to absorb fully and create that signature moist texture. With these basics in mind, you're well on your way to creating a lemony masterpiece that's sure to impress. Selecting Quality Ingredients The journey to a perfect lemon drizzle cake begins with selecting high-quality ingredients. Freshness is paramount, especially when it comes to the star of the show: lemons. Opt for organic lemons with bright, unblemished skin to ensure the zest contributes a vibrant citrus flavor without any unwanted chemicals. Dairy products also play a crucial role. Use unsalted butter and fresh eggs, as they greatly influence the cake's richness and structure. Here's a quick checklist for your shopping trip: Organic lemons Unsalted butter Fresh, free-range eggs Pure vanilla extract Fine sugar All-purpose flour Remember, the quality of each component is what elevates your cake from good to extraordinary. Mastering the Technique The technique of creating a Lemon Drizzle Cake is as crucial as the ingredients themselves. It's about understanding the harmony between the sponge and the drizzle, ensuring that the lemon flavor is evenly distributed and the cake remains moist. Following the right steps is key to achieving the perfect texture and flavor. Here's a condensed guide to the process: Pre-heat your oven to the correct temperature, typically around 175°C. Prepare your baking pans with parchment paper to prevent sticking. Cream the butter and sugar until pale and fluffy, which forms the base of your sponge. Gradually add eggs, ensuring each is well incorporated before adding the next. Fold in dry ingredients gently to maintain the airiness of the batter. Bake until golden and a skewer inserted comes out clean. While still warm, drizzle with a mixture of lemon juice and sugar to create that signature moist texture. Remember, patience and attention to detail will take your Lemon Drizzle Cake from good to great. It's almost too simple, yet it's about striking the perfect balance between the ingredients and the method. Lemon Drizzle Cake Variations Classic Lemon Drizzle Loaf The Classic Lemon Drizzle Loaf is a beloved staple in the world of sweet treats, known for its moist texture and tangy citrus flavor. To achieve the perfect loaf, one must follow a precise balance of ingredients and steps. For the cake batter, creaming together softened unsalted butter with caster sugar until light and fluffy is essential. This process incorporates air, which contributes to the cake's fluffiness. Eggs are then added one at a time, ensuring each is well mixed before introducing the next. The final touch is the careful folding in of self-raising flour and lemon zest, which should be evenly distributed throughout the batter. Once the batter is prepared, it's poured into a lined loaf tin and baked until golden. The moment it's out of the oven, the lemon drizzle topping is applied, allowing the cake to absorb the lemony sweetness as it cools. Here's a quick guide to the ingredients and steps: Ingredients: 225g unsalted butter, softened 225g caster sugar 4 eggs 225g self-raising flour 1 lemon, zested For the drizzle: 1.5 lemons, juiced 85g caster sugar Instructions: Preheat the oven to 180°C (160°C fan/gas mark 4). Cream the butter and sugar. Add eggs one at a time. Fold in flour and lemon zest. Bake in a lined loaf tin. Prepare and apply the lemon drizzle topping. Serve your lemon drizzle loaf with a hot cup of tea or coffee, and enjoy the perfect balance of sweetness and zest that makes this cake a timeless classic. Lemon Bundt Cake with Glaze The Lemon Bundt Cake with Glaze is a delightful twist on the classic drizzle cake, offering a moist and rich texture that's sure to impress. Baking the perfect bundt requires precision and care, especially when it comes to the glaze that crowns this citrusy masterpiece. Here's a quick guide to the ingredients you'll need for the cake and the glaze: For the Cake: Lemon Cake Mix Instant Lemon Pudding Mix Water Vegetable Oil Sour Cream Eggs For the Glaze: Powdered Sugar Fresh Lemon Juice Vanilla Extract Once you've gathered your ingredients, the process is straightforward. Pour the batter into a greased bundt pan and bake for 40-45 minutes. After cooling, apply the glaze with a pastry brush, allowing it to seep into the cake's grooves. This not only adds flavor but also ensures a moist texture throughout. Innovative Twists on Traditional Recipes Exploring innovative twists on the traditional lemon drizzle cake opens up a world of creativity and flavor. Incorporating unexpected ingredients can transform the classic dessert into a modern culinary masterpiece. For instance, adding a hint of rosemary or thyme to the batter infuses the cake with a subtle, aromatic depth that complements the lemon's zesty punch. Another avenue for innovation is the incorporation of different textures. Imagine a lemon drizzle cake with a layer of crunchy, candied chickpeas, offering a delightful contrast to the moist sponge. This unique combination of sweet and spicy elevates the cake to a new level of indulgence. For those who enjoy a bit of experimentation, here's a simple list to get started: Experiment with herbs like basil or lavender for a botanical touch Introduce nuts or seeds for an added crunch Swirl in a ribbon of lemon curd for an extra lemony burst Top with a lemon-infused cream cheese frosting for a creamy finish Baking Tips and Tricks Achieving the Ideal Consistency The quest for the perfect consistency in a lemon drizzle cake is a delicate balance of ingredients and technique. Adding lemon juice to a cake batter alters the acidity and changes the consistency, more than it adds lemon flavor. It's crucial to understand how each component interacts within the batter to achieve that desirable moist crumb with a crispy topping. To ensure a pale and fluffy consistency, begin by creaming together softened butter and sugar. This step is foundational, as it incorporates air into the batter, setting the stage for a light and tender cake. Following this, the addition of vegetable oil can enhance the cake's moisture, contributing to the overall texture. Remember, the consistency of your lemon drizzle cake can make or break the experience. It's the symphony of flavors and textures that creates a truly memorable dessert. Ensuring Even Baking Achieving an even bake is crucial for the perfect lemon drizzle cake. Preheating the oven to the correct temperature before baking is the first step to ensure consistency. It's also important to divide the batter evenly between pans, smoothing the surface with a spatula. Preheat oven to the specified temperature (usually around 175-180 degrees Celsius). Use the same type of pans for uniform heat distribution. Divide the batter equally and smooth out any peaks or troughs. After placing the cake in the oven, avoid opening the door frequently as this can cause temperature fluctuations that affect the bake. Use an oven thermometer to check for accuracy if your oven is prone to uneven heating. Lastly, the skewer test is a reliable method to ensure the cake is baked evenly throughout; it should come out clean when inserted into the center. Decorating and Presentation Ideas When it comes to decorating your Lemon Drizzle Cake, the possibilities are as endless as they are delightful. A well-presented cake can elevate the entire experience, turning a simple dessert into a showstopper. Here are a few ideas to get you started: Dust with icing sugar for a classic, elegant finish. Add candied lemon slices for a pop of color and a zesty bite. Drizzle with a thin glaze and sprinkle with lemon zest for an extra lemony kick. Presentation is not just about the cake itself, but also how it's served. Consider the plate or cake stand, and perhaps garnish the serving platter with fresh lemon slices or herbs like mint for a refreshing contrast. The title of Nicola Lamb's Kitchen Project #126, 'Lemon Drizzle Cake', suggests a pure-to-form approach, which aligns perfectly with the idea of letting the cake's natural charm be the star of the show. Serving and Storage Suggestions Best Practices for Freshness Ensuring your Lemon Drizzle Cake remains as delectable as the day it was baked is paramount. Store the cake in an airtight container to prevent it from drying out or absorbing odors from the refrigerator. For optimal freshness, follow these guidelines: Consume within 1-2 days when stored at room temperature. Refrigerate for up to 5 days; bring to room temperature before serving. Freeze slices individually wrapped in cling film for up to a month. Remember, the zesty glaze can attract moisture, so avoid humid conditions. If you notice any signs of spoilage, such as mold or an off smell, discard the cake immediately to ensure food safety. Creative Serving Ideas When it comes to serving lemon drizzle cake, the presentation can be just as important as the taste. Incorporate elements that complement the cake's zesty flavor and enhance its visual appeal. For instance, a dollop of clotted cream or a scoop of vanilla ice cream can add a luxurious touch, while a sprinkle of lemon zest or edible flowers can provide a pop of color and texture. Consider the following serving suggestions to make your lemon drizzle cake a standout dessert: Pair with a tangy lemon curd or berry compote for an extra burst of flavor. Offer a variety of toppings, such as crushed nuts, to allow guests to customize their slice. Present the cake on a vintage cake stand for a touch of elegance, or go rustic with a wooden board. Remember, the goal is to create an experience that delights all the senses, not just the palate. Freezing and Reheating Tips Properly freezing and reheating your Lemon Drizzle Cake ensures that you can enjoy its zesty flavor and moist texture even on a later date. To freeze the cake effectively, wrap it tightly in cling film or aluminum foil, and place it in an airtight container. This method prevents freezer burn and maintains the cake's quality for up to two months. For individual servings, consider slicing the cake before freezing. This allows for easy thawing and reheating of single pieces, providing convenience without compromising the cake's integrity. Remember to label your container with the freezing date to keep track of freshness. Lastly, always ensure that the cake has cooled completely before attempting to freeze, as this will prevent condensation from forming and affecting the texture. Conclusion In conclusion, the lemon drizzle cake stands out as a delightful treat that is both easy to make and irresistibly delicious. Whether you're following Gordon Ramsay's classic recipe or opting for a convenient doctored-up cake mix version, the zesty lemon flavor paired with the sweet, moist crumb creates a perfect balance that is sure to please any palate. With a few simple ingredients and straightforward instructions, this cake is a fantastic choice for a quick dessert or a lovely addition to afternoon tea. The versatility of the lemon drizzle cake also allows for adaptations, such as adding a glaze or simply dusting with powdered sugar, making it a recipe that can be tailored to individual tastes. So, the next time you're in the mood for something sweet and citrusy, remember that the lemon drizzle cake is just a few steps away from bringing a burst of sunshine to your table. Frequently Asked Questions What are the main ingredients for a lemon drizzle cake? The main ingredients for a lemon drizzle cake include unsalted butter, caster sugar, eggs, self-raising flour, and the zest and juice of lemons. For the drizzle topping, you'll need more lemon juice and caster sugar. How long should I preheat the oven for a lemon drizzle cake? You should preheat the oven to 180°C (160°C fan/gas mark 4) before baking your lemon drizzle cake. How do I know when my lemon drizzle cake is done baking? Your lemon drizzle cake is done when you can insert a skewer into the center and it comes out clean, which typically takes about 45-50 minutes. Can I make a lemon drizzle cake using a cake mix? Yes, you can use a lemon cake mix along with additional ingredients like instant lemon pudding mix, water, vegetable oil, sour cream, and eggs to create a delicious lemon drizzle cake with minimal effort. How should I store a lemon drizzle cake to keep it fresh? Store your lemon drizzle cake in an airtight container at room temperature for 3-4 days, or freeze it for up to 1 month. Are there any variations to the traditional lemon drizzle cake recipe? Yes, there are variations such as the classic lemon drizzle loaf, lemon bundt cake with glaze, and innovative twists that incorporate different ingredients or presentation styles.
- "Perfecting the Art of Pavlova: Tips and Tricks for a Delicate Dessert"
The Pavlova, a dessert named after the Russian ballerina Anna Pavlova, is an ethereal delight that combines a crisp meringue shell with a soft, marshmallow-like center, all crowned with whipped cream and fresh fruit. Despite its seemingly complex nature, creating the perfect Pavlova is an achievable art, steeped in rich history and open to creative interpretation. This article delves into the intricacies of Pavlova, from its basic composition to its storied past, and provides practical advice for crafting this elegant dessert. Key Takeaways Pavlova is more than just meringue; it's a dessert with a marshmallow-like center, distinguished by its combination of egg whites, sugar, cornstarch, and white vinegar. The dessert honors the Russian ballerina Anna Pavlova, with its origins contested between New Zealand and Australia, dating back to the 1920s. Crafting the perfect Pavlova involves selecting quality ingredients, mastering the meringue technique, and applying tips for a flawless finish. Toppings can vary, with a preference for fresh berries, and the Pavlova can be assembled with make-ahead strategies for stress-free entertaining. Creative twists on the classic Pavlova include innovative flavor pairings, seasonal variations, and inspirations from culinary traditions around the world. The Art of Crafting the Perfect Pavlova Understanding the Basics of Pavlova The pavlova, with its crisp exterior and marshmallowy center, is a dessert that celebrates simplicity and elegance. At its core, a pavlova consists of a meringue base, typically topped with whipped cream and a vibrant array of fresh fruits. Unlike a traditional meringue, which is crisp throughout, a pavlova's meringue includes ingredients like cornstarch and white vinegar to achieve its characteristic soft interior. To embark on your pavlova journey, you'll need a few essential tools: A reliable hand mixer A sturdy baking sheet Quality mixing bowls Remember, while the pavlova may seem daunting due to its impressive presentation, it is an accessible dessert that even a novice baker can master with patience and attention to detail. Selecting the Right Ingredients The foundation of a sublime Pavlova lies in the quality of its ingredients. Selecting the right components is crucial to ensure the perfect balance of flavors and textures. Begin with fresh, room-temperature egg whites, which will whip up more voluminously than cold ones. The sugar should be fine, like caster sugar, to dissolve easily and contribute to a glossy meringue. For a Pavlova that's as delightful to the eyes as it is to the palate, choose vibrant, ripe fruits. Strawberries, kiwifruit, and passionfruit are traditional favorites, but feel free to get creative with your selections. The cream, too, should be thickened to hold up well against the delicate meringue. Lastly, don't forget the tools that will make your baking experience smoother: a reliable digital kitchen scale for precise measurements, a stand mixer for effortless whipping, and quality mixing bowls and spatulas. With these ingredients and tools at hand, you're set to create the perfect pavlova every time. Mastering the Meringue Technique Achieving the perfect meringue is a pivotal step in creating a Pavlova that's both visually stunning and texturally delightful. The key to success lies in the meticulous folding of ingredients and precise baking. Keep everything clean—When preparing a Pavlova recipe, the most important thing is to have scrupulously clean utensils, free of grease, egg yolks, or eggshells. Bring your eggs to room temperature—To get more volume, it's necessary to have the egg whites at room temperature before beating them. After incorporating the sugar and vanilla, spread the meringue within the drawn circle on your baking sheet, ensuring the edges are slightly higher to create a well in the center. Bake until it achieves a pale, pinkish eggshell color. Remember, patience is essential; allow the meringue to cool completely in the oven with the door slightly ajar to avoid cracks. Tips for a Flawless Finish Achieving a flawless finish for your pavlova is both an art and a science. Ensure your utensils are impeccably clean; any residue can prevent the egg whites from reaching their full volume. It's also crucial to bring your eggs to room temperature before whipping them, as this helps to maximize volume. When it comes to sugar, patience is key. As recommended by the NZ Herald, beat in the caster sugar one tablespoon at a time, waiting 20 seconds between each addition, and continue whisking until the sugar has dissolved. You can test this by rubbing a little of the mixture between your fingers; it should feel smooth, not gritty. Finally, consider the presentation. Use fresh berries, mint, or figs to add a burst of color and flavor. The right toppings not only complement the taste but also enhance the visual appeal of your pavlova, making it a true showstopper at any gathering. Pavlova: A Dessert with a Rich History The Origin and Naming of Pavlova The Pavlova dessert is a sweet tribute to the Russian ballerina Anna Pavlova, renowned for her airy performances in the 1920s. The dessert's name reflects the lightness of her tutus, a characteristic mirrored in the dessert's delicate meringue base. While the exact origins are debated, evidence suggests that New Zealand may have been the first to publish a recipe, dating back to 1929. Historical accounts also trace the conceptual roots of Pavlova to earlier European desserts. For instance, a similar confection is mentioned in a 13th-century Syrian cookbook, and Austria's meringue traditions date back to the 1700s. Despite these ancient connections, the Pavlova as we know it today is a relatively modern creation, inspired by and named for a ballerina's grace. The Pavlova's composition is distinct from a traditional meringue. It includes cornstarch and white vinegar, which contribute to its unique marshmallow-like center—a feature that sets it apart and defines the dessert. Both Australia and New Zealand ardently claim the Pavlova as their own, a testament to its cultural significance in both countries. Cultural Significance and Variations The pavlova, with its light, airy texture and versatility, has become a beloved dessert across various cultures. Its adaptability allows it to be infused with local flavors and seasonal fruits, making it a canvas for culinary creativity. For instance, in tropical regions, you might find pavlovas topped with passion fruit and mango, while in colder climates, toppings might include stewed apples or pears. In the United States, pavlovas often feature a mix of berries, such as strawberries, blueberries, and raspberries. The United Kingdom might see a twist with the addition of sherry-infused berries or a layer of lemon curd beneath the cream. In France, a touch of elegance is added with the inclusion of kiwi and starfruit, or a drizzle of Chambord. While the pavlova is a festive dish often reserved for celebrations, it has also found its way into the hearts of home cooks around the world, thanks to accessible recipes like the Delia Smith Pavlova Recipe. This ease of preparation ensures that the pavlova remains a popular choice for both novice and experienced bakers. Historical Debates: New Zealand vs. Australia The debate over the origins of the Pavlova dessert is as rich and layered as the dessert itself. Both New Zealand and Australia fervently claim the Pavlova as their own, with evidence to support both sides. The dessert, named after the Russian ballerina Anna Pavlova, is said to have been inspired by her fluffy tutus during her tours in the 1920s. While New Zealanders point to a recipe dating back to 1929, Australians cite their own versions and insist on their rightful place in the Pavlova's history. The debate has even reached culinary conferences, with scholars presenting papers on the subject. Despite the ongoing contention, the Pavlova remains a beloved dessert in both countries, symbolizing a shared passion for sweet indulgence. New Zealand Claim: Recipe found as early as 1929 Australian Counterclaim: Own versions and national pride Ultimately, the Pavlova's true origin may remain a mystery, but the enjoyment it brings to dessert lovers is undeniable. Topping and Serving Your Pavlova Masterpiece Choosing the Perfect Combination of Fruits The crowning glory of any pavlova is the vibrant array of fruits that not only add a burst of flavor but also a visual feast. Selecting the right combination of fruits is crucial to achieving a harmonious balance between sweetness, acidity, and texture. Consider fruits that complement each other, such as the classic pairing of strawberries and kiwi, or venture into more exotic territories with passionfruit or mango. Wash and prepare your fruits just before assembly to maintain freshness. If using bananas, a splash of lemon juice will keep them from browning and add a zesty note. For a touch of elegance, garnish with fresh mint sprigs just before serving. Remember, the pavlova is a delicate dessert, so arrange your fruits gently. The final presentation should be as delightful to the eye as it is to the palate. Serve your pavlova masterpiece immediately to savor the crispness of the meringue against the softness of the cream and the juiciness of the fruits. The Art of Assembling Your Pavlova Assembling a pavlova is the moment where your culinary creativity truly shines. Begin by ensuring your meringue base is completely cool; this will prevent the toppings from causing it to soften prematurely. Spread a generous layer of whipped cream over the meringue, using a spatula to create gentle peaks and valleys. Next, arrange your chosen fruits artistically on top of the cream. The key is to balance the flavors and colors for a visually stunning dessert. Here's a simple guide to help you with the fruit placement: Place larger fruit pieces, like strawberry halves or kiwi slices, evenly around the perimeter. Fill in the gaps with smaller berries or fruit pieces. Consider adding a drizzle of fruit coulis or passionfruit pulp for an extra zing. Finally, add the finishing touches. A sprinkle of powdered sugar, a few mint leaves, or edible flowers can elevate the presentation of your pavlova. Serve immediately after assembly to enjoy the crispness of the meringue contrasted with the softness of the cream and the freshness of the fruits. Serving Suggestions and Presentation Tips The moment of unveiling your pavlova to guests is as crucial as its preparation. To serve, it is ideal to add toppings just before presentation to avoid sogginess. Common toppings include fresh fruit, such as berries, whipped cream, and various sauces, each complementing the delicate sweetness of the meringue. Presentation is key; choose your serveware wisely to enhance the visual appeal. A dessert stand can elevate the pavlova, making it the centerpiece of your table. Accompanying serveware like dipping bowls for extra sauces or condiments can add an interactive element to the dessert experience. For a memorable finish, garnish with a sprig of mint or a dusting of powdered sugar. These final touches not only add to the flavor but also to the overall aesthetic, ensuring your pavlova is as pleasing to the eye as it is to the palate. Make-Ahead Strategies for Stress-Free Entertaining Preparing Components in Advance Preparing your Pavlova components in advance is a smart way to ensure a stress-free dessert experience. The meringue base is the cornerstone of your Pavlova and can be made ahead of time. Wrap it tightly in plastic wrap or place it in an airtight container, and store at room temperature for up to several days. However, be mindful of the weather; in humid conditions, the meringue may become soft and chewy. Here are a few additional tips to keep in mind: Ensure all utensils are impeccably clean to guarantee the success of your meringue. Egg whites should be at room temperature to achieve maximum volume. Assemble the Pavlova just before serving to prevent the base from becoming soggy. Storing and Assembling Before Serving The key to a delightful Pavlova experience lies in the balance of its crisp meringue base and the luscious toppings. Storing the meringue properly is crucial; it should be kept in an airtight container at room temperature for several days, especially if you're dealing with humid weather to prevent it from becoming soft and chewy. When it comes to the cream, softly whip it 3-4 hours in advance and refrigerate. A short extra whisk just before using ensures the perfect consistency for assembling the pavlova. This approach not only maintains the texture but also simplifies the process, allowing you to focus on the presentation and final touches. Remember, the Pavlova is a symphony of textures and flavors that should be orchestrated with care. By following these simple storage and assembly tips, you'll ensure that each bite is a harmonious blend of crunchy, creamy, and fruity elements. Maintaining Texture and Flavor To ensure your pavlova retains its delightful texture and flavor, consider these tips. Store the meringue base in an airtight container at room temperature to prevent it from becoming chewy. Humidity is the enemy of meringue, so avoid storing it in the fridge unless absolutely necessary. If you must refrigerate, do so for no more than a day before serving. When it comes to assembly, add the cream and fruit toppings close to serving time. This prevents the meringue from absorbing moisture and losing its crispness. For a make-ahead strategy, prepare the cream and fruit separately, storing them in the fridge. If you're dealing with leftovers, they can be kept in the fridge, but be mindful that the edges of the pavlovas may dry out and the center can become more soft and chewy each day. Creative Twists on the Classic Pavlova Innovative Flavor Pairings Exploring innovative flavor pairings can transform a classic pavlova into a contemporary culinary delight. Boldly pairing unexpected flavors not only tantalizes the taste buds but also adds a touch of sophistication to your dessert. For instance, incorporating herbs into your fruit toppings can create a unique profile that complements the sweetness of the meringue. Citrus fruits like lemon or orange can be paired with fresh mint or basil for a refreshing twist. Berries, always a pavlova favorite, can be elevated with a sprinkle of finely chopped rosemary or thyme. For a more adventurous palate, try combining the pavlova with Earl Grey-infused cream and lavender. Remember, the key to successful flavor innovation lies in balance. Each element should enhance the others without overpowering. Use the following chart as a starting point for your flavor adventures: Seasonal and Festive Variations Embracing the spirit of the season, pavlova can be adorned with festive flair to match any holiday celebration. From the vibrant reds and greens of Christmas to the pastel hues of Easter, the pavlova's versatility shines through in its ability to harmonize with the occasion. For Christmas, think of incorporating flavors like peppermint, cinnamon, and cranberry. A garnish of holly leaves or edible glitter can add a touch of magic. Easter pavlovas might feature lighter notes such as lemon or raspberry, with decorations of chocolate eggs or spring flowers. As the seasons change, so can your pavlova, making it a delightful dessert that's always in tune with the times. Whether it's a summer gathering with fresh berries or a fall feast featuring spiced poached pears, your pavlova can be the centerpiece that complements the seasonal fare. Inspiration from Around the World The Pavlova dessert, with its light, airy meringue and rich topping of cream and fruit, has been adapted and reinvented across the globe. Each culture infuses its own unique twist, turning the classic into a reflection of local tastes and seasonal ingredients. From the zesty flavors of citrus fruits in the Mediterranean to the exotic appeal of tropical fruits in Southeast Asia, the Pavlova's versatility is its canvas. Here's a glimpse into how different regions inspire Pavlova variations: Europe: Berries and stone fruits are popular, with a preference for elegance and tradition. Asia: Exotic fruits and bright colors, often with a fusion of sweet and savory elements. Australia & Oceania: Passionfruit and kiwi are staples, honoring the dessert's contested origins. Latin America: Bold use of local fruits like guava and mango, with a flair for vibrant presentation. As you embark on your Pavlova journey, remember that this dessert is more than just a sweet treat; it's a celebration of cultural diversity and culinary artistry. Named after the famous Russian ballerina Anna Pavlova, this delectable meringue dessert will not only melt in your mouth but can also melt your heart. Embracing the Elegance of Pavlova The Pavlova, with its delicate meringue shell and lush topping of fresh fruit and whipped cream, is a dessert that captures the essence of elegance and simplicity. Named after the renowned Russian ballerina Anna Pavlova, this dessert is as graceful as its namesake, offering a balance of textures from the crisp exterior to the soft, marshmallow-like center. Whether you're a seasoned baker or new to the art of desserts, the Pavlova is a delightful challenge that rewards with its stunning presentation and exquisite taste. As we've explored various recipes, tips for perfection, and the storied history of this beloved treat, it's clear that the Pavlova is more than just a dessert—it's a celebration of culinary artistry and a testament to the joy of baking. So, gather your fresh berries, preheat your oven, and ready your mixer; it's time to create a masterpiece that's sure to dance its way into the hearts of all who taste it. Frequently Asked Questions What is a Pavlova? A Pavlova is a meringue-based dessert named after the Russian ballerina Anna Pavlova. It features a crisp crust and soft, light inside, typically topped with whipped cream and fresh fruit. How do you achieve the perfect texture for a Pavlova? To achieve the perfect Pavlova texture, ensure that you whip the egg whites to stiff peaks, add sugar gradually, and bake the meringue at a low temperature until the exterior is crisp and the interior remains marshmallow-like. Can you make Pavlova ahead of time? Yes, the meringue base for a Pavlova can be made ahead of time and stored properly until ready to serve. It's best to add the whipped cream and fresh fruit toppings just before serving to maintain texture. What fruits are best for topping a Pavlova? The best fruits for topping a Pavlova are typically fresh berries, kiwi, passionfruit, and bananas. Ensure bananas are tossed in lemon juice to prevent browning. What's the difference between a Pavlova and a meringue? While both Pavlova and traditional meringue are made with whipped egg whites and sugar, Pavlova includes ingredients like cornstarch and vinegar to create a marshmallow-like center, distinguishing it from a typical meringue. How do you properly slice and serve a Pavlova? To slice a Pavlova, use a sharp knife, possibly dipped in hot water, to cut through the crisp meringue without crushing it. Serve immediately after slicing to enjoy the contrasting textures.
- "Unleash Your Baking Skills with the Perfect Angel Food Cake Recipe"
Angel food cake is a heavenly dessert that stands out for its light, airy texture and simple elegance. Made with no butter or oil, its fluffiness is achieved through whipped egg whites, and its delicate vanilla flavor complements a variety of toppings and sauces. This cake is not only a treat for the senses but also a healthier option for dessert lovers. Whether you're baking a classic version or adapting it for dietary restrictions, angel food cake is a versatile and beloved treat that has evolved from its 19th-century origins to become a staple in modern baking. Key Takeaways Angel food cake is distinct for its super fluffy, airy texture, achieved by using whipped egg whites instead of butter or oil. The cake's light vanilla flavor makes it an adaptable base for a variety of toppings and pairings, enhancing its appeal. It is a healthier dessert choice, being low in fat and free of cholesterol, suitable for various dietary preferences. Angel food cake has a rich history, originating in the 19th century, and remains a symbol of culinary innovation and elegance. With the right techniques and ingredient substitutions, angel food cake can be made gluten-free without compromising on taste. The Art of Angel Food Cake Understanding Its Unique Texture Angel food cake stands out in the world of desserts with its light-as-air texture that is both delicate and satisfying. Unlike other sponge cakes, angel food cake achieves its remarkable fluffiness without the use of traditional leaveners or fats. The magic behind this texture is a meringue-based batter, where beaten egg whites play the pivotal role. While most cakes rely on butter or oil to create a tender crumb, angel food cake's structure comes from the stability of whipped egg whites, which are carefully folded into the batter. This process, along with a light vanilla flavor, ensures that the cake remains airy and soft, yet capable of holding various flavours, toppings, and presentation styles. The experience of enjoying angel food cake is akin to biting into a cloud, with each slice promising a moment of pure joy. It's a testament to how simple components, when combined with skill and attention to detail, can produce an extraordinary dessert. The Role of Egg Whites in Creating Lightness The ethereal lightness of Angel Food Cake is largely attributed to the meticulous preparation of egg whites. Beaten egg whites are the secret to making light and fluffy vanilla cake at home, providing the structure and airiness that is characteristic of this dessert. When whipped, egg whites expand to create a foam that, when stabilized and baked, gives Angel Food Cake its distinctive, cloud-like texture. To ensure the perfect rise, it's crucial to start with room-temperature egg whites, as they whip up fuller and faster. The addition of cream of tartar helps to stabilize the whipped egg whites, allowing them to hold their shape and prevent weeping. This results in a tall, spongey cake that is both light and satisfying. Here are some key tips to remember when working with egg whites for Angel Food Cake: Ensure egg whites are at room temperature for maximum volume. Use cream of tartar for stabilization. Gradually add sugar to the egg whites as they whip. Fold in the dry ingredients gently to maintain airiness. Invert the cake pan after baking to prevent collapse. Vanilla Flavor: A Subtle Touch The subtle vanilla flavor in angel food cake is more than just a background note; it's a delicate enhancement that complements the cake's airy texture. A mere teaspoon of pure vanilla extract is often all it takes to add a warm, aromatic depth to the overall flavor profile, without overpowering the cake's inherent sweetness. When selecting vanilla extract for your angel food cake, consider the quality of the extract as it can significantly influence the end result. Here's a simple breakdown of the ingredients that contribute to the cake's flavor: 1 teaspoon pure vanilla extract 1 and 3/4 cups granulated sugar 1/4 teaspoon salt 1 and 1/2 teaspoons cream of tartar Remember, the vanilla flavor allows for a variety of flavours, toppings, and presentation, transforming the cake into a versatile dessert suitable for many occasions. Whether you're dressing it up with icing, fresh fruit, or a decadent ganache, the vanilla base is your canvas for culinary creativity. Baking the Perfect Angel Food Cake Step-by-Step Instructions for Fluffiness Achieving the quintessential fluffiness of angel food cake is a delicate process that begins with the preparation of egg whites. It's essential to allow the egg whites to reach room temperature, which can take about 30 minutes. This step is crucial as it helps the egg whites to whip to their fullest volume, creating the cake's signature lightness. Once the egg whites are at the right temperature, add cream of tartar and vanilla, then beat them until soft peaks form. The gradual addition of granulated sugar, approximately two tablespoons at a time, will help to form stiff peaks that stand straight. This is the stage where the magic happens, as the egg whites transform into a glossy and voluminous mixture. The final step is to fold in the flour mixture gently. This should be done in increments, carefully blending without deflating the batter. The goal is to maintain the airiness that you've worked so hard to create. Once the batter is ready, pour it into an ungreased tube pan and bake at 350°F (177°C) for 40-45 minutes, or until a toothpick comes out clean. Remember, the ungreased pan is another secret to success, allowing the cake to climb the sides and achieve its characteristic height. Temperature Matters: Room temperature egg whites are key. Sift, Sift, Sift: Aerating the flour and sugar is essential. Fold Gently: Preserve the air bubbles for structure. Cool Upside Down: Prevents the cake from collapsing. Tips and Tricks for Baking Success Achieving the perfect angel food cake is about precision and technique. Ensure your egg whites are at room temperature before you begin; this small step makes a significant difference in achieving the desired volume when whipped. When it comes to mixing, an electric mixer is your best friend, saving you both time and effort to reach the right consistency of the egg whites. Using the correct pan is crucial. Opt for a classic tube pan, which remains ungreased to allow the batter to properly climb and support the cake's rise. Sifting your dry ingredients not only prevents lumps but also incorporates air, which is essential for that characteristic lightness. After baking, remember to cool the cake upside down to prevent it from collapsing, ensuring it stays airy and fluffy. Lastly, be mindful of the baking times and avoid the temptation to mix by hand. The consistency achieved by an electric mixer is hard to replicate manually. And when it comes to adding water to a boxed mix, measure accurately for the best results. Common Mistakes and How to Avoid Them After mastering the basics of angel food cake, it's crucial to be aware of common pitfalls that can occur during the baking process. Avoiding these mistakes is essential for a flawless cake. Here are some tips to keep in mind: Temperature Matters: Egg whites should be at room temperature to reach their full volume potential. Sift, Sift, Sift: Aerating your flour and sugar is key to a light cake. Fold Gently: Preserve the air you've whipped into your egg whites by folding in the flour mixture with care. Cool Upside Down: This technique prevents the cake from collapsing and maintains its fluffiness. Additionally, ensure that no yolk contaminates the egg whites during separation, and be cautious not to overbeat the egg whites; soft peaks are what you're aiming for. By keeping these pointers in mind, you'll be well on your way to baking success. Angel Food Cake for Every Diet Making Gluten-Free Angel Food Cake Creating a gluten-free Angel Food Cake is a delightful challenge for those with dietary restrictions. The key to success lies in the careful selection and measurement of gluten-free ingredients to maintain the cake's signature fluffiness. To begin, ensure that you have a reliable gluten-free flour blend. King Arthur Gluten-Free All-Purpose Flour is a popular choice among bakers for its consistent results. Combine this with a precise amount of cornstarch to achieve the desired lightness and structure. Here are some tips to guide you through the process: Measure the gluten-free flour using the "spoon & level" method to avoid excess. Integrate the flour mixture into the egg whites gradually, adding only 1/4 cup at a time. Refrain from greasing the tube pan to prevent the cake from collapsing. Gently cut through the batter with a knife to eliminate air bubbles. Invert the cake immediately after baking and allow it to cool upside down; this step is crucial for maintaining its airy texture. Ingredient Substitutions for Dietary Restrictions When it comes to baking Angel Food Cake for those with dietary restrictions, finding the right ingredient substitutions is crucial. For vegans or those avoiding animal products, egg whites pose a particular challenge. However, there are several alternatives that can mimic the properties of egg whites to create the cake's signature lightness. Flax eggs: Mix 1 tablespoon ground flaxseed with 3 tablespoons water and let sit until thickened. Aquafaba: The liquid from canned chickpeas can be whipped into a foam similar to egg whites. Commercial egg replacers: These are available in most health food stores and can be used according to package instructions. For those who are gluten intolerant, a gluten-free flour blend can be used in place of traditional wheat flour. It's important to ensure that the blend is fine and light to maintain the cake's texture. Additionally, for individuals who are dairy-free, non-dairy milk and butter substitutes can be used without compromising the flavor or consistency of the cake. Pairing with Gluten-Free Desserts After mastering the art of making a gluten-free Angel Food Cake, the next delightful step is pairing it with other gluten-free desserts to create a truly inclusive dessert table. Here are some additional gluten-free treats that will complement your cake and ensure everyone can indulge: Gluten-Free Lemon Bars Gluten-Free Snickerdoodle Cookies Gluten-Free Brownies These pairings not only add variety but also cater to different taste preferences, ensuring that your dessert spread is both delicious and considerate of dietary needs. For those who are short on time but still want to impress, consider the 2 Ingredient Pineapple Angel Food Cake Recipe. It's a testament to how a simple recipe can yield a delightful dessert that's both easy to make and a joy to eat. Decorating and Serving Angel Food Cake Topping Ideas for Every Occasion Angel Food Cake is a canvas for creativity, with flavours, toppings, and presentation playing pivotal roles in its transformation. Whether it's a festive gathering or an intimate celebration, the right topping can elevate this ethereal dessert to new heights. Here are some topping ideas tailored to various occasions: Anniversary: Luxurious chocolate ganache with gold leaf accents Mother's Day: Fresh berry compote and a dusting of powdered sugar New Year: Sparkling wine-infused whipped cream and pomegranate seeds Valentine's Day: Strawberry coulis and delicate rose petals Birthday: Colorful sprinkles and a light lemon glaze For a summer delight, consider the popular Strawberry Angel Food Dessert. This chilled layered dessert combines strawberries, angel food cake, sweetened cream cheese, and whipped topping for a refreshing treat. Creative Presentation Techniques Angel Food Cake offers a canvas for creative presentation that can turn a simple dessert into a showstopper. Beyond the classic whipped cream and berries, consider these techniques to elevate your cake's visual appeal: Layering: Build height and drama by layering slices of angel food cake with complementary fillings such as lemon curd or chocolate ganache. Texturing: Use tools like piping bags or spatulas to create swirls, peaks, and other textures in your toppings for a tactile and visual treat. Color Blocking: Introduce vibrant fruit or edible flowers in organized patterns for a modern and striking effect. When it comes to glazing, a technique as simple as drizzling can add an elegant touch. For a more immersive experience, consider dipping the cake to coat it partially or fully in a glossy glaze. Each method offers a different aesthetic and can be tailored to the occasion. Pairing with Sauces and Coulis Angel Food Cake's delicate texture makes it an ideal canvas for a variety of sauces and coulis, each adding a distinct burst of flavor. The right sauce can elevate the cake from a simple dessert to an exquisite treat. When selecting a sauce, consider the balance of sweetness and acidity to complement the cake's subtle taste. Here's a list of popular pairings: Chocolate ganache for a rich and decadent experience Raspberry coulis for a tangy contrast Lemon curd for a zesty twist Caramel sauce for a warm and comforting flavor For those looking to experiment, try combining flavors or adding a splash of liqueur to your sauce for an adult version of this heavenly dessert. Whether you're serving it at a casual gathering or a formal event, the right sauce can make your Angel Food Cake a memorable centerpiece. The Cultural Significance of Angel Food Cake A Brief History of the Cake The angel food cake, a culinary marvel, first appeared in the United States in the 19th century. It was a testament to the creativity of home bakers who used simple ingredients to craft a dessert that was as light as air, symbolizing both innovation and elegance. Over time, the cake has undergone a transformation, with variations in flavors, toppings, and ways of serving, making it a beloved treat for many. While the cake's exact origins are somewhat nebulous, it is widely acknowledged that it became popular in the late 19th century. Its name is derived from its airy lightness, which is said to be so divine that it's fit for angels. This dessert quickly found its way into the hearts and recipe books of many, becoming a staple at gatherings and a canvas for culinary artistry. Angel Food Cake in Modern Baking In the landscape of modern baking, angel food cake holds a distinctive place. Its evolution from a 19th-century innovation to a contemporary classic showcases the adaptability of this ethereal dessert. Today's bakers continue to push the boundaries, infusing new flavors and integrating various dietary considerations without compromising the cake's signature lightness. Angel food cake's versatility is evident in its ability to pair with a multitude of toppings and sauces, making it a favorite for both casual and formal occasions. The cake's simplicity allows it to be a canvas for creativity, whether it's being served with a dusting of powdered sugar or adorned with fresh berries and whipped cream. The following list highlights some of the ways angel food cake has been embraced in modern baking: Experimentation with gluten-free and vegan variations Incorporation of unique flavors like matcha, lemon zest, or coconut Pairing with seasonal fruits for a refreshing twist Serving as a base for elaborate dessert constructions Angel food cake, with its vintage charm, continues to be a beloved treat, reminiscent of the carefree days of childhood and the warmth of grandma's kitchen. It's a testament to the timeless appeal of simple, well-made desserts that resonate with taste and nostalgia. Why It's More Than Just a Dessert Angel Food Cake transcends the boundaries of a mere confectionery delight. It embodies a ritual of love and celebration, becoming a centerpiece at gatherings that marks the joy of togetherness. The cake's ability to adapt to various flavours, toppings, and presentation makes it a versatile dessert that caters to a wide array of tastes and occasions. Angel Food Cake also serves as a canvas for culinary creativity, allowing bakers to express their artistry and guests to indulge in a personalized experience. Whether it's a birthday, an anniversary, or a casual get-together, this cake has the power to turn a simple event into a cherished memory. Conclusion Angel food cake stands as a testament to the magic of baking, where simple ingredients rise to create a dessert that's as light as a cloud and as delightful as its name suggests. It's a cake that embodies elegance and indulgence, yet remains a healthier choice for those mindful of fat and cholesterol. Whether you're a seasoned baker or a curious novice, the journey to perfecting this airy confection is filled with joy and discovery. From its humble 19th-century origins to today's gluten-free adaptations, angel food cake continues to enchant us with its versatility and simplicity. As we conclude this guide, remember that every slice of angel food cake is more than just a treat; it's a celebration of tradition, innovation, and the sweet moments in life. Frequently Asked Questions What makes angel food cake different from other sponge cakes? Angel food cake is unique for its super fluffy, airy texture, which is achieved by using no butter or oil. Instead, the cake relies on beaten egg whites to create its lightness. Why is angel food cake considered a healthier dessert option? Angel food cake is low in fat and cholesterol-free, making it a lighter indulgence compared to many other desserts. Can angel food cake be made gluten-free? Yes, you can make angel food cake gluten-free by using gluten-free cake flour and ensuring all other ingredients are free of gluten contaminants. What are some common mistakes to avoid when making angel food cake? Common mistakes include overmixing the batter, which can deflate the egg whites, and not cooling the cake upside down, which helps maintain its volume. How can I serve angel food cake? Angel food cake can be served with a variety of toppings such as fruit coulis, whipped cream, or simply dusted with powdered sugar. It pairs well with fresh berries or a light sauce. What is the history of angel food cake? Originating in the United States in the 19th century, angel food cake was an innovation that symbolized culinary elegance and has since become a versatile dessert enjoyed in various ways.
- "Decadent Red Velvet Cake: A Must-Try Recipe for Any Occasion"
Red velvet cake, with its striking color and unique flavor, has become an iconic dessert cherished by many. This article delves into the rich history, the science behind its signature taste, and provides a comprehensive guide to perfecting the recipe. We'll also explore the various frosting options that complement the cake and look at the impact this dessert has had on popular culture through reviews and testimonials. Key Takeaways Red velvet cake is a delightful blend of vanilla and chocolate flavors, with a distinctive tang from buttermilk and vinegar, which also contribute to its iconic red hue. The cake's evolution has seen the introduction of food coloring to enhance its redness, a departure from the more subtle color produced by the reaction of cocoa powder and acidic ingredients. Mastering red velvet cake involves understanding the importance of each ingredient and following the baking instructions precisely to achieve the perfect soft and moist texture. Frosting variations, like the classic cream cheese or the traditional boiled frosting, can significantly alter the cake's taste and presentation, offering a range of creative possibilities. Customer reviews and professional critiques highlight the cake's popularity and the joy it brings, solidifying its status as a beloved treat for special occasions and everyday indulgences. The History and Evolution of Red Velvet Cake Origins and Early Recipes The allure of Red Velvet Cake lies not only in its bold color but also in its rich history. During the early 20th century, the evolution of cocoa processing led to the loss of the natural reddish hue in baked goods. Resourceful bakers began experimenting with natural colorants like beet juice to recapture the cake's signature look. This ingenuity marked the beginning of what would become a culinary icon. As the cake gained popularity, the use of beet juice was largely replaced by red food dye, which offered a more consistent and vibrant color. This transition was a pivotal moment in the cake's history, solidifying its status as a visually striking dessert. The recipe continued to evolve, incorporating ingredients that contributed to its unique flavor and texture. The Role of Food Coloring The vibrant hue of Red Velvet Cake is its signature, and achieving this color has evolved over time. Food coloring plays a crucial role in distinguishing Red Velvet Cake from a mere chocolate cake. While the original recipes used natural cocoa to impart a reddish tint, modern versions often rely on food coloring to achieve the desired vibrancy. When it comes to food coloring, bakers have options. Liquid food coloring has been the traditional choice, but gel food coloring has gained popularity for its intensity and efficiency. However, using gel colors requires a slight modification to the recipe. For instance, to replace 3 1/2 tablespoons of liquid color, you would need to dilute an equivalent amount of gel color with water or milk. This adjustment ensures the batter maintains the correct consistency for that velvety texture. Here's a quick guide on how to use gel food coloring in your Red Velvet Cake: Dilute gel coloring with water or milk to match the volume of liquid color required. Use less gel color than liquid, as gel is more concentrated. Add the diluted gel color to the batter as you would with liquid color. Adjust the liquid content in the recipe to maintain the batter's consistency. Red Velvet Cake in Popular Culture Red Velvet cake has woven its way into the fabric of American dessert culture, often emerging as a centerpiece at celebrations and upscale bakeries. Its unique flavor and striking appearance have made it a favorite for many. The cake's popularity surged with its portrayal in films and television, where it frequently graces the tables of Southern-themed events, symbolizing both tradition and indulgence. The Hummingbird Bakery's take on the cake highlights its Southern roots, describing it as a "red vanilla sponge made with buttermilk and cocoa." This description underscores the cake's distinct taste profile, which sets it apart from other desserts. Red Velvet's adaptability has also led to its inclusion in a variety of culinary spin-offs, from cupcakes to ice cream flavors, showcasing its versatility beyond the traditional layer cake. The Science Behind the Signature Red Velvet Flavor The Chemistry of Cocoa and Acidity The allure of Red Velvet Cake isn't just in its bold color, but also in its unique flavor profile, which is a result of the chemistry between cocoa and acidity. Natural cocoa powder contains acids that react with other ingredients in the cake. When combined with acidic substances like buttermilk and vinegar, a chemical reaction occurs that enhances the cake's flavor and tenderizes the crumb. Understanding the role of each component can help bakers achieve the perfect balance of taste and texture. Here's a breakdown of the key ingredients involved in this reaction: Natural unsweetened cocoa powder: Provides the chocolate flavor and reacts with acids. Buttermilk: Adds acidity and moisture, contributing to a tender crumb. Distilled white vinegar: Enhances the chemical reaction with cocoa, improving the cake's texture. Baking soda: A leavening agent that reacts with the acidic components to help the cake rise. This process reduces the cocoa's acidity so the chocolate doesn't taste as bitter as it naturally does. Red Velvet Cake is flavored with non-Dutch processed cocoa to maintain the necessary acidity for the desired reaction. Buttermilk and Vinegar: Key Ingredients The distinctive tang and tender crumb of red velvet cake owe much to two key ingredients: buttermilk and vinegar. These components react chemically with the other ingredients, particularly the cocoa, to produce the cake's signature texture and subtle flavors. Buttermilk, with its mild acidity, enhances the cake's richness, while vinegar intensifies the red color and interacts with baking soda to create a light, airy structure. Incorporating these ingredients requires precision to maintain the delicate balance of flavors and textures. Here's a simple guide to their proportions in a classic recipe: Buttermilk: 3/4 cup (158 g) - room temperature White Vinegar: 1 1/2 tsp When substituting buttermilk, it's crucial to use a mixture that mimics its acidity and creaminess. For instance, mixing milk with a small amount of lemon juice or vinegar can serve as a homemade alternative, though the consistency and taste may vary slightly from the original recipe. The Taste Profile of a Classic Red Velvet Cake A classic Red Velvet Cake offers a unique flavor profile that is not merely chocolate or vanilla, but a delectable blend of both with a signature tangy twist. The subtle cocoa taste is enriched by the presence of buttermilk and vinegar, which also contribute to the cake's moist texture and tender crumb. While the color of the cake is visually striking, it's the combination of ingredients that creates its iconic taste. Here's a quick rundown of the key flavor components: Cocoa: Provides a mild chocolate undertone. Buttermilk: Adds a creamy richness and tanginess. Vinegar: Enhances the tangy flavor and reacts with the cocoa. Vanilla: Offers a sweet, aromatic base note. Understanding these elements is crucial for appreciating the complexity and appeal of this beloved dessert. Mastering the Red Velvet Cake Recipe Essential Ingredients and Substitutions The classic Red Velvet Cake recipe calls for specific ingredients that contribute to its unique texture and flavor. Buttermilk and vinegar are key to the cake's moistness and tender crumb, reacting with the cocoa powder to enhance the red hue. However, if buttermilk is not available, a mixture of milk and lemon juice or vinegar can be used as a substitute. When it comes to the cake's signature color, the type of cocoa powder used is crucial. Natural cocoa powder reacts with the acidity in the recipe to deepen the red color, while Dutch-processed cocoa powder will not yield the same result. If you're aiming for a more natural approach, beet juice or pomegranate juice can replace artificial food coloring. Here's a quick reference for some common substitutions: Buttermilk: 1 cup milk + 1 tablespoon lemon juice/vinegar Cake flour: 1 cup all-purpose flour - 2 tablespoons + 2 tablespoons cornstarch Unsalted butter: Equal amount of margarine or vegetable shortening Remember, while substitutions can save a trip to the store, they may slightly alter the final taste and texture of your cake. It's always best to use the ingredients as specified in the recipe for optimal results. Step-by-Step Baking Instructions Once you've gathered all your ingredients, the journey to a perfect Red Velvet Cake begins. Preheat your oven to 320°F (160°C) with the fan on, ensuring even heat distribution. Grease and line two 8-inch cake tins with parchment paper or use a homemade cake release for best results. Next, sift together the flour, cornflour, cocoa powder, baking soda, baking powder, and salt into a bowl. Whisk these dry ingredients until they are well combined, setting the stage for a smooth batter. In a separate bowl, cream together the room-temperature butter, vegetable oil, and sugar until the mixture is light and fluffy. This step is crucial for incorporating air into your cake, which contributes to its tender crumb. Continue by alternating the addition of the dry ingredients with the wet, starting and ending with the dry. This method helps to prevent overmixing, which can lead to a dense cake. Once the batter is ready, divide it evenly between the prepared tins and smooth the tops with a spatula. Bake in the preheated oven until a toothpick inserted into the center comes out clean. Allow the cakes to cool in the tins for a few minutes before transferring them to a wire rack to cool completely. Only then should you proceed to the frosting stage, which will add the final touch to your Red Velvet masterpiece. Common Mistakes and How to Avoid Them While the allure of a perfect red velvet cake is strong, even seasoned bakers can stumble on common pitfalls. Overbaking is a frequent misstep, leading to a dry and crumbly disappointment rather than a moist and tender delight. To avoid this, keep a vigilant eye on the baking time and check for doneness a few minutes before the recipe suggests. Another issue is the misuse of leavening agents. A balance between baking soda and baking powder is crucial for the right rise and texture. Below is a quick guide to help you measure accurately: Baking Soda: 1/4 tsp per cup of flour Baking Powder: 1 tsp per cup of flour Incorporating ingredients at the right temperature is also key. Ensure that all your perishables, like eggs and buttermilk, are at room temperature before mixing. This will help achieve a smooth and even batter. Frosting Variations: From Classic to Creative Boiled Frosting vs. Cream Cheese Frosting When it comes to adorning the classic red velvet cake, two types of frosting are often debated: boiled frosting and cream cheese frosting. Boiled frosting is a traditional choice, known for its light and airy texture. It involves cooking flour and milk to create a thick base, which is then whipped with sugar and butter. On the other hand, cream cheese frosting brings a tangy richness that complements the cake's subtle cocoa flavor. This frosting is made by blending cream cheese with butter and powdered sugar, resulting in a creamy and smooth consistency. Here's a quick comparison of the two: Boiled Frosting: Light, whipped texture; less sweet; stable for piping Cream Cheese Frosting: Rich, creamy texture; tangy sweetness; versatile for various decorations Some bakers even experiment with mascarpone frosting, a close relative to cream cheese frosting, using a soft Italian cheese as the base. Regardless of your choice, ensuring the cake is completely cool before application is crucial for a perfect finish. Innovative Twists on Traditional Frostings While the classic cream cheese frosting is a staple for red velvet cakes, bakers are constantly experimenting with new and exciting variations. Incorporating unique ingredients can transform the traditional frosting into a contemporary masterpiece. For instance, adding a hint of citrus zest or a splash of liqueur can elevate the flavor profile significantly. Citrus Zest: Adds a fresh and tangy twist. Liqueur: Infuses the frosting with complex flavors. Spices: Think cinnamon or cardamom for a warm touch. Herbs: Fresh basil or mint for an unexpected note. Another trend is the use of alternative sweeteners and dairy products to cater to dietary preferences and health-conscious consumers. The table below showcases some popular substitutions and their effects on the frosting's texture and taste. Remember, the key to a successful frosting is balance. Whether you're aiming for a subtle change or a bold new flavor, the right combination can make your red velvet cake a standout. Decorating Tips for a Stunning Presentation Once your red velvet cake has cooled, the real artistry begins. A well-decorated cake can turn an ordinary dessert into a memorable centerpiece. For those aiming to recreate the vintage charm of classic red velvet cakes, consider the lambeth buttercream piping technique, which adds an elegant touch to your cake's appearance. Start with a smooth base layer of frosting to ensure your decorations have a clean canvas. Practice piping techniques on parchment paper before applying to the cake. Use a variety of piping tips to create different textures and patterns. Keep a steady hand and consistent pressure for uniform designs. For a truly show-stopping finish, coordinate the color of your frosting with the occasion. A deep red or burgundy is perfect for romantic events like Valentine's Day, while a lighter pastel hue might suit a springtime celebration. Red Velvet Cake Reviews and Testimonials Customer Feedback and Ratings The voice of the customer is paramount when it comes to evaluating the success of red velvet cakes. Customer reviews offer invaluable insights into the overall satisfaction with flavor, texture, and presentation. A recent survey titled '10 Store-Bought Red Velvet Cakes, Ranked According to Reviews' highlighted the Member's Mark Red Velvet Bundt Cake from Sam's Club as a standout choice, receiving consistent praise for its quality. Customer testimonials from various sources paint a vivid picture of the red velvet cake experience: Debby L. from Northridge, CA, expressed her satisfaction with the timely delivery and updates, making the gifting process seamless. Samuel D. from Garland, TX, succinctly described his cake as 'amazing'. Audrey F. from Mechanicville, NY, relayed that the cake not only smelled delicious but also tasted great, according to Karen. These snapshots of customer opinions are a testament to the enduring love for red velvet cake and the joy it brings to special occasions and everyday indulgences alike. Professional Critiques and Endorsements Red Velvet Cake has not only captivated the hearts of dessert lovers but also garnered acclaim from culinary experts. Professional chefs and food critics alike have praised its unique flavor profile and texture. The cake's popularity is reflected in the endorsements it receives from those with a discerning palate. Maryam, a baking enthusiast and blogger, expresses her passion for creating quality tested recipes, hinting at the meticulous care that goes into perfecting a Red Velvet Cake. Roy W. from Stratford, CT, highlights the dependable service and awesome products, suggesting a consistent quality that resonates with customers. Lori L. from Bridgeport, CT, compares the cake to a cherished family recipe, indicating that it meets high standards of taste and nostalgia. This insight from a former professional chef in NYC underscores the distinctiveness of Red Velvet Cake, separating it from other chocolate-flavored desserts. The testimonials and professional endorsements serve as a testament to the cake's esteemed status in the culinary world. Sharing the Love: Red Velvet Cake Success Stories The journey of a red velvet cake from the oven to the heart is often paved with sweet testimonials from those who've savored its unique flavor. Customer feedback is a testament to the cake's enduring appeal, with many sharing their experiences of the cake arriving on time and tasting as delightful as it looks. Pamela I. from Central Islip, NY, mentions the seamless ordering process and the deliciousness of the cake. Donna S. from Castalian Springs, TN, praises the icing and declares it the best cake ever tasted from a delivery service. Elsie S. from Los Alamos, NM, calls it the best Red Velvet cake ever eaten, noting the perfect condition upon arrival. The stories of joy and satisfaction are numerous, with customers like Jake D. from Bronx, NY, sharing that his girlfriend loved the cake, and Lisa L. from Madisonville, TN, simply stating, "So delicious!" These anecdotes highlight the cake's ability to make special occasions even more memorable. Conclusion In conclusion, the red velvet cake stands as a timeless dessert that continues to captivate taste buds with its unique combination of flavors and textures. Whether you prefer the classic cream cheese frosting or the traditional boiled frosting, this cake offers a versatile canvas for both novice and experienced bakers. The recipes and tips shared in this article aim to guide you through creating the softest, most flavorful red velvet cake that is sure to impress at any occasion. From its rich history to its modern adaptations, the red velvet cake remains a beloved treat that celebrates the joy of baking and the sweetness of sharing. So, preheat your ovens, don your aprons, and get ready to indulge in the ultimate red velvet cake experience. Frequently Asked Questions What is the origin of red velvet cake? Red velvet cake originated in the early 20th century, with its exact origins being a bit of a mystery. It's believed to have gained popularity during the Great Depression and was further popularized by the Waldorf-Astoria Hotel in New York. Why is red food coloring used in red velvet cake? Red food coloring is used to enhance the natural reddish color that comes from the reaction between cocoa powder and acidic ingredients like buttermilk and vinegar. It gives the cake its signature bright red appearance. Can I use a different frosting other than cream cheese for red velvet cake? Yes, while cream cheese frosting is traditional, red velvet cake can also be paired with boiled frosting, ermine frosting, or other variations to suit personal taste preferences. What makes red velvet cake different from chocolate cake? Red velvet cake has a distinct flavor profile with a combination of vanilla and cocoa, and a tangy taste from buttermilk and vinegar. It's also known for its soft, velvety texture, which is different from the typical texture of chocolate cake. How do I ensure my red velvet cake is moist and soft? To ensure a moist and soft red velvet cake, follow the recipe closely, use the right amounts of buttermilk and vinegar, and avoid overbaking. Allow the cake to cool properly before frosting. Is it necessary to trim the tops of red velvet cake layers before frosting? Trimming is not always necessary if the cake layers bake up flat. However, if the tops are domed, you can trim them to create even layers for a more professional look and easier frosting application.
- Exploring the History and Recipe of the Famous Sacher Torte
The Sacher Torte is a timeless Viennese dessert that has captivated the taste buds of chocolate lovers for over a century. This exquisite cake, with its rich layers of chocolate sponge, apricot jam, and dark chocolate icing, embodies the elegance and culinary prowess of Austrian patisserie. Its origin at the Sacher Hotel in Vienna marks it as a true classic, while its global reach and variations continue to add to its storied history. In this article, we'll delve into the layers of the Sacher Torte's past, explore the artistry behind its creation, and celebrate the ways it's enjoyed around the world. Key Takeaways Sacher Torte is a traditional Austrian cake first recorded in the early 20th century and associated with Vienna's Sacher Hotel. The cake consists of chocolate sponge layers filled with apricot jam and topped with a smooth chocolate glaze; it's often served with whipped cream. Making a Sacher Torte requires high-quality ingredients, especially premium cocoa powder and chocolate, to achieve its signature taste and texture. Sacher Torte can be customized with various preserves and nuts, and is traditionally cut into squares for serving. Despite its specific origin, Sacher Torte has gained international fame, inspiring adaptations and becoming a staple in dessert menus worldwide. The History and Origin of Sacher Torte The Birth of a Viennese Classic The Sacher Torte, a chocolate cake of Austrian origin, was created by Franz Sacher. It is said that this iconic dessert was invented in 1832, specifically for Prince Metternich in Vienna. Its creation marked the beginning of a dessert that would become a symbol of Viennese culture and culinary excellence. The cake's initial reception was overwhelmingly positive, leading to its rapid popularization. It wasn't long before the Sacher Torte became a staple in Viennese cafes and a must-try for visitors. The recipe's success is attributed to its distinctive combination of flavors, with a rich chocolate sponge, apricot jam, and a smooth chocolate glaze. Today, the Sacher Torte is not only a treat for the palate but also a piece of Viennese heritage, often given as a luxurious gift and enjoyed on special occasions. Its reputation for quality and authenticity is echoed by customers who describe it as 'delicious & authentic Viennese Sachertorte'. Sacher Torte's Place in Culinary History The Sacher Torte has firmly established itself as a culinary treasure within the rich tapestry of Viennese desserts. First recorded in the early 20th century, its origins trace back to the kitchens of the Austrian nobility. The Sacher Torte is not just a chocolate cake; it is a symbol of Vienna's storied past and its ongoing influence on the world of confectionery. As a testament to its enduring popularity, the Sacher Torte has been adapted and celebrated in various forms around the globe. From the traditional recipe that calls for a delicate balance of chocolate, apricot jam, and chocolate icing, to modern variations that incorporate different preserves and nuts, the essence of the Sacher Torte remains unchanged: a luxurious dessert that speaks to the sophistication of its origins. Traditional Sacher Torte Apricot jam layer Chocolate icing Often served with whipped cream In the heart of Vienna, the Sacher Hotel continues to serve this iconic dessert, ensuring that each slice is a nod to the history and tradition that gave birth to the Sacher Torte. It is more than a dessert; it is a piece of culinary history that continues to delight and inspire. The Sacher Hotel Legacy The Sacher Hotel in Vienna, Austria, is not just a luxurious accommodation; it's the birthplace of the Sacher Torte, a dessert that has transcended its origins to become a symbol of Viennese culture. First recorded in 1905-10, the Sacher Torte's recipe has been closely guarded by the hotel, contributing to its exclusive allure. The hotel's legacy is intertwined with the torte's reputation. Visitors from around the world flock to the Sacher Hotel to experience the original cake, often served with whipped cream, in its authentic setting. The hotel's commitment to tradition ensures that each slice is a taste of history. While the Sacher Torte can be found in various forms globally, the Sacher Hotel remains the definitive destination for those seeking the quintessential experience of this Viennese classic. The Art of Making Sacher Torte Traditional Ingredients and Recipe The creation of a Sacher Torte is a meticulous process that begins with the selection of high-quality ingredients. The traditional recipe calls for a rich blend of butter, sugar, and premium dark chocolate, which forms the foundation of the cake's deep flavor. Eggs are added for structure and a hint of vanilla extract for aroma. A distinctive feature of the Sacher Torte is the layer of apricot jam that is spread between the chocolate cake layers and on top before it's glazed. To assemble the torte, the cake is first baked and allowed to cool. Then, the apricot jam is evenly applied, followed by the chocolate glaze, which must be poured over the cake at just the right temperature to ensure a mirror-like sheen. Sliced almonds may be added as an optional garnish for a touch of elegance and texture. Whether you're an experienced baker or a curious novice, the journey to making your own Sacher Torte promises a rewarding and delicious experience. The Importance of Quality Chocolate The success of a Sacher Torte hinges on the quality of the chocolate used. A high cocoa content, typically 65% or higher, is essential for achieving the rich and robust flavor that the torte is famous for. European-style dark chocolate is often recommended for its superior taste and texture. Chocolate quality not only influences the taste but also the texture and appearance of the glaze, making it a critical component. Here's a simple breakdown of the ingredients for a classic Sacher Torte: Dark chocolate (65% or higher) Unsalted butter (European-style preferred) Granulated sugar Room temperature large eggs Pure vanilla extract Pure almond extract A splash of rum, bourbon, or whiskey (optional) While the ingredients are straightforward, the process of combining them requires precision and care. The chocolate must be finely chopped and melted smoothly to blend seamlessly with the other components, creating the signature taste that has made Sacher Torte renowned worldwide. Variations and Modern Twists The classic Sacher Torte has inspired a myriad of variations, each adding a unique twist to the traditional recipe. Chefs and home bakers alike have experimented with different fillings, such as fruit jams or flavored ganaches, to add a personal touch or a seasonal flair to this iconic dessert. Here are some popular variations of Sacher Torte: Matcha Tiramisu Sacher Torte Mousse-filled Sacher Torte Vegan and Gluten-Free Sacher Torte Sacher Torte with Mirror Glaze These creative renditions demonstrate the versatility of Sacher Torte and how it continues to evolve while still paying homage to its rich history. Serving and Enjoying Sacher Torte Accompaniments and Presentation The presentation of Sacher Torte is a ritual that honors its rich history. A pristine slice of this decadent dessert is traditionally served on a delicate plate, often accompanied by a dollop of unsweetened whipped cream. This not only contrasts the deep chocolate flavor but also adds a visual appeal to the dish. When it comes to accompaniments, the choices are classic and refined. A cup of coffee or a glass of dessert wine are the most popular pairings, enhancing the overall experience. For those looking to indulge, here is a suggested serving guide: Coffee: A strong espresso or a creamy Viennese Melange Dessert Wine: A sweet Riesling or a rich Port Tea: A light Darjeeling or a fragrant Earl Grey Remember, the key to serving Sacher Torte is to respect the balance of flavors and the tradition it carries. Pairing with Beverages The perfect beverage can elevate the Sacher Torte experience to new heights. Selecting the right wine to accompany this decadent dessert is crucial. A variety of sweet white wines complement the rich chocolate and tangy apricot jam of the torte. For a harmonious pairing, consider the following options: Sweet White Premi\u00e8res C\u00f4tes de Bordeaux Sweet White Sauternes Red C\u00f4tes de Provence Sweet White Juran\u00e7on Sweet White Pacherenc du Vic Bilh While wine is a classic choice, non-alcoholic alternatives can also be delightful. A rich, dark coffee or a glass of cold milk can provide a simple yet satisfying contrast to the torte's sweetness. For those seeking a warmer complement, a spiced chai or a hot chocolate can match the intensity of the dessert. Occasions for Sacher Torte Sacher Torte is not only a delightful dessert but also a symbol of celebration and tradition. Whether it's a grand occasion or a cozy gathering, this iconic cake graces the table with its rich flavors and elegant presentation. Birthdays: A slice of Sacher Torte adds a touch of Viennese luxury to any birthday celebration. Anniversaries: Marking another year with the timeless taste of this chocolate delight is a romantic gesture. Holidays: From Christmas to Easter, Sacher Torte is a festive favorite. Coffee Gatherings: Paired with a strong cup of coffee, it's the perfect afternoon indulgence. While the original can be savored at Caf\u00e9 Sacher in Vienna, the joy of this dessert extends far beyond its birthplace. Whether at a local bakery or a homemade version, Sacher Torte remains a cherished part of culinary celebrations. Sacher Torte Around the World Adaptations Beyond Austria As the fame of Sacher Torte spread beyond the borders of Austria, various adaptations of this iconic dessert began to emerge. Bakeries and patisseries worldwide have embraced the classic recipe, adding their local twist to the traditional Viennese cake. From the addition of different types of fruit jams to the incorporation of local chocolate varieties, the essence of Sacher Torte has been preserved while allowing for regional preferences to shine through. In many countries, Sacher Torte has become a symbol of Austrian pastry excellence, often featured during special events and cultural weeks that celebrate Austrian cuisine. For instance, during an Austrian pastry week, one might find a range of traditional desserts like Topfengolatschen and Powidlgolatschen alongside the beloved Sacher Torte. United States: Often served with a side of whipped cream or vanilla ice cream. Germany: Commonly paired with a strong cup of coffee or a sweet dessert wine. Italy: Sometimes found with a layer of mascarpone or ricotta cheese to add an Italian twist. United Kingdom: Apricot jam may be substituted with raspberry or strawberry preserves for a British take on the classic. These variations, while staying true to the core components of the cake, showcase the adaptability of Sacher Torte to different palates and culinary traditions around the globe. Sacher Torte in Popular Culture The Sacher Torte has transcended its culinary roots to become a symbol of Viennese culture around the world. Its depiction in media and art underscores the dessert's status as an icon of Austria's rich gastronomic heritage. From literature to film, the Sacher Torte often appears as a luxurious treat, epitomizing the elegance and sophistication of Vienna. In recent years, the Sacher Torte has made its way into various forms of pop culture, including television shows and social media platforms, where it is celebrated for its decadent chocolate layers and distinctive apricot jam filling. The dessert's popularity has inspired a myriad of recipes and adaptations, each adding a personal touch to the classic. Here is a snapshot of the Sacher Torte's presence in popular culture: Featured in numerous cooking and travel shows Regularly appears in food blogs and Instagram posts Celebrated in chocolate and dessert festivals Referenced in novels and movies set in Vienna Customized versions in bakeries and cafes worldwide Finding Authentic Sacher Torte Globally Finding authentic Sacher Torte outside of Austria can be a delightful quest for connoisseurs and casual fans alike. The quest for the original taste is a journey through the essence of Viennese patisserie. While many establishments claim to offer a genuine experience, the true essence of this dessert lies in its adherence to tradition. In the pursuit of authenticity, one must consider the components that define Sacher Torte: a chocolate cake covered with apricot jam and chocolate icing, typically accompanied by whipped cream. It's not just about the ingredients, but also about the meticulous preparation that honors the original recipe. To aid enthusiasts in their search, here's a list of places renowned for their Sacher Torte: Vienna Pastry in Los Angeles, known for its amazing Sachertorte. Hotel Sacher in Vienna, the birthplace of the original Sachertorte. Authentic Viennese Sachertorte available online, often reviewed for its genuine flavor and quality. Remember, while the original may hail from Vienna's Hotel Sacher, the spirit of Sacher Torte can be found wherever the dedication to its craft is preserved. Conclusion The Sacher Torte stands as a testament to Vienna's rich culinary heritage, a dessert that has transcended its Austrian origins to become a beloved treat worldwide. With its luxurious layers of chocolate sponge, apricot jam, and glossy chocolate icing, it's a cake that celebrates the art of patisserie with every slice. Whether you're enjoying a slice at the storied Sacher Hotel or baking your own variation with a twist of different preserves and nuts, the Sacher Torte is more than just a cake—it's a slice of history, a sweet indulgence that continues to delight and inspire dessert aficionados a century after its creation. As we savor this iconic confection, we not only enjoy the rich flavors but also partake in a tradition that has been cherished through generations. Frequently Asked Questions What is a Sacher Torte? A Sacher Torte is a famous Viennese chocolate cake that is traditionally covered with apricot jam and chocolate icing, and it is often served with whipped cream. Where does Sacher Torte originate from? Sacher Torte first became known in the early 20th century and originates from Vienna, Austria. It is named after the Sacher Hotel in Vienna. What are the key ingredients in a traditional Sacher Torte? The key ingredients in a traditional Sacher Torte include chocolate sponge cake, apricot jam, and dark chocolate icing. It may also contain ingredients like almonds, butter, sugar, and eggs. Can I make variations of the traditional Sacher Torte? Yes, you can customize your Sacher Torte by using different types of preserves such as strawberry or blackberry, and you can also try different nuts like crushed walnuts or salted peanuts for added texture and flavor. What is the best way to serve Sacher Torte? Sacher Torte is best served with a dollop of whipped cream. It can also be paired with beverages such as coffee or a sweet dessert wine. How can I find an authentic Sacher Torte outside of Austria? Authentic Sacher Torte can be found at specialty bakeries and some international hotels. Look for places that use traditional Viennese recipes and high-quality ingredients to ensure authenticity.
- Indulgent Dessert Delight: How to Make the Ultimate Chocolate Peanut Butter Cake
Indulge in the ultimate dessert experience with our Chocolate Peanut Butter Cake, a heavenly combination of rich flavors and textures. This article will guide you through creating a decadent dessert that's sure to impress with its moist chocolate cake, creamy peanut butter filling, and sumptuous frosting. Whether you're celebrating a special occasion or simply satisfying a sweet tooth, this cake promises to be a showstopper. Key Takeaways The cake features a perfect chocolate base, rich peanut butter filling, and luscious frosting that create a symphony of flavors. A detailed step-by-step guide ensures even novice bakers can achieve baking perfection and assemble a stunning cake. Customization options abound, with variations for different occasions, dietary adjustments, and creative decoration ideas. Expert tips on cutting, presenting, and storing the cake help maintain its freshness and make-ahead strategies simplify preparation. The article extends beyond the cake with related recipes, including a peanut butter chocolate chip cookie cake and complementary desserts. Decadent Layers of Flavor The Perfect Chocolate Cake Base The foundation of any great chocolate peanut butter cake is the perfect chocolate cake base. This base should be moist, rich, and carry the deep chocolate flavor that complements the creamy peanut butter filling. To achieve this, a combination of quality cocoa powder and real chocolate is essential. For a truly decadent experience, consider using a mix of milk chocolate and dark unsweetened cocoa powder. The addition of hot coffee or espresso powder can enhance the chocolate's complexity, giving your cake an irresistible aroma and taste. Here's a simple ingredient list to get you started: 2 cups all-purpose flour 1 1/2 cups sugar 1/2 cup unsweetened cocoa 1/2 cup softened butter 3 large eggs 1 cup water Rich Peanut Butter Filling The heart of this indulgent cake is its rich peanut butter filling, a creamy blend that perfectly complements the moist chocolate layers. Creating this filling is a simple process that results in a decadent spread that's both sweet and slightly salty, ensuring a balance of flavors. To achieve the perfect consistency and taste, start by combining softened butter with peanut butter. Beat these ingredients until they are light and creamy. Gradually add powdered sugar and continue to beat the mixture, adding half & half to reach the desired spreading consistency. Here's a quick checklist for the filling ingredients: Softened butter Creamy peanut butter Powdered sugar Half & half (or milk for a lighter option) Luscious Frosting and Toppings The crowning glory of any cake is its frosting, and when it comes to a chocolate peanut butter cake, the stakes are high for both flavor and texture. The frosting should be smooth, rich, and with just the right balance of sweetness and peanut buttery goodness. Here's a simple guide to creating the perfect frosting: Start with room temperature butter for a creamy base. Sift cocoa powder and powdered sugar to avoid lumps. Gradually add milk to achieve the desired consistency. A pinch of salt can enhance the flavors. Once your frosting is ready, it's time to think about the toppings. Sprinkles add a playful touch, while a sprinkle of mini chocolate chips and chopped peanuts can provide a delightful crunch. Remember, the toppings are not just for looks; they contribute to the overall taste experience. Whether you're celebrating a special occasion or simply indulging in a sweet treat, this cake's frosting and toppings will ensure it's a hit. After all, this decadent Chocolate Layer Cake with Creamy Peanut Butter Frosting NEVER disappoints! Step-by-Step Baking Guide Preparing Your Ingredients Before diving into the creation of your chocolate peanut butter cake, it's essential to have all your ingredients measured and ready to go. Proper preparation is the key to a smooth baking experience. Preheat the oven to 350°F (175°C). Grease and line the base of a 10-inch springform pan with parchment paper. Sift together dry ingredients such as all-purpose flour, cocoa powder, baking soda, and salt. Soften the butter to room temperature and measure out the peanut butter, sugars, and eggs. Once you have everything laid out, you can proceed with confidence, knowing that you've set the stage for a delectable dessert. Baking the Cake to Perfection Achieving the perfect bake for your chocolate peanut butter cake is crucial for its texture and taste. Ensure your oven is preheated to the right temperature before you begin; this will help your cake rise evenly and develop a beautiful crust. Here's a quick checklist to follow: Preheat oven to the specified temperature Prepare your baking pans with nonstick spray and parchment paper Mix your dry ingredients thoroughly to avoid clumps Cream butter and sugars until light and fluffy Incorporate eggs one at a time for a smooth batter Once baked, allow the cake to cool in the pan for a few minutes before transferring it to a wire rack. This will prevent it from breaking apart and ensure it retains its shape for the next steps of assembly. Assembling the Chocolate Peanut Butter Cake Once your chocolate cake layers have cooled and your rich peanut butter filling is whipped to perfection, it's time to assemble your masterpiece. Begin by leveling the cake layers with a serrated knife to ensure an even stack. Place one chocolate cake layer on a round cake board, setting the stage for your decadent creation. For a touch of elegance and extra flavor, sprinkle a mixture of mini chocolate chips and chopped peanuts between each layer. This not only adds texture but also a delightful crunch that complements the smooth filling. Finally, envelop the entire cake in luscious frosting, creating a silky exterior that's ready for your creative decorations. Remember to take your time and enjoy the process of bringing your chocolate peanut butter cake to life. With each step, you're crafting not just a dessert, but an experience to be savored. Customizing Your Cake Variations for Different Occasions Whether you're celebrating a birthday, hosting a dinner party, or just indulging in a sweet treat, a Chocolate Peanut Butter Cake can be tailored to suit any event. Consider the theme and the guests' preferences when choosing your variations. For a child's birthday, add colorful sprinkles or use cookie cutters to create fun shapes from the cake layers. Elegant gatherings might call for a more refined presentation, such as a ganache drizzle and gold leaf accents. Seasonal touches like pumpkin spice for fall or peppermint for winter holidays can add a festive twist. Experiment with different fillings and frostings to discover new combinations that will delight your guests. A simple swap from milk chocolate to dark chocolate can transform the cake's taste profile, making it suitable for more sophisticated palates. Dietary Adjustments and Substitutions When it comes to dietary preferences and restrictions, a chocolate peanut butter cake can be surprisingly adaptable. For those looking to reduce sugar intake, consider using sugar substitutes like stevia or erythritol in both the cake and frosting. Gluten-free flour blends are readily available for a gluten-free version without compromising the cake's texture. For a dairy-free cake, plant-based milks and dairy-free chocolate are excellent substitutes. If you're avoiding eggs, flaxseed or chia seed mixtures can serve as effective binders. Here's a simple list of common substitutions: Sugar: Stevia, Erythritol, Monk Fruit Sweetener Flour: Gluten-Free All-Purpose Blend Milk: Almond, Soy, Oat Butter: Coconut Oil, Vegan Butter Eggs: Flaxseed Meal, Chia Seeds For those following a Mediterranean diet or similar, incorporating heart-healthy fats like olive oil in place of butter can align the recipe with your dietary goals. And as a bonus tip, you can substitute a half cup of hot brewed coffee for the hot water in the cake recipe to intensify the chocolate flavor without adding a distinct coffee taste. Creative Decoration Ideas Once your chocolate peanut butter cake is assembled, it's time to let your creativity shine with some eye-catching decorations. Whether you're celebrating a special occasion or just want to add a personal touch, here are a few ideas to inspire you: Use a piping bag with a star tip to create elegant swirls of peanut butter frosting on top. Drizzle melted chocolate over the frosting for a professional finish. Sprinkle crushed peanuts or chocolate shavings for added texture and flavor. For those looking to recreate popular cake designs, consider drawing inspiration from trending cake ideas such as the Peanut Butter Chocolate Poke Cake or the whimsical Layered Princess Cake. These designs can add a fun twist to your chocolate peanut butter masterpiece. Serving and Storage Tips Cutting and Presenting Your Cake Presenting your chocolate peanut butter cake with elegance is just as important as its delicious taste. Cutting the cake properly ensures that each guest receives an equally delightful piece. For a round cake, the 'Straight Cut' method is recommended, where you start by slicing a straight line across the center of the cake, then divide each half into equal slices. This technique helps maintain the integrity of the layers and the aesthetic of each serving. Remember, the first slice is always the trickiest to remove. Use a cake server to gently lift it out, and wipe the knife clean between cuts to keep the edges neat. Here's a quick guide to slicing your cake: Position the knife where you intend to cut. Gently saw through the frosting to avoid dragging and smudging. Cut all the way down and through the base layer. Carefully transfer the slice using a cake server or spatula. Storing Leftovers for Optimal Freshness Ensuring your chocolate peanut butter cake remains as delectable as the day it was made requires proper storage techniques. Refrigeration is key for maintaining freshness, allowing you to enjoy the cake for up to a week. For longer storage, freezing is an excellent option, with the potential to preserve your cake for several months. Refrigeration: Store in an airtight container to prevent drying out. The cake can be kept fresh for up to one week. Freezing: Wrap slices or the entire cake in cling film, followed by a layer of foil. Freeze for up to three months. Remember to thaw the cake in the refrigerator overnight before serving. To ensure your cake retains its moist texture and rich flavors, avoid leaving it at room temperature for extended periods. If you have leftover melted chocolate from the cake-making process, it can be stored similarly. Refrigeration can keep it fresh for up to two weeks, while freezing can extend its shelf life for up to three months. Just remember to thaw it in the refrigerator to maintain its quality. Make-Ahead Strategies When planning to indulge in the delightful Chocolate Peanut Butter Cake, a little foresight can go a long way. To ensure that your cake remains as fresh and tantalizing as possible, consider these make-ahead strategies. For the cake base, you can bake it up to two days in advance. Once cooled, wrap the layers tightly in plastic wrap and store them at room temperature. This not only saves time on the day of serving but also allows the flavors to meld beautifully. As for the fillings and toppings, chop any nuts or prepare garnishes the day before. This will streamline the assembly process, allowing you to focus on the art of decoration and presentation. Remember, a well-planned cake is a stress-free cake! Beyond the Cake: Related Recipes Peanut Butter Chocolate Chip Cookie Cake Transform your dessert spread with the Peanut Butter Chocolate Chip Cookie Cake, a delightful twist on the classic cookie. This treat combines the soft and chewy texture of a traditional cookie with the rich flavors of peanut butter and chocolate chips. The dough is studded with a tasty combo of chocolate chips and Reese's peanut butter chips, ensuring every bite is a decadent experience. Here's a quick glance at the ingredients you'll need: 3/4 cup salted butter, melted 1/2 cup creamy peanut butter 1 cup light brown sugar 1/4 cup granulated sugar 2 tsp vanilla extract 2 eggs, room temperature 2 cups + 2 tbsp all-purpose flour 1 tbsp corn starch 1/2 tsp baking soda 1/2 tsp kosher salt 3/4 cup milk chocolate chips 3/4 cup peanut butter chips For those who love to experiment, feel free to add your own twist to this recipe. Whether it's a sprinkle of sea salt on top or a drizzle of caramel, the possibilities are endless. Complementary Desserts and Pairings When indulging in the rich flavors of a Chocolate Peanut Butter Cake, selecting the right complementary desserts and pairings is essential to create a harmonious dessert experience. Consider lighter options that can cleanse the palate and balance the intensity of the cake. Fruit-Based Desserts: A tangy lemon tart or a fresh fruit salad can offer a refreshing contrast. Coffee-Flavored Treats: Tiramisu or coffee ice cream can enhance the deep chocolate notes. Dairy Delights: A scoop of vanilla bean ice cream or a dollop of whipped cream can soften the robust peanut butter flavor. Remember, the key is to balance the flavors and textures to ensure each dessert shines without overpowering the others. Experiment with different combinations to find the perfect match for your taste buds. Exploring More Peanut Butter Delights After indulging in the rich flavors of chocolate and peanut butter, the adventure doesn't have to end. Explore the world of peanut butter delights to discover new favorites and unexpected twists on classic treats. Here's a taste of what you can create: Peanut Butter Chocolate Chip Cookie Cake: A perfect blend of chewy cookie and creamy peanut butter. Homemade Reese’s Hearts: Craft your own version of this beloved candy. Sweetheart Strawberry Pop Tarts with a peanut butter twist: A delightful breakfast or snack option. Remember, the key to perfecting these delights is to balance the flavors and textures. Experiment with different types of peanut butter and chocolate to find your ideal combination. Happy baking! Conclusion In the world of desserts, the chocolate peanut butter cake stands out as a decadent treat that satisfies both chocolate and peanut butter lovers alike. From the rich layers of moist chocolate cake to the creamy peanut butter frosting, every bite is a delightful blend of flavors and textures. Whether you're celebrating a special occasion or simply indulging in a sweet craving, this cake is sure to impress. With the recipes and tips shared in this article, you're well-equipped to create your own scrumptious masterpiece. Remember, the key to the perfect chocolate peanut butter cake lies in the quality of ingredients and the love put into baking it. So, preheat your oven, gather your ingredients, and get ready to bake a dessert that will leave everyone asking for seconds. Frequently Asked Questions What are the key ingredients for the Chocolate Peanut Butter Cake? The key ingredients include chocolate cake mix, cream cheese, peanut butter, sweetened condensed milk, milk, whipped topping, and garnishes like peanut butter cups. Can I make any substitutions for dietary restrictions? Yes, you can use gluten-free flour for a gluten-free version, and there are vegan substitutes for cream cheese, condensed milk, and whipped topping for a vegan version. How long does it take to prepare and bake the cake? Preparation time is approximately 10 minutes, and the baking time is around 25-40 minutes, depending on the recipe and cake size. Can I make the Chocolate Peanut Butter Cake ahead of time? Yes, you can bake the cake ahead of time and store it in the refrigerator. Assemble with frosting and toppings before serving. What are some creative decoration ideas for this cake? You can decorate the cake with chocolate chips, chopped peanuts, drizzles of melted peanut butter, or even peanut butter cup pieces. How should I store leftovers for optimal freshness? Leftovers should be stored in an airtight container in the refrigerator and are best consumed within 3-4 days for optimal freshness.
- "History and Recipe of the Classic Paris-Brest Pastry: A Delightful French Dessert"
The Paris-Brest is a fascinating subject that spans across culinary arts, sports, and cultural significance. This article delves into the pastry's rich history, its traditional and innovative recipes, and its impact on popular culture. Additionally, we explore the unexpected connection to the city of Brest's football achievements, underscoring the influence of this French delight both in the kitchen and on the field. As we navigate the intricacies of shopping for Paris-Brest treats online, we also celebrate the dessert's role in social events and its enduring legacy in modern pastry trends. Key Takeaways The Paris-Brest pastry has deep historical roots and is celebrated for its unique ring shape, which is inspired by the Paris-Brest bicycle race. Classic recipes have evolved to include variations such as chocolate and praline fillings, with online shops offering these delicacies in different sizes and flavors. Brest's football team has made a significant impact on the French football landscape, with key players and memorable matches propelling them towards Champions League qualification. The dessert not only holds a place in French culinary tradition but also features prominently in popular culture, including literature and cinema. Shopping for Paris-Brest online provides convenience, with e-shops offering detailed information on pricing, sizes, and shipping options, including same-day delivery services. The Culinary Delight of Paris-Brest Exploring the Origins of the Pastry The Paris-Brest is a testament to the creativity and tradition of French pastry-making. The story goes that Paris-Brest was invented by a pastry chef from Maisons-Laffitte, near Paris. This creation was inspired by the Paris-Brest bicycle race of 1891, with its circular shape representing the race's wheel. The pastry quickly became a beloved classic, known for its delicate choux pastry and rich praline cream. Over the years, the Paris-Brest has seen numerous variations, each adding a unique twist to the original recipe. Whether it's the addition of chocolate hazelnut crunch or a British spin with a creamy chestnut filling, the essence of the Paris-Brest remains rooted in its origins. The Classic Recipe and Variations The Paris-Brest is a celebrated staple in French pâtisserie, traditionally comprising of a choux pastry ring and a praline-flavored cream. However, the versatility of this dessert allows for a myriad of variations, each adding a unique twist to the original. For instance, a British interpretation incorporates strawberries and cream, infusing a delightful seasonal freshness into the classic. Nutritional values per serving, when the dessert is portioned for ten, are as follows: Whether you're a professional chef or a home cook, the Paris-Brest offers a canvas for creativity. From the addition of chestnut filling to the use of almond flavors, each variation brings a new dimension to this exquisite dessert. Pairing and Serving Suggestions When indulging in the rich flavors of a Paris-Brest, pairing it with the right beverage can elevate the experience. A sweet dessert wine or a cup of strong coffee complements the creamy hazelnut filling and balances the sweetness of the choux pastry. For those serving Paris-Brest at a gathering, consider the following suggestions to ensure your dessert is a hit: Serve the pastry at room temperature to allow the flavors to fully develop. Offer a variety of beverages to cater to different preferences. Slice the Paris-Brest into individual portions for easy sharing. Nutritional information per serving is also important for guests who may be watching their intake: Brest's Football Triumph The Historic March Towards Champions League Brest's journey towards the Champions League has been nothing short of a fairy tale. With a squad that operates on one of the league's smallest budgets, their performance this season has defied expectations. Securing a 1-0 home win against Le Havre, Brest moved four points clear in second place, with just 10 rounds remaining in the season. The key to their success in the recent match was a moment of brilliance from influential midfielder Pierre Lees-Melou, who netted a powerful first-time shot in the 34th minute. This goal not only secured the win but also strengthened Brest's position in the quest for Champions League qualification. While defending champions PSG seem out of reach, Brest's consistent performances have made them a formidable force in French football. As the season progresses, their historic march continues to captivate fans and analysts alike, who are eager to see if this underdog story will have a triumphant chapter in the Champions League. Key Players and Memorable Matches The journey of Brest towards the pinnacle of European football has been marked by the exceptional performances of key players and a series of memorable matches that have captivated fans. Midfielder Pierre Lees-Melou's decisive goal against Le Havre exemplifies the individual brilliance contributing to Brest's success. The team's unbeaten streak of 13 games is a testament to their collective strength and strategic prowess. The following table highlights the standout players and their contributions in recent matches: These players, among others, have left an indelible mark on the club's history, turning key moments into unforgettable memories. As Brest continues to challenge the norms of French football, their impact on the landscape becomes increasingly profound. Impact on French Football Landscape The unexpected rise of Brest has been a pivotal narrative in the current French football season. With a string of successful matches, Brest has not only challenged the dominance of traditional powerhouses but also invigorated the competitive spirit of Ligue 1. Their journey towards the Champions League has been marked by strategic plays and a solid defense, culminating in a club record of 13 top-flight matches without defeat. The following table highlights Brest's recent achievements in Ligue 1: This remarkable march has not only brought joy to the fans but also added a fresh dynamic to the French football landscape, making every match a must-watch event. Shopping for Paris-Brest Delicacies Navigating Online E-shops In the digital age, purchasing Paris-Brest pastries has never been more convenient. Online e-shops offer a variety of options, from in-store pickups to shippable products, catering to the needs of both local and distant gourmands. When browsing online stores, consider the following: The range of products available, including signature items and monthly specials. The presence of a product guide detailing allergens and ingredients. The availability of gift cards for those looking to share the joy of Paris-Brest. Lastly, don't forget to check for loyalty programs that can offer rewards and discounts on future purchases. With a little research, you can easily find the perfect Paris-Brest to satisfy your sweet tooth or to gift to a fellow pastry enthusiast. Understanding Pricing and Sizes When indulging in the luxurious Paris-Brest pastry, understanding the pricing and available sizes is crucial for a satisfying purchase. Prices vary significantly depending on the size and complexity of the pastry. For instance, individual-sized pastries start at $5.50, while full-sized options can go up to $22.00 or more. The standard Paris-Brest, often serving 1-2 people, is typically priced at $8.50. It's important to note that prices may fluctuate based on the bakery's location and the ingredients used. Here's a quick reference for the common offerings: Availability can also be a factor; some bakeries offer the pastry only on specific days or require advance orders. Always check the bakery's schedule to ensure you can secure your desired treat. Shipping and Delivery Options Once you've selected your Paris-Brest delights, understanding the shipping and delivery options is crucial for a timely and satisfactory experience. Most e-shops offer a range of delivery methods, from in-store pickup to same-day delivery services. It's important to note that same-day delivery is often contingent on placing your order before a specific cut-off time. Here's a quick overview of common delivery options and conditions: In-store pickup: Usually available immediately or within a few hours of ordering. Same-day delivery: Requires order placement before a set time, often around noon. Free delivery zones: Typically offered within specific local areas. Remember to review the shipping information for each shop, as policies may vary. Additionally, consider the shop's loyalty programs, which might offer shipping perks or discounts. Paris-Brest in Popular Culture Literary and Cinematic References The Paris-Brest has not only delighted taste buds but has also found its way into the hearts of literature and film enthusiasts. Its presence in various art forms underscores the pastry's cultural significance. From being a subtle symbol in a poignant scene to being the centerpiece in a culinary-themed novel, the Paris-Brest has been savored beyond the confines of patisseries. In the realm of cinema, the dessert often appears as a nostalgic nod to French tradition or as a luxurious treat that characters indulge in during key moments. The following list highlights some notable mentions of Paris-Brest in books and films: In Search of Lost Time by Marcel Proust, where a character reminisces about the pastries of their childhood. The French film La Delicatesse, where a Paris-Brest is shared in a moment of budding romance. A detective novel where the protagonist's penchant for Paris-Brest becomes a quirky character trait. As the pastry continues to inspire artists, it cements its place not just on the menu but also in the cultural tapestry, inviting audiences to explore the layers of its influence. The Dessert's Role in Social Events The Paris-Brest has not only delighted taste buds but has also carved a niche for itself in social gatherings. Its presence on the dessert table is a nod to both tradition and gourmet sophistication. From intimate family dinners to grand wedding feasts, the circular pastry symbolizes unity and celebration. The pastry's aesthetic appeal and rich history often make it a conversation starter, enhancing the social experience. In the realm of social events, the Paris-Brest often appears alongside other French delicacies that are named after places, such as the Dijon mustard or the Quiche Lorraine. This connection to geographical origins adds an element of cultural appreciation to the dining experience. As per a popular anecdote, the Paris Brest was created in 1910 by pastry chef Louis Durand to commemorate the Paris-Brest-Paris bicycle race. Durand even shaped the pastry to resemble a bicycle wheel, further cementing its iconic status. When planning an event, the inclusion of Paris-Brest is a thoughtful touch that reflects the host's attention to detail and desire to offer a memorable culinary journey. It's a dessert that transcends mere taste, embodying the spirit of the occasion it graces. Influence on Modern Pastry Trends The Paris-Brest has not only remained a staple in French patisseries but has also inspired contemporary pastry chefs around the world. Its influence extends beyond the borders of France, as evidenced by the increasing popularity of French desserts in places like the Bay Area, where the perception of French food is undergoing a renaissance. The Paris-Brest's round shape, reminiscent of a bicycle wheel, has become a symbol of culinary innovation, leading to a variety of modern interpretations and flavor combinations. In the competitive world of desserts, the Paris-Brest stands out for its versatility. Here's a snapshot of how it's being integrated into today's pastry scene: Menu inclusion: Featured alongside other French classics like macaroons and lemon cakes. Specialty shops: Dedicated sections in e-shops, highlighting its premium status. Culinary fusion: Adaptations with local flavors, such as the British spin on the filling. Seasonal offerings: Limited-time variations that cater to festive occasions or seasonal ingredients. The Paris-Brest's enduring appeal and adaptability ensure that it will continue to be a beloved treat and a source of inspiration for pastry enthusiasts and professionals alike. Conclusion The Paris-Brest stands as a testament to the rich culinary and sporting heritage of France. From the delectable choux pastry adorned with almond flakes and filled with praline or chocolate praline pastry cream to the historic bicycle race that inspired its circular shape, the Paris-Brest is a symbol of tradition and excellence. Meanwhile, the city of Brest has made headlines with its football team's remarkable journey towards the Champions League, showcasing the same dedication to craft and success. Whether indulging in a slice of this classic French dessert or cheering for the underdog in the football league, the spirit of Paris-Brest is one of celebration and achievement. Frequently Asked Questions What is Paris-Brest? Paris-Brest is a traditional French dessert consisting of a ring-shaped choux pastry filled with praline-flavored cream, often garnished with almond flakes and powdered sugar. How can I purchase a Paris-Brest online? You can navigate online e-shops that specialize in French pastries, select the desired size and flavor (original or chocolate), and add it to your cart for purchase. Delivery options are available, and you can get it shipped as soon as the next scheduled delivery day. What are the key ingredients in a Paris-Brest? The key ingredients include choux pastry, praline or chocolate praline pastry cream, crème Chantilly, and sometimes almond flakes for garnish. When can I expect my online order of Paris-Brest to be delivered? Delivery time starts from 9:00 AM every day. If you make your payment before 12:00 PM, same-day delivery starting from 2:00 PM can be arranged. What is the significance of Brest in French football? Brest has made a historic march towards the Champions League, becoming a front-runner in the French league and impacting the French football landscape with its unexpected success. Can I find variations of the Paris-Brest recipe? Yes, there are variations of the classic recipe that include different fillings, such as chestnut or chocolate, and some may even add a British spin to the dessert.
- "Delicious Zebra Cake Recipe: How to Impress Your Friends and Family with a Stunning Dessert"
Zebra cake is an unconventional dessert that rose to fame in the US in the 1960s. It is renowned for its distinctive presentation, featuring alternating layers of chocolate and vanilla, resembling the iconic stripes of a zebra. Initially popularized using boxed cake mixes, it has evolved into a scratch-made favorite in many bakeries, celebrated for its simple yet striking contrast between the dark chocolate and the white frosting. Key Takeaways Zebra cake's unique striped pattern and contrasting flavors have made it a popular choice since the 1960s. The transition from boxed mixes to homemade recipes has allowed for greater creativity and quality in zebra cake preparation. The cake's visual appeal has been enhanced with various toppers and decorations, making it a festive choice for celebrations. Zebra cake has been featured in media and embraced by celebrities, contributing to its cultural impact and popularity. With the advent of social media, zebra cake has gained fame, inspiring a multitude of variations and dietary adaptations. The History and Rise of Zebra Cake Origins in the 1960s The zebra cake emerged as a beloved dessert in the United States during the 1960s. Its unique visual appeal, characterized by alternating chocolate and vanilla layers, quickly captured the hearts of dessert lovers. Initially, the cake was a product of convenience, often made from boxed cake mixes that were popular during that era. As home baking techniques evolved, so did the zebra cake. Bakers began to move away from the convenience of pre-made mixes, opting instead for scratch recipes that allowed for more customization and a homemade touch. This transition marked a significant moment in the cake's history, as it began to symbolize both creativity and nostalgia in American baking culture. Evolution from Boxed Mixes to Scratch Recipes The transformation from convenience to craftsmanship marked a significant shift in the world of zebra cakes. Initially, these cakes were a product of the boxed mix revolution, offering a quick and easy solution for home bakers. However, as the appreciation for homemade and artisanal foods grew, so did the desire to create zebra cakes from scratch. Bakers began experimenting with their own blends of cocoa, flour, and other ingredients, striving for a balance that would yield the perfect texture and flavor. The move to scratch recipes allowed for greater customization and a return to traditional baking techniques. This evolution not only enhanced the quality of the cakes but also provided a canvas for personal touches and creativity. Here's a brief comparison of the two approaches: Boxed Mixes: Convenient, consistent, and time-saving Scratch Recipes: Customizable, traditional, and potentially higher quality Cultural Impact and Popularity The Zebra Cake has transcended its humble beginnings to become a beloved treat across various cultures. Its distinctive pattern and delightful flavor have made it a staple at celebrations and gatherings. The cake's popularity is evident in its frequent appearance at birthday parties, weddings, and other festive occasions. Birthday parties often feature Zebra Cakes as a fun and visually appealing dessert option. Weddings may include Zebra Cakes in their dessert spreads, offering a modern twist on traditional wedding cake designs. Festive occasions such as anniversaries and graduations are also perfect opportunities for this striking cake to take center stage. As the cake continues to enjoy widespread acclaim, it serves as a testament to the power of culinary creativity and the joy that a simple dessert can bring to people of all ages. Creating the Signature Zebra Stripes Layering Techniques for Chocolate and Vanilla The art of creating the signature zebra stripes in a Zebra Cake lies in the meticulous layering of chocolate and vanilla batters. The key to perfect stripes is the careful addition of batter in alternating colors. Begin by pouring a base layer of vanilla batter into the pan. Then, add a smaller amount of chocolate batter directly in the center. Continue this process, always pouring the batter into the center, allowing the colors to spread out and form rings. To achieve the best results, consistency in the amount of batter for each layer is crucial. Here's a simple guide to follow: Start with 1/4 cup of vanilla batter for the base layer. Add about 1/4 cup of chocolate batter in the center. Alternate with 1/4 cup of vanilla, then chocolate, and so on. Patience and a steady hand are your best tools when layering. If the layers are rushed or uneven, the stripes will not form correctly. Take your time to ensure each addition is centered and spreads evenly before adding the next. Frosting and Decoration Tips The art of frosting a Zebra Cake is as crucial as the baking itself. Achieving the perfect whiteness of the frosting not only enhances the cake's visual appeal but also complements its flavor profile. When preparing the frosting, it's important to blend icing sugar and water to the right consistency for a smooth application. To decorate your Zebra Cake with finesse, consider using specialized tools such as a 2D piping tip. This tool allows for the creation of beautiful swirls and patterns that mimic the intricate stripes of a zebra. A set of disposable decorating bags can make the process cleaner and more efficient. Avoid overmixing the frosting as it needs to cook properly while air is beaten into it, resulting in a creamy texture that can be enjoyed as a warm sauce or a chilled mousse-like consistency. Here's a simple list to keep in mind while frosting your cake: Common Mistakes and How to Avoid Them While the distinctive appearance of a zebra cake is a feast for the eyes, achieving those perfect stripes can be a bit tricky. Here are some common pitfalls and tips to ensure your cake looks as good as it tastes: Uneven Layers: To prevent uneven layers, use a kitchen scale to measure out equal amounts of batter for each stripe. Bleeding Colors: Avoid colors bleeding into each other by chilling the cake layers before applying the next one. Imperfect Stripes: For sharp stripes, use a toothpick to outline the pattern before adding the batter. Lastly, it's important to know that zebra cakes don't last indefinitely. Store your cake properly to maintain its freshness and appearance. A well-covered zebra cake can remain fresh for up to 3 days at room temperature or up to a week when refrigerated. Zebra Cake Variations and Innovations Flavor Twists and Alternative Ingredients The versatility of Zebra Cake allows for a myriad of flavor twists and the use of alternative ingredients, catering to a wide range of palates and dietary preferences. Bold experimentation with spices and fillings can transform the traditional Zebra Cake into an exotic treat. For instance, adding cinnamon sugar can imbue the cake with a subtle undertone of sweetness, while incorporating pastry cream or jam fillings introduces a rich complexity to the dessert. Here are some popular flavor variations: Classic Chocolate and Vanilla Red Velvet and Cream Cheese Mocha and Salted Caramel Lemon and Blueberry Matcha and White Chocolate Each variation offers a unique sensory experience, from the comforting familiarity of chocolate and vanilla to the zesty surprise of lemon and blueberry. The key is to maintain the balance between flavors, ensuring that each stripe stands out while harmoniously blending with the others. Mini Zebra Cakes and Cupcakes The charm of zebra cakes can be captured in a smaller, yet equally delightful form: mini zebra cakes and cupcakes. These bite-sized treats are perfect for parties, offering a personal touch of elegance and a taste of nostalgia. Creating these miniature versions involves the same meticulous layering of chocolate and vanilla batters, but on a smaller scale. Precision is key to achieving the iconic zebra stripes, and a steady hand ensures the patterns remain distinct and visually appealing. Prepare the batter: Mix chocolate and vanilla batters separately. Layer the batters: Carefully spoon alternating layers into cupcake liners or mini cake pans. Bake with care: Monitor closely as mini cakes bake faster than full-sized ones. Decorate: Use a piping bag for detailed frosting work. For those looking to recreate the magic at home, resources like 'The Squeaky Mixer' blog offer a step-by-step guide, ensuring a zebra cake experience that's sure to delight taste buds and bring back sweet memories. Dietary Adaptations: Gluten-Free and Vegan Options Adapting the classic zebra cake to suit various dietary requirements has become increasingly popular. Gluten-free and vegan versions ensure that this delightful dessert can be enjoyed by a wider audience. Gluten-free adaptations often involve substituting wheat flour with a blend of rice, almond, or coconut flours, while vegan recipes replace eggs and dairy with plant-based alternatives such as flax eggs, almond milk, and vegan butter. For those embarking on this baking journey, here's a simple list to get started: Choose a gluten-free flour blend that mimics the properties of wheat flour. Use xanthan gum or guar gum as a gluten substitute to provide the necessary binding. Opt for plant-based milk and vegan butter to keep the cake dairy-free. Experiment with egg replacements like mashed bananas, applesauce, or commercial egg replacers. Remember, creating a zebra cake that caters to dietary restrictions doesn't mean compromising on taste or presentation. With careful ingredient selection and a bit of creativity, everyone can indulge in the zebra-striped wonder. Accessorizing Your Zebra Cake Choosing the Right Cake Toppers When it comes to accessorizing your zebra cake, the topper you choose can be the crowning glory that ties the theme together. Selecting the right cake topper is crucial for adding that final touch of whimsy or elegance. For instance, a fondant zebra, perfect for a birthday party or baby shower, can sit proudly atop your cake, making it the centerpiece of your celebration. Fondant Zebra: Ideal for themed parties, available with or without a flower. Ceramic Collectibles: Durable and reusable, these toppers can become keepsakes. Edible Decorations: Enhance the flavor while complementing the cake's design. Remember, the topper should not only match the aesthetic but also the occasion. A well-chosen topper can accentuate the whiteness of the frosting, elevating the cake's appearance as well as its flavor. When browsing options, consider the size and weight of the topper to ensure it sits securely without damaging the delicate stripes below. Themed Party Ideas and Presentations When planning a themed party, the presentation of your zebra cake can be as impactful as the event itself. Selecting the right theme is crucial, as it sets the tone for the decorations and accessories that will complement your cake. Here are some popular themes and ideas to get you started: Safari Adventure: Use animal print tablecloths and napkins, and add a touch of wilderness with faux greenery and stuffed animals. Elegant Black and White Gala: Opt for sleek black and white table settings, with hints of gold for a touch of luxury. Kid's Zoo Party: Incorporate colorful plates and cups featuring cartoon animals, and provide animal masks for the little ones. When it comes to accessorizing your cake, consider the following items to enhance your theme: Cake Toppers: Choose toppers that match your party theme, such as animals for a safari or elegant monograms for a gala. Tableware: Coordinated plates, cups, and napkins can accentuate the cake's appearance on the table. Party Favors: Give guests a memento that ties back to the theme, like animal-shaped cookies for a zoo party. By thoughtfully selecting each element, you can create an immersive environment that highlights your zebra cake as the centerpiece of the celebration. Pairing with Other Desserts and Drinks When it comes to enhancing the zebra cake experience, pairing it with complementary desserts and drinks can elevate the overall taste sensation. Selecting the right accompaniment is key to creating a harmonious dessert course. For a truly indulgent treat, consider pairing zebra cake with a dessert that offers a contrasting texture or flavor profile, such as a fruit sorbet or a rich, dark chocolate mousse. Here are some classic pairings to consider: Coffee: The robust flavor of coffee balances the sweetness of the cake. Red Wine: A sweet red wine complements the chocolatey notes. Fruit Sorbet: A tangy sorbet can cleanse the palate between bites. Dark Chocolate Mousse: For a double dose of chocolate indulgence. Remember, the goal is to enhance, not overshadow, the zebra cake's unique taste. Experiment with different combinations to find the perfect match for your dessert table. Zebra Cake in Popular Culture Appearances in Media and Television The Zebra Cake has made its mark on the entertainment industry, often appearing as a symbol of celebration or an object of desire in various shows and movies. Its distinctive pattern has caught the eye of audiences, making it a memorable feature in several scenes. For instance, the cake has been showcased in episodes of popular cooking shows, where contestants are challenged to recreate its iconic stripes. In family sitcoms, the Zebra Cake often appears at birthday parties or special events. Dramas have used the cake as a centerpiece in pivotal moments, highlighting its visual appeal. Reality TV has featured Zebra Cake in baking competitions, emphasizing the skill required to perfect the stripes. Celebrity Endorsements and Famous Fans The allure of the zebra cake has captivated not only the general public but also a host of celebrities and public figures. Their endorsements have played a pivotal role in elevating the cake's status from a delightful dessert to a trendy culinary icon. Among the stars, vegan celebrities have been particularly vocal, aligning the zebra cake with ethical and health-conscious lifestyles. A testament to its widespread appeal, the zebra cake has been featured in numerous social events and galas, often highlighted as the centerpiece dessert. Below is a list of notable personalities who have publicly expressed their fondness for this striped sensation: Emma Stone: Praised the cake's unique design during a charity event. Chris Hemsworth: Shared his love for the cake on a popular talk show. Beyonc\u00e9: Included zebra cake at her daughter's themed birthday party. Leonardo DiCaprio: Advocated for the vegan version of the cake, citing environmental concerns. The Role of Social Media in Zebra Cake's Fame The ascent of Zebra Cake to social media stardom is a testament to the power of visual appeal in the digital age. Platforms like Instagram and Pinterest have become showcases for the cake's striking appearance, inspiring bakers and enthusiasts to share their own creations. The sharing of Zebra Cake images and recipes has fostered a vibrant online community, where tips and variations are exchanged, further cementing its status as a beloved dessert. The influence of social media on Zebra Cake's popularity is not without its controversies. Recent news highlighted the impact influencers can have on consumer perceptions, with top influencer Chiara Ferragni's companies being fined for misleading customers. This underscores the importance of transparency and honesty in social media promotions, especially when they can sway public opinion and consumer behavior. Conclusion In conclusion, the Zebra Cake stands out as a delightful dessert that has captured the hearts of sweet tooths since the 1960s. Its signature striped appearance is not only visually striking but also a testament to the simplicity and creativity in dessert making. Whether adorned with a charming Zebra Cake Topper or featured among other zesty desserts starting with 'Z', this cake remains a beloved choice for celebrations and everyday indulgences alike. From its humble boxed mix beginnings to the artisanal versions crafted in bakeries today, the Zebra Cake continues to be a symbol of joy and a delicious way to bring a touch of whimsy to any dessert table. Frequently Asked Questions What is the origin of Zebra Cake? Zebra cake became popular in the US during the 1960s. It is known for its distinctive striped pattern that resembles a zebra's coat, created by alternating layers of chocolate and white frosting. Can Zebra Cake be made from scratch? Yes, while it was originally made using boxed cake mixes, many bakers now prefer to make Zebra Cake from scratch using ingredients like chocolate cake mix and buttercream frosting. What are some common mistakes when making Zebra Cake? Common mistakes include not evenly layering the chocolate and vanilla, which can disrupt the stripe pattern, and overmixing the batter, which can lead to a dense cake. Are there any variations of Zebra Cake? Absolutely! There are flavor twists like adding coffee or fruit extracts, as well as dietary adaptations such as gluten-free and vegan versions. Mini Zebra Cakes and cupcakes are also popular variations. How can I decorate my Zebra Cake? You can use Zebra Cake toppers, which are available for purchase, like the collectible keepsakes from CAMP HOLLOW. Additionally, you can garnish with chocolate ganache, whipped cream, or themed decorations for parties. Where can I find Zebra Cake in popular culture? Zebra Cake has made appearances in media, television, and on various food-related articles and lists highlighting desserts that start with the letter 'Z.' Social media also plays a big role in its popularity.
- "Deliciously Decadent Strawberry Shortcake Recipes for Every Occasion"
Strawberry Shortcake is a beloved dessert that conjures up images of fresh, juicy strawberries, fluffy whipped cream, and tender cake or biscuits. This article dives into the art of creating the perfect Strawberry Shortcake, exploring classic recipes, innovative twists, and essential baking tips. Whether you're a seasoned baker or new to the world of desserts, these insights will help you craft a Strawberry Shortcake that's sure to impress and satisfy any sweet tooth. Key Takeaways Classic Strawberry Shortcake remains a timeless favorite, often featuring a biscuit-style cake layered with strawberries and whipped cream. Martha Stewart's Strawberry Biscuit Sheet Cake and Strawberry Shortcake with Basil offer creative variations that add unique flavors and presentation to the traditional dessert. Strawberry Shortcake can be transformed into various forms, such as cupcakes, pound cakes, and even jellies, proving its versatility in the dessert world. Innovative recipes like Star-Shaped Strawberry Shortcakes and Strawberry-Shortcake Sundaes demonstrate that this dessert can be both a visual and gastronomic delight. Essential ingredients for a standout Strawberry Shortcake include fresh strawberries, the right balance of sweetness and acidity, and a tender, well-baked cake base. The Art of Strawberry Shortcake Classic Strawberry Shortcake The classic strawberry shortcake is a beloved dessert that has stood the test of time. Its simplicity is its charm, with layers of fluffy cake, sweetened strawberries, and a dollop of whipped cream creating a symphony of flavors and textures. To recreate this timeless treat at home, one must start with the freshest ingredients. A typical recipe might include sliced fresh strawberries, a sprinkle of sugar to enhance their natural sweetness, and a base of shortcake made from a mixture of flour, butter, and a leavening agent. The process is straightforward but requires a gentle touch to produce a tender, crumbly cake that melds seamlessly with the juicy berries. Here's a quick glance at the essentials: Fresh strawberries, hulled and sliced Granulated sugar, for macerating the berries Shortcake ingredients (flour, butter, leavening agent) Whipped cream, for topping Remember, the best strawberry shortcake is one that brings a smile to your face and a moment of pure, unadulterated joy with every bite. Martha Stewart's Strawberry Biscuit Sheet Cake Martha Stewart's take on the strawberry shortcake transforms it into a delightful sheet cake, ideal for gatherings and summer festivities. This recipe, which was highlighted on the show 'Martha Bakes,' episode 709, is celebrated for its simplicity and crowd-pleasing qualities, much like the variety of sheet cakes mentioned in 21 Easy, Crowd-Pleasing Sheet Cakes for Any Occasion. The cake is reminiscent of a scone in both appearance and texture, offering a unique twist on the traditional dessert. To ensure the biscuits maintain their integrity, allow them to cool completely before slicing with a gentle touch using a serrated bread knife. For those eager to try their hand at this recipe, here's a quick rundown of the process: Prepare the strawberry mixture and let it macerate. Whip up the biscuit dough and spread it into a sheet pan. Bake until golden and let it cool. Assemble the cake with layers of biscuit, strawberries, and cream. Whether you're hosting a large party or simply craving a sweet summer treat, this strawberry biscuit sheet cake is sure to satisfy. Strawberry Shortcake Variations Exploring the world of strawberry shortcake variations can be as delightful as savoring the dessert itself. From the simplicity of a classic sponge to the creativity of themed shapes, there's a version for every taste and occasion. For those who prefer a straightforward approach, the Easy Strawberry Shortcake from Lil' Luna offers a no-fuss experience with just sponge cake and fresh strawberries. This recipe harks back to the essence of the dessert, focusing on the pure flavors that make strawberry shortcake a timeless favorite. In contrast, adventurous bakers might gravitate towards unique interpretations like the Strawberry Shortcake With Basil or Star-Shaped Strawberry Shortcakes. These recipes infuse the traditional with a twist, adding an unexpected herb or a playful shape to the mix. Here's a quick glance at some popular variations and their unique elements: Classic Strawberry Shortcake Martha Stewart's Strawberry Biscuit Sheet Cake Strawberry Shortcake Cupcakes Summer Shortcake Strawberry Shortcake Jellies Strawberry Shortcake with Basil Star-Shaped Strawberry Shortcakes Strawberry-Shortcake Sundaes Strawberry Shortcake Cookies Easy Strawberry Shortcake Cookies Each recipe offers a distinct take on the classic, inviting you to explore and find your personal favorite. Baking the Perfect Shortcake Strawberry Shortcake Cupcakes Transforming the classic strawberry shortcake into cupcakes adds a personal touch to this beloved dessert. Sally's Baking Addiction offers a delightful recipe that's both simple and elegant, ensuring that each cupcake is a miniature version of the traditional treat. The recipe calls for a combination of all-purpose flour, baking powder, baking soda, and a pinch of salt, which provides the perfect base for the cupcakes. Incorporating fresh strawberries and strawberry jam into the batter not only infuses the cupcakes with a burst of fruity flavor but also keeps them moist and tender. To complement the sweetness, sour cream is added for a subtle tang and richness that balances the overall taste. Here's a quick rundown of the key ingredients: Strawberries Strawberry jam Sour cream All-purpose flour Baking powder Baking soda Salt Summer Shortcake Essentials When the sun is high and the days are long, a slice of summer shortcake can be the pinnacle of dessert perfection. Choosing the Right Ingredients is crucial; the quality of each component from the buttery base to the ripe strawberries defines the final taste. Here's a simple guide to ensure your shortcake is the star of summer gatherings: Select quality flour for a tender crumb. Use cold butter for flakiness. Opt for ripe, juicy strawberries for the best flavor. Homemade whipped cream makes a difference. Remember, the simplicity of a shortcake is its charm. There's no need for complex techniques or exotic ingredients. However, don't underestimate the importance of each element. For instance, the strawberries should not only be ripe but also properly hulled and sliced to release their natural juices, which will soak into the shortcake, creating a delightful symphony of flavors. Whether you're a seasoned baker or a novice, these essentials will guide you to create a shortcake that's both beautiful and delicious. It's the perfect way to celebrate the bounty of summer. Strawberry Shortcake Pound Cake Transform your dessert spread with the Gorgeous Strawberry Shortcake Pound Cake. This delightful twist on the classic shortcake layers rich pound cake with fresh strawberries and a cloud of whipped cream, making it an ideal choice for spring holidays or a sumptuous Sunday dinner. Here's a quick glance at what you'll need to get started: Stand mixer 12 cup bundt pan And don't forget the essentials: Fresh strawberries Whipping cream Your favorite pound cake recipe Remember, the beauty of this dessert lies in its simplicity and the quality of its components. Select ripe, juicy strawberries and high-quality cream to elevate your Strawberry Shortcake Pound Cake to new heights of deliciousness. Innovative Twists on a Classic Dessert Strawberry Shortcake Jellies For those who adore the classic flavors but crave a new experience, Strawberry Shortcake Jellies offer a delightful twist. This innovative dessert transforms the beloved taste of strawberry shortcake into a playful jelly form. Imagine layers of strawberry gelatin, creamy panna cotta, and tender pound cake coming together to create a dessert that's as visually appealing as it is delicious. The process is simpler than you might think, and the result is a conversation-starting centerpiece for any gathering. Here's a quick guide to what you'll need: Strawberry gelatin to capture the essence of the fruit Panna cotta for a silky-smooth layer Pound cake, diced into cubes for a familiar touch Whether you're hosting a party or just looking to spice up your dessert repertoire, these jellies are sure to impress. Part cocktail, part dessert, they're easy to make and a feast for the senses. Strawberry Shortcake with Basil Innovating the classic dessert, adding cut up basil to strawberry shortcake introduces an unexpected twist that delights the palate. This herbaceous addition complements the sweetness of the strawberries, creating a sophisticated flavor profile. To incorporate basil into your shortcake, start by preparing your favorite shortcake recipe. Once you have your base ready, gently fold in freshly chopped basil leaves before baking. The key is to use the basil sparingly to avoid overpowering the dessert. For those looking to further enhance their dessert, consider the following substitutions from an Old Fashioned Strawberry Shortcake recipe: Add some balsamic vinegar to the strawberries to deepen their flavor. Change out the lemon juice for some lime juice to add a tropical twist. Use a flavored herbal sugar, such as lavender or rose, to sprinkle on top before serving. Star-Shaped Strawberry Shortcakes Transforming the traditional strawberry shortcake into a delightful star-shaped treat adds a touch of whimsy to any gathering. Martha Stewart's adaptation of the classic dessert not only tastes divine but also presents a visually stunning centerpiece for your table. The star-shaped cutouts are not just for show; they add an element of fun that is especially appealing to children. To achieve the perfect star shape, you'll need a star-shaped cookie cutter and a bit of patience. Here's a simple guide to get you started: Prepare your favorite shortcake recipe. Once the dough is rolled out, use the star-shaped cutter to create your shortcake bases. Bake as per the recipe instructions, then allow to cool. Layer with fresh strawberries and a generous dollop of whipped cream. Remember, the key to a memorable star-shaped strawberry shortcake is in the details. Ensure your strawberries are sliced evenly and your whipped cream is light and fluffy to complement the tender shortcake. Serving Strawberry Shortcake Strawberry-Shortcake Sundaes Transform the classic dessert into a delightful frozen treat with Homemade Strawberry Shortcake Ice Cream. This no-churn recipe captures the essence of the beloved Good Humor Strawberry Shortcake Bar, blending a creamy vanilla ice cream base with bursts of strawberry flavor. The beauty of this sundae lies in its simplicity and the interplay of textures and temperatures. The cold, creamy ice cream contrasts with the tender cake, while the strawberry sauce adds a vibrant touch. It's a perfect way to enjoy the flavors of strawberry shortcake in a new, refreshing form. Remember, patience is key as the ice cream sets. Although the wait is around 3 hours, the anticipation only heightens the enjoyment of the final product. Strawberry Shortcake Cookies After indulging in the classic dessert, why not try your hand at making Strawberry Shortcake Cookies? These delightful treats encapsulate the essence of the traditional shortcake in a convenient, bite-sized form. Imagine the tender crumble of a scone merged with the gooey sweetness of a cookie, all bursting with fresh strawberries. The beauty of this recipe lies in its simplicity, making it accessible to bakers of all skill levels. Whether you're a novice or a seasoned pro, you'll find joy in creating these cookies. Here's a quick guide to get you started: Choose your preferred recipe Gather all necessary ingredients Follow the straightforward steps Revel in the delicious outcome With just a few basic ingredients like unsalted butter, granulated sugar, and eggs, you're well on your way to enjoying Strawberry Shortcake Cookies that rival those of Martha Stewart's famed creations. Don't hesitate to give this recipe a try and share the joy with friends and family. Easy Strawberry Shortcake Cookies After indulging in the classic layers of shortcake and strawberries, why not try a delightful twist with Easy Strawberry Shortcake Cookies? These cookies offer a playful take on the traditional dessert, perfect for those who love to enjoy their shortcake in a more portable form. Here's a quick guide to what you'll need: Cake mix Cool whip An egg Powdered sugar Simply mix these ingredients together, bake, and in no time, you'll have a delicious treat that captures the essence of strawberry shortcake in every bite. Remember, the key to perfect cookies is not to overbake them, ensuring they retain that delightful crinkle and soft texture. Conclusion In conclusion, the world of strawberry shortcake is as diverse as it is delightful. From the classic biscuit-style shortcake to innovative twists like strawberry shortcake jellies and sundaes, there's a recipe to satisfy every palate. Whether you're a seasoned baker or new to the kitchen, the simplicity and versatility of these recipes make it easy to create a sweet treat that's sure to impress. As we've explored various takes on this beloved dessert, from Martha Stewart's elegant creations to easy-to-make cupcakes, it's clear that strawberry shortcake remains a timeless favorite. So, save your favorite recipe, gather your ingredients, and get ready to indulge in the sweet, summery goodness of homemade strawberry shortcake. Frequently Asked Questions What are the main ingredients in a classic Strawberry Shortcake? A classic Strawberry Shortcake typically includes fresh strawberries, whipped cream, and a biscuit or cake base. How long does it take to prepare and cook Strawberry Shortcake? Preparation time can vary, but a classic Strawberry Shortcake can take about 30 minutes to prepare and 20 minutes to cook. Can Strawberry Shortcake be made with other fruits? Yes, while strawberries are traditional, you can also add or substitute other fruits like blueberries for a different twist. What makes Martha Stewart's Strawberry Shortcake with Basil unique? Martha Stewart's version includes the addition of basil, which offers a fresh and aromatic twist to the classic dessert. Is it possible to make Strawberry Shortcake in different shapes? Absolutely, you can make Strawberry Shortcake in various shapes, such as star-shaped shortcakes, for a fun and festive presentation. What is the difference between classic Strawberry Shortcake and Strawberry Shortcake Pound Cake? Classic Strawberry Shortcake typically has a lighter biscuit base, while Strawberry Shortcake Pound Cake has a denser, buttery pound cake as the base.
- "Mastering the Art of Tarte Tatin: A Step-by-Step Guide for Perfecting the Classic French Dessert"
Tarte Tatin, a quintessential French dessert, is an upside-down pastry known for its caramelized fruit filling and flaky crust. This iconic tart has a storied history, beginning with an accidental invention and evolving into a beloved classic with numerous savory and sweet variations. Whether it's the traditional apple version or a modern twist like heirloom tomato or apricot, mastering the techniques of Tarte Tatin can transform your baking repertoire and delight your taste buds. Key Takeaways Tarte Tatin originated from a serendipitous mistake by the Tatin sisters in France and has since become a celebrated dessert worldwide. The classic apple Tarte Tatin remains a favorite, but innovative variations like beet and thyme or heirloom tomato offer a delightful twist. Culinary techniques such as selecting quality ingredients, perfecting caramelization, and executing the crucial 'flip' are key to an impeccable Tarte Tatin. The heirloom tomato Tarte Tatin, with its simple five-ingredient recipe, provides a unique and savory take on the traditional sweet tart. Apricot Tarte Tatin serves as a refreshing summer alternative, showcasing how stone fruits can be substituted to create new flavor profiles. The History and Evolution of Tarte Tatin The Accidental Invention by the Tatin Sisters The Tarte Tatin, an iconic French dessert, owes its existence to a serendipitous mishap by the Tatin sisters. The tart's creation is a testament to the happy accidents that can occur in the kitchen, leading to timeless culinary masterpieces. Originally, the dessert was intended to be a traditional apple pie, but in the heat of a busy kitchen, the apples were caramelized in butter and sugar longer than intended. While the exact details of the incident are shrouded in the mists of time, the Tarte Tatin's popularity has only grown. It has inspired chefs around the world to create their own versions, each adding a personal touch to this classic dish. Below is a list of key elements that define the Tarte Tatin: Caramelized fruit, traditionally apples Buttery puff pastry or shortcrust The crucial 'flip' that inverts the tart onto a plate A rustic yet elegant presentation The Tarte Tatin continues to be a beloved dessert, enjoyed for its simplicity and the rich, comforting flavors that evoke the French countryside. The Classic Apple Tarte Tatin The classic Apple Tarte Tatin stands as a testament to the happy accidents that can occur in the kitchen. Originating from a serendipitous mishap, this dessert has become a beloved staple in French cuisine. The simplicity of its ingredients belies the complexity of its flavors, where the natural sweetness of apples is enhanced by the richness of caramel. To achieve the perfect balance of tender fruit and crisp pastry, one must pay close attention to the quality of apples used. Traditionally, varieties such as Golden Delicious or Granny Smith are favored for their ability to hold shape and provide a slight tartness, complementing the sweet caramel. While the tarte is often enjoyed as is, some prefer to serve it with a dollop of crème fraîche or a scoop of vanilla ice cream, adding a creamy texture that contrasts wonderfully with the warm apples and flaky pastry. Variations and Modern Twists The Tarte Tatin has come a long way from its origins in the French countryside. Chefs and home cooks alike have embraced the challenge of adding their own spin to this classic dessert. From the incorporation of different fruits to the exploration of savory versions, the possibilities are endless. A notable example is the Fresh Tomato Tarte Tatin, a savory upside-down tart that features fresh tomatoes, caramelized onions, and puff pastry. Modern variations often include ingredients that reflect local flavors or seasonal availability. For instance, stone fruits like peaches or plums can offer a summer twist, while pears or quince provide a delightful option for the cooler months. Here's a quick list of popular variations: Pear and Almond Tarte Tatin Peach Caramel Tarte Tatin Savory Mushroom and Goat Cheese Tarte Tatin Culinary Techniques for the Perfect Tarte Tatin Choosing the Right Ingredients The foundation of a perfect Tarte Tatin lies in the selection of its ingredients. Quality is paramount, especially when it comes to the star of the show: the apples. Opt for varieties that hold their shape and have a balance of sweetness and acidity, such as Honeycrisp or Granny Smith. When considering the puff pastry, a homemade dough can elevate the dish, but a high-quality store-bought version can also yield excellent results. Ensure it's buttery and capable of puffing to the desired flakiness. For a savory twist, ingredients like tomatoes or onions can transform the Tarte Tatin into a delightful dinner option. The PBS Food recipe for Fennel and Onion Tarte Tatin emphasizes keeping the onion rings whole for a visually appealing presentation. Mastering the Caramelization Process The heart of a Tarte Tatin lies in its caramelization process, a step that transforms simple ingredients into a deep, rich flavor symphony. To achieve the perfect caramel, begin by melting sugar over low heat, allowing it to dissolve completely before increasing the temperature. Swirl the pan gently to ensure even cooking and prevent burning. The sugar will gradually turn into a golden amber syrup, signaling it's time to incorporate the butter and, if desired, a hint of lemon juice for balance. Remember to gently move the ingredients in the pan, such as tomatoes or apples, to avoid sticking. If using a cast iron skillet, be mindful of its weight when it comes time to invert the tart. A lighter pan may offer more control. The flip is crucial; ensure the edges are loosened and the caramel hasn't caused sticking to the pan's base. The Art of the 'Flip': Inverting Your Tarte Tatin Mastering the flip of a Tarte Tatin is crucial to its presentation and can be the most nerve-wracking part of the process. The key to a successful flip is confidence and preparation. Before attempting the flip, ensure that your plate is larger than the skillet and that the tarte has cooled slightly to help it set. Allow the tarte to cool for a few minutes after baking. Run a knife around the edge to loosen the pastry. Place a plate over the skillet. Hold the skillet and plate firmly together and invert quickly. Remember, practice makes perfect. If your first flip isn't flawless, don't be discouraged. Each Tarte Tatin is a learning experience, leading to that perfect inversion. Heirloom Tomato Tarte Tatin: A Savory Delight Preparation and Cooking Tips Creating the perfect Heirloom Tomato Tarte Tatin requires a blend of technique and timing. Begin by preheating your oven to 425 degrees, a crucial step for ensuring your tarte cooks evenly. Next, prepare your tomatoes for caramelization. Start with 2 lbs. of meaty tomatoes, which will provide the best texture and flavor. Blanch the tomatoes by scoring a shallow X at the bottom and plunging them into boiling water until the skins start to peel back. This should take about 30 to 60 seconds. Immediately transfer them to a bowl of ice water to halt the cooking process and make peeling easier. Once the tomatoes are peeled and the base is ready, layer the ingredients in the pan with care, as this will affect the final presentation after the tarte is inverted. Remember, the art of the 'flip' is crucial for a tarte tatin, so prepare your serving plate next to the oven for a smooth transition. The Five-Ingredient Recipe Breakdown Creating a savory Heirloom Tomato Tarte Tatin is remarkably straightforward, requiring only five key ingredients. The simplicity of the recipe highlights the natural flavors of the tomatoes, enhanced by a touch of sweetness and the richness of butter. Tomatoes: Opt for heirloom varieties like the meaty 'Opalka' for their robust flavor and fewer seeds. Slicer tomatoes can also be used, but ensure they are cut thickly to maintain structure. Butter: Acts as the base for the caramelization and provides a rich, indulgent taste. Sugar: Balances the acidity of the tomatoes and aids in the caramelization process. Puff Pastry: Offers a flaky, buttery crust that perfectly complements the tomatoes. Vanilla: A hint of vanilla can add a subtle depth of flavor; alternatively, a splash of balsamic vinegar can introduce a tangy twist. Remember, the quality of your ingredients will directly influence the taste of your tarte, so choose them with care. The result is a delightful juxtaposition of sweet and savory, encased in a perfectly crisp pastry. Serving Suggestions and Pairings The versatility of Heirloom Tomato Tarte Tatin allows it to be paired with a variety of sides and beverages. A crisp white wine or a light-bodied red enhances the tart's flavors. For a non-alcoholic option, consider a sparkling elderflower beverage. When planning your menu, consider the following pairings: A fresh arugula salad with a lemon vinaigrette Grilled asparagus with a touch of sea salt A selection of artisan breads to complement the savory tart For a more formal dining experience, present the tarte tatin as the centerpiece of your meal, accompanied by a curated selection of cheeses and charcuterie. This combination not only delights the palate but also creates an elegant visual appeal. Apricot Tarte Tatin: A Sweet Summer Variation Selecting the Best Apricots for Your Tart The key to a delightful Apricot Tarte Tatin starts with selecting the best apricots. When in season, opt for fresh, small apricots that are firm to the touch. The ideal candidates will have a vibrant orange hue, indicating ripeness and flavor. It's crucial to avoid apricots with soft spots, wrinkles, or excessive green patches, as these can affect the overall texture and sweetness of your tart. If fresh apricots are not available, tinned apricots can be a suitable alternative. Ensure that they are well-drained to prevent excess moisture from making the pastry soggy. Remember, the quality of your apricots will directly influence the taste and presentation of your tarte tatin. Step-by-Step Guide to Apricot Tarte Tatin Creating the perfect Apricot Tarte Tatin is a delightful journey through taste and texture. Begin by preheating your oven to 200C and ensure your pastry remains chilled until it's time to use. Melt butter and sugar in an ovenproof frying pan until you achieve a golden caramel, which usually takes about 3-5 minutes. Next, arrange the apricot halves in a circular pattern atop the caramel. You may find you have a few apricot halves left over; these can be used for garnishing or another recipe. Trim your pastry into a roundish shape, fitting it over the apricots, and tuck the edges in snugly. Remember, the art of the 'flip' is essential for a successful Tarte Tatin. It requires confidence and a bit of practice, but the result is a stunning dessert that's sure to impress. Nutritional Information and Dietary Considerations When indulging in the sweetness of an Apricot Tarte Tatin, it's important to be mindful of its nutritional impact. Nutrition information should be seen as an approximation, and for those with dietary restrictions, it's crucial to be aware of the ingredients used. Here's a brief overview of the nutritional content per serving: Remember, these values can vary based on the specific recipe and portion size. For those with allergies or food sensitivities, common allergens include Egg, Milk, Soy, and Wheat. Always check the label for potential cross-contamination in manufacturing facilities. Conclusion The Tarte Tatin, with its rich history and versatile nature, stands as a testament to the creativity and resilience of French cuisine. From the classic apple to the innovative glazed beet and thyme, and the savory caramelized tomato versions, this dessert showcases the ability to transform simple ingredients into a stunning, upside-down pastry delight. Whether following the traditional methods or watching a step-by-step video tutorial, the key to a perfect Tarte Tatin lies in the careful caramelization of the filling and the daring 'flip' that reveals its beauty. As we've explored various recipes and tips, it's clear that the Tarte Tatin is more than just a dessert; it's a culinary adventure that invites both novice and experienced bakers to partake in its delicious legacy. Frequently Asked Questions What is Tarte Tatin? Tarte Tatin is a classic French dessert, an upside-down pastry pie traditionally filled with caramelized apples. It is baked with the pie filling at the bottom of the dish or pan and the crust on top, then inverted to serve. Who invented Tarte Tatin? Tarte Tatin was accidentally invented by two French sisters, Stéphanie and Caroline Tatin, at their hotel in the Loire Valley of France in the late 19th century. Can I make Tarte Tatin with fruits other than apples? Yes, while apple is the classic filling, Tarte Tatin can be made with a variety of fruits, such as apricots, pears, or even savory versions with vegetables like heirloom tomatoes. What are the key steps to making a perfect Tarte Tatin? The key steps include selecting the right ingredients, mastering the caramelization process of the fruit or vegetables, and carefully inverting the baked tart to reveal the caramelized topping. How many calories are in a serving of Heirloom Tomato Tarte Tatin? A serving of Heirloom Tomato Tarte Tatin contains approximately 302 calories. Is Tarte Tatin suitable for vegetarians? Yes, Tarte Tatin can be suitable for vegetarians, but it's important to check the ingredients of the pastry to ensure it doesn't contain any animal-derived fats if you're adhering to a strict vegetarian diet.
- "How to Make the Perfect Torta Caprese: A Decadent Gluten-Free Chocolate Almond Cake"
Torta Caprese, a luscious flourless chocolate cake hailing from the sun-kissed isle of Capri, has been tantalizing taste buds since its accidental creation in the 1920s. This rich dessert, traditionally made with ground almonds and dark chocolate, has evolved over time, incorporating new twists like the zesty Torta Caprese al Limone. Today, it's a staple in Campania's pasticcerias, reflecting the region's culinary heritage and offering a gluten-free indulgence for dessert aficionados. Key Takeaways Torta Caprese is a beloved Italian chocolate and almond cake that originated on the island of Capri, offering a rich, brownie-like experience without the use of flour. The cake's history is sprinkled with anecdotes, including an alleged encounter with Al Capone's associates and a chef's fortuitous omission of flour. Torta Caprese's recipe is simple yet precise, requiring quality dark chocolate, almond flour, and a careful technique to achieve its characteristic texture. Variations like Torta Caprese al Limone showcase the adaptability of the recipe, incorporating local flavors such as the Amalfi Coast's famed lemons. As a naturally gluten-free dessert, Torta Caprese holds a special place in contemporary Italian cuisine and caters to a wider audience with dietary restrictions. The Origins and Evolution of Torta Caprese The Birth of a Flourless Delight on the Isle of Capri The accidental creation of Torta Caprese is a testament to the serendipity of culinary innovation. In 1920, chef Carmine Di Fiore, while attempting to bake a chocolate almond cake, omitted flour, leading to the birth of a dense, rich, and flourless chocolate cake that would become a hallmark of Capri's dessert offerings. The mistake turned into a masterpiece, with a unique texture that combines a thin, crunchy crust with a truffle-like interior. While the original recipe remains a closely guarded secret, the key ingredients are known to be dark chocolate, almonds, eggs, and sugar. Here is a brief list of these essential components: Dark Chocolate Almonds Eggs Sugar This confection not only delighted local palates but also captured the hearts of visitors, securing its place in the annals of Italian culinary history. From Al Capone's Alleged Encounter to Modern Pasticcerias The tale of Torta Caprese intertwines with the mystique of the infamous Al Capone. According to popular lore, the cake's accidental creation occurred when Chef Carmine di Fiore, while preparing an almond cake for Capone's associates, omitted flour, leading to the birth of this unique dessert. The result was a serendipitous masterpiece, crispy on the outside with a rich, dense interior. As the cake gained fame, it evolved beyond its original chocolate and almond composition. In 2007, a new variation emerged: Torta Caprese al Limone. This version, conceived by pastry chef Salvatore De Riso, incorporates white chocolate, fresh lemon zest, and candied peel, offering a citrusy counterpoint to the classic. Modern pasticcerias continue to honor the tradition while infusing creativity into each Torta Caprese they craft. The table below showcases the key differences between the traditional chocolate Torta Caprese and its lemony sibling: The evolution of Torta Caprese reflects the dynamic nature of Italian cuisine, where respect for tradition meets the excitement of innovation. The Rise of Torta Caprese al Limone: A Citrusy Twist The Torta Caprese al Limone emerged as a vibrant variant of its chocolate counterpart, infusing the traditional recipe with the zest of the Amalfi Coast's sfusato Amalfitano lemons. This lemony twist was conceived by Salvatore De Riso, a renowned pastry chef, who introduced it in 2007, adding a refreshing dimension to the classic dessert. While the original Torta Caprese is a celebration of almonds and chocolate, the al Limone version is a harmonious blend of almond flour, sugar, eggs, and, most importantly, the incorporation of lemon zest and juice. The result is a cake that is both moist and fragrant, with a delicate balance of sweet and tart flavors. To experience the full delight of this dessert, it is often garnished with confectioners' sugar, stenciled with the word 'Caprese', and sometimes adorned with whipped cream, candied lemon peel, and white chocolate shavings. It's a testament to the creativity and innovation that continues to thrive in Italian pasticcerias. Decoding the Classic Torta Caprese Recipe Essential Ingredients for the Authentic Taste Achieving the authentic taste of Torta Caprese hinges on using high-quality ingredients that adhere to tradition. At the heart of this flourless chocolate cake lies a rich blend of finely chopped bittersweet chocolate and unsalted butter, which provides the dessert's luxurious texture and deep flavor. The eggs, separated into yolks and whites, play a crucial role in the structure and airiness of the cake. Bittersweet chocolate (8 ounces, finely chopped) Unsalted butter (8 tablespoons, cut into pieces) Large eggs (4, separated) Remember, the key to a successful Torta Caprese is not just in the mixing but in the quality of the ingredients used. Each element should be measured with precision and prepared with care to ensure the final product is a true slice of history. Step-by-Step Guide to Baking the Perfect Torta Caprese Achieving the perfect Torta Caprese is an art that begins with preheating your oven to a precise temperature. Start by warming the oven up to 325 degrees Fahrenheit and prepare a springform pan by greasing and lining it with parchment paper. This ensures that your cake will release easily after baking. Next, melt 3/4 cup of dark chocolate (around 70% cacao) with 1/2 cup of cubed unsalted butter. The quality of chocolate is crucial for the intense flavor Torta Caprese is known for. In a separate bowl, whisk together 3 large egg yolks with 1/2 cup of granulated sugar until the mixture is pale and thick. Gently fold in 1 3/4 cups of almond flour to incorporate the dry ingredients without deflating the eggs. In another bowl, beat the egg whites until stiff peaks form. This step is vital for the signature texture of the cake. Carefully fold the egg whites into the chocolate mixture in stages to maintain the airiness. Pour the batter into the prepared pan and bake in the middle of the oven for about 30 to 35 minutes. The cake should be moist inside; use a toothpick to test the center of the cake at 25 minutes. Tips and Tricks for Achieving the Signature Texture Achieving the signature texture of Torta Caprese is an art that requires attention to detail and precision in the baking process. The almond flour contributes to the unique texture of Torta Caprese, and it's crucial to use it as a substitute for regular flour to maintain the cake's character. Here are some tips to ensure you get that perfect crumb: Temperature control is vital; bake in a preheated oven and consider using an oven thermometer for accuracy. Consistency in your batter is key. Ensure that it is not too thick nor too thin for the best texture. Properly prepare your pan with lining and greasing to help the cake release easily after baking. Remember, patience and a steady hand during the baking process will yield the best results. Alternate between spoonfuls of batter carefully to maintain the integrity of the cake's layers and patterns. Culinary Variations and Serving Suggestions Innovative Twists on the Traditional Recipe The timeless Torta Caprese has seen a myriad of creative reinterpretations, each adding a unique flair to the classic. Bakers are experimenting with alternative flavors and toppings, infusing the dessert with new life. For instance, a glossy chocolate ganache can replace the traditional frosting, introducing a richer cocoa essence. White chocolate as a base for a 'cioccolato bianco' version Artichoke or zucchini infused into the creamy filling Strawberry tiramisù, a fruity take on the classic Pistachio 'brutti ma buoni', deviating from the usual hazelnut The influence of social media has also played a significant role in the evolution of this dessert, encouraging food enthusiasts to explore the characteristic creamy filling with a DIY approach. This trend highlights the intersection of tradition and innovation, where even the most revered dishes can be reimagined while maintaining their essence. Pairing Torta Caprese with Complementary Flavors The rich and dense nature of Torta Caprese makes it an ideal canvas for a variety of complementary flavors. When considering pairings, think about flavors that can cut through the richness or add a contrasting texture to enhance the overall experience. Sweet: A dollop of whipped cream or a scoop of vanilla gelato can add a light and sweet contrast to the dense cake. Citrus: Fresh berries or a citrus glaze can introduce a refreshing tartness that balances the chocolatey depth. Nutty: A sprinkle of toasted hazelnuts or almonds can amplify the inherent nuttiness of the cake. Boozy: A drizzle of amaretto or a shot of espresso can infuse the cake with a warm, aromatic complexity. Presentation Ideas for the Ultimate Dessert Experience When it comes to presenting Torta Caprese, the finished cake itself is a masterpiece of simplicity and elegance. A chic, less-is-more approach is often best, allowing the rich flavors and textures to take center stage. Here are a few ideas to enhance the visual appeal and taste of this classic dessert: A light dusting of confectioner's sugar or cocoa powder can add a touch of sophistication. For a burst of color and freshness, top the cake with seasonal fruits. A dollop of whipped cream can provide a creamy contrast to the dense chocolate. Consider serving each slice with a side of espresso or dessert wine to complement the intense chocolate flavor. Torta Caprese in Contemporary Italian Cuisine The Role of Torta Caprese in Italian Pasticcerias In the heart of Italian pasticcerias, the Torta Caprese stands as a testament to the country's rich dessert culture. This flourless chocolate and almond cake has become a staple in Campania's bakeries, reflecting the region's culinary heritage. Its presence is a nod to tradition, yet it offers a gluten-free option that caters to modern dietary preferences. Italian pasticcerias take pride in their Torta Caprese, often presenting it with a dusting of confectioners' sugar and a stenciled 'Caprese' in elegant cursive. The cake's versatility allows for various interpretations, from the classic chocolate version to the lemon-infused Torta Caprese al Limone, each offering a unique taste experience. The classic chocolate Torta Caprese is a bittersweet delight with a shiny, crackly top. Lemon Caprese introduces a citrusy twist, often garnished with whipped cream and candied peel. The cake's gluten-free nature makes it an inclusive dessert, suitable for those with dietary restrictions. How Torta Caprese Reflects Italian Dessert Traditions Torta Caprese is a testament to the ingenuity and simplicity that characterizes Italian desserts. Its rich history and unique flourless composition make it a standout among Italy's sweet offerings. Originating from the Isle of Capri, this dense almond-chocolate cake has become a beloved classic, embodying the Italian penchant for using quality ingredients to create deeply flavorful and texturally diverse desserts. The cake's signature texture, a fudgy interior with a shiny, crackly lid, is a result of its distinctive ingredient list, which eschews flour in favor of ground almonds. This not only imparts a moist almond texture but also makes Torta Caprese a naturally gluten-free option, accommodating dietary restrictions without sacrificing taste. In contemporary Italian cuisine, Torta Caprese continues to be a versatile canvas for innovation, with variations that include citrus zest or a dusting of confectioners' sugar. Each bite of this rich and fudgy cake is a celebration of Italian dessert traditions, adored by chocolate lovers worldwide. Torta Caprese's Place in Gluten-Free Baking The Torta Caprese has carved out a significant niche within the realm of gluten-free baking. Its naturally flourless composition makes it a beloved choice for those with gluten sensitivities or celiac disease. The traditional use of ground almonds instead of wheat flour provides not only a rich flavor but also a moist, dense texture that is characteristic of this Italian dessert. While the classic recipe remains a staple, contemporary variations often incorporate alternative ingredients such as coconut flour or hazelnut meal to cater to diverse dietary preferences and enhance the flavor profile. The following list outlines some of the key benefits of Torta Caprese in gluten-free baking: A safe and delectable option for those avoiding gluten Maintains a luxurious texture and rich taste without wheat flour Adaptable to various dietary needs with ingredient substitutions Serves as a testament to the versatility and innovation in gluten-free dessert creation In essence, Torta Caprese not only upholds the rich traditions of Italian pasticcerias but also embraces the evolving needs of modern consumers, offering a sumptuous dessert that is both inclusive and indulgent. Conclusion Torta Caprese, with its rich history and decadent flavors, has become a beloved dessert that transcends its Capri origins. Whether it's the classic chocolate and almond version or the zesty Torta Caprese al Limone, this flourless cake offers a delightful experience for chocolate aficionados and dessert lovers alike. Its gluten-free nature makes it an inclusive option for various dietary needs, while the simple yet versatile recipe allows for creativity in the kitchen. From the traditional dusting of powdered sugar to the addition of whipped cream or citrus accents, Torta Caprese remains a timeless Italian treat that continues to captivate taste buds around the world. Frequently Asked Questions What is Torta Caprese and where does it originate from? Torta Caprese is a flourless chocolate and almond cake that originates from the island of Capri in Italy. It is known for its dense, moist texture and rich flavor. What are the key ingredients in a classic Torta Caprese? The key ingredients in a classic Torta Caprese include dark chocolate, almonds (or almond flour), eggs, sugar, and butter. It is traditionally served dusted with powdered sugar. How does Torta Caprese al Limone differ from the classic version? Torta Caprese al Limone is a variation that includes lemon juice and zest, offering a citrusy twist to the traditional chocolate and almond flavors. It was created by pastry chef Salvatore De Riso in 2007. Can Torta Caprese be made gluten-free? Yes, Torta Caprese is naturally gluten-free as it does not contain flour. This makes it a great dessert option for those with gluten sensitivities or celiac disease. What are some popular variations of Torta Caprese? Variations of Torta Caprese may include adding different flavors such as orange zest or serving it with whipped cream, candied peel, and white chocolate shavings for additional texture and taste. Is Torta Caprese suitable for special occasions? Absolutely! Torta Caprese's rich and luxurious taste makes it perfect for special occasions, and its elegant presentation can impress guests at any gathering.
- "Creating the Perfect Mont Blanc Cake: Tips and Tricks for a Delicious Dessert"
The Mont Blanc Cake, a luxurious dessert that mirrors the majesty of its namesake mountain, has captivated the taste buds of sweet connoisseurs around the world. With its delicate meringue base and sumptuous chestnut cream, this pastry has evolved from its Alpine origins to become a modern patisserie staple. In this article, we'll explore the rich history, complex flavors, and expert techniques that make the Mont Blanc Cake a towering achievement in the world of desserts. Key Takeaways The Mont Blanc Cake is an exquisite dessert that features a meringue base topped with a distinctive chestnut cream, often recognized more than the actual Mont Blanc mountain. Its creation is attributed to the pastry chefs of the Grandes Jorasses region, where the dessert is still crafted to perfection in local bakeries and by renowned chefs like Paolo Griffa. Despite its elaborate appearance, the Mont Blanc Cake is accessible for home cooks to attempt, offering a rewarding challenge for those passionate about pastry arts. The dessert not only showcases the flavors and textures of its components but also represents a culinary homage to the grandeur and complexity of the Mont Blanc mountain range. Proper presentation and pairing are crucial for enhancing the Mont Blanc Cake experience, with suggestions ranging from artistic garnishing to selecting complementary beverages. The History and Significance of Mont Blanc Cake Origins and Cultural Impact The Mont Blanc cake, much like the Yule log cake, has a rich history that intertwines with the cultural fabric of France. Move beyond croissants; the Mont Blanc cake stands as a testament to the country's culinary innovation and its penchant for creating pastries that are as aesthetically pleasing as they are delicious. Originating in the 19th century, the cake quickly became a symbol of French patisserie excellence, with Parisian bakers vying to craft the most elaborate and ornate versions of this dessert. While the Mont Blanc cake may not have the ancient roots of the Yule log tradition, it shares a similar trajectory of becoming a beloved treat across borders. The cake's name, inspired by the highest peak in the Alps, reflects both its appearance and the pinnacle of dessert craftsmanship it represents. Today, the Mont Blanc cake is celebrated not just in France but around the world, embodying the spirit of French pastry artistry. Mont Blanc Cake in Modern Pastry The Mont Blanc cake has transcended its Alpine origins to become a staple in the repertoire of patisseries worldwide. Its iconic appearance and complex flavor profile have made it a favorite among dessert aficionados. In the hands of contemporary pastry chefs, the Mont Blanc has been reimagined, maintaining its classic elements while embracing modern techniques and presentations. In upscale establishments, the Mont Blanc is often a testament to a pastry chef's skill. For instance, at The Dorchester, Executive Pastry Chef Michael Kwan leads a team that crafts exquisite versions of this dessert, showcasing the meticulous artistry required for its assembly. The Mont Blanc's adaptability has also led to variations that incorporate local ingredients or seasonal twists, further cementing its status in modern pastry. The Mountain and the Dessert: A Parallel The Mont Blanc cake, with its majestic peaks of chestnut cream and meringue base, mirrors the grandeur of its namesake mountain in both form and spirit. The dessert's ascent to the pinnacle of pastry artistry is akin to scaling the heights of the Alpine giant itself. Just as the Mont Blanc mountain is surrounded by notable peaks such as the Dôme du Goûter and the Aiguille du Midi, the dessert is complemented by a variety of textures and flavors that enhance its overall experience. The dessert's complexity is a testament to the creativity and skill of the pastry chef, much like the mountain's challenging terrain showcases the mountaineer's expertise. While the mountain reveals its stature gradually, the dessert commands immediate attention with its intricate chestnut cream piping. Both are feats of engineering in their own right, whether it's the natural formation of the Alps or the careful construction of the cake by a skilled pastry chef. Decoding the Layers of Flavor The Meringue Foundation The foundation of any Mont Blanc cake lies in its meringue base, a delicate balance of crispness and lightness that sets the stage for the layers to come. The meringue must be firm to the touch after baking, ensuring it can support the weight of the chestnut cream and other components. The process begins with egg whites at room temperature, whipped to soft peaks resembling shaving cream, before granulated sugar is gradually added. To achieve the perfect meringue caps, precision is key. Once piped onto the baking sheet, only the most flawless meringues are selected to form the base of the dessert. Here's a simple breakdown of the meringue preparation: Whip egg whites with a pinch of salt until soft peaks form. Gradually add sugar, continuing to whip to stiff peaks. Pipe rounds onto a baking sheet and bake until firm. Patience is essential when baking the meringue, as it requires a slow and low heat to dry out without coloring. Once cooled, these meringue caps become the canvas upon which the Mont Blanc cake is built, promising a delightful contrast to the rich chestnut cream. Chestnut Cream: The Star of the Show At the heart of the Mont Blanc cake lies the luxurious chestnut cream, a blend of earthy flavors and creamy texture that truly defines this classic dessert. The cream is typically made from a base of chestnut purée, enriched with ingredients like mascarpone and heavy cream to create a rich and velvety component. To achieve the perfect consistency and flavor, the chestnut cream is carefully balanced with sweetness and often enhanced with a hint of vanilla or a splash of rum for depth. Below is a basic recipe structure for chestnut cream: Heavy cream and mascarpone provide the creamy foundation. Egg yolks and sugar are whisked together for richness and sweetness. Chestnut purée is folded in to impart the signature nutty flavor. Gelatin may be added to stabilize the cream for piping. While variations exist, such as the addition of sweet potatoes or chocolate elements, the traditional chestnut cream remains a beloved favorite. Some patisseries, like FUJI BAKERY in Seattle, have even adapted the Mont Blanc into a yule log, incorporating rum flavored crème chantilly and candied chestnuts to celebrate the festive season. Complementary Components and Textures Beyond the meringue and chestnut cream, the Mont Blanc cake harmonizes a variety of complementary components that enhance its overall texture and flavor profile. The choice of ingredients and their textural contrast play a pivotal role in the cake's sensory appeal. Whipped cream adds a light, airy layer that contrasts with the dense chestnut cream. Dark chocolate shavings or curls can be sprinkled on top for a bittersweet note and a delicate crunch. A base of sponge cake or almond biscuit provides a soft, chewy foundation that absorbs the chestnut cream's moisture. Each element should be carefully considered to ensure they complement rather than overpower the main flavors. The Mont Blanc cake is a symphony of textures, from the crisp meringue to the velvety chestnut cream, each bite is a discovery of new sensations. Mastering the Mont Blanc: A Step-by-Step Guide Preparing the Meringue Base The foundation of a Mont Blanc cake lies in its delicate meringue base, a component that requires precision and patience. Begin by preheating the oven to 200\u00b0F (95\u00b0C) and lining a baking sheet with parchment paper. Mark the paper with twelve five-centimeter circles as a guide for piping. Continue to whip the egg whites, adding the sugar one-third at a time, until stiff peaks form. This is the stage where the meringue is glossy and holds its shape firmly. Transfer the meringue to a pastry bag fitted with a plain tip and pipe onto the prepared circles on the baking sheet. Selecting the best six meringues after baking is crucial for a symmetrical presentation. Bake the meringues for 1-1/2 to two hours, or until they are firm to the touch. If they begin to color, reduce the oven temperature to prevent browning. Once baked, transfer the meringues to a cooling rack to cool completely before assembly. Piping the Iconic Chestnut Cream The chestnut cream is the heart of the Mont Blanc cake, and its preparation is a delicate process. Begin by combining the chestnut pur\u00e9e with mascarpone and heavy cream, ensuring a smooth and homogenous mixture. This blend is then enriched with egg yolks and sugar, creating a rich and velvety cream. Using a Mont-Blanc piping tip, the cream is artfully piped onto the meringue base, mimicking the snow-capped peaks of its namesake mountain. The technique requires a steady hand and a gentle touch to create the characteristic spaghetti-like strands. For those new to this technique, practicing on parchment paper before moving to the actual cake can be very helpful. Remember, the goal is to build a mountain of cream that is both aesthetically pleasing and structurally sound. The final product should not only look impressive but also offer a harmonious blend of textures and flavors with each bite. Assembling and Finishing Touches With the meringue base crisp and ready, and the chestnut cream piped to perfection, the final stage of assembling your Mont Blanc cake is both thrilling and delicate. Ensure each layer is balanced to maintain the cake's structural integrity. Begin by placing the meringue base on your serving platter, followed by a layer of whipped cream. Carefully spoon or pipe the chestnut cream over the whipped cream, creating the iconic Mont Blanc peak. Finally, garnish with a light dusting of powdered sugar to mimic the snow-capped mountain and add any additional decorations, such as chocolate shavings or edible gold leaf, for a touch of luxury. Here's a quick checklist to ensure you don't miss any steps: Place the meringue base on the serving platter Add a layer of whipped cream Pipe the chestnut cream to form peaks Dust with powdered sugar Garnish with desired decorations Remember, the Mont Blanc cake is best enjoyed fresh. If you must store it, keep it refrigerated and consume within 24 hours to savor its delicate flavors and textures. Pastry Chef Insights: Tips and Tricks Advice from Paolo Griffa Paolo Griffa, the Alpine pastry wizard from the Petit Royal restaurant in Courmayeur, shares invaluable insights into crafting the perfect Mont Blanc cake. His approach to the dessert is akin to a feat of engineering, requiring precision and creativity. Griffa emphasizes the importance of quality ingredients and meticulous technique to achieve the dessert's signature appearance and taste. Select the finest chestnuts: The quality of the chestnut cream is pivotal to the Mont Blanc's flavor profile. Achieve the right consistency: The cream must be smooth yet firm enough to hold its shape when piped. Temperature control: Meringue and cream should be at optimal temperatures for handling. Griffa's guidance extends beyond the basics, offering strategies to refine each layer of the cake. His tips are not just instructions but a philosophy for aspiring pastry chefs to embrace. Common Pitfalls and How to Avoid Them While the classic Mont Blanc cake is a masterpiece in its own right, personal touches can elevate the dessert to new heights. Experimenting with different textures and flavors can lead to delightful variations that cater to individual preferences. For instance, incorporating a layer of fruit compote can add a refreshing twist to the rich chestnut and meringue ensemble. Another common pitfall is the cake becoming excessively oily, which can be a result of improper ingredient ratios or technique. To avoid this, be meticulous with measurements and follow the recipe closely. If you're looking to simplify the process, consider using premade components like pastry shells, but always ensure they are of high quality to not compromise the overall taste and texture of your Mont Blanc. Remember, the key to a successful customization is to start with small, subtle changes and to taste test frequently. This way, you can ensure that your personal twist enhances the cake rather than overshadowing the classic flavors that make it so beloved. Customizing Your Mont Blanc Cake While the classic Mont Blanc cake is a marvel of pastry tradition, personal touches can transform this dessert into a unique creation. Experimenting with different textures and flavors can lead to delightful variations that cater to individual tastes. For instance, incorporating spices such as cinnamon or vanilla into the chestnut cream can add a warm, aromatic dimension. Customization can also extend to the meringue base. Consider adding a hint of citrus zest or swapping the traditional vanilla for almond extract to give it a distinctive twist. Here's a simple guide to flavor additions: Chestnut Cream: Cinnamon, vanilla, rum Meringue Base: Lemon zest, almond extract, cocoa powder Finally, don't be afraid to play with the presentation. A dusting of powdered sugar can mimic the snowy peaks of Mont Blanc, while a sprig of mint or a few edible flowers can add a pop of color and freshness. The goal is to make your Mont Blanc as visually appealing as it is delicious. Serving and Pairing Suggestions Presentation and Garnishing Ideas The presentation of Mont Blanc Cake is just as important as its flavor. A well-garnished Mont Blanc can elevate the dessert from delicious to unforgettable. Consider using elements that complement the cake's aesthetic and taste. For instance, a dusting of powdered sugar can mimic the snowy peak of its namesake mountain, while a sprig of rosemary adds a touch of greenery reminiscent of alpine forests. To create a visually stunning Mont Blanc, here are some garnishing ideas: Marzipan mushrooms to add an enchanting forest feel Crushed pistachio moss for a pop of color and texture Holly garnishes to bring a festive touch Remember, the key is to enhance the cake without overwhelming it. A thoughtful garnish not only adds to the visual appeal but can also introduce new flavor dimensions. Pairing with Beverages and Other Desserts The Mont Blanc cake, with its rich chestnut flavor and delicate meringue, pairs wonderfully with a variety of beverages and other desserts. Selecting the perfect accompaniment can elevate the overall tasting experience. Coffee: A strong espresso or a creamy latte can complement the sweetness of the cake. Tea: Black tea or a floral herbal tea balances the rich flavors. Dessert Wines: A sweet Moscato or a Port wine pairs nicely with the chestnut cream. Other Desserts: Pair with lighter desserts like fruit sorbets or panna cotta to avoid flavor competition. Storing and Serving Recommendations Proper storage of your Mont Blanc cake is crucial to maintain its delicate flavors and textures. Keep the cake refrigerated until it's time to serve, ideally within 3-4 days for optimal freshness. If you must store the cake for a longer period, consider freezing individual components before assembly. When serving, allow the cake to sit at room temperature for about 10-15 minutes for the flavors to become more pronounced. For a seamless experience, slice with a warm, sharp knife to ensure clean cuts through the meringue and chestnut cream layers. Here's a quick checklist for storing your Mont Blanc cake: Store in an airtight container to prevent moisture loss. Refrigerate for 3-4 days; freeze for longer storage. Thaw frozen components in the fridge overnight before assembly. Serve at room temperature for the best flavor experience. Conclusion The Mont Blanc cake, with its majestic peaks of chestnut cream and meringue base, is a dessert that mirrors the grandeur of its namesake mountain. As we've explored, this exquisite treat is not just a feast for the eyes but also a testament to the art of pastry making. Whether you're a seasoned home cook or a culinary enthusiast, the journey to creating your own Mont Blanc cake is one of passion and precision. From the local bakeries nestled in the Grandes Jorasses to the innovative creations of pastry chefs like Paolo Griffa, the Mont Blanc cake remains a beloved masterpiece. It invites us to savor the flavors of the Alps and to embrace the challenge of crafting a dessert as impressive as the mountain itself. Frequently Asked Questions What is Mont Blanc cake and how does it relate to the mountain? Mont Blanc cake is a dessert featuring finely piped chestnut cream on a meringue base, visually reminiscent of the snow-capped Mont Blanc mountain. The dessert and the mountain share a name, and both are iconic in their respective fields. Can Mont Blanc cake be made at home, and is it difficult? Yes, Mont Blanc cake can be made at home. While it may look ambitious, with the right guidance and patience, it is totally possible for a home cook to recreate this dessert. Where can I find the best Mont Blanc cake? The best Mont Blanc cake is often found in local bakeries around the Grandes Jorasses mountain on the border between Haute-Savoie and Aosta, and in Paris. Trendy pastry chefs on Instagram also showcase high-quality versions of this dessert. What are the key components of Mont Blanc cake? The key components of Mont Blanc cake include a meringue foundation and the iconic chestnut cream. Complementary components may vary, but these two elements are central to the dessert. Do pastry chefs offer tips for making the perfect Mont Blanc cake? Yes, pastry chefs like Paolo Griffa provide valuable insights and tips for making the perfect Mont Blanc cake. Their advice can help you avoid common pitfalls and customize the dessert to your taste. How should Mont Blanc cake be served and stored? Mont Blanc cake should be served chilled and can be garnished with additional elements for presentation. It pairs well with certain beverages and desserts. For storage, keep it refrigerated and consume within a reasonable time to maintain its quality.
- "Indulge in a Delicious Twist with a Cendol Cake: A Unique Dessert Experience"
Cendol Cake, an innovative dessert, marries the refreshing taste of the traditional Southeast Asian drink, Cendol, with the indulgent texture of cake. This article delves into the origins, artistry, and variations of Cendol Cake, providing a guide for those eager to explore this unique fusion of flavors and textures. From its cultural significance to modern adaptations, Cendol Cake represents a creative culinary evolution that is as delightful to the palate as it is to the eye. Key Takeaways Cendol Cake transforms the beloved Southeast Asian iced dessert into a baked delight, incorporating the distinctive flavors of coconut milk and pandan. The cake's creation involves a careful balance of flavors and textures, often featuring layers reminiscent of the original Cendol's jelly-like components. Innovative variations include fusion with other traditional desserts, such as Kueh Lapis and Bubur Cha Cha, and adaptations for dietary restrictions like vegan and gluten-free options. Cendol Cake is not only a treat for the taste buds but also a feast for the eyes, with decorating techniques that enhance its visual appeal for special occasions. The popularity of Cendol Cake is reflected in enthusiastic customer reviews and its availability at specialty bakeries, with many offering online ordering and delivery services. Exploring the Origins of Cendol Cake The Journey from Traditional Drink to Cake The transformation of cendol from a beloved traditional drink to a delightful cake is a testament to culinary innovation and respect for cultural heritage. Cendol cake encapsulates the essence of the original beverage, with its distinctive green jelly noodles, coconut milk, and palm sugar, now reimagined in a baked form. While the drink has been a staple in Southeast Asian cuisine, the cake version is a relatively new phenomenon. It has quickly gained popularity, merging the familiar taste of cendol with the comfort of a soft, spongy cake. Here's a brief look at the journey: Initial Concept: Chefs and home bakers inspired by the flavors of the traditional cendol drink. Experimentation: Incorporating the key components of cendol into a cake batter. Refinement: Perfecting the recipe to balance the moisture from coconut milk and the sweetness of palm sugar. Popularity: The cendol cake begins to appear in bakeries and becomes a sought-after dessert. This evolution from drink to cake showcases the versatility of cendol and the creativity of those who love it. As it continues to spread in popularity, the cendol cake is becoming a new tradition in its own right. Cendol's Cultural Significance Cendol, traditionally a sweet dessert drink, has woven itself into the cultural fabric of Southeast Asia. Its transition from a refreshing beverage to a celebrated cake form is a testament to its enduring popularity. The dessert's signature green rice flour jelly, coconut milk, and palm sugar syrup are not just ingredients but symbols of the region's culinary heritage. Cendol cake, in particular, has become a canvas for culinary expression, blending traditional elements with modern baking techniques. Below is a list of key components that define the cultural essence of cendol: Green rice flour jelly: Represents the innovation in local dessert-making. Coconut milk: A staple in Southeast Asian cooking, signifying the region's agricultural richness. Palm sugar: The sweet backbone of many traditional desserts, reflecting the natural resources available. As cendol continues to inspire chefs and home bakers alike, its cultural significance only grows, solidifying its place in the annals of culinary history. Incorporating Cendol into Baked Goods The transition of cendol from a beloved icy treat to a key ingredient in baked goods marks an innovative chapter in culinary fusion. Bakers are now infusing the distinct flavors of cendol into various desserts, creating a new realm of taste experiences. The essence of cendol, characterized by its pandan flavor and creamy coconut milk, pairs exceptionally well with the soft, spongy texture of cakes. To successfully incorporate cendol into baked goods, one must consider the balance of flavors and the structural integrity of the dessert. Here's a simple guide to get started: Begin with a basic cake recipe that complements coconut and pandan flavors. Prepare a cendol-inspired syrup or reduction to infuse the cake layers. Use cendol jelly pieces as a textural element within the cake or as a decorative topping. Consider adding coconut milk to the batter to enhance the cendol essence. The Art of Crafting Cendol Cake Selecting the Right Ingredients The foundation of a delectable Cendol Cake lies in the quality and authenticity of its ingredients. Selecting the right components is crucial to achieving the distinctive taste and texture that cendol is known for. Begin with the cendol itself; the jelly-like noodles made from rice flour and pandan should be fresh and vibrant in color. When it comes to the coconut milk, opt for a full-fat version to ensure a rich and creamy consistency. The sweetness of the cake is traditionally derived from gula melaka (palm sugar), which imparts a unique flavor that cannot be replicated with other sweeteners. Here is a basic list of ingredients to start with: Fresh cendol noodles Full-fat coconut milk Gula melaka (palm sugar) Rice flour Pandan leaves or extract Eggs Baking powder Remember, the quality of each ingredient will directly influence the final outcome of your cake, so choose wisely and prioritize freshness wherever possible. Balancing Flavors and Textures The secret to a perfect Cendol Cake lies in the harmony of its flavors and textures. Each ingredient must complement the others, ensuring a delightful experience with every bite. The chewy texture of the cendol jelly, the creaminess of the coconut milk, and the subtle sweetness of the palm sugar syrup must be balanced meticulously. Cendol Jelly: Chewy and refreshing Coconut Milk: Rich and creamy Palm Sugar Syrup: Sweet with a hint of caramel Remember, the goal is not to overpower but to create a symphony of taste that pays homage to the original dessert. Adjusting the proportions of ingredients can help achieve the desired balance, and experimenting with different textures can add an exciting dimension to the cake. Decorating Techniques for a Stunning Presentation The final touch to any cendol cake is its decoration, which not only enhances the visual appeal but also complements the flavors within. Mastering the art of decoration is crucial for creating a cake that stands out. A popular technique involves the use of edible images, which can be sourced from local bakeries or online shops. These images add a personalized touch and can be themed to suit any occasion. To achieve a professional look, consider the following steps: Start with a smooth frosting base to ensure that images and decorations adhere properly. Carefully place edible images on the cake, smoothing out any air bubbles. Embellish with additional decorations such as French macarons, which add both texture and elegance. Remember, less is often more when it comes to decoration. A minimalist approach can sometimes make the biggest impact, creating a sleek and sophisticated presentation. For instance, an all-white design can evoke a sense of elegance and purity, perfect for more formal gatherings. Cendol Cake Variations and Innovations Fusion with Other Traditional Desserts The innovation of Cendol Cake has led to a delightful fusion with other traditional desserts, creating a new wave of culinary delights. Bakers are experimenting with flavors and techniques from various cultures to produce unique and mouthwatering creations. For instance, the rich ganache of a B\u00fbche de No\u00ebl can be infused with the pandan and coconut essence of Cendol, marrying French elegance with Southeast Asian vibrancy. B\u00fbche de Cendol: A twist on the classic French Yule log, combining chocolate or coffee flavors with Cendol's signature ingredients. Mango Passion Cendol Cheesecake: A tropical blend of mango and passion fruit cheesecake layers with a Cendol-infused base. Pandan Gula Melaka Chiffon Cendol: A light and airy chiffon cake with the sweetened flavors of pandan and gula melaka, topped with Cendol jelly. Modern Twists on a Classic Recipe In the culinary world, innovation is key to keeping traditional recipes fresh and exciting. Cendol cake, with its distinctive flavors and textures, has become a canvas for modern reinterpretations. Chefs and home bakers alike are experimenting with new ingredients and techniques to give this classic dessert a contemporary edge. Some have introduced matcha to infuse the cake with a subtle, earthy flavor while maintaining its signature green hue. Others have played with the incorporation of fruits, such as mango or durian, to add a tropical twist. Adventurous bakers are even exploring savory elements, like incorporating salted caramel or cheese, challenging the conventional boundaries of this sweet treat. These innovations not only cater to a broader audience but also showcase the versatility of cendol as an ingredient. Whether it's a subtle change or a bold new direction, the modern twists on cendol cake are a testament to the dessert's enduring appeal. Dietary Adaptations: Vegan and Gluten-Free Options Adapting the beloved Cendol Cake to cater to vegan and gluten-free diets has opened up a world of possibilities for those with dietary restrictions. Innovative substitutions maintain the cake's distinctive taste and texture, ensuring that everyone can enjoy this traditional treat. For a vegan version, dairy components are replaced with plant-based alternatives. Coconut milk serves as a perfect vegan substitute, complementing the cendol's flavor profile. Egg replacers, such as flax or chia seeds, can be used to bind the ingredients without compromising the cake's structure. Gluten-free adaptations require careful selection of flours. Rice flour or a gluten-free all-purpose mix can replace wheat flour, often with the addition of xanthan gum to mimic gluten's elasticity. Here's a quick glance at the key ingredients for vegan and gluten-free Cendol Cake adaptations: Coconut milk (Vegan) Flax or chia seeds (Vegan) Rice flour or gluten-free all-purpose mix (Gluten-Free) Xanthan gum (Gluten-Free) Serving and Pairing Suggestions Complementing Beverages The rich and creamy texture of Cendol Cake pairs wonderfully with a variety of beverages that can enhance the overall dessert experience. Selecting the perfect drink to accompany your Cendol Cake is crucial for balancing the flavors and ensuring a delightful taste journey. For a traditional pairing, consider a refreshing coconut mojito, which complements the coconut milk component of the cake. Aromatic teas, such as jasmine or green tea, offer a light and floral contrast to the cake's sweetness. For coffee enthusiasts, a robust espresso can provide a bold counterpoint that cuts through the richness of the dessert. Occasions and Celebrations Cendol cake, with its vibrant layers and refreshing flavors, has become a festive favorite for various occasions. From birthdays to family gatherings, it's a dessert that brings a touch of tradition to the table. During seasonal celebrations like Thanksgiving and Christmas, a cendol cake can be a unique addition that stands out among the usual holiday treats. For those looking to celebrate with a personal touch, cendol cake can be customized to suit the interests of both men and women, making it an ideal gift that conveys admiration and appreciation. Whether it's a party or a more intimate celebration, this dessert is versatile enough to elevate the mood and delight guests. When planning your next celebration, consider the cendol cake as a centerpiece that not only satisfies the sweet tooth but also adds a splash of cultural flair to your event. Creative Serving Ideas Cendol cake, with its unique blend of flavors and textures, offers a canvas for creative serving ideas that can enhance the overall dining experience. Presentation is key, and there are numerous ways to elevate the serving of this delightful dessert. For a personal touch, serve individual mini cendol cakes instead of slicing a larger one. This allows for customized decorations and a special feel for each guest. Consider deconstructing the cendol cake, presenting its components separately for an interactive dessert experience. Pair the cake with complementary flavors such as coconut ice cream or a drizzle of palm sugar syrup to accentuate the cendol's signature taste. Where to Find and How to Make Your Own Cendol Cake Best Places to Buy Cendol Cake When the craving for Cendol Cake strikes, knowing where to find the best slice is crucial. One standout destination is Petiteserie Desserts, featured on Eat Cake Today, which offers a delightful Cendol Cake priced at 95.00. Their commitment to quality is evident in their impressive review ratings, making them a top pick for this traditional treat. For those who prefer the convenience of online shopping, Eat Cake Today provides an excellent platform. With a wide selection of cakes, including the sought-after Cendol Cake, and the option for same-day delivery, it's never been easier to indulge in your favorite desserts. Their service extends across various locations, ensuring that a delicious Cendol Cake is just a few clicks away. Step-by-Step Guide to Making Cendol Cake at Home Embarking on the journey to create your own Cendol Cake at home can be a delightful and rewarding experience. Begin with the essential step of making pandan juice, which serves as the heart of the cake's flavor. This involves blending chopped pandan leaves with water to extract the vibrant green essence. Next, prepare the cendol jelly by mixing green rice flour with water and pandan juice, then forming it into the iconic worm-like shapes. Once set, these jellies will be layered within the cake for that signature cendol texture. For the frosting, a coconut milk-based cream infused with pandan extract will complement the cake, bringing together the classic cendol elements in a new form. Assemble the cake by alternating layers of sponge and cendol jelly, finishing with a generous spread of frosting. Finally, garnish with a sprinkle of palm sugar or gula melaka to add a touch of sweetness and authenticity to your homemade Cendol Cake. Tips from Expert Bakers When venturing into the world of Cendol Cake baking, expert bakers emphasize the importance of patience and precision. Allow ample time for each layer to set before adding the next, ensuring a perfect build-up of flavors and textures. Start with a well-tested recipe, like the popular 20 top Resepi Agar Agar Cendol ideas in 2024 from Lemon8, which features a sweet cream cheese base layer and a rich caramel middle. Pay attention to the consistency of your cendol jelly to achieve the signature chewiness. Experiment with different toppings, such as the crunchy toffee bits mentioned in Lemon8's recipe, to add contrasting textures. Lastly, always keep learning. Whether it's through online resources, baking blogs like Sally's, or hands-on workshops guided by professional pastry chefs, there's always a new technique or tip to enhance your baking skills. Share your creations and experiences, adding your own unique touch to this delightful dessert. Conclusion In conclusion, the Cendol Cake encapsulates the essence of traditional Southeast Asian flavors, offering a refreshing twist on classic dessert experiences. With its delightful combination of pandan, coconut milk, and the unique texture of green rice flour jelly, this cake stands out as a testament to the region's culinary creativity. Customer reviews rave about the Pandan Gula Melaka Cake, a close relative in flavor profile, suggesting a widespread appreciation for these exotic tastes. Whether you're ending a meal with a slice of this cake or choosing it for a special occasion, the Cendol Cake is sure to provide a memorable and enjoyable experience that resonates with all ages. As we've seen, cakes like these are more than just desserts; they're a celebration of culture, a source of joy, and a bridge that connects us to the rich tapestry of flavors that the world has to offer. Frequently Asked Questions What is Cendol Cake and how does it differ from traditional Cendol? Cendol Cake is a unique dessert that transforms the traditional Cendol drink into a cake form. While classic Cendol consists of shaved ice, coconut milk, and green rice flour jelly, the Cendol Cake incorporates these flavors into a baked good, often flavored with pandan and layered with gula melaka (palm sugar). What are the key ingredients in a Cendol Cake? Key ingredients in Cendol Cake include pandan leaves for flavoring, coconut milk for richness, green rice flour jelly for texture, and gula melaka for sweetness. Can Cendol Cake be made gluten-free or vegan? Yes, Cendol Cake can be adapted for dietary restrictions. Gluten-free flour substitutes can be used for a gluten-free version, and dairy substitutes like almond or soy milk can be used to make it vegan. Are there any popular variations of Cendol Cake? Popular variations of Cendol Cake include fusion with other traditional desserts like Kueh Lapis, as well as modern twists that incorporate ingredients like chocolate or coffee for a unique flavor profile. Where can I find the best Cendol Cake? The best Cendol Cake can often be found at specialty bakeries or shops that focus on traditional Southeast Asian desserts. Some bakeries may also offer online ordering and delivery services. Is Cendol Cake suitable for special occasions? Absolutely! Cendol Cake is a delightful and refreshing choice for various special occasions, including birthdays, cultural celebrations, or as a unique dessert option for any festive gathering.
- "Why is Käsekuchen (German Cheesecake) the Perfect Dessert for Your Next Gathering?"
The German Cheesecake, or K\u00e4sekuchen, is a beloved dessert that offers a unique taste and texture, distinct from its international counterparts. With its crunchy crust, rich and creamy filling, and the perfect balance of sweet and tangy flavors, K\u00e4sekuchen is a true indulgence for the palate. This article delves into the essence of the traditional German cheesecake, guiding you through its preparation, variations, cultural significance, and its place in the global dessert scene. Key Takeaways K\u00e4sekuchen stands out with its crunchy crust and a creamy filling that combines sweet and tangy flavors for a melt-in-your-mouth experience. The perfect K\u00e4sekuchen requires attention to detail in selecting ingredients and following a precise baking guide, while also being aware of common mistakes. Regional variations and innovative flavors, including gluten-free and vegan options, showcase the adaptability of the classic German cheesecake. K\u00e4sekuchen has a rich historical significance in German culture, with its presence in modern cuisine and celebrated through annual festivals and competitions. Internationally, K\u00e4sekuchen has influenced various cheesecake varieties and has been adapted to suit different palates, illustrating its global appeal. The Quintessential German Cheesecake Experience Understanding Käsekuchen K\u00e4sekuchen, the authentic German cheesecake, is a dessert that stands out for its unique composition and taste. Unlike its American counterpart, which typically uses cream cheese, the German version is made with quark, a type of fresh dairy product that lends the cake a lighter and fluffier texture. This key ingredient, along with the addition of pudding powder, creates a distinctive mouthfeel that is both creamy and airy. German cheesecake can be enjoyed in many forms, whether it's the traditional recipe with a crunchy crust or a modern twist with fruit or chocolate. Some popular variations include adding cocoa to create a marbled effect or incorporating fresh fruits like peaches or strawberries for a refreshing touch. Here's a quick look at some of the ways K\u00e4sekuchen can be prepared: Classic K\u00e4sekuchen with a biscuit base Mini cheesecakes for a quick and easy treat K\u00e4sekuchen on a stick, dipped in chocolate Apple cheesecake with a yeast dough base Chocolate cheesecake for the chocoholics Each variation offers a new way to enjoy this delightful dessert, proving that K\u00e4sekuchen is a treat that can be tailored to suit any occasion or preference. The Perfect Blend of Texture and Flavor The allure of K\u00e4sekuchen lies not just in its flavors, but in the harmonious balance between its creamy filling and crumbly crust. Unlike the denser American-style cheesecake, K\u00e4sekuchen offers a lighter, more delicate texture that allows the subtle sweetness and tang of the cheese to shine through. The crust, often made from crushed cookies or a traditional pastry dough, provides a satisfying contrast with its buttery crunch. When it comes to flavor, K\u00e4sekuchen is versatile. From the classic vanilla-infused version to those enriched with fruit or flavored with a hint of liqueur, each variation maintains the essential characteristics that make this dessert so beloved. Here's a quick list of popular flavor additions: Lemon zest or juice for a citrusy kick Raisins soaked in rum for a rich, boozy note Fresh berries or berry compotes for a burst of natural sweetness Chocolate shavings or cocoa for a decadent twist Serving and Pairing Suggestions To fully savor the delicate flavors of K\u00e4sekuchen, serving it at the right temperature is crucial. Allow the cheesecake to cool to room temperature before indulging to let the texture set perfectly. For an enhanced taste experience, pair your K\u00e4sekuchen with a beverage that complements its richness. Here are some classic pairings: A crisp Riesling or a sweet Sp\u00e4tlese to balance the creamy texture Freshly brewed coffee, providing a robust contrast to the sweet and tangy notes A dollop of whipped cream or a scoop of vanilla ice cream for added decadence Remember, the goal is to enhance, not overpower, the K\u00e4sekuchen's flavor. Whether it's a family gathering or a formal dinner, these suggestions will ensure that your German cheesecake becomes a memorable part of the meal. Crafting the Perfect Käsekuchen Ingredients and Substitutions The journey to crafting the perfect K\u00e4sekuchen begins with gathering the right ingredients. Traditional recipes call for quark, a type of fresh cheese that's essential for the authentic taste and texture of the cake. However, quark can be hard to find outside of Europe, so substitutions such as a mixture of cream cheese and Greek yogurt can be used to mimic its creamy consistency. Here's a basic list of ingredients you'll need: 250g cream cheese, at room temperature 60g butter, at room temperature 100g (1/2 cup) caster sugar 5 eggs, separated 1 tsp vanilla bean paste 125ml (1/2 cup) milk 1 tbsp fresh lemon juice 50g (1/3 cup) plain flour 1 tbsp cornflour Icing sugar, to dust Chopped pistachios, to serve Thick or dollop cream, to serve Remember, the essence of a great K\u00e4sekuchen is not just in the ingredients but in the care and attention to detail during preparation. Take your time to source the best possible substitutes without compromising on the decadent experience that this classic German dessert promises. Step-by-Step Baking Guide Once you've gathered all your ingredients, the journey to a perfect K"asekuchen begins with precise preparation and careful baking. Follow these steps to ensure your cheesecake is as delightful as the classic German dessert should be. Preheat your oven to the recommended temperature, usually around 350°F (175°C), and prepare your baking dish with a light greasing. Start by mixing your dry ingredients, ensuring that your flour, baking soda, and sugar are well combined. In a separate bowl, beat the eggs and incorporate the wet ingredients like apricot jam, melted butter, and milk. Gradually combine the wet and dry mixtures, stirring until you achieve a smooth batter. Pour the batter into your prepared dish and bake until a toothpick comes out clean, indicating your K"asekuchen is ready to cool and then serve. Common Mistakes to Avoid Avoiding common mistakes is crucial when baking the perfect K"sekuchen. Overmixing the batter can lead to a dense and heavy cake, rather than the desired light and creamy texture. It's important to mix just until ingredients are combined. Another frequent error is not using room temperature ingredients, which ensures a smooth batter and even baking. Quark is a key ingredient in traditional K"sekuchen, and using the right type is essential. Substituting with other cheeses without adjusting for moisture and fat content can alter the final product significantly. Here's a quick guide to help you choose the right substitute if Quark is not available: Full-fat yogurt (strained): for a tangier taste Ricotta cheese: for a lighter texture Cream cheese: for a denser, richer cake Lastly, baking at the correct temperature is imperative. Too high and the cheesecake will crack; too low and it won't set properly. Use an oven thermometer to ensure accuracy, as oven dials can be misleading. Variations of German Cheesecake Regional Twists on the Classic While the traditional German cheesecake, or K\u00e4sekuchen, is beloved throughout the country, regional variations add a unique twist to this classic dessert. Each area incorporates local flavors and ingredients, creating a rich tapestry of tastes that reflect Germany's culinary diversity. In the north, you might find K\u00e4sekuchen with a hint of sea salt, echoing the coastal influence. Southern regions often include richer dairy products due to their proximity to alpine pastures. The east might showcase K\u00e4sekuchen with a dollop of fruit compote from the abundant local orchards. Western variations could feature a crunchy streusel topping, adding texture to the creamy filling. These local adaptations not only offer a new experience for the palate but also tell a story of the region's history and culture. When traveling through Germany, sampling the different versions of K\u00e4sekuchen becomes a culinary adventure, one that offers insight into the heart of German gastronomy. Innovative Käsekuchen Flavors The evolution of Käsekuchen has given rise to a plethora of innovative flavors that tantalize the taste buds and offer a modern twist on the classic. Bold experimentation with ingredients has led to delightful creations such as the Schoko-Käsekuchen, which combines the richness of chocolate with the traditional cheesecake base, and the Erdbeer-Basilikum Käsekuchen, a fusion of strawberries and basil that provides a refreshing burst of flavor. For those seeking something truly unique, the Käsekuchen am Stiel presents a whimsical take on the dessert, serving it on a stick and dipped in chocolate, adorned with fresh figs and white chocolate. Below is a list of some of the most intriguing new flavors that have emerged: Apfel-Käsekuchen with Hefe-Mürbeteig (Apple Cheesecake with Yeast Shortcrust Pastry) Käsekuchen mit Pfirsichen (Cheesecake with Peaches) Käsekuchen mit Keksboden und Erdbeeren (Cheesecake with Cookie Crust and Strawberries) Erdbeer-Basilikum Käsekuchen im Glas (Strawberry-Basil Cheesecake in a Glass) These innovative flavors not only add a new dimension to the Käsekuchen repertoire but also cater to the evolving palates of dessert enthusiasts around the world. Dietary Adaptations: Gluten-Free and Vegan Options Adapting the classic K\u00e4sekuchen to meet dietary requirements has led to the creation of delightful gluten-free and vegan versions. These adaptations ensure that the joy of indulging in a slice of K\u00e4sekuchen is accessible to everyone. For those avoiding gluten, alternative flours such as almond or oat flour can be used to create a crust that rivals the traditional graham cracker base in both taste and texture. Vegan K\u00e4sekuchen swaps out dairy ingredients for plant-based alternatives. Ingredients like coconut cream, silken tofu, and vegan cream cheese can be used to achieve the creamy consistency that K\u00e4sekuchen is known for. The result is often so close to the original that it might just surprise you. Here is a simple list of substitutions to consider when making a gluten-free or vegan K\u00e4sekuchen: Gluten-Free Crust: Almond flour, oat flour, or a gluten-free flour blend Vegan Filling: Coconut cream, silken tofu, vegan cream cheese, and plant-based milk Sweetener: Agave syrup, maple syrup, or coconut sugar for a refined sugar-free option Binding Agent: Agar-agar or arrowroot powder to replace eggs Käsekuchen in German Culture Historical Significance The origins of cheesecake can be traced back to ancient Greece, where it began as a simple combination of cheese and bread. This early version, known as 'libum,' was often served during special occasions and was considered a food of the gods. Over the centuries, the recipe for cheesecake traveled across Europe, undergoing numerous transformations before arriving in Germany, where it took on a unique identity as K\u00e4sekuchen. In Germany, K\u00e4sekuchen has evolved into a dessert that balances the rich history of its ingredients with the culinary preferences of the region. It's not just a treat; it's a reflection of the country's gastronomic journey. The dessert's significance is further highlighted by its inclusion in the Top 10 German Desserts & Sweets, underscoring its enduring popularity and cultural importance. While the exact timeline of K\u00e4sekuchen's history is difficult to pinpoint, it is clear that this dessert has been a part of German culture for generations. It stands as a delicious link to the past, while continuing to inspire contemporary variations and flavors. Käsekuchen in Modern German Cuisine In the ever-evolving landscape of modern German cuisine, K\u00e4sekuchen remains a beloved classic. The cheesecake's versatility is showcased in contemporary variations that fuse traditional flavors with new ingredients. For instance, the introduction of mini cheesecakes with cookie bases offers a quick, uncomplicated, and delicious twist to the conventional recipe. The table below highlights popular modern takes on K\u00e4sekuchen, reflecting the innovative spirit of German bakers: These innovative recipes not only honor the traditional K\u00e4sekuchen but also reflect the dynamic nature of German dishes, which have evolved significantly due to influences from guest workers and other immigrants. Annual Festivals and Competitions The celebration of K\u00e4sekuchen extends beyond the kitchen and into the heart of German culture with various annual festivals and competitions. These events showcase the pride and craftsmanship that go into creating this beloved dessert. Participants from all over the country, including pupils from the Geschwister Scholl Schule & Ellenrieder Gymnasium in Konstanz, come together to share their unique recipes and vie for the title of best K\u00e4sekuchen. While some festivals focus on traditional recipes, others encourage innovation, with categories for gluten-free or vegan variations. The table below highlights a few notable festivals: Beyond the Borders: Käsekuchen Around the World Comparing German Cheesecake to International Varieties When exploring the world of cheesecakes, the German K\u00e4sekuchen stands out with its unique characteristics. Unlike the dense and creamy New York-style cheesecake, K\u00e4sekuchen boasts a lighter, quark-based filling that offers a distinctly tangy flavor and a less compact texture. The crust, typically made from a simple dough rather than a graham cracker base, provides a crunchy contrast to the smooth filling. International varieties of cheesecake often incorporate local ingredients and cultural preferences. For instance, the French tarte au fromage is known for its delicate pastry crust, while the Japanese no-bake cheesecake is celebrated for its airy, mousse-like consistency. Here's a quick comparison of how K\u00e4sekuchen differs from some of its international counterparts: Dutch cheesecake (kwarktaart): Often features a biscuit base and a lighter, yogurt-like filling. French cheesecake (tarte au fromage): Emphasizes a buttery pastry crust with a subtle cheese flavor. Japanese no-bake cheesecake: Focuses on a fluffy, whipped texture with less emphasis on cheese richness. The global journey of cheesecake has led to a diverse tapestry of styles, each with its own story. As cheesecake recipes traveled from Europe to America, they evolved, culminating in the creation of the famous New York-style cheesecake. This evolution highlights the adaptability of cheesecake to different tastes and culinary techniques around the world. The Global Influence of Käsekuchen The allure of K\u00e4sekuchen has transcended German borders, captivating the taste buds of dessert enthusiasts worldwide. Its rich history and versatile nature have made it a beloved treat in many countries, each adding their own local twist to the classic recipe. From the creamy New York Cheesecake, which owes its roots to the traditional German version, to innovative adaptations that incorporate local fruits and flavors, K\u00e4sekuchen's influence is unmistakable. In the realm of international desserts, K\u00e4sekuchen stands out for its ability to blend seamlessly with various culinary traditions. For instance, the addition of peaches or a cocoa-marbled pattern showcases the dessert's adaptability to different tastes and presentation styles. This versatility is not only a testament to K\u00e4sekuchen's global appeal but also to the creativity of bakers around the world. As K\u00e4sekuchen continues to inspire confectioners and delight palates across the globe, it remains a symbol of culinary exchange and the shared joy of sweet indulgence. Adapting Käsekuchen Recipes for an International Palate Adapting the traditional K\u00e4sekuchen to suit an international palate involves incorporating flavors and ingredients that resonate with a global audience. The classic German cheesecake, known for its crunchy crust and rich, creamy filling, can be transformed with a few creative twists. For instance, adding a hint of citrus or blending in exotic fruits can give the K\u00e4sekuchen a refreshing new profile that appeals to diverse tastes. Here's a quick guide to some popular adaptations: Mini K\u00e4sekuchen with a cookie base for a quick and uncomplicated treat. K\u00e4sekuchen on a stick, dipped in chocolate and adorned with fresh figs and white chocolate. Strawberry-Basil K\u00e4sekuchen served in a glass, combining the freshness of fruit with the aromatic touch of herbs. These variations not only cater to the evolving tastes of consumers but also add a playful element to the traditional dessert. By presenting K\u00e4sekuchen in new formats, such as on a stick or in a glass, it becomes more accessible and intriguing to those unfamiliar with the German classic. Conclusion In the world of desserts, the German Cheesecake, or Käsekuchen, stands out with its unique blend of textures and flavors that have been perfected over generations. From the crunchy crust to the rich, creamy filling, each variation of this beloved treat offers a delightful experience. Whether it's the classic recipe, a marbled version with cocoa, or innovative takes like cheesecake on a stick or in a glass, Käsekuchen remains a testament to the versatility and enduring appeal of traditional German baking. As we've explored the many facets of Käsekuchen, it's clear that this dessert is much more than just a sweet indulgence; it's a cultural icon that continues to inspire and satisfy dessert lovers around the world. Frequently Asked Questions What is Käsekuchen? Käsekuchen is the German word for cheesecake. It is a traditional German dessert with a crunchy crust and a rich, creamy filling that offers a blend of sweet and tangy flavors, often characterized by its melt-in-your-mouth texture. How is German cheesecake different from other cheesecakes? German cheesecake, or Käsekuchen, typically uses quark (a type of fresh cheese) instead of cream cheese, which gives it a lighter texture. It also has a less sweet and more tangy flavor profile compared to American-style cheesecakes. Can I make Käsekuchen with gluten-free or vegan ingredients? Yes, there are variations of Käsekuchen that cater to gluten-free and vegan diets. These adaptations may include using gluten-free flour for the crust and plant-based substitutes for dairy ingredients. What are some popular variations of Käsekuchen? Popular variations include adding fruit like peaches or strawberries, incorporating flavors like chocolate or maracuja, or even making bite-sized versions such as Käsekuchen am Stiel (cheesecake on a stick). How should I serve and pair Käsekuchen? Käsekuchen is best served chilled. It can be paired with fresh fruit, fruit compote, or a dollop of whipped cream. For beverages, a cup of coffee or a sweet dessert wine complements it well. Are there any special occasions where Käsekuchen is traditionally served? Käsekuchen is a beloved dessert in Germany and can be served on various occasions, from family gatherings to festive celebrations. It is also featured in annual festivals and baking competitions across the country.
- "Uncovering the Uniqueness of Derby Pie: A Delicious Tradition"
Derby-Pie is a beloved dessert that captures the spirit of Kentucky, especially during the excitement of Derby Day. This rich, chocolate and nut tart is not just a treat; it's a tradition that celebrates the heritage of the Bluegrass State. In this article, we explore the origins, unique characteristics, and cultural significance of Derby-Pie, as well as tips for crafting the perfect pie and how it's shared as a symbol of hospitality. Key Takeaways Derby-Pie is a quintessential Kentucky dessert with a rich history tied to the Kentucky Derby. Unique for its combination of chocolate chips, pecans, and a flaky crust, Derby-Pie stands out from other desserts. Kern's Kitchen is the birthplace of Derby-Pie, which has been a central part of Kentucky celebrations for nearly 70 years. The pie can be gifted in beautifully curated baskets, making it a perfect representation of Kentucky hospitality. Beyond the traditional pie, variations like the chocolate nut tart and Golden Pecan Pie, as well as related merchandise, extend the brand's reach. The Essence of Derby-Pie: A Kentucky Tradition The History of Derby-Pie The origins of Derby-Pie can be traced back to the 1950s, a creation that quickly became a Kentucky tradition. It was at the Melrose Inn where the pie first made its appearance, delighting guests with its unique blend of flavors and textures. The pie's popularity soared, and it soon became synonymous with Kentucky's rich culinary heritage. While the exact recipe remains a closely guarded secret, the pie is known for its delectable combination of chocolate and nuts, encased in a buttery crust. Over the years, the Derby-Pie has become a staple at celebrations, especially during the Kentucky Derby, where it is enjoyed by locals and visitors alike. Here's a brief timeline highlighting key moments in the Derby-Pie's history: 1950s: The Melrose Inn creates the first Derby-Pie. 1960s: Popularity of the pie grows beyond the inn. 1980s: Kern's Kitchen trademarks the name "Derby-Pie". Present: The pie remains a beloved dessert across Kentucky and beyond. What Makes Derby-Pie Unique At the heart of Derby-Pie's uniqueness is its rich blend of flavors and textures that have made it a beloved Kentucky tradition. The secret recipe, which has been closely guarded by Kern's Kitchen for decades, combines chocolate and walnuts in a flaky crust, creating a dessert that is both decadent and satisfying. Derby-Pie stands out not just for its taste but also for its cultural significance. It is a symbol of the Kentucky Derby, embodying the spirit of celebration and southern hospitality. The pie's association with the Derby has made it a must-have at parties and gatherings, especially during the festive race season. Chocolate chips that melt into the filling Crunchy walnuts offering a textural contrast A buttery, flaky pastry crust The hint of bourbon that elevates the flavor profile Celebrating Kentucky's Heritage Through Dessert Derby-Pie holds a special place in the heart of Kentuckians, embodying the spirit of the Bluegrass State with every slice. It's not just a dessert; it's a festive symbol of Kentucky's rich culture and history. The pie's decadent layers of chocolate and nuts, often laced with a hint of bourbon, mirror the state's renowned hospitality and craftsmanship. During the excitement of the Kentucky Derby, locals and visitors alike indulge in this sweet treat, often rounding out a meal that celebrates the state's culinary diversity. From the iconic Churchill Downs to family gatherings across Kentucky, Derby-Pie is a testament to the state's tradition of coming together to enjoy good food and good company. Here's a glimpse of how Derby-Pie complements various Kentucky occasions: Kentucky Derby: A must-have at any Derby Day party. Weddings: A sweet addition to the couple's new beginning. Gifts: Packaged with local favorites for a taste of Kentucky charm. Holidays: Shared among loved ones during festive celebrations. Crafting the Perfect Derby-Pie Classic Ingredients of Derby-Pie The creation of a genuine Derby-Pie extregistered is akin to crafting a masterpiece, where each ingredient plays a pivotal role in the final delicacy. The core components of this Kentucky classic include a flaky pie crust, rich chocolate chips, and crunchy pecans, melding together to form a dessert that's as much a treat for the palate as it is for the soul. 1 (9-inch) unbaked pie crust 1 cup semi-sweet chocolate chips 1 cup chopped pecans 1/4 cup unsweetened cocoa powder 1/2 cup granulated sugar 1/2 cup packed brown sugar 1/2 cup all-purpose flour 1/2 cup unsalted butter, melted 3 large eggs 1 teaspoon vanilla extract Baking Tips for the Perfect Pie Achieving the perfect Derby-Pie requires a blend of tradition and technique. Do not overlook the importance of spices; they are the subtle artists of flavor enhancement. A dash of cinnamon, a whisper of nutmeg, a hint of vanilla, and a pinch of salt can elevate the pie from good to unforgettable. Preheat your oven to 350 degrees F (175 degrees C). Cream butter and sugar until smooth, then beat in flour and cornmeal. Incorporate eggs one at a time, followed by milk, vanilla, and lemon zest. Pour the mixture into an unbaked pie crust in a 9-inch pie plate. Bake for 55-60 minutes, checking at 30 minutes to tent with aluminum foil if necessary. Allow to cool for at least one hour before serving. Remember, patience is a virtue when baking. Allow your pie to cool completely to ensure the filling sets properly, providing that signature Derby-Pie texture. Variations: Chocolate Nut Tart and Golden Pecan Pie While the classic Derby-Pie is a beloved staple, variations like the chocolate nut tart and the Golden Pecan Pie offer delightful twists on tradition. The chocolate nut tart carries the essence of the original Derby-Pie with a rich blend of chocolate and nuts, perfect for those who crave a deeper chocolate flavor. On the other hand, the Golden Pecan Pie, with its buttery crust and rich pecan filling, stands as a testament to the timeless appeal of Southern desserts. For those looking to explore these variations further, here's a quick guide: Derby-Pie Chocolate Nut Pie: A decadent dessert that combines the traditional Derby-Pie with a chocolatey twist. Kern's Kitchen Golden Pecan Pie: A classic choice that exudes the rich flavors of pecans paired with a golden crust. Whether you're a fan of the original or eager to try these variations, each pie promises a slice of Kentucky's rich culinary heritage. Derby-Pie in Kentucky Culture Derby Day Celebrations and Traditions The Kentucky Derby is not just about the fast-paced excitement of horse racing; it's a cultural phenomenon that marries sport with Southern elegance. At the core of this elegance are the ornate hats, a symbol of the day's extravagance. Alongside the fashion, the Derby is also a culinary celebration, with the legendary Kern's Derby-Pie extregistered taking center stage as the event's signature dessert. To truly embrace the spirit of the Derby, one must indulge in the traditional mint juleps, a refreshing cocktail that has become synonymous with the event. Here's a simple list to get your Derby party started: Sip on a mint julep, the quintessential Derby cocktail Don a vibrant, elegant hat to capture the essence of Derby fashion Serve slices of the rich and delectable Kern's Derby-Pie extregistered Decorate with roses, the race's official flower, to set the perfect ambiance Kern's Kitchen: The Home of Derby-Pie Nestled in the heart of Louisville, Kern's Kitchen is the birthplace of the original Derby-Pie, a confection that has become synonymous with Kentucky's spirited traditions. For nearly seven decades, this family-owned establishment has been crafting the iconic dessert that's become a staple at celebrations across the Bluegrass State. While the Derby-Pie remains the star of Kern's Kitchen, their repertoire extends beyond this single delicacy. Patrons can indulge in a variety of treats, including the Derby-Pie chocolate nut tart and the classic Golden Pecan Pie, each offering a unique twist on the traditional flavors. Whether you're a local or a visitor, stopping by Kern's Kitchen is a must for anyone looking to experience the authentic taste of Kentucky. Their commitment to quality and tradition is evident in every slice of pie that comes out of their ovens. Sharing Derby-Pie: A Symbol of Hospitality In the heart of Kentucky, sharing a slice of Derby-Pie is more than a mere act of serving dessert; it's a cherished gesture of warmth and welcome. Derby Pie is more than just a dessert; it's a cultural icon that embodies the spirit of indulgence and tradition. This rich tradition is evident in the way Kentuckians incorporate Derby-Pie into their social gatherings, making it a focal point of hospitality. Whether it's a family reunion, a corporate event, or a friendly neighborhood get-together, the presence of Derby-Pie on the table signifies a special occasion. Here's a glimpse into what a typical Derby-Pie gift box might include, showcasing the essence of Kentucky's hospitality: Kern's Kitchen Derby-Pie Ted's Bourbon Roasted Coffee Packet Bourbon Country Gourmet Sauce, Mini Evan Williams Mint Julep Mix, Mini Dirty Ole' Horseshoe from Churchill Downs My Old Kentucky Home Postcard Each item in the gift box is carefully selected to represent the unique flavors and symbols of Kentucky, making it an ideal gift that conveys the generous spirit of the state. Gifting the Flavor of the Bluegrass State Derby-Pie Gift Baskets and Sets The Derby-Pie extregistered Gift Box is more than just a dessert; it's a curated experience of Kentucky's finest. At $55.00, this gift box is an ideal representation of the Bluegrass State's culinary tradition, perfect for corporate gifts or personal indulgence. Each box is a collection of local treasures, including the iconic Kern's Kitchen Derby-Pie extregistered, a packet of Ted's Bourbon Roasted Coffee, and a selection of miniature gourmet sauces and mixes. It's a thoughtful way to share the taste of Kentucky with friends, family, or clients. For those looking to explore further, related products such as the Kentucky Breakfast in a Box or the BBQ Champion Gift Basket provide additional options to enjoy or gift the flavors of Kentucky. Choosing the Right Derby-Pie for Every Occasion Selecting the ideal Derby-Pie for your event is a delightful dilemma. Kern's Kitchen offers a variety of options, each suited to different tastes and occasions. The classic Derby-Pie chocolate nut pie is a staple for any celebration, embodying the rich flavors of Kentucky tradition. For a more refined gathering, consider the Derby-Pie chocolate nut tart, a sophisticated twist on the original. And for those who prefer a less chocolatey dessert, the Golden Pecan Pie offers a buttery, nut-filled experience that's hard to resist. Here's a quick guide to help you decide: Derby-Pie Chocolate Nut Pie: Best for traditionalists and chocolate lovers. Derby-Pie Chocolate Nut Tart: Ideal for elegant affairs and those who enjoy a less sweet dessert. Golden Pecan Pie: Perfect for guests who favor classic pecan flavors without the chocolate. Unboxing Kentucky: The Derby-Pie Gift Experience The moment of unveiling a Derby-Pie gift box is an experience steeped in anticipation and Southern charm. Each package is a curated collection of Kentucky's finest, designed to delight the senses and offer a genuine taste of the Bluegrass State. The classic Derby-Pie, with its rich blend of chocolate and nuts, is the centerpiece, accompanied by an array of local treasures that complement the pie's decadent flavors. Here's what you can expect to find inside a typical Derby-Pie Kentucky Style gift box: Kern's Kitchen Derby-Pie Ted's Bourbon Roasted Coffee Packet Bourbon Country Gourmet Sauce, Mini Evan Williams Mint Julep Mix, Mini Dirty Ole' Horseshoe from Churchill Downs My Old Kentucky Home Postcard Priced at $45.00, this package is more than a collection of items; it's an invitation to savor and share the spirit of Kentucky. Whether it's a corporate gift or a personal gesture, the Derby-Pie gift box is a celebration of Kentucky's rich culture and tradition. Beyond the Pie: Derby Delights and Accompaniments Pairing Coffee and Sauces with Derby-Pie The rich flavors of Derby-Pie, with its luscious chocolate and crunchy nuts, call for the perfect beverage and sauce accompaniments to enhance the overall tasting experience. Selecting the right coffee to pair with your Derby-Pie can elevate the dessert to new heights. A full-bodied coffee, such as Ted's Bourbon Roasted Coffee, complements the pie's deep chocolate notes and the hint of bourbon in the crust. When it comes to sauces, a drizzle of Bourbon Country Gourmet Sauce can add a touch of elegance and a burst of flavor that ties the whole dessert together. Here's a simple guide to pairing your Derby-Pie with coffee and sauces: Coffee Pairing: Choose a coffee with a robust flavor to stand up to the pie's richness. A bourbon roasted variety adds a thematic twist. Sauce Drizzle: A mini Bourbon Country Gourmet Sauce is the perfect size for just the right amount of added decadence. Temperature Play: Enjoy your coffee hot to contrast with the cool, creamy texture of the pie. Remember, the key to a successful pairing is balance. The goal is to complement, not overpower, the distinct taste of the Derby-Pie. With these tips, you're ready to host a dessert experience that guests will remember fondly. Authentic Kentucky Souvenirs: From Horseshoes to Postcards Kentucky's charm extends beyond its famous Derby-Pie, offering a variety of souvenirs that capture the essence of the Bluegrass State. From the clink of a Dirty Ole' Horseshoe to the quiet nostalgia of a My Old Kentucky Home postcard, these items serve as tangible memories of Kentucky's rich culture. When visiting a Taste of Kentucky, one can expect to find an array of items that are quintessentially Kentucky. The store has been a purveyor of local favorites for almost four decades, ensuring that every visitor or recipient of a gift can experience a slice of Kentucky tradition. Here's a quick look at some of the featured products that embody Kentucky's heritage: Barrel Down South Men's Accessories: $21.99 Kentucky Derby Canvas Door Hanger: $35.99 2024 Pegasus Pin: $7.00 Kentucky Derby 150 Party Supplies: $6.99 Whether you're looking for something to commemorate your visit or a gift that says 'Kentucky,' these souvenirs are sure to delight. Expanding the Derby-Pie Brand: Merchandise and More The Derby-Pie brand extends far beyond the iconic dessert itself, branching into a variety of merchandise that captures the essence of Kentucky's culture. From kitchen staples to keepsakes, the brand's expansion offers a taste of the Bluegrass State to fans near and far. The Derby-Pie's reach is not limited to the pie; it's a full experience. The merchandise includes items like Ted's Bourbon Roasted Coffee, a perfect complement to the pie, and authentic souvenirs such as a Dirty Old Horseshoe from Churchill Downs, which embodies the spirit of the Kentucky Derby. Kern's Kitchen Derby-Pie Ted's Bourbon Roasted Coffee Packet Bourbon Country Gourmet Sauce, Mini Evan Williams Mint Julep Mix, Mini Dirty Ole' Horseshoe from Churchill Downs My Old Kentucky Home Postcard Conclusion In conclusion, the Derby-Pie® is more than just a dessert; it's a symbol of Kentucky's rich culinary tradition and a beloved staple at festive occasions, especially the Kentucky Derby. From the classic chocolate nut pie to the decadent double chocolate variation, each bite of Kern's Kitchen Derby-Pie® offers a taste of Southern hospitality and celebration. Whether you're enjoying it at a Derby party, gifting it in a beautifully curated gift box, or simply indulging in a slice at home, this pie is sure to transport you to the heart of Kentucky. With its unique blend of flavors and its storied history, the Derby-Pie® remains a cherished treat that continues to bring people together, year after year. Frequently Asked Questions What is Derby-Pie? Derby-Pie is a type of dessert that originates from Kentucky, known for its rich filling of chocolate and nuts, typically pecans, baked in a pie crust. It's a celebrated part of Kentucky culture and tradition, especially during the Kentucky Derby. What are the classic ingredients of a Derby-Pie? The classic ingredients of a Derby-Pie include a mix of chocolate chips, pecans, sugar, flour, butter, and eggs. Variations like the chocolate nut tart and the Golden Pecan Pie are also popular. Can I buy a Derby-Pie online? Yes, you can purchase Derby-Pie online from Kern's Kitchen, which offers a variety of gift baskets and sets that include the famous pie, along with other Kentucky favorites like bourbon roasted coffee and gourmet sauces. What is included in a Derby-Pie Kentucky Style package? The Derby-Pie Kentucky Style package typically includes Kern's Kitchen Derby-Pie, Ted's Bourbon Roasted Coffee Packet, Bourbon Country Gourmet Sauce, Mini Evan Williams Mint Julep Mix, a Dirty Ole' Horseshoe from Churchill Downs, and a My Old Kentucky Home Postcard. How should I serve Derby-Pie? Derby-Pie is best served warm, often with a dollop of whipped cream or a scoop of vanilla ice cream. It can also be paired with coffee or a dessert sauce for added flavor. What occasions are ideal for gifting Derby-Pie? Derby-Pie makes an excellent gift for various occasions, including holidays, birthdays, corporate events, or as a symbol of Kentucky hospitality. It's also a popular choice for Derby Day celebrations.
- "Discover the Sweet History and Irresistible Recipe for St. Louis Gooey Butter Cake"
St. Louis, Missouri, is renowned for its unique culinary delight: the Gooey Butter Cake. This sweet treat has become an emblematic dessert of the city, with various local coffee shops, bakeries, and restaurants offering their own twist on the classic. The Gooey Butter Cake has not only captured the hearts of locals but has also become a must-try for visitors. This article will guide you through some of the best spots in St. Louis to indulge in this buttery, rich confection, exploring the traditional varieties as well as innovative spins that cater to every palate. Key Takeaways Park Avenue Coffee is a crowd favorite, voted as having the best Gooey Butter Cake in St. Louis, with a staggering 76 varieties including Red Velvet and Triple Chocolate. The Mud House and Russell's on Macklind are highly praised for their Gooey Butter Cakes, with customers lauding their phenomenal and amazing offerings. Missouri Baking Company and The London Tea Room are celebrated for their traditional and innovative versions of the Gooey Butter Cake, like the Pumpkin Gooey Butter Bar. Broadway Oyster Bar and Vin de Set offer unique dessert experiences, pairing unconventional items like alligator cheesecake and maple cheesecake with the classic Gooey Butter Cake. Local reviews emphasize the importance of pairing coffee with Gooey Butter Cake, highlighting the complementary flavors and the overall experience. The Sweet Spot of St. Louis: Gooey Butter Cake Park Avenue Coffee: A Local Favorite Nestled in the heart of Lafayette Square, Park Avenue Coffee offers a cozy retreat for coffee aficionados and cake lovers alike. With a staggering 76 varieties of gooey butter cake, this local gem has become a beacon for those seeking to indulge in St. Louis's signature dessert. Favorites like the Red Velvet and Triple Chocolate stand out, but the Original remains a timeless classic. The coffee shop's reputation for quality is echoed in customer testimonials, with many declaring it as one of the best spots for coffee and gooey butter cake in the city. The ambiance of the location provides a perfect backdrop for social gatherings or a peaceful moment alone with a cup of joe. Whether you're a local or just passing through, Park Avenue Coffee's welcoming atmosphere and exceptional offerings are not to be missed. Here's a quick glimpse at what makes this coffee shop a must-visit destination: 76 varieties of gooey butter cake Voted best Gooey Butter Cake in St. Louis Excellent coffee paired with delectable cakes A great location for meeting friends or enjoying some quiet time The Mud House: Where Coffee Meets Confection Nestled in the heart of Benton Park, The Mud House stands as a beacon for those seeking the perfect blend of coffee and confection. Patrons rave about the gooey butter cake, a St. Louis specialty that has found a loving home at this cozy coffee shop. The Mud House's version of this classic treat has been described as 'phenomenal' and 'the best in the city,' earning it a loyal following. Regulars often find themselves torn between the mascarpone cheesecake, praised for its creamy texture and tart green apple notes, and the gooey butter cake, which has become a must-try item. Here's what some of the visitors had to say: Andrea A: "The gooey butter cake is phenomenal." Glenn Logan: "The dirty chai is outstanding, plus the gooey butter cake is the best in the city!" Andy Hyland: "Get the gooey butter cake, it's fucking awesome." Whether you're a local or just passing through, The Mud House invites you to pause and savor the moment, one delicious bite at a time. Baileys' Chocolate Bar: Indulgence Redefined At Baileys' Chocolate Bar, the experience goes beyond the ordinary, offering a symphony of chocolate-inspired desserts that tantalize the taste buds. With an impressive rating of 8.2, this Lafayette Square gem is renowned for its unique takes on classic treats. Patrons rave about the Chocolate Cake Shot and the Mascarpone cheesecake, which is described as creamy, sweet, and with a hint of tartness from green apple. Whether you're ending your meal with a decadent dessert or simply indulging in a sweet escape, Baileys' Chocolate Bar redefines indulgence. The establishment's commitment to quality and innovation ensures that each visit is a memorable one. A Taste of Tradition: Exploring Varieties of Gooey Butter Cake Missouri Baking Company: A Legacy of Sweetness Stepping into the Missouri Baking Company is like taking a trip back in time to when recipes were treasured family secrets and every cake was made with a generous dollop of love. The Gooey Butter Cake here is not just a dessert; it's a slice of St. Louis history. Patrons like Amber Herrera rave about its unmatched quality, declaring it the best in the city. The bakery's reputation is built on more than just its signature cake. Customers like Brian Johnson praise the variety of baked goods, from the Italian loaf to the specialty breads like blueberry pound cake. The service, often described as warm and welcoming, adds to the charm of this local gem. While the gooey butter cake might have been an accidental invention in the 1930s, today it stands as a deliberate testament to the city's culinary prowess. Celebrated on National Gooey Butter Cake Day every August 12th, this confection continues to win hearts and taste buds across generations. Russell's on Macklind: Home of the Chocolate Chip Gooey Butter Cake Nestled in the heart of The Southampton neighborhood, Russell's on Macklind stands out as a beacon for dessert lovers. Patrons rave about the chocolate chip gooey butter cake, a unique twist on the St. Louis classic that has earned the cafe a reputation for having the 'best gooey butter cake in town.' While the chocolate chip gooey butter cake is a must-try, the cafe also offers a variety of other delectable treats. Here's what customers say: Lauren Grigg: 'Eat a piece of chocolate torte or chocolate chip gooey butter cake and enjoy the lovely atmosphere.' Justin Thorp: 'Amazing gooey butter cake. Great sandwiches and salads.' If you're planning a visit, take note of the cafe's details: The London Tea Room: A Twist with Pumpkin Gooey Butter Bar The London Tea Room, nestled at 3128 Morganford Rd, is a quaint spot that offers a unique take on the classic St. Louis dessert with their Pumpkin Gooey Butter Bar. Patrons like Joshua Littrell rave about the bar's perfect blend of seasonal spice and sweet, creamy goodness, making it a must-try for both locals and visitors. The experience of enjoying a slice of gooey butter cake at The London Tea Room is about more than just indulging in a sweet treat; it's about embracing a piece of St. Louis culture. The Tea Room's commitment to quality is evident in their high-quality loose leaf teas and the care they put into each baked confection. Beyond the Cake: Complementary Delights in St. Louis Broadway Oyster Bar: From Alligator Cheesecake to Gooey Butter Cake At the heart of St. Louis's vibrant culinary scene, Broadway Oyster Bar stands out not only for its unique alligator cheesecake but also for its sublime gooey butter cake. Patrons rave about the traditional and red velvet versions, each earning its own following for their delectable flavors. The restaurant's reputation is well-earned, with a Foursquare rating of 9.1 and a spot on the list of 'The 15 Best Places for Cake in St Louis'. It's a must-visit for anyone looking to experience the full range of what St. Louis has to offer, from the adventurous alligator cheesecake to the comforting sweetness of gooey butter cake. The Cakery Bakery: Red Velvet and More Nestled in the heart of Clayton-Tamm, The Cakery Bakery stands out not just for its signature red velvet cake, but for the warmth and friendliness that greets every customer. This small dessert shop has become a beacon for those seeking a sweet treat, with patrons like James Robertson praising its delicious offerings and the pleasant experience provided by the staff. While The Cakery Bakery is renowned for its wedding cakes and special occasion delights, it's their everyday baked goods that keep locals coming back. From the classic cookie cake to the irresistible red velvet, there's a confection for every palate. Julie Miller's endorsement is a testament to the bakery's commitment to quality and service, making it a must-visit for anyone in St. Louis. Vin de Set: French Flair with Maple Cheesecake Nestled in the heart of Downtown West, Vin de Set stands out as a beacon of French culinary tradition in St. Louis. With a rating of 8.5, this French Restaurant is not just about the main course; it's a complete experience that culminates with a dessert that has patrons raving. The Maple Cheesecake comes highly recommended, with Blake E's succinct endorsement: "Need a dessert choice? Two words: Maple Cheesecake." This sweet treat is a must-try for anyone seeking the perfect finish to their meal. For those who have savored the delights of Vin de Set, the consensus is clear. Brandy M. describes the experience as the best dinner in St. Louis, with the escargot and cheesecake taking your tastebuds to heaven. It's not just about the food; it's about the memories created around the table, with each bite of the Maple Cheesecake serving as a sweet memento of St. Louis's culinary landscape. The Connoisseur's Guide to Gooey Butter Cake Hotspots The Cup: Cupcake Shop with a Gooey Twist Nestled in the heart of Central West End, The Cup stands out not just for its signature cupcakes but for its unique take on the St. Louis classic, Gooey Butter Cake. Patrons rave about the Gold Rush, a delightful blend of yellow cake and chocolate icing, and the seasonal Italian Creme, a light French vanilla cake adorned with toasted coconut and buttercream frosting. Despite the high praise, some customers express a longing for vanilla over almond extract, highlighting the shop's commitment to distinctive flavors. The Cup's dedication to quality and variety is evident, with moist cakes that leave a lasting impression. While the debate over flavor extracts continues, The Cup's gooey butter cake remains a beloved treat among locals, securing its place as a must-visit destination for dessert aficionados in St. Louis. The London Tea Room: Quality and Variety in Cakes The London Tea Room stands out as a beacon of British tradition amidst the bustling streets of St. Louis. Visitors are greeted with an array of in-house baked goods, each promising a taste of authenticity and comfort. The Tea Room's Pumpkin Gooey Butter Bar has been lauded for its unique twist on the St. Louis classic, while the Lemon Blueberry Cake emerges as a moist and flavorful delight that has captured the hearts of locals. Here's what patrons have to say about their experience: Joshua Littrell describes the Lemon Blueberry Cake as "ssssooooo good!" Kara Kirchherr praises the high-quality loose leaf tea and the delicious scones. The London Tea Room not only serves as a haven for tea enthusiasts but also stands as a testament to the versatility and enduring appeal of the Gooey Butter Cake. Riverfront Times' Picks: In-House Baked Goodness The Riverfront Times has long been a trusted source for the best local eats, and their selection of in-house baked delights is no exception. STL Steak and Cake has recently opened its doors in Tower Grove South, bringing a fresh venue for cake connoisseurs to explore. Located at 4278 Connecticut Street, this new establishment is reviving a once-vacant storefront with its unique combination of savory steaks and sweet treats. The Riverfront Times' list is not just about the latest openings; it's a celebration of the city's ongoing love affair with baked goods. From the wall-to-wall shelves of Diana's, brimming with fresh items daily, to the cozy corners of Sanctuaria, where the empanadas and tres leches cake have locals raving, the guide is a testament to St. Louis's diverse and delicious bakery scene. Customer Acclaims and Secret Recipes Local Reviews: What St. Louisians Are Saying St. Louis locals have a sweet spot for their iconic Gooey Butter Cake, and their reviews reflect a city proud of its culinary delight. Each bite is filled with crispy tops and creamy middle textures, as one customer raved about the Prairie City Bakery's version. The richness and sweetness of these cakes are consistently praised, making them a must-try for both residents and visitors alike. From coffee shops to American restaurants, the cake finds its way into the hearts of many. Park Avenue Coffee scores a 7.7 on Foursquare, indicating its popularity among locals. Meanwhile, the Broadway Oyster Bar, with a rating of 9.1, surprises guests with its diverse menu that includes the alluring alligator cheesecake. Whether it's the traditional flavor or a creative twist like red velvet, the city's bakeries and eateries receive accolades for their take on this beloved dessert. Secrets Behind the Best Gooey Butter Cake The quest for the perfect Gooey Butter Cake is a journey of sweet discovery. The secret to a sublime Gooey Butter Cake lies in the balance of a dense, rich base with a lusciously sweet and creamy topping. Each bakery in St. Louis adds its unique twist to this classic treat, but there are a few key elements that consistently stand out. Quality Ingredients: The foundation of any great cake; fresh, high-quality eggs, butter, and vanilla extract make a noticeable difference. Texture: A slightly crisp and golden edge with a gooey center is the hallmark of authenticity. Variety: From traditional recipes to innovative flavors like red velvet and pumpkin, variety keeps the love for Gooey Butter Cake alive. While many bakeries keep their recipes close to the chest, patrons often share that the best versions of Gooey Butter Cake are those that stick to tradition while allowing room for a little creativity. Whether it's a family recipe passed down through generations or a new take from a local coffee shop, the best Gooey Butter Cakes are made with passion and served with pride. Culinary Delights: Pairing Coffee with Gooey Butter Cake The perfect coffee pairing can elevate the experience of indulging in a gooey butter cake to new heights. A well-chosen coffee can complement the rich, sweet flavors of the cake, creating a harmonious balance on the palate. Here are some pairing ideas that have been well-received by St. Louis locals: A robust espresso to cut through the sweetness and add a depth of flavor. A smooth latte that mirrors the creamy texture of the cake. A spicy chai latte to contrast the sweetness with its aromatic spices. Remember, the goal is to enhance the overall tasting experience, so feel free to experiment with different coffee styles until you find your perfect match. Conclusion As we've explored the sweet and indulgent world of St. Louis Gooey Butter Cake, it's clear that this local delicacy has captured the hearts of residents and visitors alike. From the traditional to the inventive red velvet and pumpkin variations, each slice offers a taste of St. Louis's rich culinary culture. Whether enjoyed with a cup of excellent coffee at Park Avenue Coffee, savored alongside a meal at Broadway Oyster Bar, or as a treat from the beloved Missouri Baking Company, the gooey butter cake stands out as a must-try dessert. Its widespread acclaim among the city's cafes, bakeries, and restaurants is a testament to its irresistible charm. So, the next time you find yourself in St. Louis, be sure to indulge in a piece of gooey butter cake and experience a beloved piece of the city's sweet history. Frequently Asked Questions What is Gooey Butter Cake and why is it famous in St. Louis? Gooey Butter Cake is a rich, sweet dessert that originated in St. Louis, Missouri. It's famous for its dense, buttery texture and a crust that is topped with a layer of sweet, gooey filling. It has become a beloved treat in the area and a symbol of St. Louis's culinary tradition. Where can I find the best Gooey Butter Cake in St. Louis? Park Avenue Coffee is voted best Gooey Butter Cake in St. Louis, offering over 76 varieties including fan favorites like Red Velvet and Triple Chocolate. Missouri Baking Company and Russell's on Macklind are also highly praised for their delicious versions of the cake. Are there any variations of the traditional Gooey Butter Cake? Yes, there are numerous variations of the traditional Gooey Butter Cake. Some popular ones include the Chocolate Chip Gooey Butter Cake at Russell's on Macklind and the Pumpkin Gooey Butter Bar at The London Tea Room. Can I find other desserts in St. Louis that are similar to Gooey Butter Cake? Certainly! St. Louis offers a variety of unique desserts like the alligator cheesecake at Broadway Oyster Bar and the Maple Cheesecake at Vin de Set. These desserts offer a twist on the rich, creamy textures similar to Gooey Butter Cake. Are there any coffee shops in St. Louis that serve Gooey Butter Cake? Many coffee shops in St. Louis serve Gooey Butter Cake alongside their beverages. The Mud House, for example, is known for its phenomenal gooey butter cake and coffee pairing. Park Avenue Coffee is another popular spot for enjoying this St. Louis classic with a cup of coffee. Is Gooey Butter Cake available year-round in St. Louis? Yes, Gooey Butter Cake is available throughout the year in St. Louis. Many bakeries and coffee shops offer this local specialty as a staple item due to its enduring popularity among residents and visitors alike.
- "Delicious & Fluffy: How to Perfect Your Japanese Cheesecake Recipe"
Japanese cheesecake, known for its distinctively light and fluffy texture, is a delightful variation of the classic cheesecake. With its subtle sweetness and minimal ingredients, this dessert has captured the hearts of food enthusiasts worldwide. In this article, we explore the essence of Japanese cheesecake, its simple yet sophisticated recipe, and the various ways it can be enjoyed with unique flavor pairings. We also delve into its global popularity and the techniques required to master this airy confection. Key Takeaways Japanese cheesecake is characterized by its airy, souffle-like texture, achieved through the use of fewer ingredients and less sugar compared to traditional cheesecake. The classic Japanese cheesecake recipe is remarkably simple, requiring just three key ingredients: eggs, cream cheese, and sweetened condensed milk. Variations like Japanese cheesecake with mango & coconut chantilly offer a light and flavorful twist, reflecting the dessert's adaptability to different tastes. While known internationally as 'Japanese cheesecake', in Japan it's referred to as souffle cheesecake and is one of several types of cheesecake available. Mastering the technique of making Japanese cheesecake involves careful egg separation and incorporating whipped egg whites for the perfect consistency. The Essence of Japanese Cheesecake Understanding the Unique Texture The allure of Japanese cheesecake lies in its distinctive texture, which sets it apart from its Western counterpart. The secret to its lightness is the meticulous separation of egg whites from the yolks, a process that introduces air and creates a mousse-like consistency. The egg whites are whipped until stiff peaks form and are then gently folded into the batter, ensuring the cake's signature fluffiness. When baked, the cheesecake develops a subtle, caramelized top layer, beneath which lies a smooth, creamy body that culminates in a fluffy, almost ethereal base. This multi-layered experience is why many are drawn to its unique charm. To achieve this texture, the ingredients must be combined with precision: Cream cheese, cream, and egg yolks are mixed to form the base. Flour, vanilla extract, and milk are incorporated for flavor and structure. Finally, the whipped egg whites are folded in to introduce airiness. Understanding and executing this delicate process is key to creating the perfect Japanese cheesecake, a dessert that is as much a treat for the palate as it is a testament to the art of baking. Comparing Japanese vs. Traditional Cheesecake When it comes to cheesecake, the Japanese version stands out with its distinctive texture and composition. Japanese cheesecake is often likened to a hybrid between a souffl\u00e9 and a traditional cheesecake, with a lighter, airier consistency. Unlike its Western counterpart, which is typically dense and rich, the Japanese cheesecake contains less cream cheese and sugar, resulting in a subtler sweetness and a delicate mouthfeel. In Japan, you won't find a 'Japanese cheesecake' label in bakeries. Instead, there are three main types: baked, rare (no-bake), and souffl\u00e9 cheesecake. Each type offers a unique take on the dessert, with the souffl\u00e9 cheesecake being the closest to what is internationally recognized as 'Japanese cheesecake'. This diversity within Japan itself highlights the versatility and global appeal of this beloved dessert. The Role of Key Ingredients The allure of Japanese cheesecake lies not just in its fluffy texture, but also in the harmony of its key ingredients. Each component plays a pivotal role in creating the cake's signature lightness and subtle sweetness. Cream cheese provides the foundational flavor and creamy texture. Eggs are separated; the yolks enrich the batter, while the whipped whites introduce airiness. Sugar sweetens the cake and stabilizes the egg whites. Cornstarch helps to set the cake, ensuring it holds its delicate structure. Understanding the role of each ingredient is crucial for any baker aspiring to perfect this dessert. The cream cheese must be of high quality and at room temperature to blend smoothly. Eggs should be fresh, and their careful separation is key to achieving the cake's loft. The amount of sugar and cornstarch must be measured accurately to avoid altering the cake's texture and flavor profile. Simple Yet Sophisticated: The 3-Ingredient Recipe The Significance of Minimal Ingredients The allure of Japanese cheesecake lies not just in its fluffy texture and subtle sweetness, but also in its simplicity. The extraordinary thing about the Japanese cheesecake recipe is that it only requires three cheap ingredients. This minimalist approach is a testament to the Japanese philosophy of 'less is more', where the focus is on the quality and the harmony of the components rather than their quantity. Cream cheese Eggs Sugar These ingredients, when combined with precision and care, create a dessert that is both luxurious and understated. The inclusion of umami-rich ingredients enhances the overall flavor profile, making every bite a testament to the versatility of simple elements. Step-by-Step Guide to Making Japanese Cheesecake The allure of the Japanese cheesecake lies in its simplicity and the mastery required to perfect it. With just three ingredients, this dessert transforms into a creamy, ethereal delight that's both cheap and delicious. To begin, grab four eggs, 250g cream cheese, and 400g condensed milk. It's crucial to use sweetened condensed milk for the right balance of flavor. Start by separating the egg yolks from the whites, as this will be the foundation of your cheesecake's texture. Prepare the cream cheese mixture by combining the yolks and cream cheese until smooth. Gradually mix in the condensed milk to the cream cheese mixture. In a separate bowl, beat the egg whites until stiff peaks form. Carefully fold the egg whites into the cream cheese mixture, maintaining as much air as possible. Pour the batter into a prepared pan and bake in a water bath to ensure even cooking and a moist texture. Remember, patience and precision are your allies in creating the perfect Japanese cheesecake. Tips for Achieving the Perfect Consistency Achieving the perfect consistency in Japanese cheesecake is an art that requires precision and patience. Ensure a smooth blend by thoroughly mixing the yolks, cream cheese, and condensed milk before incorporating the whisked egg whites. Add the egg whites gradually, folding them in with a spatula to maintain the mixture's airiness. Here are some additional tips: Use a mixer to beat the egg whites until foamy, then continue at a low to medium-low speed until you achieve a white, fluffy foam. Separate the eggs carefully, ensuring no yolk contaminates the whites, as this can affect the egg whites' ability to form stiff peaks. When adding the cream cheese to the yolks, aim for a soft, almost liquid-like mixture, which usually takes about ten minutes of mixing. Remember, the consistency of your batter will greatly influence the final texture of your cheesecake. A water bath during baking is crucial for a smooth and creamy result, so don't skip this step. Pour the batter into a buttered and lined mold, then place it in the oven water bath to achieve that signature delicate texture. Variations and Pairings Japanese Cheesecake with Mango & Coconut Chantilly The fusion of Japanese cheesecake with tropical flavors creates an exquisite dessert that's both light and indulgent. The addition of mango and coconut chantilly not only introduces a delightful sweetness but also adds a creamy texture that complements the cheesecake's airy consistency. To achieve this tropical twist, consider the following steps: Whip the coconut milk into a light chantilly cream. Dice the mango into small, bite-sized pieces. Gently fold the mango into the coconut chantilly, ensuring not to deflate the mixture. Serve the mango and coconut chantilly atop or alongside the cheesecake, allowing each flavor to shine. This dessert is a testament to the versatility of Japanese cheesecake, proving that it can be the foundation for a variety of flavor profiles. Exploring Different Flavor Combinations The versatility of Japanese cheesecake allows for a myriad of flavor combinations that can tantalize the taste buds and offer a unique experience with each variation. Experimenting with different flavors can transform the simple cheesecake into an exotic dessert. Classic citrus infusions, such as lemon or yuzu, can add a refreshing zest. Incorporating matcha powder can give the cheesecake a distinct, earthy taste and a vibrant green hue. For a richer experience, swirls of chocolate or dollops of fruit preserves can be marbled through the batter before baking. Each ingredient chosen for the flavor combination should be added with care, considering how it interacts with the main components of the cheesecake. Whether opting for subtle or bold flavors, the goal is to enhance the overall sensory experience of this beloved dessert. Serving Suggestions for an Authentic Experience To truly appreciate the delicate flavors of Japanese cheesecake, presentation and accompaniments are key. Serve the cheesecake chilled, allowing the subtle sweetness and creamy texture to stand out. Pair it with a cup of green tea for a traditional touch, or a light coffee for contrast. Green tea: Enhances the cheesecake's sweetness Coffee: Offers a bitter counterpoint Fresh fruit: Adds a refreshing element Whipped cream: Provides a creamy complement For those looking to recreate the authentic Japanese cheesecake experience at home, it's essential to start with the right ingredients. As highlighted in the title: How to Make Authentic Japanese Cheesecake at Home - GripRoom, the foundation includes cream cheese, eggs, and sugar. Ensure each component is of the highest quality to reflect the dessert's refined nature. Japanese Cheesecake Around the World Popularity and Adaptations Outside Japan The allure of Japanese cheesecake has transcended Japan's borders, captivating the palates of dessert enthusiasts worldwide. Its light, fluffy texture and subtle sweetness have contributed to its international acclaim. Outside of Japan, adaptations of this beloved dessert can be found in various forms, each adding a local twist to the classic recipe. In many countries, Japanese cheesecake is marketed as a premium product, often associated with a fusion of traditional techniques and modern flavors. The table below highlights the popularity of Japanese cheesecake in different regions: Despite its widespread popularity, it's interesting to note that in Japan, the term 'Japanese cheesecake' is not commonly used. Instead, there are three distinct types: baked, rare (no-bake), and souffl\u00e9, each with its own unique characteristics and following. The Different Types of Cheesecake in Japan In Japan, the term 'Japanese cheesecake' might not be as commonly used as it is internationally, but the country offers a delightful variety of cheesecakes, each with its own unique characteristics. Baked cheesecake is the closest to the Western-style cheesecake, rich and dense. On the other hand, the 'rare' cheesecake refers to a no-bake version, often chilled and set with gelatin, offering a creamy and smooth texture. The souffl\u00e9 cheesecake, which has gained popularity around the world as 'Japanese cheesecake', is prized for its airy, fluffy texture that is reminiscent of a souffl\u00e9. This style of cheesecake is lighter in both texture and flavor, often containing less cream cheese and sugar compared to its Western counterpart. While these are the primary categories, numerous variations exist within each type, incorporating different flavors and techniques to create a wide array of desserts that continue to evolve with contemporary culinary trends. Cultural Impact and Global Reception The allure of Japanese cheesecake has transcended borders, captivating palates and inspiring bakers around the globe. Its light, fluffy texture and subtle sweetness have made it a beloved dessert internationally, often serving as a canvas for culinary innovation and cultural exchange. While the cheesecake remains authentically Japanese, its reception varies across different cultures. Here's a glimpse into its global impact: In the United States, it has been embraced by boutique bakeries and dessert enthusiasts, often paired with local flavors like blueberry or pumpkin spice. European patisseries have incorporated it into their repertoire, sometimes blending it with traditional pastries or regional ingredients. Across Asia, variations have emerged that infuse local fruits and teas, reflecting the region's diverse culinary heritage. The Japanese cheesecake's journey from a local specialty to an international sensation underscores the power of food to connect and inspire across cultures. Mastering the Technique The Importance of Egg Separation The art of creating the perfect Japanese cheesecake lies significantly in the importance of egg separation. This process is not just a trivial step; it's a critical technique that ensures the cheesecake's signature fluffiness and light texture. Firstly, the yolks and whites must be separated with precision to avoid any cross-contamination that could affect the final product's consistency. The yolks are typically blended with cream cheese and other ingredients to form a rich, smooth base. On the other hand, the whites are beaten until they reach the perfect foamy texture, a stage known as meringue. This meringue is then delicately folded into the base mixture, a step that demands a gentle hand to maintain the airiness of the whipped whites. Here's a simple guide to ensure you get it right: Separate the yolks from the whites into two deep bowls. Beat the egg whites until foamy and stiff peaks form. Blend the yolks with cream cheese and other ingredients until smooth. Gently fold the meringue into the base mixture, using a spatula to incorporate it gradually. Remember, achieving the perfect emulsification and consistency is key to the cheesecake's structure and mouthfeel. Baking Tips for a Flawless Cheesecake Achieving the perfect Japanese cheesecake requires precision and patience. Here are some tips to ensure your cheesecake turns out light and airy, with the characteristic souffl\u00e9-like texture that sets it apart. Preheat your oven to the correct temperature before baking. This ensures a consistent environment for your cheesecake to rise properly. Grease your mold and line the bottom with baking paper to prevent sticking. This simple step can save you from the heartache of a cheesecake that won't release from the pan. When incorporating the egg whites, do so gently to maintain their volume. This is crucial for the cheesecake's signature fluffiness. Use a water bath during baking to provide a moist and even heat, which helps prevent cracking and ensures a smooth top. Lastly, don't be tempted to open the oven door too soon. A sudden change in temperature can cause the cheesecake to collapse. Allow it to cool gradually in the oven with the door slightly ajar for the best results. Common Mistakes to Avoid Avoiding common mistakes is crucial when striving for the perfect Japanese Cheesecake. One of the most frequent errors is undermixing or overmixing the batter, which can lead to a cheesecake that's either too dense or full of air bubbles. It's essential to mix just until the ingredients are combined and no longer. Another pitfall is improper oven temperature. Cheesecakes require a gentle heat to cook evenly without cracking. Using an oven thermometer can help ensure accuracy. Additionally, water baths are often used to regulate the temperature, but failing to wrap the pan properly can result in a soggy crust. Lastly, here's a quick checklist to help you remember the dos and don'ts: Do use room temperature ingredients Don't open the oven door frequently Do perform the jiggle test to check doneness Don't forget to line and grease your pan Do allow the cheesecake to cool completely before refrigerating Conclusion In conclusion, the Japanese cheesecake stands out as a delightful dessert that combines the richness of traditional cheesecake with a unique, airy texture akin to a soufflé. Its simplicity, requiring just a few inexpensive ingredients, makes it an accessible treat for bakers of all levels. The versatility of this dessert is evident in its various forms—baked, rare, and soufflé—each offering a different experience of taste and texture. Whether you choose to enjoy it plain or accompanied by fruit and whipped cream, the Japanese cheesecake is a testament to the elegance of Japanese cuisine and its ability to captivate palates worldwide. As you embark on making your own, remember to share your creations and experiences, perhaps even inspiring others to discover the joy of this exquisite dessert. Frequently Asked Questions What is a Japanese cheesecake? Japanese cheesecake is a type of cheesecake known for its fluffy, soufflé-like texture. It contains less cream cheese and sugar compared to traditional Western cheesecakes, making it lighter and less sweet. What are the key ingredients for Japanese cheesecake? The basic Japanese cheesecake recipe requires only three key ingredients: eggs, cream cheese, and sweetened condensed milk. How do you achieve the perfect consistency for Japanese cheesecake? To achieve the perfect consistency, it's crucial to separate the egg whites from the yolks, whip the egg whites until stiff, and gently fold them into the batter to maintain the airy texture. Can you suggest any flavor variations for Japanese cheesecake? Yes, a popular variation is Japanese cheesecake with mango and coconut Chantilly. You can also experiment with other fruit toppings and flavored whipped creams to complement the delicate taste of the cheesecake. Is Japanese cheesecake popular outside of Japan? Japanese cheesecake has gained popularity worldwide due to its unique texture and taste. Many bakeries outside Japan offer their versions of this delightful dessert. What are the different types of cheesecake found in Japan? In Japan, you'll find three main types of cheesecake: baked cheesecake, which is the traditional version; rare cheesecake, which is a no-bake version; and soufflé cheesecake, which is similar to the Japanese cheesecake known internationally.
- "The Ultimate Guide to Perfecting Your Sponge Cake Recipe"
Sponge cake, with its dreamy soft and spongy texture, stands out from other cakes for its lightness and versatility. It's a beloved treat that can be enjoyed on its own as a tea cake or transformed into an elaborate dessert for special occasions. Made with staple kitchen ingredients such as flour, eggs, sugar, and oil, sponge cake is a fundamental recipe that's easy to adapt with various flavors and additions. Whether you're a beginner or an experienced baker, mastering the sponge cake is a rewarding endeavor that opens up a world of baking possibilities. Key Takeaways Sponge cake is characterized by its light, fluffy, and airy texture, primarily due to the whipped eggs used in its preparation. It is a versatile base that can be enjoyed on its own or used in layered cakes and desserts like trifles. The recipe is simple, using common pantry ingredients, and is suitable for beginners as well as experienced bakers. Flavor variations are endless, with options to add different essences like orange or butterscotch, and mix-ins such as chocolate chips or tutti frutti. Consistency and perfect results can be achieved by following precise instructions, and the cake can be adapted for various diets and occasions. The Basics of Sponge Cake Defining Sponge Cake A sponge cake is a delightful treat that stands out for its light and airy texture, achieved through the meticulous whipping of eggs. Unlike denser cakes, the sponge cake's structure is characterized by its delicate crumb and its ability to soak up syrups and creams, making it an ideal base for various desserts. Ingredients: Flour, eggs, sugar, and sometimes butter or oil. Texture: Fluffy, airy, and moist. Uses: Base for layered cakes, trifles, and as a tea cake. The recipe for sponge cake is a staple in many bakers' repertoires, often passed down through generations or perfected in baking workshops. Its variations are numerous, allowing for the inclusion of different flavors like vanilla, orange, or butterscotch, and add-ins such as chocolate chips or tutti frutti. Key Ingredients for the Perfect Sponge Cake The foundation of a perfect sponge cake lies in its simplicity and the quality of its ingredients. A classic sponge cake requires only a few key components, each playing a vital role in creating the cake's signature light and airy texture. Flour: Provides the structure and is often sifted to incorporate air. Sugar: Adds sweetness and aids in the aeration process during whipping. Eggs: Essential for binding the ingredients and introducing air. Baking Powder: Acts as a leavening agent to help the cake rise. Remember to whip the egg whites until they are light and fluffy, as this step is pivotal for achieving the sponge's characteristic fluff. Once the batter is ready, it should be poured into the prepared cake tin and baked without delay to prevent deflation. The Role of Eggs in Sponge Cake Texture Eggs are a cornerstone ingredient in sponge cake, providing structure, moisture, and that classic airy texture we all love. The role of eggs is multifaceted, impacting everything from volume to flavor. The egg whites, when whipped, introduce air into the batter, which is essential for achieving the light and fluffy consistency characteristic of a perfect sponge cake. It's crucial to whip the egg whites until they are light and fluffy, as this step is pivotal for a fluffy sponge. After whipping, fold in the other ingredients gently to avoid deflating the batter. Here's a quick checklist to ensure your eggs are doing their job in your sponge cake: Whip the egg whites until light and fluffy. Fold in ingredients gently after eggs are whipped. Pour batter into the cake tin and bake immediately. Check the cake after 25 minutes with a toothpick. Remember, the fats in the egg yolks contribute to the cake's richness and color, making them just as important as the whites. Baking the Perfect Sponge Cake Preparation of Baking Tools and Ingredients Before embarking on the journey of baking a Victoria Sponge Cake, it's crucial to have all your tools and ingredients ready. Begin by preparing a 6'X6' cake tin; line it with parchment paper, brush it with melted butter, and dust it with a little flour to ensure your cake releases easily after baking. Here's a quick checklist of what you'll need: Parchment paper for lining the cake tin Melted butter for greasing Flour for dusting the tin and for the cake batter Baking powder and baking soda as leavening agents Eggs, separated into whites and yolks Vinegar to create a tender crumb Vanilla essence for flavor Milk and oil for moisture Remember to preheat your oven to the correct temperature, as an accurate oven temperature is vital for the perfect bake. Separate your eggs and have your dry ingredients sieved and mixed, ready to be incorporated into the batter. Step-by-Step Baking Instructions After preparing your cake tin and preheating the oven, the real magic begins. Whisk room-temperature eggs and sugar until the mixture triples in volume and forms ribbons when lifted. This is crucial for achieving the desired sponge cake texture. Pour the batter into the prepared pan, smoothing the top for an even rise. Bake for 25–30 minutes at 180°C (356°F) or until a toothpick comes out clean. Remember, patience is key; allow the cake to cool completely before slicing to enjoy the fruits of your labor. Here's a quick checklist to ensure you've got everything right: Preheat oven to 180°C (356°F) Whisk eggs and sugar to triple volume Fold in flour gently Bake for 25-30 minutes Cool down completely Common Mistakes and How to Avoid Them Avoiding common mistakes is crucial for baking a perfect sponge cake. First, check the expiration dates on your baking powder and baking soda. Using expired leavening agents can lead to a cake that doesn't rise properly. Overmixing the batter once the dry ingredients are added can result in a tough cake; instead, gently fold in the ingredients to maintain a light texture. If you don't have an oven, don't worry. A pressure cooker or a kadai with a base layer of salt or sand can be used as an alternative baking method. However, for those without a hand mixer, using a stand mixer is preferable to hand whisking, which can be overly time-consuming and may not yield the desired cake consistency. Flavor Variations and Additions Experimenting with Different Essences The essence you choose can transform the humble sponge cake into a sensory delight. Vanilla extract remains a classic choice, but why not venture into new territories? Almond extract adds a nutty warmth, while citrus oils bring a zesty punch. For those with a penchant for floral notes, rose or lavender essences can impart a delicate fragrance that elevates the cake to a new level of sophistication. Vanilla Extract: The timeless classic for a reason. Almond Extract: Adds a hint of nuttiness, perfect with fruits. Citrus Oils: Lemon or orange zest for a tangy twist. Rose Essence: A floral touch for a refined flavor. Lavender Essence: Unique and aromatic, for an adventurous palate. Incorporating Add-ins like Chocolate Chips and Tutti Frutti Transforming a basic sponge cake into a delightful treat brimming with texture and flavor can be as simple as incorporating your favorite add-ins. Chocolate chips and tutti frutti are popular choices that blend wonderfully with the light and airy structure of sponge cake. When adding these mix-ins, it's crucial to coat them lightly in flour to prevent them from sinking to the bottom during the baking process. To ensure even distribution of add-ins like chocolate chips or tutti frutti, follow these steps: Toss the add-ins with a small amount of flour. Gently fold them into the batter just before pouring it into the baking pan. Avoid overmixing, as this can deflate the batter and lead to a denser cake. While the classic sponge cake is a marvel on its own, experimenting with add-ins can cater to a variety of tastes and occasions. From the simplicity of a vanilla sponge cake to a more decadent version studded with chocolate chips, the possibilities are endless. It is made using basic ingredients which you might already have on hand, allowing for a personalized touch with your choice of add-ins. Adapting the Recipe for Special Diets Sponge cake is a versatile dessert that can be modified to suit various dietary requirements. For those avoiding eggs, an eggless vanilla sponge cake can be just as delectable. The key is to find the right substitutes that maintain the cake's structure and fluffiness. Vegetarian versions can easily use flaxseed or chia seeds mixed with water as an egg alternative. Vegan adaptations might include plant-based milk and butter, along with a binding agent like banana or applesauce. For a gluten-free sponge, almond or coconut flour can replace traditional wheat flour. Dairy-free recipes can utilize soy or almond milk and vegan butter or oil. Additionally, wrapping the cake in plastic wrap or aluminum foil before placing it in an airtight container can further prolong its shelf life. This is especially useful for those who prepare their sponge cake in advance or have leftovers. Sponge Cake for Every Occasion Layering Techniques for Celebratory Cakes Creating a celebratory cake often involves the art of layering. Each layer can be a canvas for flavor and texture, offering a delightful surprise with every slice. Begin by ensuring that your sponge cake layers are completely cooled; this prevents the filling from melting and helps maintain the structure of the cake. Cool the cake layers on a wire rack to avoid sogginess. Trim the tops to create flat, even surfaces for stacking. Choose a complementary filling, such as fruit preserves or buttercream, and spread evenly between layers. For added stability, consider using a thin layer of frosting on the outside to act as a crumb coat before the final decoration. When stacking the layers, align them carefully to ensure a straight and stable cake. If you're aiming for a traditional Danish Layer Cake, bake individual layers from separate batters before stacking and filling each. This technique not only adds variety but also pays homage to a beloved dessert tradition. Transforming Sponge Cake into Elegant Desserts The simplicity of sponge cake makes it a perfect canvas for creating elegant desserts that are sure to impress. Layering with luxurious fillings such as mousses, fruit compotes, and whipped cream can elevate a basic sponge to a sophisticated treat. For a touch of finesse, consider a mirror glaze or a dusting of powdered sugar. Begin by slicing the sponge cake into even layers. Choose a complementary filling and spread it evenly between each layer. For a smooth finish, apply a thin crumb coat of frosting before the final layer. Chill the cake to set the layers, then apply the final coat of frosting or glaze. Remember, the final presentation is just as important as the taste. A garnish of fresh berries, edible flowers, or delicate chocolate shavings can add a pop of color and an extra dimension of flavor. With these simple steps, your sponge cake will be the centerpiece of any dining occasion. Serving Suggestions for Tea and Snack Cakes Sponge cakes, with their light and airy texture, are a delightful accompaniment to afternoon tea. These snack cakes, often referred to as tea cakes, can be customized with a variety of flavors, from the classic vanilla to orange or butterscotch essence. For a more indulgent treat, consider adding chocolate chips or tutti frutti to the batter. When serving sponge cake, presentation is key. Slice the cake neatly and arrange on a platter for an elegant display. To complement the cake, here are some popular side dishes: Sandwich Cake Orange Scones Roasted Salmon Sandwiches Banana Bread Scotch Eggs Remember to cool the cake completely before slicing to maintain its perfect structure. Store any leftovers in an airtight container to keep the cake moist and fresh. Whether you're hosting a party or simply enjoying a quiet afternoon, sponge cake is a versatile dessert that can be tailored to suit any occasion. Tips and Tricks from the Experts Learning from Baking Workshops Baking workshops offer a treasure trove of insights and hands-on experience that can elevate your sponge cake game to new heights. Participating in a workshop can demystify the complexities of baking, providing you with practical tips and techniques that are often overlooked in written recipes. For instance, you might learn the precise way to fold in flour to maintain the cake's light and airy texture, or discover the impact of oven temperature variations on your bake. These workshops are not just about following a recipe; they're about understanding the 'why' behind each step. Understanding the science of baking Perfecting the folding technique Controlling oven temperature Selecting the right ingredients Ensuring Consistency in Every Bake Achieving the same high-quality results with each sponge cake requires a methodical approach. Being precise when measuring ingredients is super important in baking. Straying from the recipe can lead to common issues like a cake that's too dense. To ensure consistency, follow these steps: Use a kitchen scale for accurate measurements. Ensure all ingredients are at room temperature before mixing. Stick to the recommended baking times and temperatures. Remember, small deviations can have a significant impact on your sponge cake's texture and flavor. Keep a baking journal to note any adjustments and their outcomes, which can be a valuable reference for future bakes. Storage and Freshness Tips To ensure your sponge cake remains as delightful as the day it was baked, proper storage is key. To maximize the shelf life of a sponge cake, it's essential to consume it fresh, slice as needed, and refrigerate leftovers in an airtight container. This will help maintain its moisture and prevent it from drying out. Remember, overbaking is a common culprit for dryness, so keep an eye on your cake and perform the toothpick test to ensure it's just right. If you find your cake hard or dry, it may be due to incorrect liquid measurements or overbaking. To enjoy your sponge cake at its best, follow these simple guidelines: Conclusion In conclusion, the sponge cake stands as a testament to the beauty of simplicity in baking. Its light, airy texture and versatility make it a beloved choice for everything from a humble tea-time treat to an elegant dessert base for special occasions. The recipe's adaptability allows for endless flavor variations, ensuring that there is a sponge cake to suit every palate. Whether you're a novice baker or a seasoned pro, the sponge cake is a delightful challenge with delicious rewards. Its straightforward ingredients and clear, step-by-step instructions pave the way for a perfect bake every time, making it a reliable and cherished recipe in any baker's repertoire. Frequently Asked Questions What is a sponge cake? Sponge Cake is a basic, light, fluffy, and airy cake made primarily from whipped eggs, flour, sugar, and sometimes oil or milk. It's known for its spongy texture and can be served as a snack cake or used as a base for layering cakes and various desserts. What are the key ingredients for a perfect sponge cake? The key ingredients for a perfect sponge cake include flour, sugar, eggs, and often a leavening agent like baking powder or baking soda. Some recipes may also call for oil or milk to enhance the cake's moisture. Can I make sponge cake with different flavors? Yes, you can flavor your sponge cake by adding different essences such as vanilla, orange, or butterscotch. You can also incorporate add-ins like chocolate chips or tutti frutti to create various taste profiles. How do I avoid common mistakes when baking sponge cake? To avoid common mistakes, ensure you prepare your baking tools and ingredients beforehand, follow the step-by-step instructions carefully, and avoid over-mixing the batter or opening the oven door too often during baking. Is sponge cake suitable for special diets? Sponge cake can be adapted for special diets. For example, you can use wheat flour for a whole grain version or experiment with egg substitutes and dairy-free options for vegan or allergy-friendly variations. How should I store sponge cake to keep it fresh? Store sponge cake in an airtight container at room temperature for a few days. For longer storage, you can wrap it well and refrigerate or freeze it. Always ensure the cake has cooled completely before storing.
- "Mastering the Art of Making the Perfect Lemon Meringue Pie: Tips and Tricks"
Lemon meringue pie is a delightful dessert that combines the tangy zest of lemon curd with the sweet, airy texture of meringue. This classic treat has been cherished for generations, and with the right techniques, you can create a homemade pie that rivals the best out there. Whether you're sticking to the traditional recipe or adding a twist with a secret ingredient like cardamom, the journey to the perfect lemon meringue pie is as rewarding as the final product. Key Takeaways The perfect balance of sweet and tart in the lemon curd filling is crucial for an authentic lemon meringue pie experience. Blind baking the crust and using pie weights ensures a crisp base that holds up to the creamy filling. Achieving stiff and glossy peaks in the meringue is essential for a fluffy, well-structured topping. A subtle addition of cardamom can elevate the classic lemon meringue pie, adding an exotic touch to the flavor profile. The pie should have a harmonious blend of flavors and textures, from the buttery crust to the intense citrus filling and the light meringue. The Art of Crafting the Perfect Lemon Meringue Pie Selecting the Right Ingredients The foundation of a classic Lemon Meringue Pie lies in the quality of its ingredients. Each component plays a pivotal role in creating the pie's signature taste and texture. For the pie crust, a balance between flakiness and firmness is essential to support the weight of the filling. The lemon filling, vibrant with citrus, requires fresh lemon juice for that bright, tangy flavor, and the zest to add depth. When it comes to the meringue, egg whites should be at room temperature to achieve maximum volume. A pinch of cream of tartar will help stabilize the peaks, and a subtle addition of vanilla extract can enhance the overall aroma. For those looking to add a special touch, a whisper of ground cardamom in the meringue can elevate the pie to new heights, marrying the warm spice with the lemon's acidity. Here's a quick checklist of the key ingredients: Fresh lemon juice and zest for the filling Room temperature egg whites for the meringue A pinch of kosher salt to balance the sweetness Cream of tartar for meringue stability Optional: A hint of ground cardamom for a unique twist Mastering the Lemon Curd Filling The heart of any lemon meringue pie is its curd, a luscious blend of tart lemon and sweet, creamy ingredients. Achieving the perfect balance of flavors and textures is crucial for a filling that's both tangy and smooth. Start by whisking together your sugar and cornstarch, then gradually incorporate water and bring the mixture to a boil, ensuring it thickens appropriately. Once your base is ready, it's time to temper the eggs. This involves gradually whisking half of the hot mixture into your beaten egg yolks to prevent them from curdling. After combining them well, return the mixture to heat until it reaches the desired consistency. Remember, patience is key; rushing this process can lead to a filling that's less than ideal. Here's a quick reference for the key components of your lemon curd: Fresh lemon juice (3/4 cup) White sugar (3/4 cup) Unsalted butter, cubed (1/2 cup) Large eggs (3) Grated lemon zest (1 tablespoon) Achieving the Ideal Meringue Consistency The secret to a perfect meringue lies in its consistency. Achieving stiff and glossy peaks is crucial for that quintessential lemon meringue pie experience. Begin by beating room temperature egg whites until foamy, then gradually add sugar, one tablespoon at a time, to ensure it dissolves properly and contributes to the structure of the meringue. Here's a quick checklist for your meringue: Use 3 to 4 large egg whites at room temperature. Add a 1/4 teaspoon of cream of tartar to stabilize the egg whites. Beat in 6 to 8 tablespoons of granulated sugar, one at a time. Include a 1/2 teaspoon of vanilla extract for flavor, and cardamom if desired. Bake the pie at 325 degrees F (162 degrees C) for 15 to 20 minutes, or until the meringue is golden. If the meringue or crust begins to brown too quickly, tent loosely with foil. The perfect meringue is not just about taste but also about the visual appeal, so aim for that beautiful golden-brown finish. Step-by-Step Guide to Homemade Lemon Meringue Pie Preparing the Pie Crust The foundation of any great lemon meringue pie is its crust. Begin by preheating your oven to 375 degrees F and carefully pressing your crust into a 9-inch pie plate. Ensure the edges are thick and well-formed, either crimped with fingers or fluted with a fork for that classic pie look. Next, it's crucial to dock the crust by pricking holes across the bottom with a fork. This prevents the crust from puffing up during baking. Cover the crust with parchment paper and fill it with pie weights or dry beans to keep it flat and even. After baking for 12 minutes, remove the weights and parchment, and bake for an additional 5 to 8 minutes until you achieve a golden brown perfection. For those opting for convenience, a store-bought crust can work just as well. Whether you choose a Pillsbury roll and bake crust or a frozen variety, make sure to follow the blind baking instructions specific to the product you're using. Creating a Balanced Lemon Filling The key to a balanced lemon filling lies in the harmony of sweetness and tartness, which hinges on the precise combination of sugar and fresh lemon juice. Begin by whisking together sugar and cornstarch, then gradually add water and bring the mixture to a boil, ensuring it thickens properly. The zest of the lemon not only adds a burst of flavor but also intensifies the pie's citrusy aroma. Incorporating egg yolks and unsalted butter into the filling adds a creamy texture that contrasts delightfully with the flaky crust. It's crucial to temper the egg yolks with the hot cornstarch mixture to prevent curdling, achieving a smooth and luxurious consistency. A pinch of kosher salt is the final touch that enhances and balances the sweet profile of the filling. Remember to pour the lemon mixture into the prepared pie crust and set it aside as you prepare the meringue topping. This step is pivotal in layering the flavors and textures that make up the best lemon pie. Whipping Up the Fluffy Meringue Topping The crowning glory of any lemon meringue pie is its ethereal meringue topping. Achieving the ideal consistency is crucial for that picture-perfect pie. Begin by ensuring your egg whites are at room temperature before beating them with cream of tartar until foamy. Gradually add sugar, one tablespoon at a time, while the mixer runs, until all sugar is incorporated and the whites transform into a stiff and glossy mixture. A touch of vanilla adds flavor, and for those who dare, a hint of cardamom can introduce an exotic twist. For a successful meringue, follow this simple ingredient list and the corresponding steps: 3 to 4 large egg whites 1/4 teaspoon cream of tartar 6 tablespoons granulated sugar 1/2 teaspoon vanilla extract 1/2 teaspoon ground cardamom (optional) Remember, patience and precision are your allies in creating the fluffy peaks and beautiful swirls that make a classic French-style meringue pie topping. Grandma's Secret: Elevating the Classic Recipe The Time-Honored Traditional Method The journey to the best Lemon Meringue Pie begins with honoring tradition. This method, passed down through generations, ensures a pie that's both authentic and delicious. The process is meticulous, but the result is a pie that celebrates the simplicity and elegance of classic baking. To achieve the perfect texture and flavor, follow these steps: CRUST. Press the crust into a pie plate and flute the edges. WEIGHTS. Use parchment paper and pie weights to blind bake the crust, ensuring it's crisp and golden. YOLKS. Beat the egg yolks until smooth for a rich base. CORNSTARCH MIXTURE. Cook the sugar, cornstarch, and water mixture until thick. TEMPER. Gradually incorporate the hot mixture into the egg yolks. REINCORPORATE. Combine the yolk mixture back into the saucepan. THICKEN. Boil the mixture, then remove from heat and add lemon juice, butter, zest, and a pinch of salt. By adhering to these time-tested steps, your Lemon Meringue Pie will not only taste great but also hold a piece of history in every slice. Incorporating the Magic of Cardamom The introduction of cardamom to the classic lemon meringue pie is akin to a magician revealing a spectacular trick. This exotic spice, often found in Indian cuisine, brings a warming and complex flavor that is unparalleled by any other. Its citrusy undertones harmonize with the lemon filling, creating a symphony of taste that elevates the pie from familiar to extraordinary. To incorporate cardamom into your pie, consider the following proportions: Ground cardamom: 1/4 teaspoon Lemon filling mixture Meringue topping Remember, a little goes a long way with this potent spice. It's best to start with a conservative amount and adjust according to your taste preferences. The goal is to achieve a balance where the cardamom complements rather than overpowers the lemon flavor. Tips from the Family Recipe Book After delving into the treasured family recipe book, it's clear that the secret to an unforgettable Lemon Meringue Pie lies in the nuances of preparation and the love poured into every step. The subtleties of technique can elevate a simple pie to a masterpiece of flavors. Always start with the freshest ingredients, particularly the lemons, which should be zesty and aromatic. The crust should be rolled to an even thickness to ensure a consistent bake. For the lemon filling, take care to combine the sugar, cornstarch, and lemon zest meticulously before adding water and egg yolks. When making the meringue, beat the egg whites until frothy before gradually adding sugar to achieve that glossy, stiff peak perfection. These tips may seem simple, but they are the culmination of generations of baking wisdom. It's not just about following a recipe; it's about understanding the harmony between the ingredients and the techniques that bring them together. Home Chef Tips for an Exquisite Lemon Meringue Pie Blind Baking the Crust to Perfection Blind baking the crust is a crucial step in creating an exquisite lemon meringue pie. Ensuring your crust is pre-baked to the right degree of doneness sets the foundation for a pie that's as delightful to look at as it is to eat. Begin by preheating your oven to 375 degrees F and carefully pressing your crust into a 9-inch pie plate. Remember to crimp or flute the edges for that classic pie look. Docking the crust by pricking holes across the bottom prevents it from puffing up during the initial baking phase. Cover the crust with parchment paper and weigh it down with pie weights or dry beans to keep it flat and even. After baking for 12 minutes, remove the weights and parchment, then return the crust to the oven for an additional 5 to 8 minutes until it achieves a golden brown hue. Using the right pie weights and a standard depth pie pan can make all the difference in preventing the crust from shrinking or sinking. Once your crust is beautifully blind baked and cooled, it's ready to be filled with the vibrant lemon curd and topped with meringue for a truly memorable dessert. Ensuring a Smooth and Creamy Filling Achieving a smooth and creamy lemon filling is essential for the perfect Lemon Meringue Pie. Temperature control is crucial; a gradual increase in heat prevents the eggs from curdling. Begin by whisking together sugar and cornstarch, then slowly incorporate water and bring the mixture to a boil, stirring constantly. Once thickened, temper the egg yolks by gradually whisking in half of the hot mixture. This step ensures that the eggs are brought up to temperature without cooking them outright. After tempering, combine everything back into the saucepan and heat until the consistency is just right. Remember to constantly whisk the mixture to avoid lumps and ensure even cooking. If done correctly, the filling will be thick enough to coat the back of a spoon, a sign that it's ready to be poured into the pastry shell. The Final Touch: Toasting the Meringue Toasting the meringue is the crowning glory of your lemon meringue pie, transforming it from simply delicious to a show-stopping dessert. Achieving that perfect golden hue is not just about aesthetics; it's about adding a subtle crunch and a deeper flavor to the soft meringue. If you're without a kitchen torch, fear not! A preheated oven will serve you just as well. Here's a quick guide: Preheat your oven to 325 degrees F. Carefully tent the pie with foil if you notice the meringue or crust browning too quickly. Bake for 15 to 20 minutes, or until the meringue is a delicious golden brown. Remember, patience is key. Whether you're using a torch or an oven, take your time to achieve an even toast. Your taste buds will thank you. Conclusion In the world of sweet and tart desserts, the Lemon Meringue Pie holds a special place in the hearts of many. From its flaky, buttery crust to the smooth, zesty lemon curd, and the crowning glory of a fluffy, toasted meringue, this pie is a symphony of textures and flavors. Whether you stick to the classic recipe or add a pinch of cardamom for an exotic twist, the result is always a delightful treat that's sure to impress. Remember, the secret to the perfect Lemon Meringue Pie lies in the balance of its components and the love put into its creation. So, gather your ingredients, preheat your oven, and get ready to bake a masterpiece that's as beautiful to behold as it is delicious to devour. Frequently Asked Questions What is the secret ingredient that sets homemade lemon meringue pie apart? The secret ingredient that adds a unique twist to the classic lemon meringue pie is cardamom. Its warm, citrusy undertones complement the lemon filling and create an exotic flavor profile. How can I prevent my pie crust from shrinking or sinking during baking? To prevent the crust from shrinking or sinking, use pie weights or dried beans during blind baking. This helps the crust maintain its shape and provides a stable base for the filling. Can I still make a great lemon meringue pie without a kitchen torch? Yes, if you don't have a kitchen torch, you can bake the pie in the oven to toast the meringue. Refer to the recipe notes for detailed instructions on this method. What is the ideal consistency for the meringue topping? The ideal meringue topping should be stiff and glossy. Beat the egg whites until they form stiff peaks, and make sure to add the sugar gradually to achieve the perfect consistency. How do I achieve the most intense citrus flavor in my lemon meringue pie? For an intensely flavorful lemon meringue pie, use both lemon juice and lemon zest in the filling. This combination ensures a rich and zesty citrus taste in every bite. How do I store lemon meringue pie to maintain its quality? Lemon meringue pie should be stored in the refrigerator. Cover it loosely with foil or plastic wrap to prevent the meringue from becoming soggy. Consume within a few days for best quality.
- "Unwrapping the History and Heritage of Fruitcake: A Delectable Tradition"
The fruitcake, often a centerpiece of holiday festivities, is a dessert rich in history and flavor. Baking the perfect fruitcake is an art that requires attention to detail, from selecting the finest ingredients to mastering the baking technique. This article delves into the intricacies of creating a fruitcake that's sure to delight, exploring the nuances of ingredient selection, preparation, and presentation. Whether you're a seasoned baker or new to the world of fruitcakes, our guide will help you craft a confection that's both delicious and visually stunning. Key Takeaways Premium ingredients, including hand-picked pineapples, ripe cherries, and lush papaya, are essential for a high-quality fruitcake. A fast-soaked fruit method involving heating in the microwave and soaking for just one hour can achieve a moist fruitcake without overnight soaking. Balancing flavors is key; a variety of dried fruits is used, avoiding an overly citrusy taste by finely chopping the fruit and measuring portions carefully. Adding crunchy nuts like pecans provides texture contrast and enhances the overall eating experience of the fruitcake. The baking process is crucial, requiring a long and slow technique to ensure even cooking without drying out the cake, often finished with a skewer test for doneness. The Art of Crafting the Perfect Fruitcake Selecting Premium Ingredients The foundation of a delectable fruitcake begins with selecting premium ingredients. Each component, from the flour to the fruit, plays a pivotal role in creating the final product that is both rich in flavor and pleasing in texture. For instance, the choice of flour can affect the cake's structure, while the quality of fruit determines its taste and moisture content. When it comes to fruit, it's essential to use a variety that offers a balance of sweetness and tartness. Here's a list of some top-quality fruits commonly used in fruitcakes: Crunchy pecans Ripe cherries Hand-picked pineapple Lush papaya Golden raisins In addition to fruit, other ingredients such as honey and nuts contribute to the overall taste and texture of the cake. It's crucial to ensure that these ingredients are fresh and of the highest quality. For example, all-natural honey can add a subtle sweetness and moistness that enhances the fruitcake's flavor profile. The Secret to Moisture: Fast-Soaked Fruit Achieving the perfect moisture level in a fruitcake is a delicate balance, but one secret weapon is the fast-soaked fruit technique. This method not only saves time but also ensures that each morsel of fruit is plump with flavor and moisture. Once heated, it's crucial to stir the fruit mixture to evenly distribute the warmth and liquid. Covering and setting it aside for an hour allows the fruit to cool and plump up, achieving the desired texture and moisture for your cake. This approach is not only efficient but also infuses the fruit with a deep, rich flavor that permeates the entire cake. Here's a quick guide to the proportions of fruit and liquid for fast soaking: 300g raisins 150g diced dried apricots 75g mixed peel 150g glace cherries 180g dates 1 cup + 2 tbsp apple juice, or a mix of brandy and juice Remember, the key to a moist and flavorful Christmas Cake is ensuring your fruit is adequately soaked. By using the fast-soaked fruit method, you can achieve a cake that is just as moist and delicious as one made with overnight-soaked fruit. Balancing Flavors: Not Too Citrusy Achieving the right balance of flavors in a fruitcake is crucial to its overall taste. The key is to avoid overpowering citrus flavors that can overshadow the delicate blend of spices and fruits. A subtle hint of citrus should complement, not dominate, the cake's profile. When incorporating citrus elements, it's important to use them sparingly. For instance, mixed peel, often a combination of lemon and orange, should be finely chopped and used in moderation. This ensures that each bite is pleasantly flavored without encountering large, bitter pieces of peel. Here's a simple guide to adjusting citrus content in your fruitcake recipe: Use less citrus peel than traditional recipes suggest. Opt for crystallised citrus peel over fresh to avoid excessive bitterness. Balance the citrus with a variety of other fruits to enhance the overall flavor profile. Remember, the goal is to create a harmonious taste that celebrates all the ingredients without any single one becoming too prominent. The Role of Nuts: Pecans and Their Crunch Pecans play a pivotal role in fruitcake by adding a delightful crunch that contrasts the softness of the soaked fruits. Their unique texture and buttery flavor elevate the cake, making it a gourmet treat. When selecting pecans, ensure they are fresh and unsalted to maintain the cake's intended taste profile. For those with dietary restrictions, it's important to note that while pecans are a staple, they can be substituted with other nuts or omitted entirely for an allergy-friendly version. Always check the ingredient list for potential allergens, as fruitcakes often contain a variety of nuts and other common allergens like gluten and dairy. Here's a quick glance at some related products and their current offers: Remember, a fruitcake's charm lies in its balance of flavors and textures. Whether you prefer a traditional recipe or a personalized twist like the Icebox Fruitcake, the inclusion of pecans or your nut of choice is essential for that signature crunch. Fruitcake: A Staple of Festive Celebrations Christmas Cake: A Timeless Tradition The traditional Christmas cake, with its rich history, is a testament to the enduring appeal of this festive dessert. Originating from Christian feast days, the Christmas cake has evolved from a simple plum confection to the elaborate creations we see today. The cake's ability to be just as delightful with or without alcohol makes it a versatile choice for holiday celebrations, ensuring everyone can partake in the joy. When it comes to decorating, options abound. A traditional white Christmas Cake may feature a smooth marzipan layer, topped with fondant for a pristine finish. For a simpler approach, fresh cherries or a dusting of icing sugar can add a touch of elegance without much effort. And for those who enjoy a bit of creativity, mini Christmas cakes make for charming gifts that are as adorable as they are delicious. Whether served plain or with a generous helping of custard, the moist and velvety texture of the Christmas cake is a highlight of the holiday season. Its preparation, often beginning with an overnight soaking of dried fruit, is a labor of love that pays off in every slice. Serving Suggestions: To Custard or Not? When it comes to serving fruitcake, a common question arises: to accompany it with custard or to savor it solo? The richness of homemade custard can elevate the fruitcake experience, providing a luxurious mouthfeel that complements the cake's dense texture. Store-bought custard can also suffice, especially when enhanced with a touch of vanilla bean paste, adding both flavor and those characteristic little black specks. For those who prefer their fruitcake unadorned, the cake's inherent moisture and full flavor profile make it delightful on its own. A hot beverage, such as coffee, tea, or cocoa, can be the perfect pairing, offering a warm contrast to the cool, dense cake. Decoration Ideas: From Marzipan to Icing Sugar The final flourish of marzipan and icing sugar can transform a simple fruitcake into a festive masterpiece. Applying these elements with care is crucial for a professional finish. Begin by dusting your work surface with icing sugar and shaping the marzipan into a disc. Roll it out until it's large enough to cover the cake and its sides. Carefully drape the marzipan over the cake, smoothing out pleats with a wet knife for a seamless layer. Once the marzipan is set, roll out your fondant to create a smooth, white canvas. For those seeking a traditional look, a dusting of icing sugar or an arrangement of cherries can add a touch of elegance. If you're feeling adventurous, consider adding Christmas tree decorations or a drippy white glaze for a whimsical touch. For a detailed visual guide, refer to the step-by-step photos or video tutorials available online. These resources can be invaluable in helping you achieve that coveted smooth finish. Step-by-Step Guide to Baking Fruitcake Preparing the Batter: A Simple Process Creating the perfect fruitcake batter is a straightforward process that begins with preheating your oven to the right temperature. Start by greasing and lining your cake pan with parchment paper to ensure a smooth release after baking. Next, cream together the butter and sugar until you achieve a smooth and creamy consistency. This step is crucial for a light and fluffy cake. Then, incorporate the oil and molasses, followed by the salt, spices, and baking powder. Each ingredient should be beaten in until just combined, maintaining the airiness of the mixture. Finally, stir in the fruit mix, ensuring that all the extra liquid is included, and add walnuts if desired. Pour the batter into the cake tin, spreading it out evenly. To remove any large air bubbles, give the cake tin a light drop on the counter before covering with foil and placing it in the oven to bake. Baking Techniques: Long and Slow The key to a perfectly baked fruitcake lies in the long and slow baking process. This method ensures that the cake cooks evenly all the way through, without drying out the edges and surface. Typically, the cake is covered with foil and baked for an extended period, then finished without foil to achieve a beautifully browned surface. Here's a basic timeline for baking your fruitcake: Cover with foil and bake for 2 1/2 hours. Remove the foil and continue to bake for an additional 30 to 45 minutes. Check for doneness with a skewer; it should come out clean with no batter. Remember to preheat your oven and prepare your cake pan properly to ensure the best results. While the fruitcake is traditionally served with pouring custard, its rich flavor allows it to stand alone, or you can explore various decorating and serving ideas. Checking for Doneness: The Skewer Test Ensuring your fruitcake is perfectly baked is crucial for that ideal texture and taste. The skewer test is a reliable method to check for doneness. Insert a skewer into the center of the cake; if it comes out clean, your cake is ready. If not, it may need more time in the oven. Here's a simple guide to interpret the results: Clean skewer: The cake is done. Moist skewer: The cake needs more time. Batter on skewer: The cake is undercooked. After the test, if the cake is not yet done, continue baking and check every 10-15 minutes. Once done, remove the cake from the oven and let it cool for 20 minutes before transferring it to a cooling rack. A completely cooled cake ensures easy cutting and optimal flavor. Variations of the Classic Fruitcake Boozy Christmas Cake: A Spirited Twist The Boozy Christmas Cake is a festive delight that infuses the traditional fruitcake with a generous helping of spirits, such as rum or brandy, to create a rich and indulgent dessert. This variation is perfect for those who appreciate a deeper flavor profile in their holiday treats. To achieve the perfect balance of moisture and taste, consider substituting a portion of the liquid in your recipe with your choice of alcohol. For instance, replacing one-third of apple juice with brandy can elevate the cake's flavor complexity. If you're aiming for a cake that's enjoyable with or without alcohol, ensure that the base recipe is of high quality to stand on its own. Remember, the key to a successful Boozy Christmas Cake is not just the inclusion of alcohol, but also the harmony of all ingredients. Whether you choose to serve it with a side of custard or enjoy it as is, this cake is sure to be a satisfying conclusion to any festive meal. White Christmas Cake: An Elegant Alternative The White Christmas Cake offers a sophisticated twist to the traditional fruitcake, with its pristine appearance and delicate flavors. A vintage family recipe can be the secret to a cake that not only looks stunning but also tastes divine. This elegant version often features marzipan and fondant for a smooth and classy finish. Decorating this cake can be as simple or as elaborate as you wish. A minimalist approach might include topping the cake with fresh cherries or a dusting of icing sugar, while a more ornate method could involve a drippy white glaze for a chic effect. Here are some popular decorating options: Marzipan layer for a smooth surface Fondant for a sleek look Fresh fruit or a dusting of icing sugar for a simple yet elegant touch Drippy white glaze for a modern twist When considering a White Christmas Cake, remember that the beauty lies in its versatility. Whether you're wrapping it up as a gift or serving it at your holiday table, this cake is sure to impress with its timeless elegance and exceptional taste. Customizing Your Fruitcake: Tips and Tricks Customizing your fruitcake allows for a personal touch that can make your dessert stand out. Incorporating your favorite flavors and decorations can transform a traditional fruitcake into a unique centerpiece. For those who enjoy a less citrusy taste, consider adjusting the variety and proportion of dried fruits to suit your palate. When it comes to decorating, simplicity can be key. A dusting of icing sugar or a topping of cherries can add an elegant touch without overwhelming the cake. For a festive look, try using Christmas tree decorations or a drippy white glaze for a snowy effect. Remember, the goal is to enhance the fruitcake, not to disguise it. Here are some popular decorating options to consider: Dust with icing sugar for a classic finish Add cherries or other fruit, then dust with icing sugar for a pretty and simple decoration Create a drippy white glaze for a modern twist Use inedible Christmas tree decorations for a playful element Experiment with these ideas to find the perfect match for your fruitcake masterpiece. Ensuring Fruitcake Perfection Quality Assurance: Our 100% Satisfaction Guarantee At the heart of our commitment to excellence is our 100% Satisfaction Guarantee. We stand behind the quality and craftsmanship of every fruitcake we bake, ensuring that each one meets our high standards before it reaches your table. To maintain transparency and trust, we've outlined our satisfaction metrics from the past year: We continuously strive to improve these numbers because we believe there's always room to enhance your fruitcake experience. Remember, our customer service team is just a call or email away, ready to assist with any concerns or feedback you may have. Storing Your Fruitcake: Keeping It Fresh Ensuring your fruitcake remains moist and delicious over time is a matter of proper storage. We recommend wrapping your fruitcake in plastic wrap before placing it in an airtight container. This method is crucial for maintaining the cake's freshness, especially if you plan to savor it over several months. For short-term storage, the refrigerator is your best bet. Here's a simple guideline to follow: Wrap the fruitcake in plastic wrap or aluminum foil. Place the wrapped cake in an airtight container. Refrigerate for up to three months for optimal freshness. Remember, the key to a fruitcake that tastes as good as the day it was baked is to keep it well-sealed and away from moisture and air exposure. By following these storage tips, you can ensure that every slice is as rich and delectable as intended. Shipping and Delivery: Getting Your Fruitcake Home After the careful selection of ingredients and the meticulous baking process, ensuring your fruitcake arrives at your doorstep in perfect condition is our final step. We take pride in our efficient delivery system, which is designed to deliver your fruitcake fresh and on time, whether you're ordering for yourself or sending a gift. For a complete breakdown of shipping options, here's what you can expect: National and international shipping availability Transparent cost structure Estimated delivery times Please visit our Shipping Information and Details page for more specifics. In the rare event that you encounter any issues with your delivery, our customer service team is readily available to assist you. We're committed to making your fruitcake experience delightful from start to finish. Conclusion In the world of festive desserts, the fruitcake stands out as a timeless classic, rich with tradition and flavor. From the luxurious combination of crunchy pecans, ripe cherries, and exotic fruits like hand-picked pineapple and lush papaya, to the modern convenience of no-soak recipes that maintain that velvety, moist texture, fruitcake is a testament to culinary versatility. Whether you prefer your fruitcake with a splash of custard, adorned with marzipan and fondant, or simply savor it in its pure, unembellished form, there's no denying the appeal of this storied treat. With options for fast soaking methods and a variety of fruit and decoration choices, there's a fruitcake to suit every palate. As we reflect on the rich ingredients and expert baking that go into each DeLuxe Fruitcake, it's clear that this is not just a holiday staple, but a year-round delight that carries with it the guarantee of satisfaction. Embrace the joy and indulge in the fruitcake experience, a confection that truly embodies the spirit of celebration. Frequently Asked Questions What makes your fruitcake so special? Our DeLuxe Fruitcakes are crafted with high-quality ingredients, including juicy hand-picked pineapples, ripe cherries, golden raisins, lush papaya, and crunchy pecans, all baked to perfection. It's the cornerstone of many family traditions. Can I customize the dried fruit in my fruitcake? Absolutely! You can use any combination of dried fruit totaling 855g / 30 oz, finely chopped. Our recipe is designed to balance the flavors without being too citrusy, ensuring a delightful taste experience. Do I need to soak the fruit overnight for this fruitcake? No, our fruitcake features a fast-soaking method where fruit is heated in the microwave and soaked for just 1 hour, achieving perfect moisture without the overnight wait. What are some serving suggestions for fruitcake? Our fruitcake is moist and flavorful enough to be enjoyed plain, but a slosh of custard or a dusting of icing sugar can add a delightful touch. You can also decorate it with marzipan or a white fondant for a festive look. How should I bake the fruitcake to ensure it's perfectly cooked? Bake the cake long and slow, covered with foil for 2 1/2 hours, then uncovered for an additional 30 to 45 minutes. Use a skewer to test for doneness, ensuring the cake is cooked through without drying out. What is your satisfaction guarantee? We stand behind our DeLuxe Fruitcakes with a 100% Satisfaction Guarantee. If you're not completely satisfied with your fruitcake, we are committed to making it right.
- "How to Make the Ultimate Cannoli Cake: A Step-by-Step Guide"
Cannoli Cake is a sumptuous dessert that marries the iconic elements of a classic cannoli with the indulgent layers of a cake. This article delves into the art of crafting a Cannoli Cake, guiding you through the process of creating a dessert that is not only a feast for the taste buds but also a tribute to Italian dessert traditions. From selecting the finest ingredients to assembling the layers with precision, each section of this article is designed to help you achieve a Cannoli Cake that is as visually stunning as it is delicious. Key Takeaways Cannoli Cake is a creative spin on the traditional Italian cannoli, combining rich ricotta cream with a moist cake base. The cake requires careful selection of high-quality ingredients, including fresh ricotta, cream cheese, and dark chocolate. A step-by-step guide and baking tips are essential for achieving the perfect texture and flavor balance in the cake. Layering the cake with chocolate, pistachios, and ricotta cream is key to recreating the classic cannoli experience. Proper cutting, plating, and storage techniques ensure that the Cannoli Cake remains fresh and visually appealing for serving. The Essence of Cannoli Cake A Tribute to Italian Dessert Traditions Cannoli Cake is a grand celebration of Italian dessert traditions, where the sweetness of ricotta cream meets the rich history of Sicily's pastries. This dessert is not just a treat for the palate but a nod to the island's cultural tapestry, woven through centuries of influence and innovation. The history of cannoli is intertwined with the island's diverse heritage, with theories suggesting its origin as a symbol of fertility during religious events in a newly Catholicized Sicily. The cake's layers echo the layers of history, each one telling a story of conquests, celebrations, and the sweet art of pastry making. As we delve into the components that make up this iconic dessert, we honor the legacy of Italian bakers whose skills have perfected the balance of crisp shells and creamy fillings. The Cannoli Cake is more than just a dessert; it's a piece of history served on a plate. Understanding the Unique Components Cannoli Cake is not just a dessert; it's a symphony of distinct elements that come together to create a memorable culinary experience. Each component plays a critical role in the overall taste and presentation of the cake. From the crispiness of the cannoli shells to the smoothness of the ricotta cream, every ingredient is selected with purpose. The base of the cake often includes a blend of flours and a leavening agent to achieve the desired texture. A typical recipe might call for all-purpose flour, baking powder, and perhaps a touch of baking soda. Sugars, such as granulated or brown sugar, contribute to the sweetness and color of the cake. Fats, like butter or oil, ensure moisture and richness, while eggs bind the mixture and help it rise. To truly appreciate the uniqueness of Cannoli Cake, one must consider the delicate balance of flavors and textures. The ricotta cream filling, often flavored with vanilla or citrus zest, provides a creamy contrast to the denser cake layers. Chocolate and nuts, such as pistachios, add depth and a satisfying crunch. The final touch, a dusting of powdered sugar or a drizzle of chocolate, completes the masterpiece. Balancing Flavors and Textures Achieving the perfect balance of flavors and textures in a Cannoli Cake is both an art and a science. The interplay between the sweet, creamy ricotta and the crisp, flaky pastry is crucial. To ensure this balance, the cake's base must be meticulously prepared, considering the role of each ingredient. Flour: Provides structure to the cake. Baking powder & Bicarbonate of soda: Act as leavening agents, giving rise to the cake. Brown sugar: Offers a deep, caramel-like sweetness. Butter: Adds richness and moisture. Eggs: Bind the ingredients together and contribute to the cake's texture. Vanilla extract & Orange juice: Infuse the cake with aromatic flavors. In the assembly, the addition of chopped chocolate and pistachios introduces a satisfying crunch that complements the softness of the cake layers. It's this thoughtful layering of textures and flavors that transforms a simple dessert into an exquisite culinary experience. Preparing the Perfect Base Choosing the Right Ingredients The foundation of a delectable Cannoli Cake begins with the selection of high-quality ingredients. Choosing the right flour, dairy, and flavorings is crucial to achieving the authentic taste and texture reminiscent of traditional cannoli. A well-composed ingredient list includes plain flour for the cake base, fresh ricotta, and cream cheese for the creamy filling, with the addition of vanilla extract to enhance the overall flavor profile. When it comes to the cake's richness and moisture, ingredients like buttermilk, eggs, and unsalted butter play pivotal roles. For the filling, the freshness of the ricotta and the smoothness of the cream cheese are non-negotiable. To bring a touch of citrus, freshly squeezed orange juice can be incorporated, providing a subtle zest that complements the sweetness of the icing sugar. Lastly, the inclusion of dark chocolate and pistachios not only adds texture but also honors the classic cannoli elements. These components should be of the highest quality to ensure the cake's indulgent character is preserved. Step-by-Step Baking Guide Following a step-by-step baking guide is crucial to achieving the perfect base for your Cannoli Cake. Begin by preheating your oven to the appropriate temperature and preparing your cake pans with grease and lining. This ensures an easy release after baking. Step 1: Preheat oven and prepare pans. Step 2: Sift together dry ingredients like flour, baking powder, and salt. Step 3: Combine sugar and butter, then add eggs and vanilla. Step 4: Alternately fold in the dry ingredients and buttermilk. Step 5: Gently fold in chocolate and divide the batter among the pans. Step 6: Bake until a skewer comes out clean and cool on wire racks. Once your cakes are baked and cooled, you're ready to move on to the next exciting phase: creating the rich and creamy ricotta filling that is the hallmark of this delectable dessert. Tips for Achieving the Ideal Cake Texture Achieving the perfect texture for your Cannoli Cake is crucial for that authentic Italian dessert experience. Ensure your ingredients are at room temperature before mixing to promote even blending and a smooth batter. Overmixing the batter can lead to a dense and tough cake, so mix just until the ingredients are combined. Here's a quick checklist to ensure you're on the right track: Use the correct measurements of ingredients as specified in the recipe. Sift dry ingredients to incorporate air and achieve a lighter texture. Gently fold in the flour to prevent gluten overdevelopment. Bake at the recommended temperature and avoid opening the oven door frequently. Mastering the Ricotta Cream Filling The Role of Ricotta in Cannoli Cake The ricotta cream is the heart of any cannoli cake, providing a rich and creamy contrast to the more structured cake layers. Ricotta's creamy texture and subtle sweetness make it an ideal base for the filling, which can be enhanced with various flavors such as citrus or chocolate. The quality of the ricotta is paramount; it should be fresh and of high quality to ensure the best taste and texture. When preparing the ricotta cream, it's important to achieve a balance between the ricotta and other components like cream cheese and sugar. Here's a simple breakdown of a typical ricotta cream recipe: Fresh ricotta: 240g (1 cup) Cream cheese, at room temperature: 100g Orange juice (from 1 small orange) Vanilla extract: 1 tsp Pure icing sugar, sifted: 230g (1 1/2 cups) Thickened cream: 500ml (2 cups) This combination ensures a filling that is both flavorful and has the perfect consistency to complement the cake layers. Creating a Smooth and Flavorful Cream The secret to a smooth and flavorful ricotta cream lies in the meticulous blending of ingredients and the gentle incorporation of air. Begin by combining fresh ricotta with room temperature cream cheese, ensuring both are of the highest quality for the best taste and texture. The addition of freshly squeezed orange juice and vanilla extract introduces a subtle, yet distinctive, layer of flavor that complements the creamy base. To achieve the desired consistency, sifted icing sugar is gradually beaten into the mixture. This not only sweetens the cream but also contributes to its velvety texture. The final step involves folding in whipped thickened cream, which should be done in batches to maintain a light and airy structure. This process is crucial for creating a cream that is both rich and delicate, capable of holding its shape when piped between the layers of the cake. Remember to chill the cream before assembling the cake to ensure it retains its form and enhances the overall eating experience. Incorporating Citrus and Vanilla Accents The addition of citrus and vanilla to the ricotta cream is a delicate process that infuses the filling with a fragrant aroma and a subtle, yet distinct, flavor profile. The zest of an orange or lemon can add a bright note, complementing the creamy richness of the ricotta. Vanilla, with its warm and comforting essence, rounds out the flavor, ensuring that each bite is a harmonious blend of taste and scent. To achieve the perfect balance, consider the following proportions: Fresh ricotta: 240g (1 cup) Cream cheese, room temperature: 100g Orange juice: from 1 small orange Vanilla extract: 1 tsp Icing sugar, sifted: 230g (1 1/2 cups) Remember, the key to a successful cannoli cake is not just in the bold flavors but in the subtle touches that elevate the entire dessert. The citrus and vanilla accents should be discernible but not overpowering, creating a delightful dessert that pays homage to traditional Italian ricotta pie recipes. Assembling the Cannoli Cake Layers Constructing the Cake Structure Constructing the cake structure is a pivotal step in creating your Cannoli Cake, where precision and patience are key. Begin by ensuring your cake layers are perfectly level; a serrated knife can be used to trim any domes off the tops of the cakes to create flat surfaces. Each layer should be handled with care to maintain its integrity. Step 1: Prepare your cake layers by trimming and leveling. Step 2: Apply a thin layer of melted chocolate to the cut surface of one cake layer. Step 3: Sprinkle with chopped pistachios, pressing gently to secure them. Step 4: Chill in the fridge for 10 minutes to set the chocolate. Once the base is set, you can begin to layer the ricotta cream filling, which should be smooth and spreadable. The filling acts not only as a flavor enhancer but also as a glue that holds the layers together. As you stack the cakes, be mindful of the distribution of the cream to avoid any unevenness. Layering with Chocolate and Pistachios The process of layering your cannoli cake with chocolate and pistachios is both an art and a science. Begin by spreading a thin layer of melted chocolate on the cut surface of one cake layer, ensuring an even coating. This chocolate base acts as a delicious adhesive for the pistachios. After applying the chocolate, sprinkle a generous amount of coarsely chopped pistachios over the surface, pressing them gently to secure. Once the chocolate and pistachios are in place, allow the cake to rest on a wire rack. This step is crucial as it lets the chocolate set, ensuring that the pistachios stay attached and the layers remain distinct when the cake is assembled. Repeat these steps with the remaining cakes before moving on to the next layer of ricotta cream. Here's a quick checklist to ensure each layer is perfect: Spread a thin layer of melted chocolate Sprinkle and press chopped pistachios Roll the cake edge in additional pistachios Allow to set on a wire rack Decorative Techniques for a Stunning Presentation Once your Cannoli Cake is assembled, the final touch is all about presentation. A visually stunning cake is just as important as its taste. Carefully consider the finishing touches that will make your cake a showstopper. Use a fine sieve to dust the top with powdered sugar, creating a delicate snow-like effect. Strategically place candied orange slices or zest around the edges for a pop of color and a hint of citrus. Drizzle melted chocolate in an artful pattern across the top layer for a glossy finish. Finally, if you're serving the cake at a special event, consider the theme and color scheme. A few well-placed edible flowers or gold leaf accents can tie the cake's presentation into the overall aesthetic of the occasion. Serving and Storing Your Cannoli Cake Cutting and Plating for Guests Presenting your Cannoli Cake to guests is as much about the visual appeal as it is about the taste. Ensure each slice showcases the layers of delicate cake and rich ricotta cream filling. Use a sharp, thin-bladed knife, dipping it in hot water and wiping it clean between slices for the cleanest cuts. For a touch of elegance, garnish each plate with a sprig of mint or a few fresh berries. Remember, the first slice may not come out perfectly, but it will still taste divine. Here's a quick guide to ensure your guests are served with finesse: Heat the knife Cut with gentle sawing motions Clean the knife after each slice Serve immediately or chill briefly Preserving Freshness and Flavor To ensure your cannoli cake retains its delightful taste and moist texture, proper storage is key. Wrap the cake tightly in plastic wrap or aluminum foil to prevent air from drying it out. For short-term storage, keep the cake in the refrigerator where it can stay fresh for up to three days. For longer preservation, consider freezing the cake. Here's a simple guide to freezing your cannoli cake: Cool the cake completely before wrapping. Wrap in multiple layers of protection: plastic wrap followed by foil. Label the cake with the current date before placing it in the freezer. Thaw overnight in the refrigerator when ready to serve. When stored properly, the flavors of the ricotta cream and the delicate cake base will remain as luscious as the day it was assembled. Avoid storing the cake near strong-smelling foods to prevent flavor transfer. Creative Variations for Leftovers When it comes to enjoying the remnants of your delightful Cannoli Cake, creativity is key. Transforming leftovers into new treats not only maximizes your culinary efforts but also brings a fresh twist to your dessert repertoire. Consider crafting a Cannoli Cheesecake, an inspired variation that combines the richness of cheesecake with the signature flavors of cannoli. This baked delight, topped with a sweet and spiced mascarpone topping, is a nod to the classic Italian dessert. For a quick and satisfying snack, try making Cannoli Cake Bites. Simply crumble the leftover cake, mix with a bit of the ricotta cream, and roll into bite-sized balls. Dip these in melted chocolate and a sprinkle of chopped pistachios for a decadent finish. If you're in the mood for something lighter, consider using the cake as a base for a trifle. Layer chunks of cake with fresh fruit, a drizzle of honey, and a dollop of whipped cream for a delightful dessert that's as easy to assemble as it is to enjoy. Conclusion The Cannoli Cake is a true masterpiece that pays tribute to the beloved Italian dessert. With its layers of choc chip brown butter cake, rich ricotta cream, and a delightful combination of chocolate and pistachio, this cake is a celebration of flavors and textures. Whether you're an experienced baker or trying your hand at something new, the detailed steps and comprehensive ingredient list make it possible to recreate this stunning dessert at home. Perfect for special occasions or as a weekend baking project, the Cannoli Cake is sure to impress and satisfy any sweet tooth. So, gather your ingredients, and let's honor the tradition of Italian pastry with this incredible Cannoli Cake! Frequently Asked Questions What is the origin of Cannoli Cake? Cannoli Cake is inspired by the classic Italian dessert, the cannoli. It incorporates similar ingredients such as ricotta cheese, chocolate, and pistachios, but is presented as a layered cake rather than individual pastry tubes. How many servings does the Incredible Cannoli Cake recipe make? The Incredible Cannoli Cake recipe yields approximately 15 servings, making it suitable for gatherings and special occasions. What are the key ingredients in the Cannoli Cake? Key ingredients include plain flour, baking powder, bicarbonate of soda, brown sugar, unsalted butter, eggs, vanilla extract, buttermilk, dark chocolate, mini unfilled cannoli shells, pistachio kernels, fresh ricotta, cream cheese, orange juice, vanilla extract, pure icing sugar, and thickened cream. Can the Cannoli Cake be made in advance? Yes, you can prepare the cake layers and ricotta cream in advance. However, for the best texture and flavor, assemble the cake close to the time of serving. How should I store leftover Cannoli Cake? Leftover Cannoli Cake should be stored in an airtight container in the refrigerator to preserve its freshness and flavor. It's best consumed within a few days. Are there any allergens in the Cannoli Cake recipe? Yes, the recipe may contain gluten, wheat, tree nut, egg, and milk, so it's important to consider these allergens if serving guests with food sensitivities or allergies.
- Exploring the History and Technique of Genoise Cake Making
Genoise cake, a classic European sponge cake, is cherished for its delicate texture and rich flavor, often paired with a variety of fillings and frostings. This article delves into the intricacies of making a Genoise sponge, assembling a Rhubarb & Custard Genoise Cake, exploring flavor variations, and offering tips for storage and serving. We'll also troubleshoot common challenges to ensure your Genoise cake is as flawless as it is delicious. Key Takeaways Mastering the Genoise cake involves perfecting the whipping method to achieve a light and airy sponge. The quality of ingredients, such as fresh eggs and proper flour, is crucial for the characteristic texture of Genoise. Layering with crème pâtissière and rhubarb jam adds depth to the Rhubarb & Custard Genoise Cake, while orange zest provides a zesty twist. Proper storage, including wrapping the cake to exclude air or freezing, is essential for maintaining freshness and flavor. Troubleshooting common issues like overmixing and uneven baking can ensure a consistently perfect Genoise cake every time. The Art of Making Genoise Sponge Understanding the Whipping Method The whipping method is the cornerstone of creating a light and airy Genoise sponge. It involves beating the eggs and sugar until they reach a ribbon-like consistency, which can take about 5-7 minutes. This process incorporates air into the batter, providing the cake's signature rise without the use of chemical leaveners. Here are some tips to perfect the whipping method: Use a large mixing bowl to give the eggs plenty of space to expand. Start with room temperature eggs for better volume. Add sugar gradually to stabilize the egg whites. If using a stand mixer, use the whisk attachment for optimal aeration. Be patient and avoid under-whipping, as this will result in a denser cake. Choosing the Right Ingredients The foundation of a flawless Genoise sponge lies in the selection of high-quality ingredients. Each component plays a crucial role in creating the delicate structure and flavor of the cake. For instance, the type of flour used can affect the cake's texture; cake flour is preferred for its fine texture and lower protein content, which contributes to a lighter sponge. When it comes to eggs, freshness is paramount as they are responsible for the cake's rise and structure. Similarly, the choice of fat, such as butter, should be of high quality to ensure a rich flavor. It's also essential to use pure vanilla extract for an authentic taste, rather than artificial flavorings. Here is a basic list of ingredients for a standard Genoise sponge: Cake flour Fresh eggs Granulated sugar Unsalted butter Pure vanilla extract Salt Achieving the Perfect Texture Achieving the perfect texture in a Genoise sponge is a delicate balance that requires precision and care. The key to a light and airy Genoise is incorporating air into the eggs. This is typically done through a process of warming the eggs over a bain marie and then whipping them to the right consistency. It's crucial to ensure that the eggs are lukewarm to the touch before removing them from the heat and continuing to beat them. When it comes to incorporating the flour, a double-sifting method is recommended. Sift the flour onto a plate first, and then sift it again into the egg mixture. This helps to add extra air and prevents the batter from becoming dense. Lastly, be mindful of the baking process. An even oven temperature and the correct baking time are essential to prevent the sponge from drying out or becoming too moist. Here's a quick checklist to ensure you're on the right track: Use lukewarm eggs for whipping Double-sift the flour for added air Fold in ingredients gently to retain air Monitor oven temperature and baking time closely Assembling the Rhubarb & Custard Genoise Cake Preparing the Crème Pâtissière The Cr\u00e8me P\u00e2tissi\u00e8re is a cornerstone of this delightful Rhubarb & Custard Genoise Cake, providing a creamy, rich layer that complements the lightness of the sponge. Begin by whisking together egg yolks and sugar, then incorporate the flour to create a smooth base. Heat the milk to just below boiling and gradually blend it into the egg mixture to avoid curdling. Return the mix to the heat, stirring constantly, until it reaches a custard-like thickness. Remember to simmer for an additional minute to ensure it's fully cooked. Once done, stir in the butter and a hint of orange extract to infuse the custard with a subtle citrus aroma that pairs beautifully with the rhubarb. Here are a few tips to perfect your Cr\u00e8me P\u00e2tissi\u00e8re: Use a balloon whisk initially, then switch to a spoon for better control when cooking. If the custard starts to lump, remove it from the heat and whisk vigorously. The custard can be prepared a day ahead and stored in the refrigerator once cooled. Remember, the leftover egg whites from the custard can be stored in the fridge or frozen for future use, ensuring no part of the egg goes to waste. Layering the Components Layering the components of a Rhubarb & Custard Genoise Cake is a delicate process that can be prepared ahead of time. Ensure each layer is assembled with care to maintain the cake's structure and flavor balance. Begin by placing the first genoise sponge layer on your cake stand or plate. Spread a generous amount of crème pâtissière over the sponge, making sure to reach the edges. Add a layer of thinly sliced rhubarb, previously poached in orange juice for a tangy twist. Repeat the process with the remaining sponge layers, custard, and rhubarb. Remember, the cake can be assembled in stages if needed. This flexibility allows for better time management and ensures that each element is at its best when served. Decorating with Rhubarb and Orange The final flourish of the Rhubarb & Custard Genoise Cake involves a vibrant decoration that not only adds visual appeal but also enhances the flavor profile. Begin by spooning the prepared rhubarb mixture into the center of the cake, creating a colorful focal point. Next, pipe uniform 'blobs' of Crème Pâtissière around the rhubarb, ensuring a level surface for the cake's top layer. Once the top layer is carefully placed, an orange water icing is spread over it to add a glossy finish. The remaining orange zest is then sprinkled over the icing, introducing a fresh citrus aroma that complements the tartness of the rhubarb. This delicate genoise cake recipe marries the classic flavour combination of rhubarb and custard, teaming it with orange for extra zing. Flavor Variations and Pairings Classic Rhubarb and Custard The Classic Rhubarb and Custard Genoise Cake is a testament to the harmony of flavors that can be achieved when sweet meets tart. The rhubarb's sharpness contrasts beautifully with the creamy custard, creating a delightful balance on the palate. To assemble the cake, follow these simple steps: Spread a thin layer of Cr\u00e8me P\u00e2tissi\u00e8re over the base of the cake. Arrange the rhubarb batons on top, ensuring they point towards the center. Spoon rhubarb jam into the center of the cake. Pipe additional custard between the rhubarb to achieve a level surface for the top layer. This cake is not only a visual treat but also a delightful culinary experience, perfect for those who appreciate the classic combination of rhubarb and custard with a twist of orange. Exploring Citrus Infusions Citrus infusions in a Genoise cake can elevate the flavor profile to new heights. Incorporating citrus elements not only adds a refreshing zest but also infuses the sponge with a subtle tanginess that complements the sweetness. Lemon zest or juice can brighten the overall taste. Orange zest and juice bring a sweet and fragrant dimension. Lime offers a sharp, tropical twist. Grapefruit provides a unique, slightly bitter note. Experimenting with different citrus combinations can result in a delightful array of flavors. For instance, combining lemon and orange can create a balanced and aromatic cake. It's important to adjust the sugar levels accordingly to maintain the desired sweetness. Remember, the key to a successful citrus infusion is moderation; too much can overpower the delicate structure of the Genoise. Creative Toppings and Fillings The versatility of Genoise cake allows for a myriad of creative toppings and fillings that can transform this classic dessert into a personalized treat. Experimenting with different combinations can lead to delightful surprises and new favorites. Consider the following ideas to inspire your next creation: Fresh fruit compotes or reductions, such as a tangy lemon curd or a sweet strawberry jam. Whipped cream flavored with extracts like almond or peppermint for a refreshing twist. Crunchy elements like toasted nuts, praline pieces, or even a sprinkle of sea salt to enhance the flavors. Remember, the key to a successful Genoise cake is balance. The lightness of the sponge pairs wonderfully with both rich and delicate accompaniments, so don't be afraid to mix textures and flavors. For a special occasion, such as Valentine's Day, a strawberry cake roll filled with strawberry jam and cream cheese, decorated with hearts, can be the way to anyone's heart. Storing and Serving Tips Keeping the Genoise Sponge Fresh Maintaining the freshness of a Genoise sponge is crucial for the best eating experience. Wrap the sponge tightly in cling film or a plastic bag, ensuring as little air as possible remains inside. This method helps to preserve the cake's delicate texture and prevents it from drying out. For those who like to prepare in advance, the Genoise sponge can be frozen. Here's a simple guideline to follow: Wrap the sponge securely to protect against freezer burn. Label the package with the current date. Freeze for up to one month. Thaw at room temperature before assembling your cake. Remember, the Crème Pâtissière and jam components of your cake can also be prepared ahead of time. Store them in the refrigerator once cooled, and they'll be ready when you are to assemble your masterpiece. Freezing and Defrosting Guidelines Properly freezing and defrosting your Genoise sponge is crucial for maintaining its delicate texture and flavor. Always cool the sponge completely before freezing to prevent condensation and ice crystals from forming. Wrap the sponge tightly in plastic wrap, followed by a layer of aluminum foil to protect against freezer burn. To defrost, transfer the cake to the refrigerator for several hours or overnight, ensuring it remains wrapped to avoid absorbing any odors. Once thawed, let it sit at room temperature for about an hour before serving to bring out the best flavor and texture. Here's a quick checklist for freezing and defrosting your Genoise cake: Cool the sponge completely. Wrap in plastic wrap, then aluminum foil. Freeze for up to 3 months. Defrost in the refrigerator, then at room temperature. Best Practices for Serving Serving a Genoise cake is an art in itself, ensuring that the delicate texture and flavors are presented at their best. Always allow the cake to cool at room temperature for an hour before serving to let the flavors meld and the texture to set properly. For a denser finish, some bakers recommend cooling it upside down, which can also help to minimize any unwanted air pockets. When slicing the cake, use a serrated knife with a gentle sawing motion to avoid compressing the sponge. Serve the Genoise with a dollop of freshly whipped cream or a light dusting of powdered sugar to enhance its subtle sweetness. If you've prepared a layered Genoise, like the Rhubarb & Custard variation, ensure each slice showcases the beautiful layers. For a formal presentation, consider plating individual slices on dessert plates with a garnish that complements the cake's flavor profile. A sprig of mint or a few strands of citrus zest can add a touch of elegance. Troubleshooting Common Genoise Challenges Avoiding Overmixing and Deflation One of the critical steps in creating a flawless Genoise sponge is to avoid overmixing once the flour is incorporated. Overmixing can lead to the batter losing air, which is essential for the sponge's light and airy texture. To prevent this, use a gentle folding motion rather than vigorous stirring. Aim to work safely with the bain marie, warming the eggs until lukewarm before beating them off the heat. Sift the flour onto a plate and then again into the bowl to incorporate extra air. Remember, the goal is to achieve a batter that is thick, pale, and has substantially increased in volume. This usually takes around 5-7 minutes of beating the eggs and sugar. Once you reach this stage, turn off the beaters and carefully fold in the dry ingredients to preserve the airiness. Ensuring Even Baking Achieving an evenly baked Genoise sponge is crucial for the perfect cake structure. Ensure your oven is properly preheated and that the baking rack is positioned in the center. This allows for optimal heat distribution. Use an oven thermometer to verify the temperature, as ovens can often run hotter or cooler than the dial indicates. To prevent uneven baking, rotate the cake pan halfway through the baking time. However, be gentle to avoid deflating the batter. Here are some additional tips: Check the oven seal and door closure to prevent heat from escaping. Avoid opening the oven door frequently, as this can cause temperature fluctuations. If your oven has hot spots, use baking strips around the cake pan to help distribute the heat more evenly. Fixing Texture Issues When your Genoise cake doesn't have the desired soft and airy texture, it's time to troubleshoot. A common culprit is overmixing, which can deflate the batter and result in a denser cake. To avoid this, fold in the flour gently and stop as soon as it's incorporated. Another factor could be the ingredients themselves; for instance, incorporating a small amount of vinegar can help soften the texture, as it's not overly sweet and provides balance. Lastly, consider the moisture content. If your cake is dry, it might need more liquid. This could be in the form of syrups or simple adjustments to the existing recipe. Remember, fixing texture issues often requires a bit of experimentation to find the right balance for your specific oven and ingredients. Conclusion The Genoise cake, with its delicate crumb and rich history, is a testament to the art of classic baking. This light and airy sponge, made with precision and care, offers a versatile canvas for a variety of flavors, from the zest of orange to the tang of rhubarb. Whether served at afternoon tea or as a sumptuous dessert, the Genoise cake is a celebration of skill and simplicity. Its intricate preparation, from the whipping of eggs and sugar to the gentle folding of flour, results in a confection that is both elegant and comforting. As we've explored the nuances of making a Genoise, from the ingredients to the equipment, it's clear that this cake is more than just a treat—it's a labor of love that, when shared, becomes a cherished memory. So, whether you're a seasoned baker or a curious novice, the journey of creating your own Genoise cake is sure to be as rewarding as the first bite. Frequently Asked Questions What is Genoise cake? Genoise cake, also known as Genoise sponge, is a type of soft cake made from eggs, sugar, and flour, with a small amount of butter. It's known for its light texture achieved through the whipping method. How do you store a Genoise cake to keep it fresh? Genoise cake is best eaten fresh but can be stored for a few days wrapped tightly in cling film or a plastic bag to exclude as much air as possible. It can also be frozen for up to a month. Can I make components of the Genoise cake ahead of time? Yes, the Crème Pâtissière can be made a day ahead and stored in the fridge once cooled, and the rhubarb jam can be made a few days in advance and refrigerated until needed. What are the key ingredients for a Genoise sponge? The key ingredients for a Genoise sponge are large eggs, caster sugar, plain (all-purpose) flour, and butter. Flavorings such as orange zest can be added for extra taste. What is the secret to achieving the perfect Genoise texture? The perfect texture of a Genoise is achieved by beating the eggs and sugar together until thick and pale, which can take around 5-7 minutes, and then gently folding in the flour to retain air. Can the Genoise cake be flavored differently? Absolutely! While the classic flavor is rhubarb and custard, you can experiment with citrus infusions, various jams, and creative toppings and fillings to personalize your Genoise cake.
- "The Ultimate Pecan Pie Recipe: A Perfect Blend of Sweet and Nutty"
Pecan pie is a beloved dessert, especially in American cuisine, known for its rich, nutty flavor and irresistibly gooey texture. Crafting the perfect pecan pie is an art that combines traditional baking techniques with personal touches and regional variations. Whether you're a seasoned baker or a newcomer to the world of pies, this article will guide you through the essentials of making a classic pecan pie, exploring its variations, and delving into its cultural significance. Key Takeaways A classic pecan pie recipe includes ingredients like brown sugar, corn syrup, eggs, butter, vanilla, and pecans, baked to perfection at 350 degrees Fahrenheit. Creative variations such as Chocolate Bourbon Pecan Pie and Pecan Pie Cobbler offer innovative twists on the traditional recipe, catering to diverse palates. The perfect pecan pie texture is achieved when the pecans on top are crisp and toasty, while those underneath remain slightly chewy, complemented by a creamy filling. Regional recipes and festive traditions highlight the cultural journey of pecan pie, from Southern classics to global delights that celebrate its culinary versatility. Mastering pecan pie techniques involves selecting the right equipment, understanding the science behind the perfect pie crust, and balancing flavors to enhance the overall taste. The Art of Crafting the Perfect Pecan Pie Essential Ingredients for a Classic Pecan Pie The foundation of a classic pecan pie lies in its simple yet precise ingredients. A balance of sweetness and texture is key to the pie's signature flavor. The essential components include a flaky pie crust, typically made from flour, butter, and a pinch of salt. The filling is a rich mixture of eggs, corn syrup, sugar, and of course, pecans—preferably toasted for an extra layer of nuttiness. While variations exist, the core ingredients remain largely the same. Here's a basic list to get you started: Unbaked pie crust White sugar and dark brown sugar Salt Light corn syrup Pure vanilla extract Pecans Each ingredient plays a pivotal role in creating the perfect pecan pie, from the crust that holds it all together to the pecans that give it its name. Remember, the quality of ingredients can make or break your pie, so choose them wisely. Step-by-Step Baking Instructions Following the right steps is crucial for creating a delicious pecan pie. Begin by preheating your oven to the appropriate temperature, which is often around 350°F to 375°F. While the oven warms, you can start preparing your pie crust. Whether you're using a homemade dough or a store-bought one, make sure to press it evenly into your pie pan. For a flakier crust, consider pre-baking the shell; just remember to prick it with a fork to prevent air bubbles. Next, mix your filling ingredients thoroughly. A classic pecan pie filling includes sugars, butter, eggs, and of course, pecans. The exact proportions can vary, but a balance of sweetness and nuttiness is key. Once your filling is ready, pour it into the crust and spread the pecans evenly. If you're adding any special ingredients like chocolate or bourbon, now is the time to incorporate them. Finally, place your pie on a preheated cookie sheet and bake until the filling is set and the crust is a perfect golden brown. This usually takes between 50 to 80 minutes, depending on your recipe and oven. After baking, let your pie cool to allow the filling to thicken, which can take about 30 minutes. Serve your pecan pie with a dollop of whipped cream or a scoop of vanilla ice cream for an extra treat. Tips for Achieving the Ideal Texture Achieving the perfect texture in a pecan pie is a delicate balance between a crisp and toasty top layer of pecans and a creamy, rich filling that is to die for. The contrast in textures is what makes a classic pecan pie so irresistible. To ensure that your pecans have that desirable crispness while maintaining a chewy underside, follow these guidelines: Use fresh, high-quality pecans for the best flavor and texture. Toast the pecans lightly before adding them to the filling to enhance their nutty flavor. Avoid overmixing the filling to keep it smooth and prevent it from becoming too dense. Remember, the goal is to have a filling that sets well but retains a slight jiggle in the center when you remove the pie from the oven. This indicates that the pie will have a soft, yet stable texture once cooled. Variations on the Traditional Pecan Pie Innovative Twists with Chocolate and Bourbon The ULTIMATE Chocolate Bourbon Pecan Pie emerges as a standout variation, infusing traditional pecan pie with rich dark chocolate and a hint of Kentucky bourbon. This decadent twist not only enhances the flavor profile but also adds a layer of complexity to the dessert. Here's a quick guide to the ingredients you'll need: Dark chocolate, chopped Salted butter Granulated sugar Dark brown sugar Corn syrup Dark cocoa powder Fine sea salt Vanilla extract Large eggs, room temperature Bourbon Pecan halves Why this pie will capture your heart: Ease of preparation: A simple mixing bowl and whisk are your primary tools. Flavor balance: The dark chocolate tempers the pie's inherent sweetness. The bourbon factor: It adds a distinctive warmth and depth. This innovative pie variant promises to be a conversation starter at any gathering, offering a sublime balance of sweetness, chocolate richness, and the unmistakable character of bourbon. Exploring Regional Pecan Pie Recipes The diversity of regional pecan pie recipes reflects the rich tapestry of culinary traditions across different areas. Deep Dish Pecan Pie is a heartier version that's particularly popular in regions where filling, comfort food is cherished. This variant often includes a thicker crust and a generous filling, making it a substantial dessert option. New Orleans Pecan Pie often incorporates local flavors like molasses or rum, adding a unique twist to the classic recipe. Texas Pecan Pie is known for its emphasis on locally sourced nuts, which are abundant in the state, and may include a hint of bourbon. Southern Bourbon Pecan Pie combines the traditional pecan filling with the rich, warming notes of bourbon, a staple in Southern hospitality. Creative Combinations: Pecan Pie Cobblers and More When it comes to pecan desserts, the innovation doesn't stop at the traditional pie. Creative combinations have led to a delightful array of pecan cobblers, bars, and even dump cakes that tantalize the taste buds. One standout is the original pecan cobbler, a dessert that promises a richer experience than its pie counterpart, with layers of pecans and a self-saucing caramel that's both gooey and irresistible. This simple recipe has garnered acclaim for its buttery flavor and ease of preparation. For those looking to explore these innovative desserts, here's a list of some popular pecan combinations: Pecan Strawberry Rhubarb Cobbler Pecan Pumpkin Pie Chocolate Pecan Pie Bars Cranberry Pecan Pie Lemon Pecan Pie Each variant offers a unique twist on the classic, ensuring that there's a pecan dessert for every palate. Pecan Pie: A Culinary Journey The History and Origins of Pecan Pie The history of pecan pie is as rich and layered as the dessert itself. Legend has it that the French, upon settling in New Orleans, were introduced to the pecan nut by Native American tribes. This encounter led to the creation of what we now know as pecan pie, a dessert that has woven its way into the fabric of culinary tradition, particularly in the southern United States. While the exact origins are debated, pecan pie's popularity surged with the introduction of Karo corn syrup in the early 20th century. This ingredient became a staple in pecan pie recipes, contributing to the pie's signature sweetness and texture. Today, pecan pie is not only a year-round staple in the south but also a highlight at holiday gatherings across the country. Pecan Pie Across Cultures: From Southern Classics to Global Delights While pecan pie is a quintessential Southern delight, its appeal has transcended regional boundaries to become a beloved dessert worldwide. The rich, nutty flavor and distinctive texture of pecan pie have charmed taste buds across the globe. From the classic Southern Bourbon Pecan Pie to the innovative Pecan Strawberry Rhubarb Cobbler, the versatility of this dessert is evident in its many variations. In different cultures, pecan pie is often infused with local ingredients and culinary traditions, resulting in unique and mouthwatering creations. For instance, the New Orleans Pecan Pie incorporates the vibrant flavors of Louisiana, while the Kentucky Pecan Pie often features a splash of the state's famous bourbon. Pecan Pumpkin Pie Pecan Apple Pie Lemon Pecan Pie Pecan Fudge Pie Each recipe offers a distinct twist on the classic, showcasing the pie's ability to evolve while maintaining its core identity. The journey of pecan pie from a Southern classic to a global delight is a testament to its enduring popularity and the creativity of those who bake it. The Role of Pecan Pie in Festive Traditions Pecan pie has woven its way into the fabric of festive traditions, particularly in the American South. During the holidays, this dessert takes center stage, gracing tables with its rich, nutty flavor and sumptuous texture. It's not just a dish; it's a symbol of hospitality and celebration. While pecan pie is a year-round favorite, its presence is especially pronounced during Thanksgiving and Christmas. Here's a glimpse at how pecan pie features in various holiday menus: Thanksgiving: A must-have dessert, often alongside pumpkin pie. Christmas: A sweet staple, sometimes with festive variations like chocolate or bourbon. New Year's: A symbol of prosperity, with pecans representing coins. Easter: A springtime treat, lighter versions may appear. The dessert's adaptability to different seasons and celebrations is a testament to its enduring appeal. From the Kentucky Derby to Christmas festivities, pecan pie is a versatile player in the culinary world. Mastering Pecan Pie Techniques Selecting the Right Equipment for Pecan Pie Baking When embarking on the journey to bake the world's best pecan pie, selecting the right equipment is crucial. A high-quality pie plate is the cornerstone of pie baking, and experts often recommend a glass pie plate, such as the Pyrex 9-Inch Glass Pie Plate, for its even heat distribution. Additionally, a pie shield can be an invaluable tool to protect your crust from over-browning. For a successful pecan pie, the following items are essential: Pie plate Pie shield These tools not only aid in the baking process but also contribute to the pie's final presentation. Pre-baking the pie crust is a step you shouldn't skip; it ensures a crisp base that can hold the rich, syrupy filling without becoming soggy. Remember to prick the crust with a fork before pre-baking to prevent air bubbles from forming. Lastly, don't overlook the importance of the right ingredients and their measurements. A balance of eggs, corn syrup, brown sugar, vanilla, butter, salt, and, of course, pecans, will result in a pie that is consistently perfect every time. The Science Behind the Perfect Pie Crust The quest for the perfect pie crust is both an art and a science. Understanding the role of each ingredient and technique is crucial to achieving that flaky, tender crust that is the hallmark of a great pie. One innovative approach involves creating a paste-like consistency by blending butter with a portion of the flour, which is then combined with the remaining flour to create layers of fat that result in a flaky texture. To ensure the crust cooks evenly without puffing up or becoming soggy, several steps are key. Begin by poking holes at the bottom of the crust with a fork, known as docking, to prevent bubbles. Then, employ the technique of blind baking, which gives you a headstart on creating a solid base. This involves freezing the crust for a short period, lining it with foil or parchment, and filling it with weights such as pie weights, dried beans, or uncooked rice. After an initial bake to set the edges, the weights are removed to allow the crust to finish baking to a gentle golden hue. Remember, the temperature of your ingredients and equipment can greatly affect the outcome. Keeping everything cold ensures that the butter remains solid, which is essential for a flaky crust. Here's a quick checklist for pie crust success: Preheat the oven to the right temperature before baking. Use cold butter and ice water to maintain a cool dough temperature. Roll out the dough on a lightly floured surface to prevent sticking. Crimp the edges for a decorative touch that also helps prevent slumping. Balancing Flavors: How to Enhance Your Pecan Pie Achieving the perfect balance of flavors in a pecan pie is both an art and a science. The key is to harmonize the sweetness of the filling with the natural nuttiness of the pecans. To do this, consider the type of sweeteners and their proportions. Traditional recipes often call for corn syrup, but experimenting with a blend of brown sugar and honey can add depth to the flavor profile. Here's a quick guide to enhancing your pecan pie's flavor: Use high-quality pecan halves for a robust nutty taste. Dark chocolate can introduce a rich complexity; opt for a high cocoa content bar. Avoid artificial sweeteners like Splenda, as they may affect the pie's texture. Toasting the pecans before adding them to the pie can elevate the overall flavor. Remember, the best pecan pie is one that suits your personal taste preferences. Don't be afraid to tweak traditional recipes and make them your own. Conclusion In the journey through the sweet and nutty world of pecan pies, we've explored various recipes, tips, and twists on this classic dessert. From the traditional Southern pecan pie to innovative variations like Chocolate Bourbon Pecan Pie and Pecan Pie Cobbler, there's a version to satisfy every palate. The key to a perfect pecan pie lies in the balance of its flaky crust, rich filling, and the toasty crunch of pecans. Whether you're a seasoned baker or trying your hand at this dessert for the first time, the recipes provided offer a roadmap to creating a delectable treat that's sure to impress. Remember, the best pecan pie is the one made with love and shared with friends and family. So, preheat your oven, gather your ingredients, and get ready to bake a pie that could very well be the highlight of your next gathering. Frequently Asked Questions What are the essential ingredients for a classic pecan pie? The essential ingredients include 1 cup brown sugar, 1 1/4 cup corn syrup, 4 eggs, beaten, 4 tablespoons butter, 1 teaspoon vanilla, and 1 1/2 cup pecans. How do you achieve the perfect texture for a pecan pie? To achieve the perfect texture, ensure the pecans on top get crisp and toasty while the ones underneath stay slightly chewy. The filling should be creamy and rich. Are there any variations to the traditional pecan pie recipe? Yes, variations include Chocolate Bourbon Pecan Pie, Pecan Pie Cobbler, Pecan Cream Cheese Pie, and more, offering different flavors and textures. What is the difference between a pecan pie and a pecan pie cobbler? A pecan pie is a classic pie with a filling of pecans and a custard made from eggs, sugar, and syrup. A pecan pie cobbler combines the ease of a cobbler with the rich flavor of pecan pie, often with a more textured topping. How long should you bake a pecan pie? Typically, a pecan pie should be baked at 350° for about 45 minutes, or until the filling is set. Can you add chocolate or bourbon to a pecan pie? Yes, you can add chocolate or bourbon to a pecan pie for a rich and gooey dessert. These ingredients offer a delicious twist to the traditional recipe.
- "Decadent and Delicious: The History and Recipe of German Chocolate Cake"
German Chocolate Cake, a sumptuous treat with a rich history, is an American classic that has tantalized taste buds for over a century. Its unique combination of delicate chocolate layers and a luscious coconut-pecan frosting has made it a beloved dessert for countless celebrations. This article delves into the cake's origins, its evolution, and provides a guide to crafting the perfect German Chocolate Cake, ensuring even the most amateur bakers can achieve confectionary success. Key Takeaways German Chocolate Cake was created by Sam German in the mid-1800s and gained popularity after being published in a Dallas newspaper. The ideal chocolate for this cake is the German's Sweet Chocolate bar, known for its sweeter, milder flavor compared to other chocolates. Buttermilk plays a crucial role in the batter, and if unavailable, a substitute can be made with whole milk and vinegar. The coconut-pecan frosting is a signature element of the cake, and following a classic recipe ensures an authentic taste. Careful layering and frosting techniques, including the use of parchment paper, contribute to the cake's aesthetic and structural integrity. The Origins and History of German Chocolate Cake Sam German's Creation The German Chocolate Cake we know today is not from Germany, but rather an American classic with a misleading name. It owes its name to Sam German, who developed a type of baking chocolate for the Baker's Chocolate Company in 1852. This chocolate, with its distinct sweetness, was later used in the cake's original recipe. In 1956, the recipe featuring German's Sweet Chocolate was first published, marking the beginning of the cake's journey to becoming a beloved dessert across the United States. The cake's unique combination of flavors, including coconut and pecan, has made it a staple in American baking. While the cake's name suggests European origins, its true roots are firmly planted in American soil, a testament to the country's ability to embrace and enhance culinary creations from around the world. The Rise to Popularity Following its creation by Samuel German in 1852, the German Chocolate Cake began its ascent to fame. The sweetened, dark chocolate baking bar named after its creator became a staple in American baking. Its popularity surged in the mid-20th century when a recipe using German's Sweet Chocolate was published in a Dallas newspaper. The cake quickly became a beloved dessert across the United States, celebrated for its rich flavor and unique coconut-pecan frosting. The cake's reputation was further solidified through its presence in bakeries and cookbooks nationwide. It became a common sight at celebrations, from birthdays to anniversaries, and was often featured in holiday dessert lineups. The German Chocolate Cake's rise to popularity is a testament to its delightful taste and the joy it brings to those who savor it. The Recipe's Evolution Over Time The German Chocolate Cake we know today has undergone a delicious transformation since its inception. The original recipe, first developed in 1957, has been a springboard for countless variations. Adaptations of the classic recipe reflect both changing tastes and the creativity of bakers who have embraced and personalized this dessert. The journey of the German Chocolate Cake recipe is a testament to the dessert's flexibility and enduring appeal. Here's a brief timeline highlighting key milestones in the cake's evolution: 1957: The original Baker's German's Sweet Chocolate Cake recipe is published. Late 20th Century: Home bakers begin to experiment with the recipe, adding their own flair. 21st Century: Professional pastry chefs, like David Lebovitz, offer gourmet takes on the classic, sometimes requiring advanced techniques. As the cake continues to evolve, one thing remains certain: its ability to bring joy to those who bake and savor it. Preparing the Perfect Batter Choosing the Right Chocolate The foundation of a luscious German Chocolate Cake lies in the selection of its primary ingredient: chocolate. Begin with a 4 oz. bar of German's Sweet Chocolate for an authentic taste. If this specific brand is elusive, opt for a semisweet chocolate bar, ensuring it contains 50%-56% cacao for the right balance of sweetness and chocolate depth. When preparing your batter, the chocolate's quality can make or break the cake's flavor profile. Here's a quick guide to help you choose: German's Sweet Chocolate: Mild in flavor, it's the traditional choice. Semisweet Chocolate (50%-56% cacao): A suitable alternative that offers a richer taste. Bittersweet Chocolate: Intense and less sweet, for those who prefer a deeper chocolate note. For those who treasure the originality of the cake, using German's Sweet Chocolate by Baker's Chocolate Company is recommended. However, the versatility of the recipe allows for experimentation with different types of chocolate to cater to personal preferences. The Role of Buttermilk The inclusion of buttermilk in the batter is a game-changer for German Chocolate Cake. Unlike regular milk, buttermilk reacts with the baking soda, creating a leavening effect that results in a lighter, more tender cake. This is because buttermilk's acidity helps to break down the strands of gluten, leading to a finer crumb and a softer texture. If you find yourself without buttermilk, a simple substitute can be made by adding a tablespoon of white vinegar or lemon juice to a cup of whole milk. Although not a perfect match for the richness of buttermilk, this makeshift solution can suffice in a pinch. When preparing the batter, the dry ingredients and buttermilk should be added alternately to the creamed butter and sugar mixture, ensuring a well-incorporated and smooth batter. Mix dry ingredients in one bowl Cream butter, sugar, and egg yolks in another Alternate adding dry ingredients with buttermilk to the creamed mixture Gently fold in whipped egg whites to retain airiness Whipping Egg Whites for Fluffiness Achieving the perfect fluffiness in a German Chocolate Cake is all about the egg whites. Whipping egg whites to stiff peaks is crucial for incorporating air and giving the cake its signature light texture. Start by beating the egg whites on medium-high speed until they form soft peaks. Then, gradually add sugar and continue to beat until they are stiff and glossy. When folding the whipped egg whites into the batter, be gentle. Use a large rubber spatula and fold in half of the egg whites first to lighten the batter. Then, carefully fold in the remaining whites. This step is essential to ensure that the air you've worked so hard to incorporate doesn't escape. Here's a simple guide to the process: Beat egg whites until soft peaks form. Gradually add sugar and beat until stiff peaks. Fold half of the egg whites into the batter. Gently fold in the remaining egg whites. Divide the batter evenly between prepared pans and bake. Assembling the Layers Baking with Parchment Paper After preparing your cake pans with nonstick spray and carefully lining them with parchment paper, you're ready to pour in the batter. Using parchment paper ensures that your cake layers will release easily after baking, preventing any heartbreaking moments when turning them out onto a cooling rack. It's a simple trick using two lengths of parchment paper extending one inch above the pan's rim so the parchment paper doesn't touch the oven racks or wall. When the cakes are done, a toothpick inserted near the center should come out clean. Once out of the oven, it's crucial to run a knife around the edge of the pans to loosen the cakes before they cool. After 15 minutes, remove the cakes from the pans and gently peel away the parchment paper. Allow the cakes to cool completely on wire racks before moving on to the frosting stage. Remember, the parchment paper is not just a tool for easy removal; it also helps in achieving evenly baked cake layers that are essential for a well-assembled German Chocolate Cake. Layering Techniques After baking your German Chocolate Cake layers to perfection, it's time to assemble them with precision. Place the first cake layer on your chosen display, such as a cake stand or serving plate. Scoop a generous amount of the coconut-pecan frosting onto the layer, aiming to spread it evenly to the edges. This ensures each bite includes the delightful combination of cake and frosting. For a visually stunning and structurally sound cake, it's crucial to align the layers. Here's a simple guide to follow: Brush each cake layer with a light syrup to keep it moist. Spread approximately 3/4 cup of coconut filling over each layer, reaching the edges. Carefully set the next layer on top, checking for alignment. Repeat the process with the remaining layers. If you're opting for a two-layer cake, simply divide the batter between two larger pans and extend the baking time. This approach offers a more robust slice with the same rich flavors. And don't forget, toasting your pecans before adding them to the frosting will elevate the nuttiness and add a delightful crunch. Ensuring Even Cake Layers Achieving even cake layers is crucial for a visually appealing and structurally sound German Chocolate Cake. Carefully leveling each layer after baking ensures that your cake will stack neatly and not wobble. Use a serrated knife or a cake leveler to slice off any domed tops, aiming for uniform thickness across all layers. For those opting for a simpler approach, consider baking two layers and splitting them horizontally to create four layers. This method can save time and reduce the risk of uneven baking: Remove the cake from the pan and let it cool completely. Using a serrated bread knife, carefully cut each layer in half horizontally. Brush the top of each layer with syrup or your chosen moistening agent before applying the frosting. Remember, patience and a steady hand are your best tools for ensuring that each layer of your German Chocolate Cake is as perfect as the last. The Signature Coconut-Pecan Frosting Ingredients for the Frosting The signature coconut-pecan frosting is what sets the German Chocolate Cake apart, and getting the ingredients right is crucial for the perfect taste and texture. The base of the frosting is a rich blend of evaporated milk, granulated sugar, and egg yolks, which are cooked together to form a thick custard. Evaporated Milk: 1 cup (240 ml) Granulated Sugar: 1 1/2 cups (300 grams) Unsalted Butter: 3/4 cup (170 grams) Egg Yolks: 4 large Vanilla Extract: 1 1/2 teaspoons Sweetened Shredded Coconut: 2 2/3 cups (7 oz. or 1 package) Chopped Pecans: 1 1/2 cups (toasted, if preferred) Once you have gathered all the ingredients, you're ready to move on to the preparation phase, where these components will be transformed into the luscious frosting that is synonymous with this classic dessert. Step-by-Step Frosting Preparation Once you have gathered all the ingredients for your Coconut-Pecan Frosting, the real magic begins. Start by combining the granulated sugar, evaporated milk, and lightly beaten egg yolks in a saucepan. Add the unsalted butter and cook over medium heat, stirring constantly until the mixture thickens. It's crucial to keep the heat at a level where the mixture cooks but does not burn. After removing from the heat, stir in the vanilla extract, shredded coconut, and chopped pecans. The transformation into a luscious, gooey frosting is almost complete. To achieve the perfect consistency, let the frosting cool until it reaches a spreadable texture. This may take some time, but it ensures your cake layers will be topped with nothing but perfection. Remember, the frosting can be quite thick, making it challenging to spread. An ice cream scoop can help you portion the frosting onto the cake. Then, with an offset spatula, gently push and pat the frosting across the cake to spread it evenly. This technique helps in managing the thickness and achieving a smooth layer. Tips for a Smooth and Creamy Texture Achieving a smooth and creamy texture for your German Chocolate Cake's coconut-pecan frosting is crucial for both taste and presentation. Here are a few tips to ensure perfection: Begin by toasting the coconut and pecans to enhance their flavor and add a subtle crunch that contrasts the creamy frosting. When cooking the custard base, constant stirring is key to prevent lumps and achieve a velvety consistency. It's ready when it coats the back of a spoon. Allow the frosting to cool to room temperature before spreading. This not only makes it easier to handle but also prevents it from melting the buttercream beneath. Remember, the frosting will thicken as it cools, so if it's too runny initially, give it time. If it's too thick, a splash of cream can help loosen it. The goal is a spreadable consistency that will hold its shape once on the cake. Decorating and Serving Your Masterpiece Adding the Final Touches Once your German Chocolate Cake has been layered with its rich fillings and frosted to perfection, it's time to add those final decorative touches that will transform it from a homemade delight to a confectionery masterpiece. Refrigerate the cake in its crumb coating for at least 20 minutes to set the layers and make the final frosting application smoother. After chilling, apply the final layer of frosting with care, ensuring an even coat that will serve as a canvas for your decorations. For a truly elegant presentation, consider piping additional frosting along the edges or creating intricate designs on the top. If you've reserved some frosting, now is the time to fill your piping bags and let your creativity shine. Remember, the goal is to enhance the cake's visual appeal without overwhelming its classic beauty. As you complete your cake, take a moment to appreciate the journey from simple ingredients to this moment of artistry. With each embellishment, you're not just decorating; you're adding to the storied history of the German Chocolate Cake. Presentation Ideas Once your German Chocolate Cake is frosted to perfection, it's time to think about presentation. A well-presented cake can be as stunning as it is delicious. Consider the occasion and choose a presentation style that complements it. For a formal event, a cake stand with a glass dome adds elegance, while a rustic wooden board suits a casual gathering. For birthdays, personalize with candles or a written message in icing. Seasonal flowers can add a natural touch for spring celebrations. Edible gold leaf or glitter can give a luxurious finish for anniversaries or weddings. Finally, think about the surrounding elements. A coordinated tablecloth, subtle lighting, and complementary tableware can all enhance the visual appeal of your cake. The goal is to create an inviting atmosphere that makes everyone eager to dig in. Storing and Serving Suggestions After you've enjoyed the rich flavors of your German Chocolate Cake, proper storage is key to maintaining its freshness. To put it plainly, no, German chocolate cake does not need to be refrigerated to stay fresh. However, it is important to store it in an airtight container to prevent it from drying out. If you find yourself with leftovers, consider these tips: Keep the cake at room temperature if it will be consumed within a couple of days. For longer storage, wrap the cake well and place it in the refrigerator. If you have a significant amount left, freezing is an excellent option. Wrap individual slices for a convenient treat later on. When serving, let the cake come to room temperature for the best flavor and texture. And if you're planning a special presentation, a dollop of whipped cream or a drizzle of chocolate sauce can add an extra touch of elegance. Conclusion In summary, German Chocolate Cake is not just a dessert; it's a slice of American history. From its inception by Sam German to its rise to popularity following a Dallas newspaper feature, this cake has delighted taste buds for over a century. Its unique combination of rich chocolate layers, luscious coconut-pecan frosting, and the optional touch of chocolate ganache makes it a standout treat. Whether you're an amateur baker or a seasoned pro, following the recipe closely will yield a cake that's guaranteed to impress. Remember to source the right chocolate and don't shy away from making substitutions as needed for ingredients like buttermilk. With each bite, you'll appreciate the tradition and care that goes into creating this classic confection. Frequently Asked Questions Who created the German Chocolate Cake? The German Chocolate Cake was first created by Sam German in the mid-1800s. Why is German Chocolate Cake known for its light chocolate appearance? The light chocolate appearance is due to the use of German's Sweet Chocolate bar, which is sweeter and milder than other chocolate bars. Can I use a substitute if I can't find German's Sweet Chocolate bar? Yes, you can use a semisweet chocolate bar with around 50%-56% cacao as a substitute. What makes the coconut-pecan frosting special in German Chocolate Cake? The coconut-pecan frosting is a signature element that combines coconut, caramel, and pecans, offering a rich and satisfying experience. Is there a substitution for buttermilk in the cake recipe? If you don't have buttermilk, you can make a substitution using whole milk and vinegar. See the recipe notes for exact proportions. How can I ensure success when baking German Chocolate Cake as an amateur? Following the directions carefully is key to success. You can also refer to trusted sources like David Lebovitz's recipes for guidance.
- "Discover the History and Secret Ingredient Behind the Famous Smith Island Cake"
The Smith Island Cake is not just a dessert; it's a slice of Maryland's rich culinary heritage. With its roots stretching back to the 1800s, this multi-layered cake has been a symbol of community and togetherness, accompanying watermen on their autumn oyster harvests and becoming the official state dessert of Maryland. The cake's signature thin layers of moist yellow cake and luscious chocolate fudge icing have made it a beloved treat for generations, and its versatility allows for a variety of flavors and personalized touches. Whether you're celebrating a special occasion or simply indulging in a decadent dessert, the Smith Island Cake promises an experience that is both memorable and delicious. Key Takeaways The Smith Island Cake is Maryland's official state dessert, symbolizing the state's culinary tradition and community spirit. Characterized by its many thin layers, the cake combines moist yellow cake with a rich chocolate fudge icing that seeps into each layer. The cake has evolved to include a range of flavors beyond the classic chocolate and yellow cake, such as lemon, coconut, and Funfetti. Making the perfect Smith Island Cake requires mastering the art of layering and choosing quality ingredients for both the cake and the frosting. Smith Island Cakes hold a special place in local celebrations and have a growing online presence, with options for ordering and delivery. The History and Significance of Smith Island Cake Maryland's Culinary Gem The Smith Island Cake stands as a proud testament to Maryland's rich culinary heritage. This multi-layered marvel is not just a dessert; it's a slice of history that continues to sweeten the present with its ties to past traditions. Local feasts often feature this cake alongside steamed crabs and crab cakes, showcasing Maryland's affinity for both seafood and sweets. While the cake's exact origins are shrouded in the mists of the Chesapeake Bay, its significance is crystal clear. It's a dessert that has transcended its humble beginnings to become a symbol of Maryland pride. With each layer carefully baked and assembled, the Smith Island Cake is a labor of love that reflects the dedication of those who make it. Here's a glimpse at how the Smith Island Cake stands out in Maryland's dessert scene: Official state dessert of Maryland A unique multi-layered structure A symbol of local tradition and community Whether enjoyed fresh or savored as a storied treat, the Smith Island Cake is a culinary gem that continues to impress with its luscious layers and rich history. A Symbol of Community and Togetherness The Smith Island Cake is more than just a dessert; it's a tapestry of tradition and affection that binds the community. Originating from Maryland's last inhabited island, these cakes became a heartfelt emblem of the bonds that families and neighbors share. The cakes were a symbol of community and togetherness, meant to remind the men of the community they had left behind. During festive seasons and significant events, the Smith Island Cake takes center stage, symbolizing the unity and spirit of the occasion. Whether it's a holiday, a wedding, or a local celebration, the presence of this cake is a testament to the island's ethos of camaraderie and mutual support. The Official State Dessert of Maryland In the realm of state symbols, the Smith Island Cake stands out as Maryland's official state dessert, a testament to its cultural significance. Not many states can claim a dessert as part of their official emblems, which underscores the uniqueness of this multi-layered treat. The designation of the Smith Island Cake as the state dessert is not just about recognizing a delicious confection; it's a nod to the state's history and the skills of its bakers. The cake's journey to official recognition was marked by community effort and pride. It serves as a delicious symbol of Maryland's culinary heritage, enjoyed by residents and visitors alike. Here's a quick look at how the Smith Island Cake compares to other state desserts: Creating the Classic Smith Island Cake The Art of Layering The Smith Island Cake is renowned for its visually stunning and delectable layers, each contributing to the cake's overall richness and texture. Baking each layer individually is crucial, ensuring that they cook evenly and maintain their delicate structure. Typically, each layer takes about 12 minutes to bake, and with the right oven capacity, you can bake three layers simultaneously, completing the task in under 40 minutes. Here are the essential tools you'll need for the layering process: Medium saucepan 9-inch round cake pans Whisk Glass mixing bowl Electric mixer (handheld or stand) Cake turntable Cake carrier for storage Make-ahead tips can greatly ease the process. Bake and cool the cake layers in advance, and cover them tightly at room temperature overnight. The icing can also be prepared ahead and refrigerated. If you plan to freeze the assembled cake, it can be stored for 2-3 months; just remember to thaw it in the refrigerator overnight and bring it to room temperature before serving. Choosing the Right Ingredients The foundation of a Smith Island Cake lies in the quality of its ingredients. Selecting fresh, high-quality components is crucial to achieving the cake's signature taste and texture. For the cake layers, a fine balance between all-purpose flour, sugar, and eggs is essential, while the choice of butter over margarine can make a significant difference in flavor. When it comes to the chocolate icing, the type of chocolate used can vary from semi-sweet to dark, depending on personal preference. However, it's the addition of corn syrup that gives the icing its characteristic sheen, though it's optional. Heavy cream is preferred for its richness, contributing to the icing's creamy consistency. Below is a basic list of ingredients needed for a traditional Smith Island Cake: All-purpose flour Granulated sugar Unsalted butter Eggs Baking powder Salt Milk Pure vanilla extract For the chocolate icing: Unsweetened cocoa powder Granulated sugar Corn syrup (optional) Heavy cream Pure vanilla extract Frosting Techniques for the Perfect Finish Achieving the perfect finish on a Smith Island Cake is all about mastering the frosting technique. The chocolate icing is the star of the show, and its preparation is crucial. Melt unsalted butter, bittersweet chocolate, sugar, heavy cream, and a touch of corn syrup for shine. After boiling, add vanilla extract and salt, then cool to a spreadable consistency. Here are some make-ahead tips to ensure your frosting is perfect every time: Bake and cool the cake layers in advance, covering them tightly at room temperature overnight. Prepare the icing ahead and refrigerate; soften at room temperature for an hour before use. Assembled cake can be frozen for 2-3 months. Thaw overnight in the refrigerator and bring to room temperature before serving. Remember, while fresh is best, these tips can help you manage your time and still achieve that perfect glossy finish that Smith Island Cakes are known for. Variations and Modern Twists Exploring Different Flavors The traditional Smith Island Cake, known for its delectable chocolate frosting, is just the beginning of a flavorful journey. Variety is the spice of life, and this cake is no exception, embracing a spectrum of tastes that cater to every palate. From the subtle sweetness of vanilla to the tropical allure of coconut, the possibilities are endless. Chocolate: The classic choice that never fails to delight. Vanilla: A light and airy option for those who prefer a less intense flavor. Coconut: Brings a hint of the islands to this Maryland favorite. Lemon: Zesty and refreshing, perfect for summer gatherings. Red Velvet: A visually stunning and decadently rich variation. Funfetti and Celebration Cakes The Smith Island Funfetti Cake transforms a classic dessert into a vibrant celebration centerpiece. With its 11 alternating layers of colorful cake and vanilla icing, it's not just a treat for the taste buds but also a feast for the eyes. These cakes are perfect for birthdays, anniversaries, and any festive gathering where a touch of whimsy is desired. For those looking to indulge in this celebratory confection, here's a quick guide to what you can expect: Price: $40 Serves: 8 to 10 people Advance Ordering: Required (at least one day) Whether it's a personal craving or a grand event, the convenience of having these cakes delivered nationwide ensures that no celebration is without a slice of happiness. The Smith Island Cake, with its thin layers and generous icing, is a culinary masterpiece that's sure to be the highlight of your next special occasion. Tips for Personalizing Your Cake Personalizing your Smith Island Cake adds a unique touch that can transform this classic dessert into a reflection of your own tastes and creativity. Experiment with different fillings to add a new dimension of flavor to each layer. Whether it's fruit preserves, lemon curd, or a rich ganache, the possibilities are endless. Fruit Preserves Lemon Curd Chocolate Ganache Peanut Butter Incorporating seasonal ingredients can also make your cake stand out. For a fall-themed cake, consider spices like cinnamon or nutmeg, and for summer, fresh berries or citrus zest. For those who love a bit of crunch, try adding nuts or toffee bits between the layers or as a topping. If you're aiming for a more elegant presentation, edible flowers or gold leaf can add a luxurious touch. Here's a simple guide to help you decide: Nuts or Toffee Bits Edible Flowers Gold Leaf Finally, don't forget to write a special message or create a design on top with icing. This can be a heartfelt way to celebrate an occasion or simply to express your artistic side. Serving and Presentation Cutting the Perfect Slice Achieving the perfect slice of Smith Island Cake is both an art and a science. The key is to use the right tools and techniques to ensure clean, even cuts that showcase the cake's many layers. Here are some tips to help you slice like a pro: Use a long, serrated knife that's been warmed under hot water and wiped dry. This helps to cut through the frosting without dragging crumbs through the layers. Before cutting, allow the cake to cool completely; this will make the layers firmer and less prone to crumbling. For uniform slices, measure and lightly mark the top of the cake with small indentations before making any cuts. Remember, practice makes perfect. Don't be discouraged if your first few attempts aren't bakery-quality. With patience and the right technique, you'll be cutting flawless slices in no time. Pairing with Complementary Desserts When presenting the Smith Island Cake, consider the array of complementary desserts that can enhance the overall experience. A well-paired dessert can accentuate the flavors and textures of the cake, making each bite more memorable. For a harmonious dessert table, consider these pairings: A scoop of vanilla or coffee ice cream can provide a creamy contrast to the cake's rich layers. Lemon bars or peach cobbler offer a tart counterpoint that can cleanse the palate between decadent chocolate bites. For a truly indulgent experience, serve alongside a plate of Ghirardelli brownies, doubling down on chocolatey goodness. If the cake is slightly dry, a scoop of ice cream or a dollop of whipped cream can add moisture and richness. For an extra touch of elegance, drizzle a sauce that echoes one of the cake's flavors, such as a raspberry coulis or a caramel sauce. Decorating Ideas for Special Occasions When it comes to special occasions, the Smith Island Cake transforms from a beloved dessert to a centerpiece of celebration. The art of decorating these cakes is as intricate as their layering, with each cake telling its own story. For a truly personalized touch, consider the following ideas: Use edible flowers for a natural, elegant look. Incorporate themed toppers or edible images for birthdays and anniversaries. Experiment with different icing colors to match the event's theme. Add a sprinkle of gold leaf for a touch of luxury on milestone celebrations. Remember, the key to a showstopping cake lies not only in its taste but also in its presentation. Whether it's a birthday, anniversary, or a festive holiday gathering, a well-decorated Smith Island Cake can elevate any event. For those planning ahead, many bakeries recommend one day advance ordering to ensure your cake is as fresh as it is beautiful. Smith Island Cake in the Community A Staple in Local Celebrations In the heart of Maryland, the Smith Island Cake is more than just a dessert; it's a cherished tradition that marks every celebration. From birthdays to anniversaries, and even work functions, this multi-layered cake is a testament to the state's rich culinary culture. It's not uncommon for Marylanders to ring in the new year with a slice of this decadent cake, as highlighted by WBAL-TV's mention of the state's unique 'crab drop' celebration. The cake's presence extends beyond personal celebrations, becoming a centerpiece at local events and festivals. Its significance is such that it often serves as the grand finale at communal gatherings, symbolizing the unity and shared heritage of the community. With the advent of online ordering and nationwide shipping, the joy of Smith Island Cake has spread far and wide. Now, anyone can experience a taste of Maryland's community spirit, delivered right to their doorstep. Online Presence and Customer Reviews In the digital age, the Smith Island Cake has carved out its own niche online, with numerous bakeries and home bakers showcasing their versions on various platforms. Customers eagerly share their experiences, often noting the cake's timely arrival and impeccable condition. For instance, the Celebration Smith Island Cake by Chesapeake Bay Gourmet boasts reviews highlighting verified purchases and satisfaction with the product's quality. Feedback from customers is not only a testament to the cake's popularity but also serves as a guide for new buyers. Positive reviews often mention the cake's rich flavor and the joy it brings to special occasions. Negative feedback, while less common, provides valuable insights for continuous improvement. Below is a snapshot of customer sentiments: Verified purchase satisfaction Product quality and condition Flavor and enjoyment Delivery and packaging Ordering and Delivery Options In the age of convenience, the delight of Smith Island Cake is just a click away. Goldbelly offers a seamless experience for cake enthusiasts to order this Maryland treasure from anywhere in the country. With a service that ships from over 850 top-notch eateries, the Smith Island Cake by Angelina's of Maryland is a standout offering. For those planning ahead, it's important to note that a one day advance ordering is required. This ensures that every cake arrives fresh and ready to elevate your special occasion. Whether it's a birthday, anniversary, or just a craving, the Smith Island Cake is an ideal choice for any celebration. Here's a quick guide to get you started: Visit the Goldbelly website and search for Smith Island Cake. Choose from the various flavors and sizes available. Place your order with a day's notice to ensure timely delivery. Anticipate the arrival of your decadent dessert, ready to be the centerpiece of your event. Conclusion The Smith Island Cake is not just a dessert; it's a slice of Maryland's rich history and a testament to the island's enduring spirit of community. With its origins tracing back to the 1800s, this multi-layered marvel has evolved from a symbol of love and togetherness into Maryland's official state dessert. Whether you're savoring the classic moist yellow cake with its signature chocolate fudge icing or indulging in a festive Funfetti variation, each bite is a celebration of tradition and craftsmanship. As we've explored the layers of this culinary masterpiece, it's clear that the Smith Island Cake stands as a cherished treasure, promising to elevate any special occasion with its exquisite presentation and delectable flavor. Remember to plan ahead, as these cakes require one day of advance ordering, but the wait is undoubtedly worth it for a blissful slice of paradise that is sure to leave a lasting impression. Frequently Asked Questions What is the significance of the Smith Island Cake? Smith Island Cake is Maryland's official state dessert and represents a cherished tradition dating back to the 1800s. It symbolizes community and togetherness, as it was originally sent with watermen during the autumn oyster harvest as a sweet taste of home. How many layers does a classic Smith Island Cake have? The classic Smith Island Cake boasts a towering structure with 8-14 ultra-thin layers, typically of moist yellow cake and chocolate fudge icing. Can I order a Smith Island Cake for a special occasion? Yes, you can order Smith Island Cakes for special occasions with at least one day's advance notice. They are perfect for any event, from intimate gatherings to lavish celebrations. What are some popular flavors of Smith Island Cake? Apart from the traditional chocolate and yellow cake, popular flavors include lemon, carrot cake, coconut, strawberry, and Funfetti with vanilla icing. What makes Smith Island Cake unique in terms of frosting? Smith Island Cake is unique for its use of a rich chocolate fudge icing instead of traditional buttercream. This icing seeps into the thin cake layers, creating a moist and indulgent texture. How should I serve Smith Island Cake for the best experience? For the best experience, serve Smith Island Cake at room temperature to ensure the layers and icing are perfectly soft. Pair it with a light dessert like fruit salad with whipped cream to complement its richness.
- "How to Make the Perfect Tres Leches Cake: A Step-by-Step Guide"
Tres Leches Cake, a luscious dessert hailing from Latin America, has won hearts with its unique combination of three different kinds of milk soaking into a soft sponge cake. This cake is a celebration of texture and flavor, offering a moist and creamy experience that's both comforting and indulgent. Whether you're a seasoned baker or new to the world of desserts, the simplicity and versatility of Tres Leches Cake make it a delightful treat to prepare and enjoy. Key Takeaways Tres Leches Cake is a moist and creamy dessert made by soaking a sponge cake in a blend of three milks: evaporated milk, sweetened condensed milk, and heavy cream. The cake's ease of preparation is enhanced by the option of using boxed cake mix, making it accessible for bakers of all skill levels. Understanding the cultural significance and the right soaking techniques is crucial for achieving the perfect balance of moisture without making the cake soggy. Customization options abound, from flavor variations using different fruits to allergy-friendly substitutes, ensuring there's a version of Tres Leches for everyone. Proper storage and serving methods are essential to maintain the dessert's freshness and to present it stunningly for any occasion. The Essence of Tres Leches Cake Understanding the 'Three Milks' At the heart of the tres leches cake is its signature blend of milks that give the dessert its name and distinctive character. The traditional recipe calls for a vanilla sponge cake to be generously soaked in a trio of dairy: sweetened condensed milk, evaporated milk, and whole milk or cream. This combination creates a rich and creamy texture that is both indulgent and comforting. Understanding the role of each milk is crucial: Sweetened condensed milk adds sweetness and a thick, syrupy consistency. Evaporated milk offers a concentrated milk flavor without the additional water content. Whole milk or cream provides the creamy richness that balances the other two. Patience is a virtue when preparing tres leches cake. Allowing the cake to cool completely before the soak is essential, as a warm base can lead to a soggy outcome. Once the milks are poured, the cake should rest, allowing the flavors to meld and the sponge to achieve the perfect moistness. The Cultural Significance of Tres Leches The tres leches cake is more than just a dessert; it's a symbol of celebration and cultural pride across Latin America. While its exact origins are a subject of debate, the cake has been embraced by many countries, each adding their own twist to the recipe. In Mexico, the tres leches cake is often associated with festivities and is a testament to the nation's love for rich, indulgent desserts. Mexico: Known for its spectacular versions of the cake. Nicaragua: Another possible birthplace of the tres leches cake. Latin America: Each country claims the dessert as part of its culinary heritage. The cake's popularity has transcended borders, making it a beloved treat in celebrations beyond its original geography. Whether it's a birthday, a wedding, or a simple family gathering, tres leches cake brings a sense of occasion and joy to the table. The Anatomy of a Perfectly Soaked Cake Achieving the quintessential texture of a Tres Leches cake is a delicate balance between moisture and structure. The cake should be moist but not soggy, tender yet not mushy. It's a testament to the cake's ability to absorb the milks while maintaining its form. To ensure even soaking, many bakers recommend poking holes throughout the cake, allowing the milks to penetrate deeply. Here are some tips to remember when soaking your cake: Do not rush the cooling process; let the cake sit for at least 30 minutes before soaking. Use a skewer to poke holes across the cake for even milk distribution. Consider removing a thin layer of the upper crust to enhance milk absorption. Resist the urge to cut into the cake too soon; a well-rested cake is worth the wait. Baking the Base: Crafting the Sponge Cake Choosing the Right Ingredients The foundation of a delectable Tres Leches Cake lies in the quality of its ingredients. Selecting fresh, high-quality components is crucial to achieving the cake's signature taste and texture. Begin with all-purpose flour, which provides the necessary structure, and use fine granulated sugar for a smooth sweetness. Eggs: The cornerstone of the sponge, providing leavening and structure. Baking powder: A leavening agent that helps the cake rise. Milk: For the cake batter, often whole milk for richness. Vanilla extract: A dash enhances flavor complexity. When it comes to the milks for the soak, each plays a distinct role. Evaporated milk offers depth, condensed milk brings sweetness, and heavy cream adds a luxurious creaminess. Together, they create a harmonious blend that is both indulgent and comforting. Step-by-Step Baking Instructions After setting your oven to the ideal temperature and preparing your pan, the journey to a fluffy and moist sponge begins with the precise mixing of ingredients. Start by combining your dry ingredients—flour, baking powder, and a pinch of salt in a bowl. In a separate bowl, beat the eggs until they reach a voluminous and airy consistency, then gradually add sugar to maintain the fluffiness. Next, incorporate the melted butter and oils carefully; the temperature of the butter is crucial as it should be warm enough to mix but not so hot as to deflate your batter. Vanilla and, for an extra hint of flavor, a splash of rum can be added to the mixture for that distinct touch. Once the wet and dry ingredients are ready, it's time to unite them. Gently fold the flour mixture into the egg batter, ensuring not to overmix as this is the secret to a light sponge. Pour the batter into the pan, smoothing the top for an even bake. The cake should be baked until a toothpick comes out clean, signaling it's ready to cool and later be soaked in the signature tres leches mix. Tips for a Fluffy and Moist Sponge Achieving the perfect sponge for Tres Leches Cake is crucial for its texture and overall enjoyment. The key to a fluffy and moist sponge is to avoid adding fats like butter or oil, which can weigh down the cake and prevent the milks from soaking in properly. Instead, focus on creating a light and airy structure that can absorb the milks without becoming soggy. Let the cake cool completely before adding the milk mixture to prevent sogginess. Consider slicing off the top crust of the cake to enhance milk absorption if a crust has formed. For a homemade touch, bake the sponge from scratch, ensuring it has a mild flavor that won't compete with the milks. When baking, divide the batter evenly and check for doneness with a toothpick. Once baked and cooled, the sponge will be ready for the tres leches soak, which should be generously applied. Trust that even if it seems like too much liquid, the sponge will absorb it, resulting in a decadent dessert. The Tres Leches Soak: A Symphony of Milks Combining Evaporated, Condensed, and Heavy Cream The tres leches soak is the heart of the cake, where the magic of moisture and flavor happens. Combining the right proportions of evaporated milk, sweetened condensed milk, and heavy cream is crucial for achieving the signature taste and texture. A common blend includes 12 ounces of evaporated milk, 14 ounces of sweetened condensed milk, and a variable amount of heavy cream, depending on how traditional and wet you prefer your cake. For those who enjoy a hint of complexity, a tablespoon of Brandy or other liqueurs can be optionally added to the mixture. It's important to taste the milk mixture and adjust the sweetness or creaminess to your preference before soaking the cake. The Art of Soaking the Cake Mastering the art of soaking is what sets an authentic Tres Leches cake apart from the rest. Begin by allowing the cake to cool for at least 30 minutes; this prevents the structure from collapsing when soaked. Once cooled, the cake should be poked with a fork or skewer to create channels for the milks to penetrate deeply and evenly. After the initial soak, patience is key. The cake must rest in the refrigerator, allowing the flavors to meld and the texture to achieve the perfect balance between moist and firm. For the best results, refrigerate the cake for a minimum of 4 hours, though overnight is ideal. Remember, a well-soaked cake is the pinnacle of this dessert's experience. Timing and Techniques for Optimal Absorption Achieving the perfect absorption of the tres leches mixture is both an art and a science. Allow the cake to cool for at least 30 minutes before the soak to prevent it from becoming mushy. Once the milks are poured, patience is key; the cake should rest in the refrigerator for several hours, ideally overnight, to ensure a creamy texture throughout. Here's a quick guide to the soaking process: Bake the cake and let it cool. Prepare the tres leches mixture while the cake is baking. After cooling, poke holes across the cake's surface. Gently pour the milk mixture, ensuring even distribution. Refrigerate the cake, covered, to set the soak. Remember, the longer the cake soaks, the more flavorful and moist it becomes. Serving it chilled will enhance the experience, making each bite a delightful fusion of sponge and cream. Customizing Your Tres Leches Cake Flavor Variations: From Classic to Creative Exploring the realm of flavor variations in Tres Leches Cake opens up a world of culinary creativity. Classic versions often stick to simple toppings like sweetened whipped cream or a sprinkle of cinnamon, allowing the milky essence to take center stage. Yet, the addition of fresh fruits or a drizzle of homemade caramel can elevate the cake to new heights of deliciousness. For those looking to experiment, here's a list of popular variations that can add a unique twist to your dessert: Strawberry Tres Leches: Incorporates fresh strawberries for a tangy, refreshing flavor. Chocolate Tres Leches: A chocolate sponge base with chocolate shavings on top. Coconut Tres Leches: Infused with coconut milk and topped with toasted coconut flakes. Dulce de Leche Tres Leches: Drizzled with rich dulce de leche for a caramelized finish. Remember, the key to a successful variation is to maintain the harmony between the sponge, the milks, and the additional flavors. Experiment, but always keep the integrity of the original recipe in mind. Decorating with Whipped Cream and Fresh Fruit The crowning glory of any Tres Leches cake is its decoration. Whipped cream, applied with a gentle hand, creates a cloud-like topping that's both elegant and inviting. For a touch of color and freshness, adorn your cake with an array of fresh fruit slices. To achieve the perfect whipped cream consistency: Begin by chilling your mixing bowl and beaters to help the cream whip more easily. Whip the heavy cream until firm peaks form, ensuring your topping will hold its shape. Gently fold in any flavorings or purees, like the vibrant mango puree mentioned in a cozy kitchen recipe, to add a unique twist to your cake. Finally, arrange the fruit in a pattern that complements the shape of your cake. Whether you opt for a simple ring of strawberries or an intricate design, the fresh fruit not only adds visual appeal but also a burst of natural sweetness with every bite. Allergy-Friendly Alternatives For those with dietary restrictions or preferences, creating an allergy-friendly Tres Leches Cake is both considerate and possible. Almond milk, for instance, can be a delightful substitute for whole milk, especially when enhanced with almond extract and garnished with toasted almonds. Here's a simple guide to dairy-free milk substitutions for Tres Leches Cake: Almond milk: A nutty alternative to whole milk. Coconut milk: Provides a creamy texture and exotic flavor. Soy milk: A versatile and widely available option. Oat milk: Offers a mild, naturally sweet taste. Remember, the key to a successful allergy-friendly cake is to ensure that the substitutes mimic the properties of the traditional ingredients as closely as possible. Serving and Storing Your Tres Leches Creation Presentation Tips for a Stunning Dessert After meticulously soaking your Tres Leches Cake, it's time to present it in all its glory. A visually appealing presentation amplifies the indulgence of this dessert. Begin by choosing the right platter; a simple, elegant dish can make your cake the centerpiece of any table setting. To add an extra touch of elegance, consider garnishing with a light dusting of powdered sugar or cinnamon. For a pop of color and freshness, strategically place a few berries or mint leaves around the cake. Finally, while the whipped cream topping is a classic finish, feel free to get creative with your toppings. A drizzle of caramel or a sprinkle of cocoa can add a delightful twist to this traditional dessert. How to Keep Tres Leches Cake Fresh Ensuring your Tres Leches Cake remains fresh and delectable requires proper storage techniques. The best way to maintain its freshness is by using the right type of container. Airtight containers or cake carriers are ideal as they prevent the cake from absorbing unwanted odors and protect it from drying out. After enjoying your slice of heaven, follow these simple steps to store any leftovers: Cover the cake with plastic wrap, making sure it's snug against the cake to keep air out. Place the cake in the refrigerator, as the cool temperature will help preserve its moistness and flavor. If you've already added whipped cream topping, it's best to remove it before storing and add a fresh layer when you're ready to serve again. Making Tres Leches Cake Ahead of Time Preparing a Tres Leches Cake in advance is not only possible but recommended, as it allows the flavors to meld and the cake to achieve the perfect level of moisture. Ensure the cake has at least 4 hours to chill before serving, which makes it an ideal dessert for gatherings where time is of the essence. Here's a simple guide to storing your Tres Leches Cake: To Store: Keep the cake refrigerated with plastic wrap covering. Whipped Cream: Apply only when ready to serve to ensure peak texture and taste. Leftovers: Remove any whipped cream and store the cake portion as instructed. Add fresh whipped cream upon serving. Remember, freezing is not recommended due to the high dairy content, which may not thaw evenly, potentially affecting the cake's texture. Conclusion Tres leches cake is a delightful indulgence that combines simplicity with creamy richness. This traditional Mexican dessert, with its trio of milks, transforms a basic sponge into a moist, tender, and irresistibly milky treat. Whether you're a novice baker using a convenient boxed mix or a seasoned pro making it from scratch, tres leches is a versatile cake that can be garnished with anything from fresh berries to a sprinkle of cinnamon. It's a testament to the magic of baking, where even an 'excessive' amount of liquid results in a perfectly balanced dessert that's neither soggy nor mushy. As we've explored the ingredients, methods, and variations of this beloved cake, it's clear that tres leches is more than just a dessert—it's a celebration of flavor and texture that's sure to be a hit at any gathering. So, the next time you're looking to satisfy your sweet tooth, remember that the luscious layers of a tres leches cake are just a bake away. Frequently Asked Questions What is Tres Leches Cake? Tres leches cake is a type of poke cake that means 'three milks' in Spanish. It's a light sponge cake soaked in a mixture of three kinds of milk: evaporated milk, sweetened condensed milk, and heavy cream, resulting in a moist and creamy dessert. What makes the Tres Leches Cake moist? The moistness of tres leches cake comes from soaking the baked sponge cake in a rich blend of three milks. This soak, which typically includes evaporated milk, sweetened condensed milk, and heavy cream, infuses the cake with moisture and creaminess. Can I use boxed cake mix to make Tres Leches Cake? Yes, you can use a boxed cake mix to make tres leches cake. It simplifies the process and requires fewer minutes of preparation, while still delivering the delicious flavor and moist texture of the traditional cake. How long does it take for the cake to absorb the milk mixture? After pouring the milk mixture over the cake, it needs at least four hours to adequately soak up the liquid. This ensures the cake is thoroughly moistened and develops the signature texture of tres leches cake. What are the essential ingredients for a Tres Leches Cake? The essential ingredients for a tres leches cake include all-purpose flour, baking powder, sea salt, unsalted butter, sugar, vanilla extract, eggs, evaporated milk, sweetened condensed milk, and heavy cream. For flavor variations, additional ingredients like ripe mangoes can be used. How should Tres Leches Cake be stored? Tres leches cake should be stored in the refrigerator due to its dairy content. Cover it with plastic wrap or place it in an airtight container to maintain its moisture and freshness. It's best consumed within a few days of preparation.
- "5 Delicious Key Lime Pie Recipes You Need to Try"
Key Lime Pie is a delightful dessert that has captured the hearts of many with its tangy flavor and creamy texture. It's a dessert that's not only rooted in American culinary tradition, especially in the Florida Keys, but also versatile enough to be adapted to various dietary needs and personal tastes. From the classic recipe to creative twists and dietary adaptations, Key Lime Pie offers a rich tapestry of flavors and experiences for everyone to enjoy. Key Takeaways The classic Key Lime Pie is simple to make, with a preparation time of 25 minutes and a cook time of 35 minutes, resulting in a dessert that's both delicious and accessible. Variations of Key Lime Pie, such as Single Serve, Mini Pies, and Lime Bars, cater to different preferences and occasions, allowing for personalization and creativity in serving this iconic dessert. When presenting Key Lime Pie, attention to detail in plating, pairing with beverages, and adding decorative garnishes can significantly enhance the overall dining experience. Dietary adaptations, including gluten-free and vegan options, ensure that Key Lime Pie can be enjoyed by those with specific dietary restrictions without compromising on flavor. Key Lime Pie's cultural journey from its origins in the Florida Keys to its presence in popular culture underscores its status as an enduring and beloved American dessert. The Quintessential Key Lime Pie Recipe Gathering the Right Ingredients The foundation of a perfect Key Lime Pie lies in the quality and freshness of its ingredients. Selecting the right limes is crucial; they should be ripe and juicy to impart that signature tangy flavor. Here's a basic list of what you'll need: Freshly squeezed lime juice Sweetened condensed milk Egg yolks Graham cracker crumbs Butter, melted Whipped cream (for serving) Finely grated lime rind (for garnish) While the list seems simple, each component plays a pivotal role in the pie's overall taste and structure. For instance, the graham cracker crumbs must be fresh to ensure a crisp crust, and the lime juice needs to be freshly squeezed for the best flavor. As you gather your ingredients, keep in mind that the quality of these items will reflect in the final dessert. Step-by-Step Preparation The journey to a perfect Key Lime Pie begins with the crust. Preheat your oven to 350F (180C) and combine graham cracker crumbs with melted butter until the mixture holds together. Press this mixture over the base and side of your pie dish, then bake for 10 minutes until it turns light golden. Allow it to cool before proceeding. For the filling, beat egg yolks until they are light and fluffy, which takes about 3 to 4 minutes. Gradually incorporate sweetened condensed milk, lime juice, and continue beating. Gently pour this filling into the cooled crust, using a spatula to even it out. Follow these steps meticulously, and you'll be rewarded with a Key Lime Pie that's both delicious and visually appealing. Cooking Time and Techniques Once your key lime pie filling is whisked to perfection, it's time to focus on the cooking process. Bake the pie for 22-23 minutes, or until the center feels set when lightly touched. The pie should have the consistency of a set custard and will jiggle slightly when shaken. It's crucial to avoid over-baking, as the residual heat will continue to cook the pie as it cools. Keep a close eye on your oven during the baking process. Here are some key points to remember: The crust should resemble wet sand for the perfect consistency. Vigorous whisking of the filling prevents lumps and ensures a creamy texture. Watch for over-browning to prevent a burnt crust. Chill the pie for at least an hour before serving to let it set. Following these techniques will ensure your key lime pie is a delightful balance of tangy and sweet, with a texture that's smooth and firm. Variations on the Classic Single Serve Key Lime Pie Ever fancied a quick, delicious dessert just for yourself? The Single Serve Key Lime Pie is the epitome of convenience and taste, providing a personal indulgence without the worry of leftovers. Imagine a buttery graham cracker crust filled with a smooth, creamy lime custard, striking the right balance between tart and sweet. For those who appreciate the details, here's a quick breakdown of what to expect: Prep: 10 minutes Cook: 30 minutes Cooling Time: 3 hours Total: 3 hours 40 minutes Servings: 1 serving Easy to prepare with a classic tart-sweet flavor and a hassle-free process, this single serve pie is a quick, delightful treat that's perfect for any day of the week. Key Lime Mini Pies Key Lime Mini Pies offer a delightful twist on the traditional dessert, perfect for parties or as a personal treat. Each bite-sized pie is a burst of tangy lime and sweet creaminess, encased in a buttery graham cracker crust. They are as charming to look at as they are delicious to eat. To create these miniature delights, start with the following ingredients: 1 & 1/2 cups graham cracker crumbs 4 ounces unsalted butter, melted 8 oz cream cheese, softened Fresh key lime juice and zest For those who love to share their culinary creations, these mini pies are a surefire hit. Their size makes them ideal for gatherings where guests can enjoy their own little piece of pie heaven without the commitment to a larger slice. Creative Twists: Lime Bars and More When it comes to reinventing the classic Key Lime Pie, enthusiasts have concocted a variety of delightful alternatives. Lime bars, with their tangy filling and crumbly crust, offer a handheld version of the beloved dessert. For those who enjoy a fusion of flavors, the Blueberry Lime Pound Cake marries the tartness of lime with the sweet, fruity notes of blueberries. Corn Lime Cookies introduce an unexpected twist, incorporating a savory element that complements the citrus zest. These creative adaptations showcase the endless possibilities for key lime to shine in various forms of confections. Serving and Presentation The Perfect Slice: Plating Tips Achieving the perfect slice of Key Lime Pie is both an art and a science. Presentation is key, as the vibrant green hue of the lime filling contrasts beautifully with the golden-brown crust. Here are a few tips to ensure your slices are as appealing as they are delicious: Crust Consistency: The foundation of any great pie slice is a well-made crust. Aim for a consistency that holds together well without being too hard. Mix the crumbs and butter until the mixture resembles wet sand. Chill Before Serving: A chilled pie not only tastes refreshing but also holds its shape better when sliced. Let the pie cool and set in the fridge for at least an hour before serving. Whisk it vigorously: To achieve a smooth, creamy filling without lumps, whisk the ingredients thoroughly before pouring into the crust. Watch the Oven: Keep a close eye on your pie as it bakes to prevent the edges from over-browning. Pairing with Beverages and Sides When it comes to enhancing the flavors of a Key Lime Pie, the choice of beverages and sides can make a significant difference. A crisp, slightly sweet white wine or a light, citrus-infused beer complements the tartness of the pie perfectly. For non-alcoholic options, consider a sparkling limeade or a mint-infused iced tea for a refreshing balance. Here are some recommended pairings: White Wine (Riesling, Moscato) Citrus Beer (Lime Lager, Lemon Ale) Non-Alcoholic (Sparkling Limeade, Mint Iced Tea) Fresh Fruit (Berry Medley, Sliced Mango) Creamy Options (Whipped Cream, Vanilla Ice Cream) Decorative Garnishes for a Stunning Display The final flourish of a Key Lime Pie is in its garnish, which not only adds to the visual appeal but can also enhance the overall flavor profile. Garnishing with lime zest offers a burst of citrus aroma and a contrasting color that makes your pie stand out. For a truly stunning display, consider the following tips: Whip cream with confectioners' sugar and vanilla extract until stiff peaks form. This creates a luxurious base for your garnishes. Pipe the whipped cream onto the pie in your preferred design, be it elegant swirls or delicate dollops. Adorn the whipped cream with lime slices, either halved or quartered, for a fresh, summery look. Sprinkle lime zest over the pie for that extra touch of flavor and a hint of color. Whether you're serving this classic dessert at a family gathering or a formal event, these garnishing techniques will ensure your Key Lime Pie is as delightful to look at as it is to eat. Dietary Adaptations of Key Lime Pie Gluten-Free and Vegan Options Adapting the classic Key Lime Pie to suit gluten-free and vegan diets has become increasingly popular. Finding the right substitutes for traditional ingredients is key to maintaining the pie's iconic taste and texture. For the crust, gluten-free graham crackers or a blend of almond flour and coconut oil can provide a delicious base without the gluten. For the filling, a combination of raw cashews, coconut milk, and coconut oil can emulate the creamy consistency typically achieved with eggs and condensed milk. The zest and juice of limes remain central to imparting that zesty flavor that is so characteristic of a Key Lime Pie. Below is a simple list of vegan substitutes that can be used in making a Key Lime Pie: Raw cashews Coconut milk (light or full-fat) Coconut oil Lime juice Lime zest These ingredients not only cater to dietary restrictions but also add a unique twist to the traditional pie, often resulting in a richer and more nuanced flavor profile. Healthy Ingredient Substitutions Creating a healthier version of the classic Key Lime Pie doesn't mean sacrificing flavor. Substituting certain ingredients can maintain the delicious taste while reducing calories and increasing nutritional value. For instance, swapping out traditional sweetened condensed milk for a low-fat or non-dairy alternative can make a significant difference. Consider using a natural sweetener like honey or agave in place of refined sugar. These not only add a unique flavor profile but also offer a more wholesome sweetness. Here's a simple guide to some common substitutions: Full-fat cream cheese -> Use low-fat or non-fat cream cheese Heavy cream -> Opt for light cream or coconut milk Refined sugar -> Try honey, agave, or stevia Remember, the goal is to find a balance that works for your dietary needs without compromising on the key lime pie's signature zest and creaminess. For those looking for a completely vegan option, the Minimalist Baker offers a Classic Vegan Key Lime Pie recipe that is undetectably vegan and can be made gluten-free. Maintaining Flavor While Cutting Calories Creating a lighter version of Key Lime Pie doesn't mean you have to sacrifice the vibrant, tangy flavor that makes this dessert a favorite. Substituting certain ingredients can reduce the calorie count while preserving the pie's signature taste. For instance, using a low-fat graham cracker crust and replacing some of the sweetened condensed milk with Greek yogurt maintains the creamy texture with fewer calories. Here's a quick guide to ingredient substitutions: Crust: Use low-fat graham crackers or almond flour for a healthier base. Filling: Opt for low-fat or fat-free sweetened condensed milk, and mix in Greek yogurt. Sweetener: Choose natural sweeteners like stevia or monk fruit extract. Remember, the key to a successful low-calorie Key Lime Pie is to experiment with these substitutions without compromising the pie's essential flavors. The zest and juice of key limes, or a suitable alternative like Nellie & Joe's Key Lime Juice, should remain the star of the show. The Cultural Journey of Key Lime Pie Origins and Evolution The history of Key Lime Pie is as rich and tangy as the dessert itself. Originating in the Florida Keys, the pie became a staple in the early 20th century. It's believed that the pie was first created by 'Aunt Sally', a cook for a millionaire named William Curry, who made use of the readily available local ingredients. The exact date of the pie's invention remains a mystery, but it was popularized in the 1930s. Key limes, once abundant in the Keys, are a crucial ingredient, giving the pie its distinctive flavor. The traditional recipe calls for a simple combination of key lime juice, egg yolks, and sweetened condensed milk. As the pie's fame grew, so did variations in recipes and serving styles, adapting to new tastes and dietary needs while maintaining its core identity. The Key Lime Pie has truly evolved, yet its essence remains unchanged, a testament to its timeless appeal. Key Lime Pie in Popular Culture The allure of Key Lime Pie extends beyond the kitchen and into the heart of popular culture. Key Lime Pie has been featured in various forms of media, from movies to books, symbolizing a slice of Americana. It's not just a dessert; it's a cultural icon that represents the laid-back, sunny vibes of the Florida Keys. In the realm of cinema, the dessert has made notable appearances. For instance, the title 'The Glass Key' might not directly reference the pie, but the film's success has parallels to the dessert's impact on the culinary world. Similarly, the pie's influence can be seen in the way it has inspired a variety of spin-off treats that have gained their own popularity. The following list showcases some of the ways Key Lime Pie has been reinterpreted in popular culture: Lime Bars Blueberry Lime Pound Cake Corn Lime Cookies Each variation maintains the core elements that make Key Lime Pie a beloved treat, while offering a unique twist that keeps it fresh and exciting. Personal Experiences and Reviews Key Lime Pie, with its tangy sweetness and creamy texture, has left a lasting impression on many dessert lovers. Personal anecdotes often reveal a deep affection for this classic treat, with memories tied to family gatherings and sunny afternoons. However, not all experiences are created equal. Some store-bought versions have been met with criticism for being overly sweet or lacking in authentic flavor. The following table summarizes customer feedback from a popular retail outlet: This feedback echoes the sentiment that the quality of a Key Lime Pie can vary greatly depending on where it's made and who's making it. The journey of finding the perfect slice is a personal one, with each individual's palate leading the way. Conclusion Throughout this article, we've explored the delightful world of Key Lime Pie, from its origins in the Florida Keys to the various ways it can be enjoyed today. Whether it's the classic easy Key Lime Pie, a single serve version for those craving a personal treat, or the adorable Key Lime Mini Pies, this dessert continues to be a refreshing and vibrant choice for any occasion. We've shared tips on achieving the perfect balance of tart and sweet, and how to make your pie even if you have dietary restrictions. Key Lime Pie is not just a dessert; it's a versatile creation that can be adapted to suit any taste or preference. So, the next time you're in the mood for something that's both simple to prepare and a pleasure to enjoy, remember the timeless and tangy Key Lime Pie. Frequently Asked Questions What makes Key Lime Pie different from regular lime pie? Key Lime Pie is made with key lime juice, which comes from key limes that are smaller, more aromatic, and tarter than regular limes. This gives the pie a unique flavor profile that's both tart and sweet. Can I use bottled key lime juice instead of fresh? Yes, you can use bottled key lime juice if fresh key limes are not available. Just make sure to look for a high-quality brand that uses pure key lime juice for the best flavor. What are some common variations of Key Lime Pie? Common variations include Single Serve Key Lime Pie, Key Lime Mini Pies, Lime Bars, and even desserts like Blueberry Lime Pound Cake and Corn Lime Cookies. How can I make a gluten-free Key Lime Pie? For a gluten-free Key Lime Pie, you can use a gluten-free graham cracker crust or make your own crust using gluten-free ingredients. Be sure to check all other ingredients to ensure they are gluten-free as well. What is the best way to serve Key Lime Pie? Key Lime Pie is best served chilled with a dollop of whipped cream on top. You can also add lime zest or thin lime slices as a garnish for extra flair. Can Key Lime Pie be made vegan? Yes, Key Lime Pie can be made vegan by using plant-based alternatives for the dairy ingredients and a vegan crust. Look for recipes specifically designed to be vegan for the best results.
- "Mastering the Art of Baking the Perfect Chiffon Cake: Tips and Tricks for Success"
Chiffon Cake is a delightful dessert that combines the richness of traditional cakes with a lighter, airier texture. Its unique preparation method and the variety of flavors and presentations make it a versatile treat for any occasion. This article will explore the intricacies of creating the perfect chiffon cake, from understanding its unique characteristics to mastering the baking process, and even exploring innovative recipes and presentation ideas from around the world. Key Takeaways Chiffon cake distinguishes itself with a bouncy texture achieved by not greasing the sides of the pan, allowing the mixture to cling and rise properly. Innovative flavors like Gula Melaka, Earl Grey Milk Tea, and savory variations show the adaptability of chiffon cakes to different taste preferences. Substituting ingredients like wheat flour and experimenting with essences can lead to endless delightful variations without compromising the cake's texture. The cake's versatility extends to decorations, with options ranging from simple icings to elaborate presentations for special occasions. Chiffon cakes enjoy global popularity, with cultural variations and fusion recipes highlighting the dessert's universal appeal. The Art of Chiffon Cake Defining the Chiffon Cake Chiffon cake is a delightful dessert that stands out due to its light and airy texture. This cake is a fusion of both butter and foam-type (sponge) cakes, which gives it a richness similar to the former and the fluffiness of the latter. The secret to its distinctive texture lies in the use of vegetable oil, which remains liquid at room temperature, ensuring the cake stays moist and tender. Typically, the cake is baked in a special tube pan that allows for even cooking and easy cooling when inverted. Here's a basic overview of the process: Preheat the oven and prepare the chiffon cake tin. Whisk egg yolks and sugar until creamy. Incorporate oil and other liquid ingredients. Fold in beaten egg whites to create the signature fluffiness. The result is a cake that is like a fluffy cloud of sweetness, with a hint of vanilla or other chosen flavors, creating a symphony of taste that is both subtle and satisfying. The Unique Texture of Chiffon Cakes The hallmark of a chiffon cake is its distinctive light and airy texture, which sets it apart from other types of cakes. Achieving this feathery softness requires a precise combination of ingredients and technique. The cake's structure is primarily built on whipped egg whites, also known as a meringue, which are gently folded into the batter to incorporate air and volume. Here are some key steps to ensure the perfect texture: Step 1: Use room temperature eggs to achieve the fullest volume when whipping the whites. Step 2: Add cream of tartar to stabilize the egg whites and maintain their structure during baking. Step 3: Gently fold the whipped egg whites into the batter to preserve the air bubbles. Step 4: Avoid greasing the sides of the pan, as the batter needs to cling to the sides to rise properly. Each of these steps contributes to the chiffon cake's signature texture, which can be described as a cloud-like softness that melts in your mouth. This texture is not only a delight to the palate but also a visual treat, often leaving a lasting impression on those who experience it. Variations and Flavors Chiffon cakes are beloved for their light and airy texture, but it's the vast array of flavors that truly makes them stand out. From classic vanilla to exotic fruit infusions, the possibilities are endless. A popular trend is incorporating local ingredients to create a cake that reflects regional tastes and traditions. Chocolate Chiffon Cake with Chocolate Mocha Glaze Chocolate Almond Chiffon Cake with Amaretto Cream Lemon Zest Chiffon Cake with Lemon Curd Filling Matcha Chiffon Cake with White Chocolate Ganache In addition to sweet variations, savory chiffon cakes are making a mark in the culinary world. Ingredients like cheese, herbs, and even smoked salmon are being used to transform the traditional dessert into a versatile dish suitable for any meal. Baking the Perfect Chiffon Cake Essential Ingredients and Substitutions The foundation of a chiffon cake lies in its distinctive blend of ingredients that contribute to its light and airy texture. At its core, a chiffon cake requires vegetable oil, eggs, sugar, flour, and leavening agents. The high ratio of eggs and oil is crucial, as it imparts the cake's signature moistness and delicate crumb. While the classic recipe calls for these staples, substitutions can be made to accommodate dietary preferences or to add a twist to the traditional flavor. For instance, coconut milk can be used in place of water or dairy milk to infuse a subtle tropical essence into the cake. Similarly, self-raising flour can be a convenient alternative to all-purpose flour combined with a separate leavening agent. Here's a quick reference for common substitutions: Vegetable oil: Canola or sunflower oil Eggs: A combination of egg whites and yolks, or egg substitutes for dietary restrictions Sugar: Granulated white sugar, or caster sugar for a finer texture Flour: All-purpose flour with baking powder, or self-raising flour Leavening agents: Baking powder or cream of tartar when using plain flour Step-by-Step Baking Process Achieving the perfect chiffon cake is an art that requires precision and care. Begin by preheating your oven to the temperature specified in your recipe, which is often around 190C for a standard chiffon cake. It's crucial to line and grease only the base of your cake tin, leaving the sides ungreased to allow the cake to rise properly. Once your oven is ready, start with the eggs. Beat them vigorously for about 10 minutes, then gradually add sugar and continue beating until the mixture is pale and thick. This process is essential for incorporating air, which contributes to the cake's signature lightness. Next, sift together your dry ingredients, including flours, baking soda, and cream of tartar, multiple times to ensure a fine, lump-free consistency. Gently fold these into the egg and sugar mixture with a metal spoon or spatula, taking care not to deflate the batter. Pour the batter into the prepared tin and place it in the upper half of the oven. Bake for the time indicated, usually 15-20 minutes, and remember to turn the sponge a quarter turn every five minutes to promote even baking. The cake is done when it springs back upon a gentle touch. Once cooled, you can proceed to fill and ice the cake as desired, transforming it into a delightful treat that's as pleasing to the eye as it is to the palate. Troubleshooting Common Issues Baking a chiffon cake can sometimes be as delicate as the cake's texture itself. Common issues such as the cake collapsing or not rising properly can often be traced back to simple mistakes in the process. For instance, if the sides of your cake are sinking inward, it could be a sign of imbalance in the liquid, grease, or moisture content of your batter. Ensure that your cake batter has the correct amount of ingredients. Check that the oven temperature is accurate and consistent. Avoid opening the oven door frequently during baking. By following these tips and keeping a keen eye on the subtleties of the recipe and baking process, you can overcome these common issues and achieve a light and airy chiffon cake. Innovative Chiffon Cake Recipes Gula Melaka Chiffon Cake The Gula Melaka Chiffon Cake is a delightful twist on the classic chiffon, incorporating the rich flavors of palm sugar. This Southeast Asian specialty infuses the airy cake with a caramel-like sweetness that is both distinct and comforting. To achieve the perfect balance of flavor and fluffiness, follow these steps: Preheat your oven and prepare the chiffon cake tin as per the usual method, ensuring not to grease the sides. Whisk together the egg yolks and sugar until creamy, then blend in the oil and coconut milk. Gently fold in the flour and leavening agents, being careful not to deflate the mixture. Finally, stir in the melted Gula Melaka, ensuring it is well incorporated into the batter. Nutritionally, this cake offers a unique profile due to the Gula Melaka. Here's a simplified breakdown per serving: Remember, while the chiffon cake is known for its softness and airiness, the Gula Melaka version brings a depth of flavor that makes it a standout dessert. Earl Grey Milk Tea Chiffon Cake The Earl Grey Milk Tea Chiffon Cake is a delightful twist on the classic chiffon, infusing the subtle fragrance of Earl Grey tea into every bite. This cake is a favorite for those who appreciate the blend of tea and sweetness in their desserts. To achieve the perfect flavor, the process begins with infusing the Earl Grey tea into the milk, which is then used to flavor the cake batter. The key to its light and airy texture is in the technique of whipping the egg whites. As suggested by Freddy's Harajuku, it's crucial to whip the egg whites with the Earl Grey sugar to stiff peaks before combining with the other wet ingredients. For a successful bake, follow these steps: Infuse the Earl Grey tea into the milk. Whip the egg whites with the Earl Grey sugar to stiff peaks. In a separate bowl, whisk the egg yolks with canola oil and the infused tea. Sift the dry ingredients into the wet mixture and fold gently. Remember, the key is to not overmix the batter to preserve the chiffon's signature fluffiness. Savory Chiffon Cake Creations Moving beyond the sweet classics, savory chiffon cakes offer a delightful twist on traditional flavors. These creations are perfect for those who prefer a less sugary treat or want to incorporate chiffon cakes into their meal as a unique side dish or appetizer. One innovative example is the Sweet and Savory Salted Egg Chiffon Cake, which combines the rich taste of salted egg yolks with the airy texture of chiffon. Another crowd-pleaser is the Soft Fluffy Bak Kwa Chiffon Cake, where the smoky flavor of grilled pork jerky is baked into the cake, providing a surprising burst of flavor with every bite. For those interested in exploring these savory delights, here's a simple list to get started: Sweet and Savory Salted Egg Chiffon Cake Soft Fluffy Bak Kwa Chiffon Cake Cotton Soft Pumpkin Walnut Chiffon Cake Soft and Fluffy Tofu Chiffon Cake Each recipe offers a unique combination of flavors that are sure to intrigue and satisfy. Decorating and Presenting Chiffon Cakes Icing and Toppings The final flourish of icing and toppings can transform a simple chiffon cake into an exquisite dessert. Choosing the right combination is crucial to complement the cake's delicate texture without overwhelming it. For instance, a light vanilla buttercream can add a subtle richness, while a tangy lemon curd butter creme can introduce a refreshing contrast. When it comes to toppings, the options are endless. A hazelnut sponge pairs beautifully with a variety of garnishes such as chocolate dipped walnuts or chocolate flowers. For a more decadent touch, consider a Browned Buttercream Frosting to make your cake even more indulgent. Here's a quick guide to some popular icing and topping combinations: Light hazelnut sponge: Hazelnut buttercream, chocolate garnishes Lemon biscuit sponge: Lemon curd butter creme, marzipan covering Summer citrus cake: Creme fraiche frosting, fresh citrus segments Creative Presentation Ideas When it comes to chiffon cakes, presentation is just as important as taste. A well-presented chiffon cake can be the centerpiece of any gathering, turning a simple dessert into an unforgettable experience. Here are a few ideas to elevate your chiffon cake presentation: Use a cake stand with a contrasting color to make your chiffon cake pop. Garnish with edible flowers or fruit slices for a natural and elegant touch. Experiment with different piping techniques to add texture and sophistication. Dust with powdered sugar or cocoa powder for a simple yet stunning finish. For those special occasions, consider theming your cake to match. Whether it's a birthday, anniversary, or seasonal event, a chiffon cake can be customized to suit any theme. Use color-coordinated icing, sprinkles, or themed toppers to tie everything together. With these creative ideas, your chiffon cake won't just be delicious—it'll be a true work of art. Chiffon Cakes for Special Occasions Chiffon cakes are not only a delight for everyday dessert but also a versatile choice for special occasions. Their airy texture and delicate flavors make them an elegant centerpiece for any celebration. Whether it's a birthday, wedding, or holiday gathering, a chiffon cake can be customized to suit the theme and taste preferences of the event. For those looking to create a chiffon cake for a special occasion, here are some popular flavor combinations and their typical uses: Lychee Rose Chiffon Cake: Ideal for weddings and anniversaries, symbolizing love and romance. Green Tea Red Bean Chiffon Cake: A hit for cultural celebrations or as a sophisticated option for tea parties. Lemon Chiffon Cake: Perfect for summer gatherings or citrus-themed events. Chocolate Marble Chiffon Cake: A classic choice for birthday parties and casual get-togethers. Remember, the key to a successful chiffon cake for special occasions is in the details. From the choice of ingredients to the final touches of decoration, every element should come together harmoniously to create a dessert that's as impressive to look at as it is to eat. Chiffon Cake Around the World Cultural Variations of Chiffon Cake Chiffon cake, a delightful confection known for its airy texture, has been adapted by cultures around the world to include local flavors and ingredients. The versatility of chiffon cake makes it a canvas for culinary creativity, allowing bakers to infuse it with tastes that resonate with their cultural heritage. In Japan, the chiffon cake takes a delicate turn with flavors like green tea and sweet red bean. Southeast Asia offers the rich Gula Melaka and pandan variations, adding a tropical twist to the classic cake. Latin American influences can be seen in chiffon cakes that incorporate cornmeal, reminiscent of the arepa. Each region's unique take on this dessert showcases the global love for chiffon cake, from the citrus-infused versions found in the Mediterranean to the spice-laden gingerbread chiffon cakes enjoyed during festive seasons in the West. Fusion Chiffon Cake Recipes Fusion Chiffon Cake Recipes blend traditional chiffon cake techniques with innovative flavors from around the globe. The result is a delightful array of cakes that cater to diverse palates and dietary needs. For instance, the Gluten-Free Pandan Chiffon Cake marries the lightness of chiffon with the aromatic pandan flavor and the richness of coconut milk. Here are some popular fusion creations: Green Tea Red Bean Chiffon Cake Soft Fluffy Oreo Chiffon Cake Banana Chocolate Marble Chiffon Cake Cotton Soft Pumpkin Walnut Chiffon Cake Whether you're looking to incorporate local flavors or cater to specific dietary restrictions, fusion chiffon cakes offer a canvas for creativity. With options like the Soft and Fluffy Gluten-Free Pandan Chiffon Cake, there's a recipe for every taste. Chiffon Cake in Modern Baking In the realm of modern baking, chiffon cake continues to shine as a versatile dessert that can be adapted to a myriad of contemporary flavors and dietary requirements. The evolution of chiffon cake recipes has been remarkable, with bakers around the world infusing traditional recipes with innovative twists. A notable trend is the rise of Asian-inspired chiffon cakes, such as Matcha Chiffon Cake with Black Sesame Cream, which has gained popularity for its delicate balance of flavors. Here's a quick glance at some of the exciting variations: Matcha Chiffon Cake with Black Sesame Cream Soft Fluffy Mango Chiffon Cake Green Tea Red Bean Chiffon Cake Oreo Chiffon Cake Pandan Kaya Hokkaido Chiffon Cupcakes These creations not only cater to a broad range of palates but also reflect the cultural diversity that chiffon cake has embraced in its global journey. Conclusion Chiffon cakes, with their airy texture and diverse flavor profiles, offer a delightful experience for both novice and seasoned bakers. From the traditional Gula Melaka to the innovative Oreo and Tofu varieties, there's a chiffon cake to satisfy every palate. The versatility of the chiffon cake is evident in its ability to incorporate flavors from around the world, making it a true celebration of culinary creativity. Whether you're enjoying a slice of the zesty Orange Pillow Loaf or savoring the exotic Lychee Rose, chiffon cakes promise a light and fluffy indulgence. As we've explored various recipes and techniques, it's clear that the perfect chiffon cake is within reach for anyone willing to follow the steps and experiment with flavors. So preheat your oven, choose your favorite variation, and get ready to delight in the soft, spongy perfection of a well-made chiffon cake. Frequently Asked Questions What makes a chiffon cake different from other cakes? Chiffon cakes are known for their light, fluffy texture, which is achieved by using oil instead of butter and by folding whipped egg whites into the batter. This creates an airy structure that is distinct from the denser textures of other cakes. Can I substitute ingredients when making a chiffon cake? Yes, certain ingredients can be substituted in a chiffon cake recipe. For example, wheat flour can replace the standard flour, and you can experiment with different essences or add-ins like chocolate chips or nuts to create various flavors. How do I prevent my chiffon cake from deflating? To prevent deflation, avoid greasing the sides of the cake tin, as the batter needs to cling to the sides to rise properly. Also, fold the egg whites gently into the batter to maintain their structure and do not open the oven door frequently while baking. What are some popular variations of chiffon cake? Popular variations include Gula Melaka, Earl Grey Milk Tea, Oreo, Mango, Lemon, and Green Tea Red Bean chiffon cakes. These flavors incorporate unique ingredients and essences to give each cake a distinctive taste. Can chiffon cakes be decorated and used for special occasions? Absolutely! Chiffon cakes can be beautifully decorated with icing, toppings, and creative presentation ideas, making them suitable for special occasions like birthdays, weddings, and anniversaries. Are there any savory chiffon cake recipes? Yes, chiffon cakes can be made in savory versions. Ingredients like cheese, herbs, and even salted egg can be incorporated into the batter to create a delightful savory chiffon cake that's perfect as a unique appetizer or snack.
- "Creating the Perfect Lamington: Tips and Tricks for the Ultimate Australian Treat"
Lamingtons are an iconic Australian dessert that have become a symbol of the nation's baking tradition. These delightful squares of sponge cake, dipped in chocolate and rolled in coconut, have a rich history and have made their mark not only in Australia but around the world. From their debated origins to their role in public events and fundraisers, and from traditional recipes to modern nutritional adaptations, lamingtons are a sweet treat that has stood the test of time. This article delves into the journey of lamingtons, celebrating their cultural significance and the various ways they continue to be enjoyed today. Key Takeaways Lamingtons were named after Lord Lamington, Governor of Queensland, and have become a cherished Australian dessert. The treat gained widespread popularity in the 1950s, featuring in fundraising events and becoming a staple at public gatherings. Traditional lamingtons consist of sponge cake coated with chocolate and coconut, with many variations and twists now available. Nutritional adaptations of lamingtons, such as high-protein and low-sugar versions, cater to health-conscious consumers. Lamingtons have crossed borders, leading to international celebrations and setting world records, showcasing their global appeal. The Origin and History of Lamingtons The Naming of the Lamington The Lamington is a quintessential Australian dessert, but its name carries a history as rich as the cake itself. The title 'Lamington' is widely attributed to Lord Lamington, who served as the Governor of Queensland from 1896 to 1901. This connection is supported by various sources, including the Oxford English Dictionary, which links the cake's name to Lord Lamington. While some myths suggest the cake was named after Lady Lamington, the governor's wife, the evidence leans heavily towards Lord Lamington as the namesake. The cake's enduring name is a testament to its longstanding presence in Australian culture. The Rise to Popularity in the 1950s The 1950s marked a significant era for the humble lamington, transforming it from a simple homemade treat to a national icon. The Australian Women's Weekly, a widely circulated magazine, played a pivotal role in this transformation by publishing a detailed lamington recipe. This inclusion not only introduced the dessert to a broader audience but also coincided with a societal shift where women were increasingly joining the workforce. As a result, the need for more explicit cooking instructions became apparent, and the lamington recipe catered to this new demographic. The cake's simplicity and ease of preparation made it an ideal choice for various public events. Lamingtons began to feature prominently at fundraising drives, and community gatherings, becoming a staple at Girl Guide and Boy Scout events, and even election day functions. The rise of the lamington during this period can be attributed to several factors, which are outlined below: Publication of the recipe in a major magazine Societal changes leading to more detailed recipes The cake's suitability for large-scale public events Its association with community and charity Myths and Legends Surrounding Its Creation The origins of the lamington are shrouded in mystery and folklore, with numerous tales spinning around its creation. One of the most enduring myths is that the lamington was a serendipitous mistake, a happy accident that occurred when a sponge cake was dropped into chocolate and coconut. This narrative, while charming, lacks historical evidence but continues to be a favorite among lamington enthusiasts. Another popular legend suggests that the dessert was named after Lord Lamington, a former Governor of Queensland, or his wife, Lady Lamington. However, the true connection between the noble title and the humble cake remains speculative at best. The stories vary widely, with some claiming the cake was invented by the couple's chef as a way to use up leftover sponge cake, while others believe it was designed to impress guests. Despite the lack of concrete evidence, these myths and legends have become an integral part of the lamington's identity, weaving a narrative tapestry as intriguing as the dessert is delicious. Whether fact or fiction, they contribute to the cultural significance of the lamington in Australia and beyond. Lamingtons in Australian Culture A Staple at Public Events and Fundraisers Lamingtons have become an indispensable treat at various public events and fundraisers across Australia. Their ease of preparation and delightful taste have made them a favorite for event organizers and attendees alike. School fairs often feature lamington drives, where boxes of these sponge cakes are sold to support school activities. Community groups embrace lamington sales to fund local projects or charity efforts. Corporate events frequently include a spread of these iconic sweets, adding a touch of Australian tradition to the gathering. The popularity of lamingtons at these functions is a reflection of their status as a cultural icon, one that resonates with the Australian ethos of mateship and community. Symbol of Australian Baking Tradition Lamingtons have become an emblematic symbol of Australian baking tradition, often representing the country's culinary heritage at various events and gatherings. Their consistent presence in Australian society underscores their status as a cultural icon. Lamingtons are a staple at national celebrations and local community events. They are frequently compared to other Australian desserts, such as Pavlova, but maintain a unique place in the nation's heart. The simplicity of the recipe and the joy it brings to various occasions make it a beloved treat across generations. The popularity of lamingtons has not waned over the years, and they continue to be a favorite at bakeries and cafes. Their role in fundraising events, such as school and church fetes, further cements their significance in Australian culture. Lamingtons vs. Other Australian Desserts While Lamingtons are Australia's favorite dessert, they stand in a sweet rivalry with other iconic Australian treats. Unlike the Pavlova, which is a meringue-based dessert with a crisp crust and soft, light inside, often topped with fruit and whipped cream, Lamingtons offer a different texture and flavor profile. They are a small cake, traditionally cloaked with chocolate and then a dusting of desiccated coconut, making them not only delicious but also portable and less prone to melting, thanks to the protective layer of coconut. In comparison to other desserts, Lamingtons have a unique place in Australian culture. They are not only a staple at public events and fundraisers but have also been a part of Australian baking tradition for decades. Their popularity soared in the 1950s and they continue to be a beloved treat at various gatherings, from school fetes to election days. Here's a look at how Lamingtons stack up against some other Australian desserts: Pavlova: A meringue-based dessert, often served with fruit and cream. Anzac Biscuits: A sweet biscuit made using rolled oats, flour, sugar, butter (or margarine), golden syrup, baking soda, boiling water, and (optionally) desiccated coconut. Vanilla Slice: A pastry consisting of several layers of puff pastry, with thick custard or cream filling, often topped with icing sugar. Meat Pie: Although not a sweet dessert, the meat pie is an iconic Australian dish, often enjoyed as a savory snack or meal. The Making of a Lamington Traditional Ingredients and Preparation The classic Australian Lamington is a testament to the beauty of simplicity in baking. A fluffy sponge cake forms the foundation, which is then immersed in a velvety chocolate icing and finally adorned with a generous coating of desiccated coconut. The process, while straightforward, requires a delicate touch and precise timing to ensure the perfect texture and flavor balance. The traditional recipe calls for a combination of staple ingredients found in any baker's pantry. Here's a typical list of what you might need: Eggs Caster sugar Butter Vanilla extract Flour (plain, self-raising, and sometimes cornflour) Milk or fresh orange juice Cocoa powder Icing sugar Desiccated coconut Each ingredient plays a pivotal role in creating the lamington's distinctive taste and texture. The eggs provide leavening, the sugar sweetens, the butter adds richness, and the vanilla offers a hint of aromatic flavor. The flours ensure a light, airy sponge, while the cocoa powder and icing sugar combine to make the indulgent chocolate icing. The desiccated coconut not only adds texture but also a subtle tropical flavor that complements the chocolate perfectly. While the recipe may seem simple, the execution is an art form. Achieving the right consistency for the icing and the sponge cake requires patience and practice. The sponge must be airy yet firm enough to withstand dipping, and the icing must be smooth and of the right thickness to coat without making the cake soggy. Variations and Modern Twists The classic Lamington has been a canvas for creativity, leading to a myriad of variations that cater to different tastes and dietary requirements. Homemade Vegan Lamingtons have emerged as a popular alternative, maintaining the essence of the traditional treat while substituting animal products with plant-based ingredients. A soft vanilla sponge replaces the standard cake, with a jam filling adding a layer of sweetness before being coated in dark chocolate and shredded coconut. In the spirit of innovation, some bakers have infused their Lamingtons with unique flavors, such as orange or coffee, adding a modern twist to the iconic dessert. For instance, Colin's Orange Cream Lamingtons introduce a boozy citrus note, elevating the classic profile with a zesty punch. Traditional Lamington Vegan Lamington with jam filling Orange Cream Lamington with a hint of brandy The versatility of the Lamington is a testament to its enduring appeal. As culinary techniques evolve and new ingredients become available, the potential for reinvention is limitless. From the addition of fruit purees to the incorporation of alternative flours, the Lamington continues to adapt, ensuring its place in the hearts of dessert lovers everywhere. The Art of Coating with Chocolate and Coconut The final step in creating a lamington is both an art and a technique: coating the sponge cake with chocolate icing and then rolling it in desiccated coconut. This process not only gives the lamington its signature look but also its delightful texture contrast. To achieve the perfect coating, the chocolate icing must be smooth and runny. A common method involves melting butter with boiling water, then mixing it into a cocoa mixture to form the icing. Once the icing is ready, the cake is dipped using two forks, ensuring an even layer of chocolate covers the cake. The coconut tray awaits as the next destination for the chocolate-coated cake. A gentle roll in the coconut ensures an even layer of this second key ingredient. The lamington is then placed on a wire rack to set, completing the transformation from plain sponge to a classic Australian treat. Nutritional Adaptations of the Classic Lamington High-Protein, Low-Sugar Variants In response to the health-conscious consumer, high-protein, low-sugar lamingtons have emerged as a popular alternative to the traditional recipe. These variants cater to fitness enthusiasts and those monitoring their sugar intake, without compromising on the indulgent nature of the dessert. The key to these healthier lamingtons lies in the substitution of ingredients. Refined sugars are replaced with natural sweeteners, and protein-rich components like whey isolate are incorporated into the mix. Here's a snapshot of the nutritional shift: This innovative approach to baking allows for a guilt-free experience, aligning with modern dietary preferences. As the trend continues to grow, we can expect to see even more creative adaptations in the realm of lamingtons. Incorporating Healthier Ingredients In the quest for healthier Lamingtons, bakers are turning to alternative ingredients that maintain the cake's beloved taste while providing better nutritional value. Replacing traditional flour with coconut flour or almond meal can significantly reduce the carbohydrate content and add a boost of fiber and protein. Similarly, using natural sweeteners like honey instead of refined sugar offers a more wholesome sweetness. To illustrate the shift towards healthier ingredients, consider the following adaptations from popular recipes: Organic butter or coconut oil instead of margarine Vanilla bean paste for a more natural vanilla flavor Raw organic honey as a natural sweetener Almond meal to add a nutty flavor and extra nutrients Maintaining Taste While Improving Nutritional Profile In the quest to make lamingtons healthier without compromising on their iconic taste, innovative substitutions have become key. For instance, replacing traditional sugar with natural sweeteners like stevia can significantly reduce the calorie count while maintaining sweetness. To further enhance the nutritional value, bakers are incorporating protein-rich ingredients. Whey protein isolate, known for its high protein content and low lactose levels, is a popular choice. It can be seamlessly integrated into the lamington sponge, boosting protein levels without altering the classic texture. Here's a comparison of traditional and adapted lamington recipes based on their nutritional content: While these changes are subtle, they make a significant difference in the overall health profile of the dessert. The challenge lies in balancing these healthier choices with the taste and texture that lamington lovers expect. Lamingtons Around the World Adoption and Adaptation Beyond Australia The humble lamington has transcended its Australian roots, becoming a beloved treat in various parts of the world. Its adaptability has allowed it to blend into different cultures, with each adding their unique twist to the classic recipe. In New Zealand, lamingtons are often filled with jam and cream, a nod to the country's British-influenced culinary traditions. Across the Pacific, Hawaiian versions incorporate tropical flavors like pineapple and coconut, further enhancing the cake's sweetness. European adaptations have seen lamingtons served alongside local pastries, sometimes using alternative coatings such as almond flakes or chocolate sprinkles. While the original recipe remains a staple, these global variations have enriched the lamington's legacy, ensuring its continued popularity and relevance in the ever-evolving world of desserts. International Lamington Day Celebrations Celebrations of the humble lamington have transcended Australian borders, with various countries adopting their own versions of this iconic dessert. World Lamington Day on October 31 is a testament to its global appeal, uniting lamington lovers in a sweet celebration of its cultural significance. This day is marked by events ranging from baking competitions to charity bake sales, each showcasing the versatility and enduring popularity of the lamington. In addition to the international festivities, Australians hold their own National Lamington Day on July 21, further cementing the cake's status in the national consciousness. The day is an opportunity for communities to come together, often involving activities that highlight the lamington's role in Australian heritage. World Records and Notable Lamington Events Lamingtons have not only become a beloved treat within Australia but have also made their mark on the global stage. World records and notable events have showcased the lamington's appeal and versatility. For instance, a significant moment in lamington history occurred in 1993 when bakers at the Sydney Opera House attempted to create the world's largest lamington, a feat that highlighted the cake's cultural significance. While the lamington may not have a designated day on the official list of food days by country, its impact is nonetheless celebrated informally by enthusiasts around the world. The spirit of competition and camaraderie that surrounds these events speaks to the lamington's enduring popularity. Conclusion Lamingtons are not just a treat; they are a cultural icon embedded in Australia's culinary history. From their practicality in transport to their presence at community events and their debated origins, these chocolate-and-coconut-covered sponge cakes have become a symbol of Australian ingenuity and tradition. Whether enjoyed in their classic form or reinvented with a health-conscious twist, lamingtons continue to be a beloved dessert that transcends generations. As we've explored their journey from potential accidental invention to a staple at local fetes and beyond, it's clear that the humble lamington holds a special place in the heart of Australians, representing both nostalgia and the simple joy of a sweet indulgence. Frequently Asked Questions What is a lamington? A lamington is a square piece of sponge cake that is dipped in liquid chocolate and covered with small pieces of coconut, originating from Australia. Who was Lord Lamington? Lord Lamington was the Governor of Queensland, Australia, from 1895 to 1901, and it is believed that lamington cakes were named after him. How did lamingtons gain popularity in the 1950s? Lamingtons became widely popular in the 1950s when the Australian Women's Weekly published a recipe for them, and they started to be featured at various fundraising events and public occasions. Are there any myths about the creation of lamingtons? Yes, one myth suggests that lamingtons were created by early settlers who wanted to improve the taste of stale cake, but this has been debunked by historical research. Can lamingtons be made with healthier ingredients? Yes, there are variations of lamingtons that include high-protein and low-sugar ingredients, offering a healthier alternative to the classic recipe. What are the key steps in making a traditional lamington? The key steps include trimming and slicing sponge cake, spreading filling such as jam, coating the cake with chocolate icing, and finally rolling it in shredded coconut before the icing sets.
- "Unveiling the History and Tradition of King Cake: From Roots to Mardi Gras"
The King Cake is a vibrant and delicious tradition that plays an integral role in Mardi Gras celebrations. This article delves into the rich history and cultural significance of King Cake, offers practical advice on preparing and decorating your own cake, explores the different varieties available, and provides nutritional information. We also look at customer reviews to understand the impact of this beloved treat on those who enjoy it. Key Takeaways King Cake is a staple of Mardi Gras festivities with historical origins that date back centuries, blending cultural significance with festive fun. Pre-baked King Cake kits include a naked king cake, icing, colored sugar, and a golden baby, allowing for personal decoration and serving over 16 people. Varieties of King Cake range from Traditional Cinnamon to Cream Cheese Filled, with unique flavors catering to diverse palates. Nutritional information is available for those conscious of dietary intake, with a standard serving containing about 240 calories. Customer reviews highlight satisfaction with the taste and quality of the King Cake, though some suggest an increase in frosting would be beneficial. The King Cake Tradition Historical Origins The King Cake is a vibrant part of Mardi Gras celebrations, with its roots deeply embedded in European history. The tradition of the King Cake is intertwined with the festivities of Epiphany, marking the end of Christmas and the beginning of the Mardi Gras season. Originating in Old World France and Spain, the cake became a symbol of the holiday, often enjoyed during the Middle Ages. The cake's journey across the Atlantic brought a new cultural dimension to the Gulf Coast of the United States, particularly in New Orleans. Here, the King Cake evolved, incorporating local flavors and customs, becoming a staple of the Mardi Gras celebration. Each cake is typically adorned with a small trinket, such as a plastic baby, which represents luck and prosperity for the person who finds it in their slice. Cultural Significance The King Cake is more than just a festive dessert; it's a vibrant emblem of Mardi Gras celebrations. The colors of the cake hold deep symbolic meanings: gold represents power, green is associated with faith, and purple illustrates justice. These colors are not only visually striking but also convey the values that are central to the festival. Traditionally, the King Cake is baked without a center, resembling a Bundt cake. This unique shape is said to symbolize the unity of faiths. Each cake contains a small trinket, often a plastic baby, which represents luck and prosperity to whoever finds it in their slice. The finder is also tasked with hosting the next King Cake party, ensuring the continuation of community and festivity. Modern Celebrations The tradition of the King Cake has evolved significantly from its historical roots, becoming a staple of Mardi Gras festivities, especially in New Orleans. The cake, often adorned with the traditional colors of purple, green, and gold, symbolizes the joy and exuberance of the carnival season. Inside, a small figurine, commonly referred to as the 'baby,' is hidden, and the person who finds it is said to be blessed with good luck and is tasked with hosting the next celebration. Modern celebrations of the King Cake include a variety of events and practices that bring communities together. From office parties to school events, the cake is a centerpiece that sparks joy and camaraderie. Here's a quick look at how the King Cake is integrated into contemporary festivities: Office Celebrations: Colleagues share the cake, eagerly anticipating who will find the 'baby.' School Functions: Students learn about the cultural significance while enjoying a slice. Community Events: Local bakeries and organizations host King Cake-themed events. Private Parties: Friends and families gather to continue the tradition in their own unique way. Preparing Your King Cake What's Included in Your Kit Each King Cake kit is designed to provide you with everything needed to create your own festive masterpiece at home. Included in your kit is one pre-baked, 'naked' king cake, ready for you to bring to life with your personal touch. To complement the cake, you'll find: 1 packet of icing 3 packets of colored sugar (traditional Mardi Gras colors) 1 golden baby figurine The kit is crafted to feed over 16 people, making it perfect for parties and family gatherings. Rest assured, the quality and safety of your culinary experience are paramount. As such, the kit is non-returnable due to food safety reasons. With the Mam Papaul's brand, you can trust that you're receiving a product steeped in tradition and ready for celebration. Icing and Decorating Tips Once your King Cake is baked and cooled, it's time to bring it to life with vibrant icing and festive decorations. Start by spreading an even layer of cream cheese frosting on the top of your cake. If you're using a round piping tip, it can help achieve a consistent thickness across the cake. For a touch of sweetness and texture, drizzle fully cooled caramel sauce before adding another layer of cake. Continue stacking your cake rounds, spreading frosting and caramel between each layer. Once you reach the final layer, apply a thin coat of frosting around the entire cake. This 'crumb coat' will secure any loose crumbs and provide a smooth base for additional frosting. You can choose to keep this minimalist look or add another layer of frosting for a more indulgent finish. Finally, decorate with colorful sprinkles, and if you're feeling extra festive, top with gingerbread cookies or a drizzle of caramel sauce. Serving and Storage Recommendations Once you've delighted in the sweet, festive flavors of your King Cake, proper storage is key to maintaining its freshness. Store king cake at room temperature in an airtight container or wrapped tightly in plastic wrap to prevent it from drying out. For those who have leftovers or prefer to savor their cake over time, the King Cake can be stored in the freezer. Wrap the cake well in plastic wrap, place it in an air-tight Ziploc bag, and it can be frozen and refrozen for up to six months without losing its charm. For optimal longevity, follow these simple steps: Remove cake from packaging and place in freezer immediately upon arrival. To serve, unwrap the cake while still frozen to maintain the delicate icing. After serving, wrap any remaining cake in plastic wrap and return it to an air-tight container or freezer bag. Enjoy your King Cake within six months for the best quality, though it's often enjoyed much sooner! Varieties of King Cake Traditional Cinnamon The Traditional Cinnamon King Cake is a timeless classic that remains a favorite among purists. Its warm, spicy aroma and sweet taste evoke a sense of nostalgia and comfort. This variety is often praised for its simplicity, allowing the cinnamon's natural flavor to shine through. Wintery spices: Cinnamon is the star, but it's often accompanied by ginger, cloves, allspice, nutmeg, and a hint of salt. Moist and flavorful: The cake's texture is crucial; it should be tender enough to melt in your mouth. Balanced sweetness: While the cake is sweet, it's important for the cinnamon's spice to be prominent, creating a harmonious blend of flavors. When considering a Traditional Cinnamon King Cake, it's essential to choose one that uses quality ingredients and a tried-and-true recipe. La Boulangerie and Cochon are notable for offering a variety of traditional and creative king cakes, including the beloved cinnamon variety. Cream Cheese Filled Delights The indulgence of cream cheese filling in a King Cake transforms the traditional treat into a decadent dessert. Cream cheese filled King Cakes are a sumptuous twist on the classic, combining the rich, velvety texture of cream cheese with the sweet, doughy cake. As noted in 'King Cake for Mardi Gras - Sense & Edibility', these cakes often feature a delightful blend of cinnamon sugar and cream cheese, creating a balance of flavors that is both comforting and luxurious. For those looking to recreate this delight at home, here's a basic recipe for cream cheese frosting: 1/2 cup unsalted butter, softened 8 oz plain cream cheese, softened 3 1/2 cups powdered sugar 1/2 tsp vanilla extract A pinch of salt This frosting can be spread over the cooled cake or piped into intricate designs for a more festive look. When purchasing a pre-baked King Cake, such as Cartozzo's King Cake - Strawberry Cream Cheese, expect to pay around $64.99 for the convenience and quality of a professionally prepared dessert. Exploring Unique Flavors The quest for unique flavors in King Cake has led to an explosion of creativity in bakeries across the globe. Innovative combinations and exotic ingredients have transformed the traditional King Cake into a canvas for culinary artistry. From the incorporation of international spices to the infusion of unexpected confections, the possibilities are endless. Here's a glimpse at some of the unique flavors that have emerged: Fazer Marianne (Peppermint crunch) Fazer Salmiakki (Salty licorice) Fazer Fazermint (Chocolate mint) Fazer Pure Dark (Rich dark chocolate) Fazer Tutti Frutti (Fruit flavored) These flavors represent just a fraction of the innovative options available. As the tradition of King Cake evolves, so does the spectrum of flavors, offering a delightful surprise with each new creation. Nutritional Information Caloric Content Understanding the caloric content of King Cake is crucial for those monitoring their dietary intake. The number of calories in a slice of King Cake can vary depending on the size and ingredients. On average, a slice of King Cake can contain around 300-500 calories, making it a treat to enjoy in moderation. Here's a quick breakdown of the nutritional content per serving for a typical King Cake: *The % Daily Value (DV) tells you how much a nutrient in a serving of food contributes to a daily diet. Allergen Information When indulging in the sweet delight of a King Cake, it's crucial to be aware of potential allergens that could affect sensitive individuals. The cake contains common allergens such as milk, eggs, soy, and wheat. Additionally, it's important to note that the cake is produced in a facility that also processes tree nuts and peanuts, posing a risk of cross-contamination. For those with concerns about non-edible items, be aware that the traditional plastic baby figurine is included inside the box. While this trinket is a key part of the King Cake tradition, it is not meant for consumption and should be handled with care to avoid any choking hazards. Below is a summary of the allergen information for quick reference: Contains: milk, eggs, soy, wheat Made in a facility processing: tree nuts, peanuts Non-edible item: plastic baby figurine Making Healthier Choices While indulging in a slice of King Cake is a festive tradition, making healthier choices can be part of the celebration too. Opting for smaller portions can significantly reduce caloric intake without sacrificing the joy of the occasion. Additionally, consider the following tips to enjoy your King Cake in a more health-conscious manner: Substitute high-fat ingredients like cream cheese with lower-fat or plant-based alternatives. Use natural sweeteners such as honey or pure maple syrup in place of refined sugars. Incorporate whole wheat flour for added fiber and nutrients. For those with dietary restrictions or preferences, it's important to review nutritional labels carefully. Here's a simplified table to help you compare common King Cake ingredients: By making these adjustments, you can still partake in the festivities while aligning with your nutritional goals. Customer Reviews and Feedback Satisfying Sweet Tooths The King Cake, with its rich history and festive allure, has been a staple in satisfying the cravings of those with a sweet tooth. Customers rave about the perfect balance of sweetness and spice, often highlighting the joy it brings to their Mardi Gras celebrations. The traditional cinnamon-infused dough brings warmth and comfort. Cream cheese fillings offer a creamy, decadent twist. Unique flavors like praline and strawberry keep the taste buds guessing. Feedback consistently points to the King Cake as a highlight of the holiday, with many customers returning year after year for that signature taste. It's clear that this beloved treat holds a special place in the hearts of those who indulge in its festive flavors. Suggestions for Improvement While many customers relish the sweet and festive flavors of our King Cake, we recognize there is always room for growth. Feedback on texture and sweetness levels has been particularly insightful, prompting us to consider adjustments in our recipe. Here are some common suggestions we've received: Reducing the sugar content for a less sweet option Offering gluten-free and vegan varieties to cater to dietary restrictions Enhancing the filling-to-dough ratio for a richer experience In response to these suggestions, we are exploring new formulations and will be conducting taste tests to strike the right balance. Your input is invaluable to us, and we aim to delight your palate with every slice. Repeat Customers' Endorsements The loyalty of our repeat customers speaks volumes about the quality and appeal of our King Cakes. Many have made it a yearly tradition to order our cakes for their celebrations, citing the consistent taste and quality as their reason for coming back. Here's what some of our loyal patrons have to say: "It's become a family tradition to have one of these cakes every Mardi Gras!" "I've tried other brands, but I always return to this one for the authentic flavor." "Year after year, the quality never falters. It's a staple at our holiday parties." Our customer satisfaction is reflected not only in words but also in numbers. Below is a snapshot of our customer ratings: Conclusion The King Cake is a delightful tradition that brings a taste of festivity to any gathering. With the option to decorate your own pre-baked cake, it offers a personalized experience that is both fun and convenient. Customer reviews like those from Carol and Jeff attest to the quality and appeal of these cakes, with flavors ranging from traditional cinnamon to strawberry cream cheese. Whether you're feeding a crowd of 16 or simply looking for a unique dessert, the King Cake is a versatile choice that promises to be a crowd-pleaser. As we've explored various aspects of the King Cake, from preparation to customer favorites, it's clear that this treat is more than just a cake—it's a celebration of culture, community, and culinary delight. Frequently Asked Questions What comes in the pre-baked King Cake decorating kit? Each kit includes 1 naked king cake, 1 packet of icing, 3 packets of colored sugar, and a golden baby. How many people does a King Cake serve? A King Cake typically serves over 16 people. Can I order different flavors of King Cake? Yes, there are various flavors available such as traditional cinnamon, cream cheese, and strawberry cream cheese. What are the nutritional facts for a serving of King Cake? A serving size of King Cake has approximately 240 calories, 2.5g of saturated fat, 210mg of sodium, and 25g of sugars. How should I store my King Cake? Your King Cake should be kept in a cool, dry place and can be stored in an airtight container to maintain freshness. Is there a way to make a King Cake healthier? To make a King Cake healthier, you can reduce the amount of sugar in the icing or opt for a lower-calorie cream cheese filling.
- "Indulge in Decadence: How to Perfect Your Caramel Layer Cake Recipe"
The art of making a Caramel Layer Cake is a delightful journey through the chemistry of caramelization, the finesse of baking, and the joy of assembling a true Southern classic. This cake, with its rich buttery layers and a homemade caramel frosting that hardens into a delicate shatter at room temperature, is a testament to the beauty of taking one's time to create something extraordinary. Whether it's a festive birthday, a cozy Thanksgiving, or a simple desire to indulge in a sweet masterpiece, the Caramel Layer Cake stands as a beacon of homemade dessert perfection. Key Takeaways The Caramel Layer Cake combines traditional Southern baking techniques with the intricate process of caramelization to create a dessert that's both luxurious and homely. Using dark brown sugar in the caramel glaze not only imparts a deep caramel flavor but also simplifies the caramel-making process, making it more accessible for home bakers. The cake's versatility makes it an ideal choice for various occasions, from replacing the classic Thanksgiving pie to becoming the centerpiece at birthdays and showers. The balance between the not-too-sweet yellow butter cake and the rich, homemade caramel icing is crucial for a harmonious flavor profile, and adjustments to the caramel intensity can cater to personal taste preferences. While the cake requires a considerable investment of time and effort, the end result is a show-stopping dessert that can be made in stages to manage the workload. The Art of Caramelization Understanding the Chemistry of Caramel Caramelization is a culinary phenomenon that turns simple sugars into a complex symphony of flavors. During caramelization, a series of chemical reactions occurs, transforming the sugars into a rich, deep caramel. This process involves isomerization, dehydration, and polymerization, which are essential for creating the signature taste and color of caramel. Understanding the stages of caramelization is crucial for bakers. Initially, the sugar melts and becomes clear. As the heat continues, it turns golden and eventually a deep amber. Each stage corresponds to a different flavor profile, allowing bakers to tailor the caramel to their specific needs. Here's a simple guide to the stages: Stage 1: Sugar melts into a clear liquid Stage 2: Liquid sugar turns golden Stage 3: Golden sugar deepens to amber By mastering these stages, bakers can ensure their caramel layer cake has the perfect balance of sweetness and complexity. Mastering the Homemade Caramel Icing Creating the perfect homemade caramel icing is an art that requires patience and precision. The key to a sublime caramel icing lies in the caramelization process itself. It's not just about melting sugar; it's about controlling the heat to coax the sugar and butter into a rich, golden brown elixir that will perfectly complement your cake. The ingredients for this icing are simple, yet the outcome is anything but. Here's a quick rundown of what you'll need: Unsalted butter Dark brown sugar Buttermilk Kosher salt Confectioners' sugar Vanilla extract Once you have your ingredients ready, the process is straightforward but requires your full attention. Begin by melting the butter with the brown sugar and buttermilk, then bring the mixture to a gentle boil. This is where the magic happens, as the heat transforms the mixture into a deep caramel. After reaching the desired consistency, sift in the confectioners' sugar and add vanilla extract, mixing until you achieve a glossy and smooth icing that pours easily from the bowl. The Role of Heat in Achieving the Perfect Glaze The application of heat is a pivotal moment in the creation of a caramel glaze. Maintaining the correct temperature is crucial to avoid the bitter taste of burnt sugar. A candy thermometer is an indispensable tool for this task, as it helps monitor the sugar's temperature, ensuring it reaches the ideal point without exceeding it. Following the precise temperature guidelines will result in a glaze with the perfect consistency and shine. It's important to start the icing process only when the cakes have cooled sufficiently, as working with icing that has begun to set can diminish its lustrous finish. Baking the Perfect Base Choosing the Right Ingredients for the Cake The foundation of any great caramel layer cake begins with selecting the right ingredients. Quality matters, as each component plays a crucial role in the final taste and texture of your cake. Start with a good base of self-rising flour, which already contains leavening agents, to ensure a light and airy structure. Granulated sugar is essential not just for sweetness but also for the caramelization process. Room temperature ingredients like unsalted butter and eggs are key for a smooth batter. Buttermilk, with its slight tang, adds moisture and a subtle richness that can't be matched. Remember, the quality of your vanilla extract will shine through, so choose a pure extract over imitation. Here's a quick checklist of the ingredients you'll need: Self-rising flour Granulated sugar Unsalted butter Eggs Buttermilk Vanilla extract Some bakers prefer to tweak the recipe by adding sour cream or milk for additional moisture, or even swapping in cake flour for a finer crumb. Pay attention to feedback from others who have tried variations; it can guide you to perfect your own version of this classic dessert. Tips for a Fluffy and Moist Layer Cake Achieving a fluffy and moist layer cake is the cornerstone of a great caramel layer cake. Proper ingredient measurements and mixing techniques are crucial to ensure the right consistency and texture. Here are some tips to help you create that perfect cake base: Measure your ingredients accurately. A kitchen scale is your best friend for precision. Avoid overmixing the batter, which can lead to a dense cake. Mix until just combined. Incorporate air into the batter by creaming the butter and sugar well. Use room temperature ingredients to ensure even mixing. Alternate adding dry and wet ingredients to the butter mixture to maintain a uniform texture. For those who have ventured into making their own self-rising flour or substituting ingredients, the results have been promising. A slight reduction in sugar for the icing can also tailor the sweetness to your preference. And when it comes to layering, a simple yet effective technique is to place the first layer top side down and the last layer top side up, ensuring the layers nestle into each other for a seamless look. The Importance of Buttermilk in Southern Baking Buttermilk holds a special place in the heart of Southern baking, acting as a key ingredient that imparts a distinct tanginess and tender crumb to layer cakes. Its acidity reacts with leavening agents, such as baking soda, creating a rise that yields a fluffy and moist texture. This reaction is not just crucial for the cake's structure, but also for enhancing its flavor profile. When incorporating buttermilk into your cake batter, follow these steps for best results: Add eggs one at a time, mixing well after each addition. Alternate adding flour and buttermilk, starting and ending with flour to ensure a smooth batter. Mix in vanilla extract, being careful not to overmix to maintain the cake's delicate texture. For those seeking authenticity in Southern baking, the choice of flour is also pivotal. A low-gluten flour, such as cake flour or the regionally favored White Lily brand, is recommended for a lighter, softer cake. Adjusting the flour type can make a significant difference in achieving the desired tenderness. Assembling the Caramel Layer Cake Layering Techniques for a Balanced Cake Achieving a balanced cake structure is essential for both aesthetics and taste. Always start with the first layer top side down to create a stable base. This simple trick helps to avoid gaps between layers that require excess frosting to fill. For multi-layer cakes, continue placing each layer top side down, except for the final layer which should be top side up, ensuring that the layers nestle into each other seamlessly. When assembling your cake, apply fillings and frostings in thin, even layers. This not only prevents the cake from becoming too heavy but also ensures that each bite has the perfect ratio of cake to frosting. Remember, too much filling can cause the layers to slide, compromising the cake's integrity. Lastly, be mindful of the cake's moisture. If you opt for a single-layer cake in a larger pan, adjust the recipe accordingly to avoid dryness. A well-balanced cake should be moist, with flavors that are enhanced by a pinch of salt or the right amount of vanilla. Applying the Caramel Frosting Evenly Achieving an even layer of caramel frosting is crucial for both the appearance and the taste of your cake. Spread about 1 cup of the warm icing on the first cake layer, ensuring it reaches the edges. Place the second layer on top and repeat. The final step is to use the remaining icing to cover the top and sides, creating a smooth finish. Remember, the consistency of your caramel frosting will affect its spreadability. A common issue is frosting that firms up too quickly, which can be mitigated by adjusting the flour or liquid ratios in your recipe. Be generous with the salt to enhance the caramel flavor, and use a small offset spatula for a professional touch. Decorative Touches: Apple Chips and Toffee Bits Once your caramel layer cake is frosted to perfection, it's time to add the final flourishes that will elevate it from delicious to visually stunning. Apple chips offer a delightful crunch and a hint of autumnal charm, making your cake not just a treat for the palate but also for the eyes. Toffee bits, with their rich buttery flavor, complement the caramel's sweetness and add an irresistible texture. To ensure a professional finish, consider the following tips: Gently press the toffee bits into the sides of the cake for a clean look. Strategically place apple chips on the top, creating a pattern or a border. Remember to sprinkle some toffee bits over the apple chips for a cohesive design. These final touches not only add to the cake's allure but also hint at the flavors within, promising a harmonious blend of sweetness and spice with every bite. Occasions for Caramel Cake Delight A Showstopper for Birthdays and Showers When it comes to marking a special occasion, nothing says celebration quite like a caramel layer cake. Its rich, golden layers are a decadent treat that will delight guests and serve as the centerpiece of any dessert table. Whether it's a vibrant birthday bash or an elegant baby shower, this cake is versatile enough to suit any theme. For a truly memorable event, consider the following accessories to enhance your cake: Bakery Boxes for elegant takeaway Birthday Candles for a traditional touch Cake Boards and Pillars for a multi-tiered masterpiece Cupcake Toppers and Decorating Kits for added flair Remember, the cake is more than just dessert; it's a symbol of the occasion, a canvas for creativity, and a source of joy for all who partake. An Alternative to Pie for Thanksgiving While pies are a traditional Thanksgiving staple, the rich and decadent Caramel Layer Cake offers a delightful twist to the holiday dessert table. This cake, with its deep caramel flavors and luxurious texture, stands as a worthy contender amidst the classic pumpkin and apple pies. For those looking to break away from the norm, here's a simple comparison to highlight the difference in dessert options: As seen in the table, the Caramel Layer Cake is richer in calories and carbs, making it a more indulgent choice. It's a perfect end to a hearty Thanksgiving meal, offering a satisfying sweetness that lingers on the palate. Making Every Slice Count: Portion and Serving Suggestions When it comes to serving your Homemade Southern Caramel Cake, portion size can make all the difference in enjoying the rich flavors without being overwhelmed. A common piece of feedback from cake enthusiasts is that while the caramel frosting is delicious, its sweetness can be intense. To ensure each slice is savored to its fullest, consider the following tips: Cut smaller slices: This allows guests to indulge in the cake's decadence without feeling overpowered by the sweetness. Offer seconds: It's better to have guests craving a little more than to leave them feeling they've had too much. Balance with beverages: Pair the cake with a beverage that complements its richness, such as coffee or a glass of milk, to cleanse the palate between bites. Adjusting the caramel intensity to individual taste can also enhance the dining experience. Some may prefer a thinner layer of frosting or a less sweet version. Experiment with the amount of sugar or try adding a pinch of salt to cut through the sweetness. Ultimately, the perfect slice is about personal preference and the joy of sharing your dessert masterpiece. Preservation and Serving Tips Storing Your Caramel Cake for Freshness Ensuring your caramel cake remains as delightful as the day it was made is all about proper storage. Keep your cake loosely covered at room temperature to maintain its optimal taste and texture for 3-4 days. Refrigerating is not the ideal method for these types of cakes as it can alter their delicate moisture balance. For those who want to savor their cake over a longer period, freezing is an excellent option. Wrap leftover slices or even whole cake layers in plastic wrap and store them in the freezer. Here's a simple guide: At room temperature: 3-4 days In the freezer (slices): up to 3 months In the freezer (whole layers): up to 3 months Allow frozen cake to come to room temperature before serving to ensure the best flavor and texture. Remember, the caramel icing's homemade taste is best enjoyed fresh, but these tips will help you extend that experience. Adjusting the Caramel Intensity to Your Taste The sweetness of your caramel layer cake can be a personal preference, and adjusting the caramel intensity is key to ensuring everyone's delight. Finding the right balance between too sweet and not sweet enough is crucial. For a less intense caramel flavor, consider reducing the amount of sugar in your caramel recipe. This will yield a milder taste. If the caramel is too runny, as some have experienced, reducing the liquid content or increasing the cooking time may help it set better. Conversely, for a richer caramel taste, you can increase the sugar content slightly or cook the caramel longer to develop a deeper flavor. It's also important to note that the type of sugar used can affect the flavor profile. Brown sugar, for example, can impart a more molasses-like taste, which may be desirable for some. Experimenting with different sugars and cooking times will help you find your perfect caramel icing. Pairing Suggestions for the Ultimate Dessert Experience To elevate your caramel layer cake to new heights, consider the company it keeps on the dessert table. A well-paired beverage can enhance the flavors of your cake, making each bite even more memorable. For a classic pairing, serve your cake with a glass of cold milk or a cup of hot coffee. The creaminess of milk balances the sweetness of caramel, while coffee's bitterness can cut through the richness. For those who enjoy a tipple, a sweet dessert wine or a glass of bourbon could be the perfect match. The notes of vanilla and oak in bourbon resonate beautifully with the buttery caramel. Here's a simple guide to pairing: Milk: A traditional choice that complements any dessert. Coffee: Ideal for balancing sweetness with its robust flavor. Dessert Wine: A sweet Moscato or Riesling pairs well with caramel. Bourbon: For a sophisticated twist, its warmth pairs nicely with the cake's richness. Conclusion In conclusion, the journey of creating a traditional Southern caramel layer cake is a testament to the art of baking. Each step, from the light and fluffy cake layers to the rich, homemade caramel icing, contributes to a symphony of flavors that celebrate true caramelization. While it may require time and patience, the result is a stunning dessert that's perfect for special occasions or simply to satisfy a sweet craving. The optional addition of apple chips or a salted caramel drizzle can elevate the cake even further, making it a versatile treat for any season. Whether you're a seasoned baker or a curious novice, this caramel layer cake is a delightful challenge that promises a rewarding and delicious outcome. Frequently Asked Questions What makes the caramel in this cake special? The caramel frosting in this cake is made through true caramelization, starting with granulated sugar, milk, and butter, which are carefully heated to create a deep, rich caramel flavor that surpasses simpler brown sugar butterscotch versions. Is this caramel layer cake suitable for special occasions? Absolutely! This cake is perfect for special occasions such as birthdays, showers, and even as an alternative to traditional Thanksgiving desserts. Can I make the cake layers in advance? Yes, the cake layers can be baked in advance to spread out the preparation time, making it more manageable to assemble the final cake. How can I adjust the caramel frosting to my taste? If you find the caramel frosting too intense, you can reduce the quantity used for the cake or adjust the sweetness by altering the amount of confectioners sugar in the recipe. How should I store the caramel layer cake to maintain freshness? The caramel cake should be stored in an airtight container at room temperature to maintain freshness. The caramel glaze hardens at room temperature, which helps to preserve the cake. Are there any decorative touches I can add to the caramel layer cake? For a delightful crunch and visual appeal, you can garnish the cake with apple chips, toffee bits, and a drizzle of salted caramel.
- How to Make a Jaw-Dropping Rainbow Cake: A Step-by-Step Guide
Rainbow cakes are not just a feast for the taste buds but also a visual spectacle that can bring joy and color to any celebration. From the whimsical layers of the Rainbow Layer Cake to the traditional flavors of the Classic Italian Rainbow Cake, and the enchanting Irish Rainbow Cake with its Sumikko Gurashi cookie decorations, each variety offers a unique experience. These cakes can be customized for various events, such as children's birthdays, weddings, and Pride celebrations, and are available in different sizes to cater to any gathering. Let's delve into the key takeaways that make these rainbow cakes exceptional. Key Takeaways Rainbow Layer Cake is ideal for festive occasions and can be customized with different base colors and rainbow piping on top. Classic Italian Rainbow Cake combines almond cake layers, raspberry compote, and chocolate ganache for a luxurious dessert. Rainbow Cotton Candy Cake is surprisingly generous in serving size, making it perfect for large parties with its vibrant design. The Irish Rainbow Cake is not just a dessert but a work of art, featuring vanilla layers and unique Sumikko Gurashi cookie decorations. Rainbow cakes can be ordered with various customization options and are available for pickup or local delivery, with some offering nationwide shipping. The Art of Crafting a Rainbow Layer Cake Choosing the Perfect Base Color The foundation of a stunning Rainbow Layer Cake lies in selecting the ideal base color that will complement the vibrant hues of the rainbow. This choice sets the tone for the entire cake, so it's crucial to get it right. Here are a few tips to ensure your base color enhances the overall aesthetic: Start with a neutral or pastel shade to allow the rainbow colors to truly pop. Consider the flavor of the cake as well; a vanilla base can be a blank canvas, while chocolate might add depth. Remember, the base color is just the beginning. It's the canvas upon which your rainbow masterpiece will be built. So take a moment to envision how each layer will interact with the next. If you're feeling adventurous, experiment with different shades until you find the perfect match for your creation. Swirling Techniques for Rainbow Borders Mastering the art of swirling rainbow borders can transform a simple cake into a vibrant masterpiece. Ensure that the cake layers have straight sides and minimal browning to maintain the rainbow's visual integrity. Using cake strips can help achieve this effect, although it may slightly extend the baking time. To create the perfect swirl, follow these steps: Begin with a base buttercream layer in a neutral or chosen color. Apply dabs of colored frosting around the cake's edge. Use a palette knife or spatula to blend the colors, creating a seamless transition. Rotate the cake as you work, ensuring even coverage and a balanced design. Pricing for cakes with rainbow borders varies based on size, with a 4" personal cake starting at $40 and larger sizes increasing in price. For specific color requests, communicate with the bakery staff to ensure your vision is accurately brought to life. Piping the Perfect Rainbow Top Achieving the perfect rainbow top on your cake is both an art and a science. The key to a vibrant and uniform rainbow is consistency in piping. Begin by preparing multiple piping bags, each filled with a different color of the rainbow. It's essential to use a high-quality buttercream that holds its shape well. Here's a quick guide to the quantities needed for different cake sizes: Remember to smooth out each layer before adding the next to avoid colors bleeding into one another. For an extra touch of whimsy, you can decorate with rainbow sprinkles or decorations after piping your swirl frosting. Classic Italian Rainbow Cake: A Culinary Journey The Almond Cake Foundation The foundation of the Classic Italian Rainbow Cake is a flavorful almond cake that sets the stage for the layers of delight that follow. Crafting this base requires precision and care to ensure that each layer is perfectly baked and ready to be adorned with the complementary flavors of raspberry and chocolate. Once your cakes have baked and cooled, level each cake. Place your pink almond cake on your cake decorating table and add a thin layer of raspberry compote. Add on your yellow almond cake layer followed by more raspberry compote. Top your cake stack off with your green almond cake. Begin to fully cover your cake with chocolate ganache. Using a cake frosting scraper, straight spatula, or offset spatula, smooth over your chocolate ganache to achieve a sleek finish. Raspberry Compote Filling: A Fresh Twist The raspberry compote is a vibrant addition that brings a fresh twist to the classic Italian Rainbow Cake. The secret to its intense flavor lies in the reduction process, where the raspberries are simmered with sugar and lemon juice until their essence is concentrated into a luscious, jam-like filling. This compote not only adds a burst of natural sweetness but also infuses the cake with a stunning layer of color that complements the chocolate ganache. Its homemade quality and the balance of tartness make it an unforgettable part of the cake's layered journey. Silky Chocolate Ganache: The Final Touch The crowning glory of the classic Italian rainbow cake is undoubtedly the silky chocolate ganache. This luscious layer not only adds a touch of elegance but also seals in the vibrant flavors of the almond layers and raspberry compote. Place chocolate chips into a heatproof bowl. Heat heavy cream and pour over the chocolate, allowing it to sit before mixing to a smooth mixture. Once applied, the ganache should be smoothed over with a spatula, and after a brief chill in the fridge, a second coating can be added for an impeccable finish. The final step is a sprinkle of chocolate shavings or sprinkles, adding texture and a hint of whimsy to this elegant dessert. Rainbow Cotton Candy Cake: A Visual Feast Sizing and Serving: Feeding the Crowd When planning a Rainbow Cotton Candy Cake for your event, it's crucial to consider the number of guests and the size of the cake needed. Here's a quick guide to help you choose the right size: Small - serves approximately 6-10 people. Medium - serves around 12-16 people. Large - serves about 20-30 people. For larger gatherings, you may want to consider multiple cakes or a tiered option to ensure there's a slice for everyone. Remember, the visual impact of a Rainbow Cotton Candy Cake is just as important as the serving size, so choose a cake that will be both a feast for the eyes and the palate. Always consult with your baker to discuss the specifics of your cake, including any custom sizes or designs that may affect the number of servings. Design and Decoration: Aesthetic Considerations When it comes to the visual appeal of the Rainbow Cotton Candy Cake, design and decoration are paramount. The cake's vibrant layers serve as a canvas for your creativity. Here are a few tips to ensure your cake is as delightful to look at as it is to eat: Color Coordination: Using a simple color wheel, select shades that complement each other for a harmonious look. Texture Variety: Incorporate different textures such as smooth icing, crunchy sprinkles, and soft cotton candy to add depth. Symmetry and Balance: Aim for an even distribution of decorations to maintain visual balance. Finally, consider the practical aspects of your decoration. Ensure that all elements are securely attached and that the cake remains stable for presentation and transport. With these considerations in mind, your Rainbow Cotton Candy Cake will not only be a feast for the taste buds but also a feast for the eyes. Ordering and Delivery: Logistics and Planning Ensuring your Rainbow Cotton Candy Cake arrives in perfect condition is our top priority. Orders are processed swiftly and can be shipped as early as the next day. To cater to your convenience, we operate Monday through Saturday, from 9 AM to 4 PM, with a lead time of 1-3 days for all cakes. For those planning ahead, we recommend scheduling a tasting and placing your order with at least 2 days' notice. Below is a quick guide to our cake sizes and servings: 6" Cake (6-10 servings) 8" Cake (12-16 servings) Customer satisfaction is echoed through their reviews, praising the ease of ordering, the delightful customization options, and the exceptional service provided. Remember, a well-planned cake delivery can be the centerpiece of your celebration, so choose wisely and order in advance to ensure a seamless experience. Irish Rainbow Cake: A Symphony of Flavors The Magic of Vanilla Layer Cake The foundation of the Irish Rainbow Cake is a classic vanilla layer cake that's beloved for its moist and fluffy texture. The secret to its perfection lies in the precise combination of ingredients and the method of preparation. Here's a quick guide to the essential components: Cake flour and sugar for a tender crumb Baking powder for rise Salt to balance the sweetness Unsalted butter for richness Egg whites and a whole egg for structure Whole milk and vanilla extract for flavor The process of creating this vanilla masterpiece starts with whisking the dry ingredients together. Then, the butter and sugar are beaten until light and fluffy, which is crucial for the cake's airy quality. The addition of oil ensures moisture, while the egg whites contribute to the cake's firm yet delicate structure. Remember, the choice of vanilla is pivotal; clear vanilla extract will provide a pure, unadulterated flavor, but regular vanilla will work just as well. When it comes to sizing, the cake is available in various dimensions to cater to different occasions, from a personal 4" cake to a larger 10" cake that serves up to 24 people. The vanilla layer cake is not just a treat for the palate but also a centerpiece that brings joy and color to any celebration. Sumikko Gurashi Cookie Decorations After the vanilla layers have been assembled and frosted, the Sumikko Gurashi cookie decorations take center stage, transforming the cake into a whimsical masterpiece. These cookies, inspired by the popular Japanese characters, add a playful touch to the cake's presentation. For the cookie dough, a tried-and-true recipe is essential. Here's a simple list of ingredients you'll need: 2 2/3 cups all-purpose flour 2 tbsp cornstarch 1 cup sugar 1/2 tsp salt 8 oz unsalted butter, room temperature 1 large egg 1 tbsp vanilla extract 1 tsp almond extract The final touch of these adorable cookies not only delights the eyes but also offers a unique texture contrast to the soft cake layers. Whether served as part of the cake or as individual party favors, these cookies are sure to be a hit. Ordering Your Slice of Enchantment After indulging in the whimsical journey of the Irish Rainbow Cake, securing your slice is the final step to bringing the enchantment to your table. Order Now for a Taste of the Extraordinary! Don't miss out on the magic; with limited quantities available, it's essential to act swiftly to ensure your celebration is graced with this culinary masterpiece. For a seamless ordering experience, here's a quick guide: Visit Celebrity Cake Studio at 314 E 26th St. Tacoma, WA 98421 or contact us at (253) 627-4773 or info@celebritycakestudio.com. Choose your desired cake size and flavor from our range of options, including gluten-free varieties for an additional $5.00. Allow for a 1-3 days lead time as all cakes are made-to-order. Our studio is open from 9 AM to 4 PM, Monday through Saturday, ready to assist you in scheduling a tasting or consultation for your perfect cake. Remember, every slice of our Irish Rainbow Cake tells a story, one that's best shared with friends and family during life's sweetest moments. Conclusion In the kaleidoscope of desserts, the rainbow cake stands out as a vibrant symbol of joy and celebration. From the whimsical layers of the Rainbow Layer Cake perfect for birthdays and Pride events, to the traditional flavors of the Classic Italian Rainbow Cake with its almond and raspberry notes, each variation offers a unique taste experience. Whether it's the enchanting Irish Rainbow Cake that promises a symphony of flavors or the pastel-hued layers inspired by Sumikko Gurashi, these cakes are more than just a treat for the palate—they are a feast for the eyes. As we've explored the world of rainbow cakes, it's clear that they hold a special place in the hearts of many, embodying the spirit of festivity and the magic of sweet moments. So, whether you're celebrating a special occasion or simply looking to add a splash of color to your day, a slice of rainbow cake is sure to bring a smile to your face and a burst of joy to any gathering. Frequently Asked Questions What occasions are rainbow layer cakes suitable for? Rainbow layer cakes are perfect for a variety of occasions, including children's birthday parties, gay wedding cutting cakes, Pride celebrations, and any festive event where a colorful and whimsical touch is desired. How many people can a rainbow cotton candy cake serve? The size of the rainbow cotton candy cake can vary, but it's known to feed more people than one might expect, making it a great choice for larger gatherings. Can I customize the color shades on my rainbow layer cake? Yes, you can use the 'Notes' field when ordering to clarify color shades. However, additional design requests may alter the price and should be discussed with bakery staff prior to ordering. Are there different variations of rainbow cakes available for order? Absolutely! There are various rainbow cake options available including rainbow border scroll tiered cake, rainbow garden layer cake, rainbow ruffle tiered cake, and more. You can select options based on your preference. How far in advance do I need to order a mini I Heart Rainbow Cake? For the mini I Heart Rainbow Cake, a 24-hour advance order is required. For weekend pickups in Tulsa, please order by Wednesday evening. What are the key features of the Irish Rainbow Cake? The Irish Rainbow Cake is a vanilla layer cake adorned with Sumikko Gurashi cookie decorations, offering a symphony of flavors and a visually delightful experience for any celebration.
- Exploring the History and Tradition of Gâteau Basque: A Culinary Journey into the Heart of Basque Country
The Gâteau Basque is more than a dessert; it's an emblem of the rich culinary heritage of the Basque region. This article delves into the essence of this traditional pastry, explores the unique experience at Au Gâteau Basque de Bayonne, and examines the global phenomenon of the Basque-style cheesecake. Additionally, it highlights the importance of supporting local commerce and provides insights into crafting the perfect Gâteau Basque experience. Key Takeaways Gâteau Basque is a cherished traditional pastry that embodies the flavors and craftsmanship of Basque culture, particularly noted for its cerise (cherry) and crème fillings. Au Gâteau Basque de Bayonne, run by Sébastien and Christelle, offers an artisanal and authentic experience of this dessert in a welcoming shop located near the train station in the Saint-Esprit district. The Basque-style cheesecake, known as Tarta de Queso, has gained international acclaim for its creamy interior and crustless design, originally developed by Santiago Rivera of La Viña in San Sebastian, Spain. Supporting local businesses like Au Gâteau Basque de Bayonne aligns with the 'Vivons Local' initiative, encouraging community engagement and offering customer loyalty programs and gift options. Creating the perfect Gâteau Basque involves using high-quality ingredients, mastering specific baking techniques, and considering expert tips for pairing and serving. The Essence of Gâteau Basque A Culinary Staple in Basque Culture The Gâteau Basque stands as a proud emblem of the Basque region's culinary heritage. It is a symbol of tradition and is cherished for its rich, comforting flavors that have been passed down through generations. This dessert is more than just a treat; it's a piece of history, lovingly preserved in each bite. At the heart of this tradition is Au Gâteau Basque de Bayonne, where Sébastien and Christelle have been crafting their specialty with a remarkable duo of cerise and crème. Their dedication to the craft is evident in the quality and taste of their confections. Embracing the local ethos, Au Gâteau Basque de Bayonne is a testament to the region's commitment to preserving its culinary practices. The establishment is a hub for gourmands of all ages, where the love for well-made, beautiful work is as palpable as the aroma of freshly baked pastries. The Unique Flavors of Cerise and Crème The Gâteau Basque is a symphony of flavors, where the tartness of cerise (cherry) harmoniously blends with the velvety texture of crème. The interplay of these two core ingredients defines the dessert's character and sets it apart from other pastries. The cherries used in Gâteau Basque are often of the black or sour variety, providing a depth of flavor that contrasts with the sweetness of the crème. This crème is not just any filling; it is a rich custard, often infused with vanilla or almond, that complements the fruit's acidity. While the cerise provides a burst of freshness, the crème brings a comforting creaminess, making each bite a delightful experience. The Gâteau Basque is not just a treat; it's a celebration of Basque culinary tradition. Sébastien and Christelle's Artisanal Approach At the heart of Au g\u00e2teau basque de Bayonne, the dedication of S\u00e9bastien and Christelle to their craft is evident. Their bakery, nestled in the Saint-Esprit district close to the train station, is a hub for those who appreciate the beauty of well-made confections. Here, the g\u00e2teau basque is not just a pastry; it's a testament to their passion for traditional baking and innovative flavors. Christelle's homemade chocolates and ice creams complement the bakery's offerings, each created with an unwavering love for quality. Their commitment to excellence extends beyond the products to the very spirit of local commerce, encouraging a vibrant community connection. Operating Hours: Monday: 7:30 AM - 7:30 PM Tuesday to Saturday: 7:30 AM - 1:00 PM / 3:00 PM - 7:30 PM Sunday: 7:30 AM - 7:30 PM Visiting Au Gâteau Basque de Bayonne Location and Ambiance Nestled in the heart of Bayonne, Au Gteau Basque offers a charming escape into the world of traditional Basque pastries. The quaint patisserie is surrounded by the city's vibrant atmosphere, with its narrow streets and riverside restaurants adding to the allure of the location. Address: Central Bayonne, near the Nive River Ambiance: Cozy, with a rustic Basque country feel Visitors can expect a warm welcome in a space that reflects the rich cultural heritage of the Basque region. The outdoor seating area provides a perfect spot to enjoy these delicacies while soaking in the local scenery. Operating Hours and Accessibility Au Gâteau Basque de Bayonne welcomes visitors with a schedule that accommodates both early birds and evening strollers. Accessibility is a priority, ensuring that everyone can enjoy the delightful pastries on offer. Operating hours are as follows: Monday: 7:30 AM - 7:30 PM Tuesday to Saturday: 7:30 AM - 1:00 PM / 3:00 PM - 7:30 PM Sunday: 7:30 AM - 7:30 PM Located in the charming Saint Esprit district, the bakery is a short stroll from local attractions, making it a perfect stop during a day of exploration. The bakery can be reached at 05 59 55 17 10 or via email at christelleetsebastiengarry@gmail.com for any inquiries. Customer Services and Local Engagement Au Gâteau Basque de Bayonne prides itself on exceptional customer service and a strong commitment to the local community. Visitors can expect a warm welcome and a range of services tailored to enhance their experience. From digital catalogs to current promotions, the bakery ensures that both in-store and online shoppers are well catered for. The bakery also plays an active role in the 'Vivons Local' initiative, promoting local commerce and artisanal products. Engagement with the Bayonne shopping community is evident through various programs: Baker's Rewards Affiliate Program Baking Classes Baking Contests Au Gâteau Basque is more than a bakery; it's a hub for local culture and a supporter of sustainable commerce. The Basque-Style Cheesecake Phenomenon The Origins of Tarta de Queso The Tarta de Queso, or Basque-style cheesecake, has its roots deeply embedded in the gastronomic traditions of the Basque region. Its inception is credited to a restaurant in San Sebastian, Spain, known as La Viña, where the cheesecake became a signature dish. Unlike its American counterpart, the Basque version is known for its rustic, caramelized exterior and a velvety, creamy core. The recipe for Tarta de Queso is straightforward, focusing on quality ingredients and precise execution. Here's a basic outline of the ingredients used: Cream cheese Granulated sugar Table salt Eggs Heavy cream This dessert's popularity has transcended borders, with variations popping up in restaurants and online platforms worldwide. Its creamy interior, combined with a distinctive burnt top, offers a taste experience that is both authentic and innovative. Adapting the Recipe for Global Palates As the Gâteau Basque steps onto the global stage, chefs and bakers are embracing the challenge of adapting this traditional dessert to suit a variety of international tastes. The key to its worldwide acceptance lies in the delicate balance of maintaining its authentic essence while incorporating diverse flavors and ingredients. Experimentation with different fruit preserves, such as raspberry or apricot, offers a twist on the classic cerise filling. Alternative creams, like matcha or chocolate, provide a novel experience for those seeking a departure from the traditional crème pâtissière. Gluten-free and vegan versions are emerging, catering to dietary restrictions and preferences without compromising on taste. The adaptation process also involves tweaking the recipe's sweetness and texture to appeal to palates unaccustomed to the rich, dense nature of the original. This evolution of the Gâteau Basque not only honors its heritage but also ensures its place in the patisseries and home kitchens of the world. The Secret Behind Its Creamy Interior The meltingly smooth and creamy interior of the Basque-style cheesecake is a textural delight that sets it apart from its counterparts. Achieving this consistency is a delicate balance; it requires precise timing and temperature control during baking. Too early a removal from the oven results in a soupy center, while leaving it too long causes the loss of the luxurious just-firm-enough texture. For those without a thermometer, observing the cake's behavior is crucial—it should appear underdone in the center when removed from the oven. Understanding the nuances of this dessert's preparation can elevate a simple cheesecake to an extraordinary culinary experience. The key lies in the meticulous steaming of ingredients and the careful monitoring of its baking process. Supporting Local Commerce with Au Gâteau Basque Promoting 'Vivons Local' Initiative Au Gâteau Basque de Bayonne is at the forefront of the 'Vivons Local' initiative, a movement that encourages the community to support local businesses. This initiative is not just about preserving the unique character of Bayonne's commerce but also about fostering a sustainable economic environment where local artisans and shopkeepers can thrive. The 'Vivons Local' campaign is multifaceted, involving various activities and services designed to promote local commerce: Customer feedback mechanisms to improve products and services Regular updates and promotions through Bayonne Shopping social media A comprehensive map of local businesses to facilitate discovery The Bayonne Shopping gift voucher program to incentivize local shopping Each of these components plays a role in reinforcing the bond between the residents and the local businesses, ensuring that the city's commercial landscape remains dynamic and responsive to the needs of its community. Gift Options and Customer Loyalty Programs Au Gâteau Basque offers a variety of gift options to suit any occasion, ensuring that customers can share the joy of Basque culinary delights with friends and family. From ready-to-gift packages to customizable baskets, there's something for everyone. The shop's loyalty program rewards frequent visitors with exclusive discounts and early access to new products. Gift Cards Recipe Bundles Mix & Pan Sets Appliances Customer Favorites Gifts Under $25 Gifts Under $50 Gifts Under $100 Best Splurges The loyalty program is designed to celebrate and thank regular patrons. By accumulating points with each purchase, customers can unlock a tiered system of rewards, including special sale events and personalized offers. Engagement with Bayonne's Shopping Community Au Gâteau Basque's commitment to the local community extends beyond the bakery's doors. They actively participate in Bayonne's vibrant shopping scene, collaborating with other local businesses and associations. This synergy not only enriches the city's commercial offerings but also fosters a strong sense of community among merchants and customers alike. Local Associations: Au Gâteau Basque is a proud member of various merchant associations, which organize events and initiatives to promote local commerce. Social Media Presence: With regular updates on platforms like @bayonneshopping, they keep the community informed and engaged. Bayonne Shopping Vouchers: The bakery accepts and promotes the use of local shopping vouchers, encouraging residents to support neighborhood businesses. Crafting the Perfect Gâteau Basque Experience The Importance of Quality Ingredients The foundation of an exquisite G eau Basque lies in the quality of its ingredients. Each component, from the flour to the flavorings, plays a pivotal role in creating the cake's signature taste and texture. A G eau Basque is not merely a dessert; it's a reflection of the region's culinary heritage, demanding respect for the raw materials used. Here is a list of essential ingredients that contribute to the authenticity of a G eau Basque: Flour: The base of the cake, providing structure and softness. Sugar: Adds sweetness and affects the texture. Eggs: Bind the ingredients together and enrich the flavor. Butter: Gives the cake its rich, tender crumb. Flavorings: Vanilla, chocolate, or fruit, infusing the cake with distinctive aromas. These ingredients, when sourced carefully and combined with skill, result in a G eau Basque that is not just a treat, but an experience to savor. Mastering the Technique: Tips from the Experts Achieving the perfect Gâteau Basque is an art that requires precision, patience, and a touch of creativity. The key to success lies in the meticulous preparation and understanding of the process. Here are some expert tips to guide you: Start with the highest quality ingredients, as they are the foundation of flavor. Ensure all ingredients are at room temperature to facilitate a smooth batter. Be gentle when folding the dough; overworking it can lead to a tough texture. Preheat your oven accurately; an even temperature is crucial for even baking. While these tips may seem straightforward, they are often overlooked by novices. By adhering to these guidelines, you'll be well on your way to creating a Gâteau Basque that's as authentic as it is delicious. Pairing and Serving Suggestions To fully savor the richness of Gâteau Basque, consider the following pairings and serving suggestions. A well-chosen drink can enhance the flavors, while the right accompaniment can turn the dessert into a memorable experience. Coffee: A robust espresso or a creamy latte balances the sweetness. Tea: A fragrant Earl Grey or a soothing chamomile complements the pastry. Dessert Wines: A sweet sherry or a smooth port pairs beautifully. Fresh Fruit: Seasonal berries or a tangy citrus salad cut through the richness. Remember, the ultimate goal is to create a harmonious balance that respects the traditional Basque flavors while catering to your personal taste preferences. Conclusion The Gâteau Basque is more than just a dessert; it's a symbol of the rich culinary tradition and communal spirit found in Bayonne. From the charming bakery of Sébastien and Christelle, where love and dedication go into every cherry and cream-filled creation, to the innovative Basque-style cheesecake that has taken the world by storm, this pastry embodies the essence of local craftsmanship and gastronomic excellence. Whether you're a resident or a visitor, indulging in a slice of Gâteau Basque is a way to connect with the heart of Bayonne's culture, where every bite tells a story of heritage, flavor, and community pride. Frequently Asked Questions What is Gâteau Basque? Gâteau Basque is a traditional pastry from the Basque region of France, characterized by its tender crust and typically filled with black cherry jam (cerise) or pastry cream (crème). Who are Sébastien and Christelle? Sébastien and Christelle are artisanal bakers who own Au Gâteau Basque de Bayonne, where they craft various baked goods, including their specialty Gâteau Basque with a remarkable duo of cherry and cream. Where is Au Gâteau Basque de Bayonne located? Au Gâteau Basque de Bayonne is located in the Saint-Esprit district, close to the train station in Bayonne. What are the opening hours for Au Gâteau Basque de Bayonne? The shop is open on Mondays from 7:30 AM to 7:30 PM, and from Tuesday to Saturday, it operates from 7:30 AM to 1:00 PM and then from 3:00 PM to 7:30 PM. What is Basque-style cheesecake? Basque-style cheesecake, also known as Tarta de Queso, is a crustless cake with a creamy interior and a caramelized top, originally developed by Santiago Rivera of La Viña in San Sebastian, Spain. How does Au Gâteau Basque de Bayonne engage with the local community? Au Gâteau Basque de Bayonne promotes the 'Vivons Local' initiative, offers gift options and customer loyalty programs, and is actively engaged with Bayonne's shopping community.
- "Are Jaffa Cakes Really Cakes or Just Cookies in Disguise?"
Jaffa Cakes are a delightful treat that strikes a perfect balance between a biscuit and a cake, famous for their unique combination of a light sponge, zesty orange jam, and a coating of rich dark chocolate. This article explores the essence, nutritional profile, varieties, preparation, and consumer information of Jaffa Cakes, providing a comprehensive look at this beloved snack. Key Takeaways Jaffa Cakes are a classic treat with a light sponge, orange jam, and dark chocolate topping, enjoyed with coffee or as a standalone snack. They have a simple nutritional profile, with a single Jaffa Cake typically containing around 44 calories, 8g of carbs, and minimal fat and protein. Varieties include the original flavor and Tutti Frutti, among others, with a wide range of similar products available on the market. The perfect Jaffa Cake requires specific ingredients like unsalted butter, milk, eggs, flour, sugar, dry milk, yeast, and flavorings such as nutmeg and lemon. Jaffa Cakes are reasonably priced and widely available, but consumers should be mindful of dietary considerations when incorporating them into their diet. The Essence of Jaffa Cakes Defining the Jaffa Cake A Jaffa Cake is a delightful treat that straddles the line between biscuit and cake. Its unique structure comprises a springy sponge base, a layer of sweet citrus jelly, and a coating of crisp dark chocolate. This combination of textures and flavors has made it a favorite in many households. The debate over whether a Jaffa Cake is a biscuit or a cake has been a topic of discussion for years, even leading to a notable VAT tribunal in the UK, which ruled in favor of it being classified as a cake. This classification is not just a matter of semantics; it has tax implications, as cakes are zero-rated while chocolate-covered biscuits are not. Here is a quick nutritional snapshot of a typical Jaffa Cake product: The Unique Composition Jaffa Cakes stand out in the confectionery world due to their distinct layering and combination of textures. The base of a Jaffa Cake is a light, airy sponge, which is then topped with a tangy citrus-flavored jelly. This jelly is often a blend of orange or lemon, giving it that signature zesty kick. The final layer is a coating of smooth chocolate, which balances the tartness of the jelly and the softness of the sponge. While the classic Jaffa Cake flavor is orange, variations exist that incorporate different fruit flavors or types of chocolate. Despite these variations, the core composition remains the same, ensuring that distinctive Jaffa Cake essence is preserved across different products. Cultural Significance and Symbolism Jaffa Cakes have transcended their status as a mere confectionery to become a cultural icon in various parts of the world. Their namesake, the Jaffa orange, is deeply rooted in the history of Jaffa, an ancient port city. The Jaffa orange, once a symbol of prosperity and trade, has lent its name and flavor to these beloved treats. The circular shape and layered structure of Jaffa Cakes also carry symbolic meanings. The round form is often associated with unity and wholeness, while the different layers can represent the harmonious blend of diverse cultural influences. In some contexts, the orange center is seen as a symbol of the sun, bringing warmth and joy to those who partake in its sweetness. Nutritional Profile Caloric Content and Serving Size Jaffa Cakes are a light snack, with each cake containing approximately 44 calories. This makes them a suitable option for those who are mindful of their calorie intake but still wish to indulge in a sweet treat. The standard serving size for Jaffa Cakes is one cake, which typically weighs around 11 grams. Below is a breakdown of the nutritional content per serving: Macronutrient Breakdown Jaffa Cakes offer a unique balance of macronutrients that cater to those looking for a sweet treat with moderate caloric impact. Each Jaffa Cake typically contains around 44 calories, which come from a combination of carbohydrates, proteins, and fats. The primary macronutrient in Jaffa Cakes is carbohydrates, with a single cake providing approximately 8 grams. This includes both sugars and a minimal amount of dietary fiber. Proteins and fats are present in smaller quantities, with about 0.5 grams of protein and 1.1 grams of fat per cake, of which 0.6 grams are saturated fats. Here is a simplified nutritional breakdown for a single Jaffa Cake: It's important to note that these values can vary slightly depending on the brand and specific variety of Jaffa Cake. Vitamins and Glycemic Load Jaffa Cakes, while not a significant source of vitamins, do provide a small amount of nutritional value. They contain negligible amounts of Vitamin A and Vitamin D, with each cake offering 0 mcg of these vitamins. When it comes to the glycemic load, Jaffa Cakes are designed to be a low glycemic index treat, meaning they have a minimal impact on blood sugar levels. The nutritional profile of a single Jaffa Cake is as follows: It's important to note that while Jaffa Cakes are low in protein and fat, they are also low in sugar compared to many other sweet treats. This makes them a more favorable option for those looking to indulge without consuming a high amount of sugar. Varieties and Similar Treats Classic vs. Tutti Frutti Flavors The traditional Jaffa Cake has long been cherished for its perfect balance of light sponge, orange-flavored jelly, and dark chocolate. However, the introduction of the Fazer Jaffa Tutti Frutti flavor has brought a vibrant twist to the classic treat. This new variety promises an explosion of fruity flavors, aiming to delight the taste buds of those seeking a different kind of indulgence. While the classic Jaffa Cake remains a staple, the Tutti Frutti version offers a playful alternative. Below is a comparison of the two flavors: Classic Jaffa Cake: A timeless combination of zesty orange jelly and rich chocolate. Fazer Jaffa Tutti Frutti: A colorful mix of fruity flavors, complementing the soft sponge and chocolate. Comparing Jaffa Cake Products When exploring the diverse world of Jaffa Cakes, consumers are met with an array of options, each with its own unique twist on the classic treat. The Original Jaffa Cakes stand as the benchmark, with their iconic layer of tangy orange filling and a dark chocolate topping. However, variations such as the Jaffa Cake Bars and Mini Jaffa Cakes offer a different experience in terms of size and convenience. For those with a penchant for exotic flavors, the Fazer Jaffa Tutti Frutti introduces a burst of fruity jam, encapsulated in a soft sponge and enrobed in responsibly produced cocoa. This contrast in flavors and textures is what makes comparing Jaffa Cake products an intriguing endeavor. Here's a quick comparison of the nutritional profile for a standard Jaffa Cake and a Happy Shopper Jaffa Cake: As seen in the table, the nutritional values are quite similar, which suggests that the choice between products may come down to personal taste and brand loyalty. Alternative Jaffa-Inspired Confections The world of sweets is ever-evolving, and the influence of the classic Jaffa Cake can be seen in a variety of alternative treats. Innovative confectioners have taken the essence of the Jaffa Cake and reimagined it, creating new delights that pay homage to the original. These Jaffa-inspired confections often maintain the iconic combination of chocolate and orange but vary in form and flavor additions. For those with a penchant for variety, the market offers a plethora of options: Fazer Jaffa Tutti Frutti, with its vibrant jam filling Jaffa Cakes Sponge Biscuits, a twist on the traditional texture Fazer Marianne and Fazer Salmiakki, for a touch of Finnish flair It's not just about the flavor, but also the experience. From the Quality Street tins marketed as an affordable family selection to the luxurious Fazer Seasonal Products & Gifts, there's a Jaffa-inspired confection for every occasion and taste preference. Preparation and Ingredients Key Ingredients for the Perfect Jaffa Cake The foundation of a delectable Jaffa Cake lies in its key ingredients, each contributing to the unique taste and texture that fans adore. The perfect Jaffa Cake requires a harmonious blend of a soft sponge, zesty jam, and rich dark chocolate. For the sponge cake base, you'll need: 3 1/2 cups (420g) King Arthur Unbleached All-Purpose Flour 8 tablespoons (113g) unsalted butter, melted 3/4 cup (170g) milk, lukewarm 2 large eggs plus 1 large egg yolk, at room temperature The jam filling is pivotal, providing that signature tangy burst of flavor. While specific jam recipes may vary, a classic choice is orange marmalade, which should be of good quality to ensure the right balance of sweetness and bitterness. Remember, the quality of ingredients can make or break your homemade Jaffa Cakes. It's worth investing in premium products to replicate the indulgent experience of the store-bought classic. Step-by-Step Baking Instructions After gathering all your ingredients, the journey to a perfect Jaffa Cake begins. Preheat your oven to 350°F (175°C), ensuring it reaches the correct temperature for an even bake. Prepare your baking pans by greasing them or lining with parchment paper to prevent sticking. Next, whisk together the dry ingredients in a large bowl. This includes flour, sugar, and leavening agents like baking powder. For a twist on the classic flavor, consider adding the zest of 1/2 an orange to infuse a citrusy aroma into your cakes. In a separate bowl, combine the wet ingredients—melted butter, milk, and eggs—until smooth. Gradually mix the wet ingredients into the dry, stirring until just combined to avoid overworking the batter. Pour the batter into the prepared pans, smoothing the tops with a spatula. Once cooled, it's time to add the signature Jaffa layer of orange-flavored jelly, followed by a coating of dark chocolate. The result is a delightful combination of textures and flavors that make Jaffa Cakes a beloved treat. Decorating and Garnishing Tips Once your Jaffa Cakes are baked to perfection, the final touch is in the decoration. The icing should be smooth and pourable, allowing for a sleek finish that will hold your chosen garnishes in place. For a traditional look, alternate between yellow, purple, and green sparkling sugars to create a vibrant and festive appearance. Begin by preparing your icing, mixing powdered sugar with a touch of milk and vanilla until it reaches the desired consistency. Drizzle the icing over the cooled Jaffa Cakes, ensuring an even coat. Before the icing sets, sprinkle your colored sugars or any other decorations like candied cherries if desired. For those who enjoy a more personalized touch, feel free to experiment with different colors and patterns. The simplicity of the Jaffa Cake makes it a blank canvas for your culinary creativity. Consumer Information Pricing and Availability Jaffa Cakes, a beloved treat worldwide, vary in price depending on the brand and the region. The Original English McVities Jaffa Cakes Twin Pack, for instance, can be found online with offers including free shipping, making them accessible to a global audience. Prices for these treats can range significantly, with some sellers on platforms like Amazon listing them from $12.45 with FREE Shipping. In contrast, Scandinavian brands offer their own versions, such as the FAZER JAFFA TUTTI FRUTTI 300G, 8-PACK, which is priced at $37.49 USD. It's important to note that prices are subject to change and may be influenced by factors such as surge pricing, which is becoming increasingly common in various industries. Availability can also vary, with some products being readily available in local supermarkets, while others may need to be imported, potentially affecting delivery times and costs. Dietary Considerations When indulging in the sweet delight of Jaffa Cakes, it's important to consider their place within a balanced diet. Jaffa Cakes, enjoyed in moderation, are not bad for you. However, it's crucial to be mindful of their sugar and saturated fat content, especially if consumed in large quantities. For those with specific dietary needs, there are options available. Whether it's due to health concerns or personal preferences, one can find Jaffa Cake variants that cater to gluten-free, low-sugar, or vegan diets. Here's a quick nutritional snapshot per cake: How to Incorporate Jaffa Cakes into Your Diet Jaffa Cakes can be a delightful treat that fits into various dietary patterns when consumed in moderation. Their unique flavor and texture make them a versatile snack for different occasions. Here are some tips on how to enjoy Jaffa Cakes as part of a balanced diet: Pair a Jaffa Cake with a cup of tea or coffee for a mid-morning or afternoon snack. Include a Jaffa Cake as a sweet treat in your lunchbox, ensuring you have a portion-controlled dessert. Crumble Jaffa Cakes over yogurt or mix them into homemade ice cream for an indulgent twist on classic desserts. Remember that Jaffa Cakes are more than just a snack; they can also be a fun addition to various recipes. Experiment with using them as a base for cheesecakes or as an ingredient in trifle layers. The possibilities are as limitless as your creativity! Conclusion In conclusion, Jaffa Cakes offer a delightful combination of light sponge, fruity jam, and rich dark chocolate that has stood the test of time as a classic treat. Whether enjoyed with a cup of coffee or as a sweet snack on its own, the versatility and unique flavor profile of Jaffa Cakes continue to captivate taste buds around the world. With various brands and variations available, from the original to Tutti Frutti filled versions, there's a Jaffa Cake to suit every preference. Moreover, their nutritional content, including low glycemic load and calorie count, makes them a relatively guilt-free indulgence for those keeping an eye on their dietary intake. As we've explored the world of Jaffa Cakes, from their ingredients and preparation to their cultural significance, it's clear that these treats are more than just a biscuit or a cake—they're a beloved part of culinary heritage that brings joy to many. Frequently Asked Questions What is a Jaffa Cake? A Jaffa Cake is a light, soft sponge cake topped with jam and rich dark chocolate. It's a classic treat enjoyed with coffee or as a snack. What is the nutritional content of a single Jaffa Cake? A single Jaffa Cake contains approximately 8g total carbs, 7.8g net carbs, 1.1g fat, 0.5g protein, and 44 calories. Are there different flavors of Jaffa Cakes? Yes, besides the original flavor, there are variations such as the Tutti Frutti flavor, which contains a Tutti Frutti jam filling. What are the key ingredients for making Jaffa Cakes? Key ingredients include unsalted butter, milk, eggs, all-purpose flour, granulated sugar, dry milk, yeast, and flavorings like nutmeg and lemon. How much does a pack of Jaffa Cakes cost? The price can vary, but as an example, a pack of Fazer Jaffa Cakes is listed at $37.49 USD. Are there any dietary considerations for Jaffa Cakes? Yes, those monitoring their sugar intake should be aware of the glycemic load, and the cakes may not be suitable for those with gluten or dairy allergies.
- "Uncovering the Delicious History and Recipe of Russian Honey Cake (Medovik)"
The Russian Honey Cake, known as Medovik, is a sweet symphony of flavors and textures that has been delighting taste buds for centuries. With its rich history and cultural significance, this layered dessert is not just a treat for the palate but also a celebration of tradition. From the classic recipe to innovative twists and presentation techniques, this article will guide you through the essence of Medovik, the art of crafting it, and the joy of sharing this honey-infused delight. Key Takeaways Medovik is a traditional Russian dessert with a deep cultural and historical significance, often served during celebrations. There are numerous regional variations of Medovik, with families adding their own twist to the classic recipe. The cake consists of multiple layers of honey-infused dough filled with a creamy custard, making it a rich and decadent treat. Innovative versions of Medovik, like the 'Lazy Medovik', offer a simpler approach to the dessert without compromising on flavor. Proper serving and presentation of Medovik, including pairing with beverages and decorative techniques, enhance the overall experience. The Essence of Medovik: Exploring Russian Honey Cake Historical Roots and Cultural Significance The origins of Medovik, the Russian honey cake, are steeped in the culinary traditions of Eastern Europe. The cake's unique taste and texture are a testament to the ingenuity of Russian cuisine, which has historically incorporated a rich variety of ingredients such as cereals, sweets, berries, and honey. Medovik emerged as a beloved dessert, with its layers symbolizing the intricate layers of Russian society and history. The use of honey in Russian cooking dates back centuries, reflecting the natural abundance of the ingredient in the region. Medovik's popularity grew due to its association with festivities and its ability to be stored for long periods without losing flavor. Each layer of the cake often represents a different aspect of Russian culture, from the earthiness of its agricultural roots to the sweetness of its artistic achievements. Variations Across Regions and Families The Russian honey cake, Medovik, is beloved for its rich flavor and delicate layers, but it's the regional and familial variations that truly showcase its versatility. Each family has its own version of Medovik, often passed down through generations, with subtle differences in spices, fillings, and techniques that reflect their unique heritage and local ingredients. In Georgia, for example, the cake takes on a new identity as Medok, a Georgian rendition of the Russian honey cake medovik, is a layered dessert that intricately combines sponge cake with rich milk cream. This variation highlights the cross-cultural influences and the adaptability of the recipe to local tastes. In Siberia, more honey is used to create a darker, richer cake. Coastal regions may incorporate local nuts or fruits. Urban families might experiment with modern twists, like adding chocolate or caramel. The Role of Medovik in Russian Celebrations In the tapestry of Russian festivities, Medovik stands out as a centerpiece, especially during birthday celebrations. This multi-layered honey cake is not just a dessert; it's a symbol of hospitality and generosity. The tradition of serving Medovik at birthdays is deeply ingrained, with each layer of the cake often representing the sweetness and complexity of life's years. Medovik: A staple at birthday feasts, embodying special meaning. The cake's presence at gatherings goes beyond taste; it's a culinary ritual that unites guests in shared enjoyment. As families and friends gather around the table, the Medovik is often the highlight, with its rich flavors and intricate construction sparking conversations and admiration. Crafting the Perfect Medovik Traditional Ingredients and Substitutes The classic Medovik, or Russian honey cake, is a symphony of simple yet distinctive ingredients. At its heart lies honey, which imparts a unique sweetness and aroma. Flour, eggs, and sour cream are also essential, forming the structural and creamy components of the cake. However, modern adaptations allow for a range of substitutes to cater to dietary preferences and availability. For those looking to experiment, here are some common substitutions: Honey: Maple syrup or molasses can be used for a different flavor profile. Flour: Gluten-free flour blends work well for a gluten-sensitive audience. Sour Cream: Greek yogurt or a plant-based alternative can replace sour cream for a lighter texture or to suit a dairy-free diet. While traditional recipes call for a meticulous layering process, innovative bakers have introduced shortcuts like the 'Lazy Medovik,' which simplifies the assembly without compromising taste. The Chocolate Medovik variation, for instance, adds a rich cocoa dimension to the honey layers and is often a crowd-pleaser. Step-by-Step Baking Process The process of baking Medovik is an art that requires patience and precision. Begin by preheating your oven to 175 degrees Celsius (350 degrees Fahrenheit) and lining a 25 cm (10 inch) baking dish with parchment paper. This ensures your cake layers will release easily after baking. Next, combine all ingredients in a mixer and blend until you achieve a smooth puree. Pour the mixture into the prepared dish and let it rest for about 10 minutes to allow air bubbles to escape. You can also tap the dish gently on a work surface to remove any trapped air. Bake the cake in the center of the oven for 18 to 22 minutes or until it turns a deep golden brown. It's crucial to keep an eye on it to prevent overbaking. Once done, let the sponge cake cool completely before cutting it into layers. If there's a dome on top, level it off to create an even surface. For the cream, beat sour cream, powdered sugar, and vanilla flavor until fluffy. If the sour cream is too runny, consider adding a thickener to achieve the right consistency. Optional ingredients like prunes and walnuts can be added for extra flavor and texture. Tips for Assembling the Layers Assembling a Medovik cake is an art that requires patience and precision. Begin by ensuring all your layers are cooled to room temperature before starting. This prevents the creamy icing from melting and helps maintain the structure of the cake. Start with the flattest layer as your base for a stable foundation. Spread an even layer of icing, about one-quarter inch thick, over each cake layer. Carefully align the next layer on top, pressing down gently to secure it. Continue stacking the layers, saving the most even and attractive layer for the top. Once all layers are assembled, apply a crumb coat and chill the cake to set the icing. Finish with a final layer of icing, smoothing it out for a clean, professional appearance. Remember, the goal is to create a cake that not only tastes delicious but also looks impeccable on the table. Innovative Twists on the Classic Medovik Lazy Medovik: A No-Roll Cake Alternative For those who crave the sweetness of Medovik but lack the time for its elaborate preparation, the 'Lazy Medovik' offers a delightful shortcut. This version forgoes the traditional rolling out of individual cake layers, instead opting for a single baked dough that emerges both tender and fluffy. The ingredients for the Lazy Medovik are readily available and the process is straightforward: butter - 170 g sugar - 100 g egg yolks - 4 pcs sour cream - 250 g honey - 300 g flour - 400 g cinnamon - 1 tsp baking soda - 1.5 tsp. This approach not only saves time but also reduces the complexity of the recipe, making it accessible for any occasion. Whether you're a seasoned baker or a novice in the kitchen, the Lazy Medovik is a testament to the versatility and enduring appeal of this beloved honey cake dessert. Flavor Infusions: From Lemon to Chocolate The versatility of Medovik allows for a delightful exploration of flavors, transcending the traditional honey taste. Incorporating various infusions into the cake layers or cream can transform the entire experience. For instance, adding lemon zest or a splash of lemon juice introduces a refreshing citrus note that cuts through the sweetness, while chocolate, whether in the form of cocoa powder or melted chocolate, offers a rich and indulgent twist. Lemon Zest: Adds a fresh and tangy flavor. Lemon Juice: Provides a subtle acidity to balance the sweetness. Cocoa Powder: Gives a deep chocolate flavor without excessive sweetness. Melted Chocolate: Creates a luxurious and creamy chocolate layer. Experimenting with these flavors not only caters to personal preferences but also introduces new dimensions to the classic Medovik. Whether you're a fan of the zesty tang of lemon or the comforting embrace of chocolate, there's a Medovik variation that's sure to satisfy. Decorative Ideas: Using Fruits and Edible Flowers The final flourish to a Medovik is its decoration, which can transform the cake into a stunning centerpiece. Fresh fruits and edible flowers offer a natural and vibrant touch that complements the honeyed layers of the cake. When selecting fruits, consider those that pair well with honey, such as figs, strawberries, and blueberries. These not only add a burst of flavor but also create a visually appealing contrast against the creamy custard layers. For an enchanting finish, edible flowers can be scattered across the cake. To elevate their appearance, you might want to make them sparkling sugared flowers, adding a touch of elegance and a subtle crunch. It's important to ensure that the flowers you choose are indeed edible and have not been treated with any chemicals. Remember, the decorations are not just for show; they should enhance the overall taste experience of the cake. Here's a simple guide to help you choose the right embellishments: Serving and Presentation Pairing Medovik with Beverages The rich and nuanced flavors of Medovik, Russia's beloved honey cake, call for thoughtful beverage pairings to enhance the dining experience. Tea, particularly black or herbal varieties, is a classic choice that complements the cake's sweetness and spice. For those who prefer coffee, a robust espresso or a creamy latte can provide a delightful contrast to Medovik's tender layers. When it comes to celebratory occasions, sparkling wines or dessert wines can elevate the cake to new heights. A semi-sweet sparkling wine balances the honey's sweetness, while a rich dessert wine can echo the cake's depth of flavor. Remember, the key to a successful pairing is balance; the beverage should neither overpower the cake nor be overshadowed by it. Experiment with different combinations to discover your perfect match. Plating Techniques for Visual Appeal The presentation of Medovik is just as important as its taste. A visually appealing plate can enhance the overall dining experience, making each slice of this honey-infused delicacy a feast for the eyes. Here are some techniques to ensure your Medovik stands out: Use a doily or a decorative charger plate to add elegance to the base. Employ a dusting of powdered sugar or cocoa powder for a touch of sophistication. Strategically place edible flowers or fresh berries around the cake for a pop of color. Drizzle honey or a fruit coulis on the plate for an artistic finish. When serving Medovik, consider the size and shape of the slice. A clean, sharp knife will ensure smooth edges, and a pie server can aid in transferring the piece to the plate without compromising its structure. For larger gatherings, pre-slicing the cake can expedite service while maintaining the aesthetic appeal. Storing and Keeping the Cake Fresh To maintain the freshness and moist texture of your Medovik, proper storage is key. Immediately after serving, ensure that any remaining cake is covered with plastic wrap or placed in an airtight container. This will prevent the layers from drying out and preserve the delicate honey flavor. For short-term storage, keep the Medovik in the refrigerator where it can stay fresh for up to 5 days. When refrigerating, place the cake on a silver wrapped cardboard to retain its shape and prevent any moisture from seeping in. If you're planning to savor the Medovik over a longer period, freezing is an excellent option. Wrap the cake layers individually in plastic wrap and then in aluminum foil before placing them in the freezer. Here's a quick reference for Medovik storage: Beyond the Cake: Honey-Infused Delights Honey-Based Desserts and Pastries The allure of honey extends far beyond the iconic Medovik, permeating a wide array of desserts and pastries that are sure to delight any sweet tooth. Honey's natural sweetness and depth of flavor make it an indispensable ingredient in many baked goods, offering a touch of warmth and richness that sugar alone cannot provide. From the sticky layers of a Baklava Monkey Bread to the delicate crumble of Honey-Butter Cookies, honey-infused desserts are a testament to the ingredient's versatility. Consider the following treats that have become favorites in many households: Cranberry Pie with Honey Meringue Lavender-Honey Lemon Tart Pistachio-Honey Cake with Berries and Cream Pear and Honey Galette Whether you're looking to impress guests or simply indulge in a homemade delight, these honey-based desserts are a perfect choice. They not only satisfy cravings but also offer a comforting reminder of the simple pleasures in life. Savory Dishes with a Touch of Honey While honey is often associated with sweetness, its unique flavor can also enhance savory dishes. Incorporating honey into savory recipes can add a subtle sweetness and depth of flavor that elevates the dish. Honey-glazed carrots: A simple side dish where the natural sugars caramelize to perfection. Honey mustard chicken: A classic combination that balances the tang of mustard with the smooth sweetness of honey. Honey balsamic vinaigrette: Ideal for dressing salads or as a marinade for meats. Experimenting with honey in savory dishes can lead to delightful surprises. Whether drizzled over roasted vegetables or used as a glaze for grilled meats, honey can transform an ordinary meal into something truly special. Remember to adjust the amount of honey based on the other flavors in the dish to achieve the perfect balance. Homemade Honey Treats and Gift Ideas Creating homemade honey treats is a delightful way to share the sweetness of honey with friends and family. Honeycomb candy is a particularly popular choice, known for its light, airy texture and rich honey flavor. This treat can be made without corn syrup, relying solely on the natural sweetness of honey, such as clover honey, to achieve its signature taste. Beyond candy, consider crafting a variety of honey-infused delights. Here are a few ideas to get you started: Honey lemon madeleines, a perfect blend of citrus and sweetness Spicy honey pudding, adding a warm twist to a classic dessert Honey coffee cake, a vegetarian-friendly option for a cozy morning Remember, these honey treats are not just delicious but also make thoughtful gifts. Whether it's for a holiday, a special occasion, or just because, a homemade honey treat is a gift that's as sweet as it is heartfelt. Conclusion The Russian Honey Cake, or Medovik, is a delightful dessert that embodies the rich culinary traditions of Russia. With its luscious layers of honey-infused sponge and creamy custard filling, it's no wonder that this cake has become a beloved treat across the globe. Whether you opt for the classic version, with its intricate layers and delicate balance of flavors, or the 'lazy' Medovik that simplifies the process without compromising on taste, this cake is sure to impress. The versatility of Medovik allows for various interpretations, from chocolate cream to fresh fruit toppings, making it a perfect centerpiece for any occasion. As we've seen through the vivid images and descriptions, the Russian Honey Cake is not just a dessert; it's a celebration of culture, tradition, and the simple joy of baking. So, the next time you're looking to indulge in something sweet, consider the timeless elegance of Medovik, and let each bite take you on a journey through the heart of Russia's pastry heritage. Frequently Asked Questions What is Medovik and why is it special? Medovik is a traditional Russian honey cake known for its rich layers of honey-flavored dough and sweet cream filling. It's special because of its unique taste, historical significance, and the role it plays in Russian celebrations. Can I substitute any ingredients when making Medovik? Yes, some ingredients can be substituted in the recipe. For example, if you don't have sour cream, you can use thick yogurt or a mixture of heavy cream and lemon juice to mimic the tangy flavor. How many layers does a classic Medovik cake have? A classic Medovik typically has anywhere from 5 to 10 thin, soft layers, but some variations may have more or fewer layers depending on the recipe or personal preference. What are some popular variations of Medovik? Popular variations include the addition of different flavors such as lemon or chocolate, as well as decorative elements like fruits and edible flowers. There's also a 'lazy' version that doesn't require rolling out multiple layers. How should Medovik be stored to keep it fresh? Medovik should be stored in an airtight container in the refrigerator. It can be kept for several days and often tastes better after the flavors have had time to meld. Are there any non-dessert dishes that use honey as a key ingredient? Yes, honey can be used in savory dishes to add a touch of sweetness. It's often used in glazes for meats, in salad dressings, or to enhance the flavor of sauces and marinades.
- "Step-by-Step Guide to Making the Perfect Kransekake for Your Norwegian Wedding"
The Kransekake, often seen towering at Norwegian weddings, is more than just a cake; it is a symbol of celebration and cultural heritage. This traditional confection, with its distinctive ringed tower shape, is a centerpiece at many special occasions, particularly weddings. It's not only a treat for the taste buds but also a feast for the eyes, reflecting the artistry and tradition of Norwegian baking. This article delves into the rich history and customs surrounding Kransekake, offers guidance on how to create the perfect cake, and explores its significance beyond the realm of weddings. Key Takeaways Kransekake is an iconic Norwegian wedding cake, symbolizing celebration and heritage, with its origins deeply rooted in Scandinavian culture. The cake is crafted from concentric almond-based rings stacked to form a tower, which requires specific baking equipment such as Kransekake formers made by brands like Høyang of Norway. Vintage Kransekake baking tools are sought after for their quality and nostalgia, adding a touch of authenticity to the baking experience. Kransekake is not exclusive to weddings; it can be customized and adapted for various celebrations, often paired with Norwegian delicacies or integrated into international cuisines. Authentic Kransekake can be purchased from specialized sellers who may offer customization, and proper storage and serving tips are essential for preserving its quality. The Tradition of Kransekake Origins and Cultural Significance The Kransekake, often seen towering over tables at Norwegian celebrations, is much more than a cake; it is a symbol of festivity and heritage. Its origins trace back to the 18th century, where it was reserved for the most special occasions. Over time, the Kransekake has become a staple at Norwegian weddings, embodying the country's rich culinary traditions. One of the most cherished customs involves the bride and groom lifting the top layer of the cake at their wedding. The number of cake rings that stick to the top layer is said to predict the couple's future together. This act is not only a fun moment but also a nod to the communal spirit and optimism that characterize Norwegian celebrations. While the Kransekake is a showstopper at weddings, its presence is also felt during other significant events such as Christmas and National Day, showcasing its versatility and the affection Norwegians hold for this confectionary masterpiece. Kransekake in Norwegian Weddings The Kransekake, often the centerpiece of Norwegian wedding receptions, is much more than a cake; it's a symbol of celebration and togetherness. Traditionally, the couple breaks the top ring of the cake to signify the start of their shared life. The number of rings can also reflect the couple's aspirations, with each layer representing a year of happiness. The top ring is broken by the couple. Each layer can symbolize a year of happiness. Often served with coffee or dessert wine. While the cake is a staple at weddings, its presence is not limited to these events. It is also a festive treat at national holidays, confirming its status as a cherished cultural icon. Symbolism and Customs The Kransekake stands tall at Norwegian celebrations, embodying more than just its sweet almond layers. Each ring of the cake represents a layer of life, a testament to the couple's future together. As guests break off pieces, they symbolically partake in the couple's journey, wishing them strength and unity. Traditionally, the top tier of the Kransekake is saved for the couple's first anniversary, echoing the custom of preserving wedding cake in other cultures. This act is a nod to the endurance of marriage and the sweetness of the life they will share. The Kransekake is often adorned with Norwegian flags, ribbons, and sometimes even small ornaments like the popular wedding gonks, which add a personalized touch to the celebration. As the star of New Year's Eve & weddings, the Kransekake's presence is a beacon of good fortune, with each ascending ring aspiring to the heights of happiness and prosperity in the year to come. Crafting the Perfect Kransekake Ingredients and Recipe The foundation of a traditional Kransekake is a deceptively simple dough, combining the delicate flavors of almonds with the sweetness of sugar and the richness of egg whites. The key to its unique texture lies in the precise ratio of these ingredients. To begin crafting your own Kransekake, you'll need the following ingredients: 500g ground almonds 500g powdered sugar 3-4 egg whites 1 teaspoon almond extract (optional for enhanced flavor) Once you have your ingredients ready, the process involves mixing the ground almonds and powdered sugar, then gradually adding the egg whites until a firm dough forms. If desired, almond extract can be added for an extra hint of flavor. The dough should then be chilled before shaping and baking to ensure it holds its form. Step-by-Step Baking Guide After mastering the ingredients and recipe, the next step is to embark on the baking journey. The process requires patience and precision to ensure that each ring of the Kransekake is perfectly baked. It's important to note that not all sides of the pieces will be able to fit into the oven at once, so multiple rounds of baking will be required. This can be a time-consuming step, but the result is well worth the effort. Once the rings are baked and cooled, the assembly begins. This is where your Kransekake starts to take its traditional tower shape. Carefully stack the rings from largest to smallest, using a white icing that acts as both glue and decoration. The icing should be applied with precision, as it plays a crucial role in the structural integrity of the cake. Decorating and Assembling Techniques Once your Kransekake rings are baked to perfection, the art of decorating and assembling becomes the centerpiece of attention. Begin by ensuring that each ring is cooled completely before you start the assembly process. A traditional Kransekake stands tall, with each ring decreasing in size as it ascends. To assemble, start with the largest ring at the base and carefully stack the smaller rings on top, using a white icing that acts as both an adhesive and a decorative element. The icing should be of a firm consistency to hold the rings together effectively. For a festive look, consider adorning the cake with edible flowers or ribbons that complement the occasion. The Kransekake should be served by lifting off each ring, starting from the top, allowing guests to break off pieces of the delicious almond pastry. Kransekake Baking Equipment Essential Tools and Pans To create the iconic Kransekake, certain specialized tools and pans are indispensable. The foundation of this towering dessert is a set of graduated steel rings, which are used to shape the individual layers of the cake. These rings often come in a set designed for creating an 18-layer wedding cake, a traditional number symbolizing prosperity and good fortune. When selecting your Kransekake baking set, you may encounter options such as nonstick or aluminum finishes. Each material has its own benefits, with nonstick surfaces offering easier release of the cake rings, while aluminum pans provide even heat distribution. It's important to consider the quality and condition of these tools, as they can greatly affect the outcome of your cake. Prices for these essential baking sets can vary, but investing in a good quality set is crucial for Kransekake success. Remember, the tools you choose will become a part of your baking tradition, passed down through generations of celebrations. Vintage and Modern Kransekake Formers The art of making Kransekake bridges the gap between tradition and modernity, with formers that range from vintage treasures to contemporary designs. Vintage Kransekake formers, often found in original boxes, are cherished for their history and craftsmanship. Made by renowned manufacturers like H\u00f8yang of Norway, these aluminium rings are sometimes coated with non-stick material and can be a collector's delight, despite the wear and tear on their packaging. Modern formers, on the other hand, offer convenience and innovation, with features that cater to the needs of today's bakers. Whether you're a seasoned professional or a home baking enthusiast, the choice of former can add a unique touch to your creation. When considering a purchase, it's essential to assess the condition of vintage formers and the features of modern ones. Here's a quick guide to help you make an informed decision: Vintage Formers: Check for material (usually aluminium), non-stick coating, and overall condition. Original packaging adds to the value but may show signs of age. Modern Formers: Look for ease of use, durability, and compatibility with your baking setup. Additional features like adjustable sizes or decorative patterns can enhance your experience. Whether you opt for a piece of history or a modern tool, the Kransekake former you choose will become an integral part of your baking tradition. Care and Maintenance of Baking Equipment Proper care and maintenance of your Kransekake baking equipment are essential for ensuring longevity and consistent baking results. Always clean the pans thoroughly after each use to prevent any buildup of dough or grease, which can affect the taste and texture of your Kransekake. To maintain the quality of your baking pans, follow these simple steps: Wash with warm, soapy water and a soft sponge to avoid scratching the surface. Dry immediately with a soft cloth to prevent rusting, especially if the pans are made of metal. Store in a dry place to avoid any moisture that could lead to rust or mold. Occasionally, apply a thin coat of oil to condition the pans if they are made of cast iron or have a non-stick coating. Kransekake Beyond Weddings Variations for Other Celebrations While the Kransekake is a showstopper at weddings, its adaptability makes it a festive centerpiece for a variety of other occasions. Norwegians often serve Kransekake during major celebrations, such as Christmas, National Day (17th of May), and anniversaries, each time with a twist to match the event's theme. For Christmas, the rings might be decorated with green and red icing, and small Norwegian flags or sprigs of fir can adorn the layers. On National Day, the cake becomes a patriotic symbol, often featuring ribbons and miniature flags in the colors of the Norwegian flag. Anniversaries might see personalized decorations, such as numbers denoting the years or even miniature figures resembling the couple. Beyond personal celebrations, Kransekake also finds its place in corporate events and cultural festivals, where it can be scaled up to serve large crowds or designed to reflect corporate branding or festival themes. The cake's structure lends itself well to being a canvas for edible art, making it a beloved tradition that transcends its wedding roots. Pairing with Norwegian Delicacies The Kransekake, with its delicate almond flavor, is a versatile centerpiece that pairs wonderfully with a variety of Norwegian delicacies. To truly savor the Kransekake experience, consider enjoying it alongside traditional Norwegian brown cheese. The sweet and slightly tangy taste of the cheese complements the cake's nutty profile, creating a harmonious blend of flavors. Norwegian brown cheese, or 'brunost,' is often served with accompaniments that enhance its unique flavor. A popular way to enjoy brunost is with: Lingonberry jam Sour cream Crispbread These pairings not only add a delightful contrast to the dense texture of the Kransekake but also introduce a symphony of sweet, tart, and creamy notes to the palate. For a festive touch, you can also include a selection of Norwegian folk art-inspired tableware to elevate the presentation of these pairings. Incorporating Kransekake in International Cuisines The Kransekake stands as a testament to the versatility of traditional desserts when they cross borders. This Norwegian delight has found its way into various international cuisines, often serving as a centerpiece at multicultural events. Chefs and home bakers alike have embraced the challenge of integrating this Scandinavian treat into their own culinary traditions. Incorporating Kransekake into international dishes involves a blend of creativity and respect for the cake's origins. Here are a few ways to adapt the Kransekake for different palates: Fusion Desserts: Combining elements of Kransekake with other popular desserts, such as layering it with matcha-flavored cream or drizzling it with a mango coulis. Thematic Decorations: Adorning the Kransekake with colors and motifs that reflect the theme of an international celebration, like using red, white, and green for an Italian-themed party. Flavor Twists: Infusing the almond dough with spices or extracts popular in other countries, such as cardamom for an Indian-inspired version or vanilla bean for a French touch. As the world becomes more interconnected, the Kransekake continues to be a symbol of celebration and unity, bringing a slice of Norwegian heritage to tables around the globe. Purchasing and Preserving Kransekake Where to Buy Authentic Kransekake For those looking to purchase an authentic Kransekake, there are several options available. Nichole's Fine Pastry offers a traditional Scandinavian celebration cake, the Kransekake 18 ring, which is a staple for festive occasions. This cake is composed of 18 graduated concentric rings of chewy almond macaroon, stacked and piped with royal icing, embodying the essence of Scandinavian baking traditions. When selecting a Kransekake, it's important to consider the seller's reputation. Star Sellers, for instance, have a proven track record of excellence, earning consistent 5-star reviews and providing outstanding customer service. These sellers often accept returns and exchanges, adding an extra layer of confidence for the buyer. For those interested in the craft of baking their own Kransekake, vintage cake formers made in Norway are available for purchase. These formers, often made of aluminium with non-stick surfaces, come in complete sets of 18 rings and are essential for creating the traditional tower shape. While the forms are typically in very good condition, the original packaging may show signs of wear, which is common for vintage items. Customization and Personal Touches The beauty of a Kransekake lies not only in its taste but also in its ability to be personalized for the couple's special day. Customization can range from the choice of colors to the addition of unique decorations that reflect the couple's personality or wedding theme. For instance, a touch of whimsy can be added with a nice lilac color, some flowers, or patterns that resonate with the couple's style. Here are some popular customization options for Kransekake: Color schemes to match the wedding palette Edible flowers for a natural, romantic touch Monograms or initials piped onto the rings Themed decorations, like nautical or rustic accents Special toppers, such as figurines or a representation of the couple Remember, the goal is to make your Kransekake as unique as your love story. By adding these personal touches, your wedding cake will not only be a delicious centerpiece but also a memorable symbol of your union. Storing and Serving Tips Proper storage of Kransekake is essential to maintain its freshness and structural integrity. Keep the cake in an airtight container at room temperature to prevent it from drying out. For longer preservation, wrap individual rings in cling film and store them in the refrigerator for up to a week. When serving Kransekake, it's important to follow the traditional method: Begin at the top and gently break off a ring. Continue downwards, ensuring each guest receives a piece. Pair with coffee or sweet dessert wine for an authentic Norwegian experience. Conclusion The Kransekake, with its distinctive tower of concentric rings, stands as a proud symbol of Norwegian culture and culinary tradition, particularly at weddings. This almond-flavored delight is not only a feast for the taste buds but also a centerpiece that adds a touch of Scandinavian elegance to any celebration. The availability of vintage baking forms and the cherished memories shared by those who have included Kransekake in their special day underscore its enduring appeal. Whether it's for a wedding, Christmas, or any festive occasion, the Kransekake remains a beloved treat that embodies the warmth and craftsmanship of Norwegian heritage. Frequently Asked Questions What is the significance of Kransekake at Norwegian weddings? Kransekake, often served at Norwegian weddings, is a symbol of celebration and good fortune. It represents the layers of life and the sweetness of marriage. Its tower-like structure is also seen as a symbol of the couple's future prosperity. Can Kransekake be used for celebrations other than weddings? Yes, Kransekake is versatile and can be adapted for various celebrations such as Christmas, anniversaries, and national holidays like Norway's Constitution Day on May 17th. What are the essential tools for making a Kransekake? The essential tools include Kransekake baking rings or formers, typically made of metal, and a piping bag for the icing. Some bakers also use non-stick spray or parchment paper to ensure the rings release easily. Where can I buy an authentic Kransekake? Authentic Kransekake can be purchased from Scandinavian bakeries, specialty stores, or online shops that offer Norwegian delicacies. Some sellers may also provide customization options for special occasions. How do I store and serve Kransekake? Kransekake should be stored in an airtight container to keep it fresh. Serve it by breaking off rings from the bottom, allowing guests to take a piece easily. Can I add personal touches to a Kransekake? Absolutely! Personal touches such as custom decorations, incorporating specific colors to match the event theme, or adding cake toppers can make your Kransekake unique and memorable.
- "Uncover the Secret to Making the Perfect Sachima (Chinese Fluffy Cake) at Home!"
Sachima, a beloved Chinese fluffy cake, is a traditional snack with a rich cultural heritage and a variety of regional interpretations. This article dives into the history, art, and culinary creativity behind sachima, exploring everything from its origins to modern adaptations. Alongside sachima, we also unravel the delights of Wife Cakes, another classic Chinese pastry that pairs wonderfully with sachima. Whether you're a seasoned baker or a curious foodie, this guide will equip you with the knowledge to appreciate and craft these delectable treats. Key Takeaways Sachima is a traditional Chinese pastry that has evolved with regional variations, incorporating different flavors and ingredients while maintaining its signature fluffy texture. Authentic sachima making is an art that requires a precise balance of ingredients and technique, with expert tips available to help achieve the perfect chewy and flaky consistency. Innovative fillings such as red bean, yam, lotus seed, and various sweet pastes offer a delightful range of flavors for those looking to experiment beyond the classic sachima. Wife Cakes, also known as Sweetheart Cakes, are a flaky and chewy pastry with a sweet bean paste center, often served as a complement to sachima. Understanding the cultural significance and the meticulous process of preparing these pastries enhances the appreciation for sachima and Wife Cakes as more than just desserts, but as storied elements of Chinese cuisine. Exploring the Origins and Variations of Sachima The Traditional Chinese Sachima Recipe Sachima, a beloved Chinese pastry, is a symphony of simple ingredients coming together to create a fluffy and sweet treat. The key to authentic Sachima lies in the delicate balance of its water dough and oil dough, which when combined, yield the pastry's signature layers and texture. The water dough is typically made from a mixture of all-purpose flour, water, and lard, while the oil dough also incorporates flour and lard. The traditional filling of sweet bean paste adds a rich and smooth contrast to the crisp layers. For those looking to customize their Sachima, the garnish is a place for creativity. A sprinkle of white sesame seeds can add a nutty taste and a light crunch, though black sesame seeds are a stronger alternative. Whether you choose to garnish or not, the essence of Sachima remains in its layered, fluffy texture and sweet filling. Regional Twists on the Classic Fluffy Cake Sachima, while rooted in tradition, has been adapted across various regions, each adding its own unique spin to the classic treat. The art of achieving the flaky layers is a testament to the skill involved in making regional variations of Sachima. In some areas, the addition of local ingredients transforms the flavor profile of Sachima. For instance: Yam paste Lotus seed paste Purple sweet potato paste Black sesame paste Taro paste Mung Bean Paste Candied winter melon These fillings not only diversify the taste but also the cultural significance of the dessert. The technique of rolling the combined water and oil dough, flattening, and rolling again is crucial for creating the desired flakiness that characterizes a well-made Sachima. The versatility of Sachima is evident in its ability to incorporate various flavors and textures, making it a beloved dessert that reflects the diversity of Chinese culinary traditions. Understanding the Significance of Sachima in Chinese Culture Sachima is more than just a sweet Chinese pastry; it represents a rich cultural heritage and is a staple in Chinese snack cuisine. Often consumed as a snack, this deep-fried combination of batter and sugar syrup has found its way into the hearts of many, transcending its origins to become a beloved treat across various regions. While sachima is enjoyed throughout the year, its presence is particularly notable during special occasions, where it serves as a symbol of sweetness and joy. The versatility of sachima allows for numerous regional variations, each telling a story of local flavors and traditions. Here is a list of other popular Chinese desserts and snacks that often accompany sachima: Chinese Sachima Soft Flour Pastry Cake Shaobing (Flaky Chinese Sesame Flatbread) Taro Snow Skin Mooncake With Cheese Peanut Mochi Sprinkled With Coconut Powder Nian Gao (Chinese New Year Rice Cake) Steamed Salted Egg Yolk Buns (Liu Sha Bao) Red Bean Cake Oven-Baked Red Bean Bread Mastering the Art of Sachima Making Essential Ingredients for Authentic Sachima To create the traditional sachima, a selection of key ingredients is required. Flour is the foundation, providing the structure for the fluffy cake. A specific water-to-flour ratio of 1:3 is crucial for achieving the right dough consistency. For the fat component, lard is traditionally used, imparting a distinct richness to the pastry. However, it can be substituted with alternatives like vegetable shortening or unsalted butter for different dietary preferences. The garnish plays a significant role in adding both flavor and texture to sachima. While optional, sesame seeds are a popular choice, offering a nutty taste and a light crunch. They can be either white or black, with the latter providing a more potent flavor. If sesame seeds are not available, they can be omitted without significantly altering the essence of the cake. Here is a list of the essential ingredients for authentic sachima: Flour Water Lard (or alternative fats) Sesame seeds (optional for garnish) Step-by-Step Guide to Crafting the Perfect Sachima Crafting the perfect Sachima is an art that requires precision and patience. The key to a successful Sachima lies in the texture of the dough; it should be light and fluffy, yet hold its shape when cut into pieces. Here's a simplified guide to help you master the process: Prepare the water dough and oil dough using the right proportions of flour and lard. Knead each dough separately until smooth, then allow them to rest. Roll out the water dough, encase the oil dough within it, and fold to create layers. Shape and assemble the dough, ensuring even distribution of the filling. Bake at the correct temperature for a precise time to achieve a golden hue and the desired flakiness. While the steps above provide a basic framework, achieving the ideal texture can be tricky. It's important to handle the dough gently and to bake it until it's just right—not too soft and not too crispy. Experiment with baking times and temperatures to find the perfect balance for your oven. Expert Tips for Achieving the Ideal Texture Achieving the perfect texture for Sachima is an art that requires precision and patience. The dough's consistency is crucial; it should be soft yet non-sticky, and able to hold its shape when formed into a ball. To ensure this, using a kitchen weighing scale for accurate measurements is recommended over cups, as it guarantees the ideal pliable dough texture. For an added touch, consider garnishing your Sachima. White sesame seeds can provide a nutty taste and a light crunch, enhancing both flavor and texture. While this step is optional, it can elevate the overall sensory experience of the dessert. Delicious Fillings and Flavor Combinations Classic Red Bean Paste Filling The heart of any sachima is its filling, and the classic red bean paste is a staple in this traditional dessert. Made from adzuki beans, this filling is known for its smooth texture and sweet flavor, which complements the fluffy cake perfectly. To achieve the best quality, the beans are soaked, boiled, and then blended into a fine paste. They are further cooked with sugar and oil to reach the desired consistency. For those who prefer homemade fillings, creating your own red bean paste can be a rewarding experience. Here's a simple list of steps to make it from scratch: Soak the adzuki beans overnight. Boil the beans until soft. Blend the beans into a paste. Cook the paste with sugar and oil until pasty. Remember, a large batch of red bean paste can be versatile, allowing you to explore other delicious treats like red bean buns, mochi, and red bean bread. Exploring Alternative Sachima Fillings While the classic red bean paste is a staple in Sachima, there's a world of alternative fillings that can transform this fluffy cake into a new delight with each variation. Experimenting with different fillings can lead to exciting flavor profiles that cater to a wide range of palates. Yam paste Lotus seed paste Purple sweet potato paste Black sesame paste Taro paste Mung Bean Paste Candied winter melon Each of these fillings offers a unique taste and texture, providing an opportunity to customize Sachima to individual preferences or seasonal ingredients. For instance, the earthy sweetness of yam paste or the nutty richness of black sesame can offer a delightful contrast to the light, airy texture of the cake. Remember, the key to a successful Sachima is not just the technique, but also the quality of the filling. Whether you opt for the creamy smoothness of lotus seed paste or the subtle sweetness of candied winter melon, each choice can elevate the humble Sachima to a gourmet experience. Pairing Sachima with Other Chinese Desserts Sachima, with its sweet and fluffy texture, is a versatile dessert that pairs wonderfully with a variety of Chinese treats. To create a delightful dessert platter, consider including Sachima alongside other traditional Chinese desserts. A popular choice is the festive Snow Skin Mooncake, which offers a soft and chewy contrast to Sachima's crispiness. Another excellent companion is the Steamed Salted Egg Yolk Buns, known as Liu Sha Bao, which provide a savory balance to the sweetness of Sachima. For those who enjoy a bit of crunch, the Flaky Chinese Sesame Flatbread, or Shaobing, makes for a great addition. And for a touch of richness, the Peanut Mochi sprinkled with Coconut Powder can round out the dessert experience. Here's a simple list to inspire your next dessert pairing: Snow Skin Mooncake with Cheese Steamed Salted Egg Yolk Buns (Liu Sha Bao) Flaky Chinese Sesame Flatbread (Shaobing) Peanut Mochi with Coconut Powder Remember, the key to a successful pairing is to complement the flavors without overwhelming the palate. Explore these combinations to discover your favorite way to enjoy Sachima with other Chinese desserts. Wife Cakes: A Delightful Companion to Sachima The Story Behind Wife Cakes (Sweetheart Cakes) Wife cakes, also known as sweetheart cakes or lao po bing in Mandarin, are a beloved Chinese pastry with a rich cultural history. The name itself is shrouded in folklore; some believe the cake was created by a husband to buy back his wife from slavery, while others attribute its invention to the wives of soldiers who made them as a parting gift when their husbands went to war. The pastry is renowned for its flaky crust and sweet filling, often made with red bean paste. It's a traditional accompaniment to hot tea or coffee, perfect for any occasion. The dual-layered dough, comprising water and oil components, gives the wife cake its characteristic chewy yet flaky texture. Enjoying wife cakes is a sensory experience, from the delightful aroma to the satisfying crunch. They are a testament to the skillful art of Chinese pastry making and a cherished part of culinary heritage. How to Prepare and Bake Wife Cakes Preparing and baking Wife Cakes, also known as Sweetheart Cakes, is a delightful experience that combines traditional techniques with the simple joy of baking. The process involves creating two distinct layers of dough: water dough and oil dough, which together yield the cake's signature flaky texture. The oil dough layer, made from a lard-to-flour ratio of 1:2, is crucial for achieving the flakiness of the cake. To begin, you'll need to knead both types of dough, allow them to rest, and then carefully shape and assemble them before adding the sweet red bean paste filling. Once assembled, the cakes are flattened, brushed with beaten egg yolk, and adorned with a sprinkle of sesame seeds. Here's a simplified guide to the baking process: Preheat the oven to 350°F (175°C). Place the cakes on a baking tray lined with parchment paper. Gently press the cakes to about 1 cm thickness. Brush the tops with egg yolk. Make three cutouts on each cake and sprinkle with sesame seeds. Bake for 20 minutes, then allow the cakes to cool in the oven to prevent them from collapsing. Serving Suggestions for Wife Cakes and Sachima Pairing the right beverage or dessert with Wife Cakes and Sachima can elevate the entire tasting experience. Enjoy the delightful aroma and flaky texture of Wife Cakes with a hot cup of tea or coffee, which complements the sweetness and richness of these pastries. For a refreshing twist, consider a cold drink like hand-brewed lychee tea with lemon, taro bubble milk tea, or winter melon tea. For those who enjoy a hands-on approach, here are some serving suggestions: Arrange Sachima and Wife Cakes on a platter with a variety of teas for guests to choose from. Offer a selection of spreads or dips, such as sweetened condensed milk or fruit preserves, to add another layer of flavor. For a festive touch, garnish the platter with edible flowers or a dusting of powdered sugar. Conclusion Exploring the delightful world of Chinese pastries through the lens of Sachima and its counterparts has been a journey of both taste and tradition. From the flaky layers of Wife Cakes to the rich, sweet fillings of red bean bread, each recipe offers a unique window into the vast array of flavors and textures that Chinese cuisine has to offer. Whether you're a seasoned baker or a curious foodie, the versatility of these treats—from the choice of fillings like yam or lotus seed paste to the use of different fats for the perfect dough—ensures that there's always something new to try. So preheat your oven, gather your ingredients, and get ready to indulge in the art of Chinese pastry making, where every bite tells a story of culture, history, and culinary craftsmanship. Frequently Asked Questions What is Sachima? Sachima is a traditional Chinese pastry that is sweet and fluffy, often compared to a cake or a bar. It's made from a dough that is fried and then coated in a syrup, creating a texture that is both chewy and crispy. What are the key ingredients for making authentic Sachima? Authentic Sachima typically includes flour, eggs, sugar, and maltose syrup. Some recipes might also use butter or lard for richness and leavening agents to achieve the fluffy texture. How do regional variations of Sachima differ? Regional variations of Sachima can differ in terms of added flavors, textures, and shapes. Some regions may incorporate nuts, seeds, or local ingredients to create unique versions of this classic pastry. Can you suggest any other Chinese desserts to try alongside Sachima? Certainly! Some popular Chinese desserts to enjoy with Sachima include Taro Snow Skin Mooncake with Cheese, Peanut Mochi Sprinkled with Coconut Powder, Nian Gao, and Steamed Salted Egg Yolk Buns (Liu Sha Bao). What is a Wife Cake and how does it relate to Sachima? Wife Cake, also known as Sweetheart Cake, is a traditional Chinese pastry with a flaky crust and sweet filling, usually red bean paste. It is a delightful companion to Sachima, often enjoyed together for their contrasting textures. Are there any expert tips for achieving the perfect Sachima texture? For the perfect Sachima texture, it's important to carefully control the frying time and temperature, and to ensure the syrup is at the right consistency. Using the correct ratio of water to flour and choosing the right type of fat, like lard or butter, can also make a big difference.
- "Exploring the History and Recipe of the Prinzregententorte: The Story Behind Prince Regent Cake"
The Prinzregententorte, or Prince Regent Cake, is a sumptuous Bavarian treat that has delighted taste buds for generations. With its rich history, intricate layers of sponge cake and chocolate buttercream, and a glossy chocolate glaze, this dessert is not just a cake but a regal experience. The Prinzregententorte's complexity in both flavor and structure has made it a beloved centerpiece for special occasions and a testament to the art of fine baking. In this article, we'll explore the multifaceted aspects of the Prince Regent Cake, from its storied past to the techniques that make it a modern-day masterpiece. Key Takeaways Prinzregententorte is a traditional Bavarian cake known for its multiple thin layers of sponge cake and rich chocolate buttercream. The cake's origin is linked to Prince Regent Luitpold of Bavaria and has evolved to become a symbol of celebration in German culture. Mastering the Prinzregententorte requires precision in crafting the delicate sponge layers and achieving the perfect balance of flavors. The cake's presentation is elevated by the addition of apricot jam and a smooth chocolate glaze, making it a showstopper dessert. Exploring similar desserts reveals a broader European cake tradition, inspiring bakers to try variations and seasonal adaptations. The History and Significance of Prinzregententorte Origins of the Prince Regent Cake The Prinzregententorte is a regal dessert that has its roots in the rich history of Bavaria. Named after Prince Regent Luitpold, the cake was first created in 1894 and quickly became a symbol of Bavarian pride and craftsmanship. This multi-layered cake is not only a culinary masterpiece but also a historical emblem, reflecting the grandeur of the era in which it was born. While the exact origin story is shrouded in the mists of time, it is widely believed that the cook of King Ludwig II of Bavaria was the mastermind behind this exquisite creation. The cake's popularity soared, and it soon joined the ranks of the most famous chocolate cakes in the world, celebrated for its delicate sponge layers and rich chocolate buttercream. Here is a brief timeline highlighting the key milestones in the history of the Prinzregententorte: 1894: Creation of the Prinzregententorte Early 1900s: Rise in popularity across Bavaria Mid-20th century: Recognition as a Bavarian cultural icon Present day: Enjoyed worldwide and remains a symbol of Bavarian tradition Cultural Impact and Celebrations The Prinzregententorte is more than just a cake; it's a symbol of Bavarian pride and craftsmanship. Its presence at celebrations and festivals underscores its cultural significance. The cake is often associated with lavishness and is a staple at important events, reflecting the region's rich traditions. The cake is traditionally served at significant Bavarian state events. It is also popular during Oktoberfest, where its layers represent the finesse of German baking. Family celebrations, such as birthdays and anniversaries, often feature the Prinzregententorte as a centerpiece. Evolution of the Recipe Over Time The Prinzregententorte has undergone a remarkable transformation since its inception. Initially, the cake was a symbol of opulence, featuring fewer but thicker layers. Over time, bakers have refined the technique, resulting in the modern iteration with up to eight delicate sponge layers, each representing one of the regions of Bavaria during Prince Regent Luitpold's reign. The filling, too, has seen changes. While the original recipes called for simple creams, contemporary versions use a rich chocolate buttercream that offers a luxurious taste and texture. The addition of apricot jam as a layer and a chocolate glaze topping are relatively recent innovations that have become standard in the recipe. Early versions: Fewer, thicker layers Mid-20th century: Introduction of chocolate buttercream Late 20th century: Addition of apricot jam Present-day: Up to eight thin sponge layers with chocolate glaze Decoding the Layers of Flavor The Art of Crafting Thin Sponge Layers The foundation of a Prinzregententorte lies in its delicate, thin sponge layers that create a harmonious balance with the rich fillings. Achieving the perfect thinness requires a steady hand and a watchful eye during baking. Here's a simple guide to ensure your sponge layers are uniform and airy: Begin with room temperature ingredients to ensure a smooth batter. Whisk the eggs and sugar until they reach a ribbon stage for optimal aeration. Sift the flour to prevent lumps and fold gently into the egg mixture to maintain airiness. Spread the batter evenly in the pan using an offset spatula for consistent thickness. Bake each layer just until done to avoid drying out the sponge. Remember, the goal is to create a cake that not only tastes exquisite but also displays the craftsmanship of the baker. As aBatteredOldSuitcase suggests, the Prinzregententorte's very thin layers of sponge are essential to its perfection, especially when paired with chocolate custard and coated with shiny chocolate ganache. Chocolate Buttercream: A Rich Filling The heart of the Prinzregententorte lies in its sumptuous chocolate buttercream, a filling that elevates the cake to regal status. Each layer of sponge is enrobed in this rich cream, creating a harmonious balance of textures. The buttercream itself is a marvel of confectionery skill, requiring precise technique to achieve its silky smoothness. Begin with high-quality cocoa powder for a deep chocolate flavor. Cream the butter until it's pale and fluffy before gradually adding powdered sugar. Incorporate melted chocolate that has been cooled to room temperature. For a lighter texture, some bakers fold in whipped cream. Crafting the perfect buttercream is essential, as it must not overpower the sponge layers but rather act as a connector, enhancing the overall flavor profile of the cake. A Bavarian specialty dessert, the Prinzregententorte's reputation for smoothness and indulgence is largely attributed to this chocolatey embrace. The Final Touch: Apricot Jam and Chocolate Glaze The crowning glory of the Prinzregententorte is its glossy chocolate glaze, a visual and flavorful delight that seals the layers of sponge and buttercream. The application of apricot jam beneath the glaze not only adds a subtle fruitiness but also acts as an adhesive, ensuring that the chocolate sets perfectly on the cake. To achieve the ideal consistency and shine, the chocolate glaze should be carefully tempered and then poured over the cake, which has been chilled to set the buttercream. Here's a simple guide to applying the final touches: Warm the apricot jam until it becomes spreadable. Brush a thin layer of jam over the chilled cake. Prepare the chocolate glaze and pour it over the cake, using a spatula to smooth it out. Allow the glaze to set before serving. Baking the Perfect Prinzregententorte Essential Ingredients and Substitutions The Prinzregententorte is a classic German cake known for its multiple layers and rich flavors. Creating this cake requires precision, especially when it comes to its essential ingredients. Flour, eggs, sugar, and butter form the base of the sponge layers, while chocolate and cream are pivotal for the buttercream. However, dietary restrictions or availability issues may necessitate substitutions. For those looking to adapt the recipe, here are some common swaps: All-purpose flour can be replaced with a gluten-free blend for those with gluten sensitivities. Dairy-free margarine can stand in for butter in both the sponge and the buttercream for a lactose-free version. A high-quality dark chocolate is recommended for the buttercream, but in a pinch, cocoa powder mixed with a little extra butter can work. Remember, the key to a successful Prinzregententorte lies not only in the ingredients but in the method of preparation. Take your time to ensure each layer is even and the buttercream is smooth for the best results. Step-by-Step Baking Guide Assembling and decorating a Prinzregententorte can be a delightful challenge. Begin by preparing the thin sponge layers, ensuring each one is baked to golden perfection. Once cooled, stack them with a generous spread of chocolate buttercream between each layer. Following the buttercream, a thin layer of apricot jam adds a subtle tartness that complements the chocolate's richness. Finally, enrobe the cake in a smooth chocolate glaze for a glossy finish. Remember, patience and a steady hand will yield the best results. Here's a simple checklist to keep track of your progress: Prepare sponge layers Spread chocolate buttercream Apply apricot jam Glaze with chocolate Refer to the detailed instructions for each step to ensure your cake is a masterpiece of flavors and textures. Common Mistakes and How to Avoid Them Achieving the perfect Prinzregententorte can be a delicate process, and even experienced bakers can encounter pitfalls. Avoiding common mistakes is crucial for a flawless cake. Here are some tips to help you succeed: Overbaking the sponge layers: They should be light and airy. Use a timer and perform the toothpick test a minute before the time is up. Uneven chocolate buttercream: Achieve a smooth consistency by ensuring your butter is at room temperature before mixing. Cracked layers: Allow the cake to cool gradually in the oven with the door slightly open to prevent sudden temperature changes. Thick apricot jam: Thin it with a little water for easier spreading and a more delicate taste. As trends in the bakery world evolve, it's important to stay informed. For instance, the upcoming Easter 2024 is expected to showcase retro flavours and vibrant dcor, as well as an expansion in the variety of hot cross buns. Incorporating these trends into your Prinzregententorte, whether through decoration or flavor adaptation, can add a modern twist to this classic dessert. Serving and Pairing Suggestions Traditional Serving Occasions The Prinzregententorte is not only a delight to the palate but also a centerpiece at various traditional events. Its opulent layers make it a popular choice for celebrations such as birthdays, anniversaries, and especially significant in Bavaria, where it is often served during Oktoberfest as a nod to the region's royal heritage. Typically, the cake is presented at the end of a meal, signifying the culmination of a festive gathering. Here are some of the occasions where the Prinzregententorte takes center stage: Festive family gatherings Official state functions and receptions Cultural festivals and local fairs Weddings and significant anniversaries Wine and Beverage Pairings Selecting the perfect wine or beverage to accompany the Prinzregententorte can elevate the tasting experience to new heights. A sweet Riesling or a late-harvest Gewurztraminer complements the rich chocolate and delicate sponge layers, balancing the sweetness with a touch of acidity. For those who prefer non-alcoholic options, a dark roast coffee or a spiced chai tea can provide a warm and aromatic contrast to the dessert's sweetness. When considering pairings, it's important to match the intensity of the cake with the beverage. Here's a simple guide to help you choose: Sweet white wines: Enhance the chocolate flavors Sparkling wines: Add a festive touch Full-bodied red wines: For a bold contrast Non-alcoholic beverages: Consider dark roast coffee or spiced chai tea Creative Presentation Ideas When it comes to presenting the Prinzregententorte, creativity can transform this classic dessert into a show-stopping centerpiece. Consider deconstructing the cake, serving each layer separately with a dollop of chocolate buttercream and a drizzle of apricot jam, allowing guests to experience the flavors individually. Alternatively, create a miniaturized version of the cake, offering bite-sized delights that are perfect for parties and gatherings. For a festive touch, adorn the cake with edible flowers or gold leaf, aligning with the regal theme of the Prince Regent Cake. These small details can elevate the visual appeal and add a luxurious feel to the dessert. Remember, the presentation should not only be visually appealing but also functional, ensuring that the cake remains the star of the show. Beyond the Cake: Exploring Similar Desserts Comparing Prinzregententorte to Other European Cakes The Prinzregententorte, with its distinctive multi-layered structure, stands out among European cakes. Its closest relatives in terms of complexity and elegance are perhaps the Baumkuchen and the Swedish Princess Cake. Baumkuchen, also known as the 'Tree Cake', is celebrated for its characteristic rings that resemble tree rings, achieved by layering and grilling the batter. The Swedish Princess Cake is a visual delight with its dome-shaped marzipan covering, beneath which lies a rich combination of sponge, jam, and cream. While these cakes share a common European heritage, each has a unique story and method of preparation that reflects the culture from which it originates. The Prinzregententorte's seven layers are said to represent the seven provinces of Bavaria during Prince Regent Luitpold's reign, making it not just a culinary masterpiece but also a symbol of regional pride. Modern Twists on Classic Recipes In the realm of desserts, the Prinzregententorte stands as a testament to tradition and taste. However, modern pastry chefs and home bakers alike have embraced the challenge of adding contemporary spins to this classic recipe. Innovative variations are not only refreshing but also pay homage to the cake's storied past. Deconstructed Prinzregententorte: A playful approach that presents the cake's elements separately, allowing diners to experience each flavor distinctly. Vegan and Gluten-Free Options: With the rise of dietary restrictions, bakers have developed versions that substitute traditional ingredients for plant-based and gluten-free alternatives. Seasonal Flavor Infusions: Incorporating fruits and spices according to the season can transform the cake into a year-round delight, from summer berries to autumnal pumpkin spice. Incorporating Seasonal Flavors and Local Ingredients Embracing the rhythm of the seasons allows for a delightful variation in the Prinzregententorte, infusing it with flavors that reflect the time of year. Local produce can transform the traditional recipe into a reflection of the region's culinary heritage. For instance, incorporating summer berries or fall spices like cinnamon can add a unique twist to the cake's layers. Here's a simple guide to seasonal ingredients that can be used to customize the Prinzregententorte: Spring: Fresh berries, rhubarb, and edible flowers Summer: Stone fruits, such as peaches and cherries, and aromatic herbs Fall: Pumpkin, apples, pears, and warm spices like nutmeg Winter: Citrus fruits, nuts, and preserved jams Experimenting with these ingredients not only adds a personal touch but also offers a sensory journey through the seasons. The key is to balance the new flavors with the cake's classic profile, ensuring that each bite is both familiar and exciting. Conclusion The Prince Regent Cake, or Prinzregententorte, is a true masterpiece of baking that stands out among the myriad of delectable cakes celebrated in various traditions and family memories. As we've explored its layered complexity and rich history, it's clear that this cake is more than just a dessert; it's a symbol of culinary artistry and a testament to the joy that baking brings to both the baker and those who savor the end result. Whether it's a festive occasion or a quiet moment of indulgence, the Prince Regent Cake is a luxurious treat that promises to create new memories and perhaps even evoke a sense of nostalgia for the flavors of the past. So, the next time you're looking to impress with a dessert that has both elegance and depth, consider the timeless Prinzregententorte—a cake that truly reigns supreme in the world of sweets. Frequently Asked Questions What is Prinzregententorte? Prinzregententorte, or Prince Regent Cake, is a traditional Bavarian torte consisting of several thin layers of sponge cake interlaid with chocolate buttercream, topped with apricot jam and a chocolate glaze. How many layers does a traditional Prinzregententorte have? A traditional Prinzregententorte typically has seven layers of sponge cake, representing the seven provinces of Bavaria during Prince Regent Luitpold's era. What are some common mistakes to avoid when baking Prinzregententorte? Common mistakes include overbaking the thin sponge layers, making the buttercream too thick or too thin, and not allowing the cake to set properly before serving. Can I substitute any ingredients when making Prinzregententorte? Yes, you can make substitutions, such as using different jams or liqueurs for flavoring. However, it's important to maintain the balance of flavors and textures. What is the best way to serve Prinzregententorte? The cake is best served at room temperature. It can be paired with coffee, tea, or a sweet dessert wine. Presentation can be enhanced with a dusting of powdered sugar or decorative chocolate shavings. Are there any desserts similar to Prinzregententorte? Yes, there are several European cakes with layered structures, such as Baumkuchen and Swedish Princess Cake, but each has its unique flavor profile and presentation.
- "Exploring the Rich History and Delicious Flavors of Cassata: A Guide to this Decadent Italian Dessert"
Cassata cake, a traditional Sicilian dessert, has been satisfying sweet cravings for generations with its heavenly layers of sponge cake, creamy ricotta icing, and luscious fruit. This article delves into the rich history, culinary artistry, and cultural significance of cassata, offering a comprehensive guide to enjoying and creating this delectable treat. Whether you're looking to indulge in the finest cassata at a local bakery or eager to craft your own masterpiece at home, this piece is a celebration of all things cassata. Key Takeaways Cassata cake is a quintessential Sicilian dessert featuring layers of sponge cake and creamy ricotta icing. It is a staple for special occasions, often serving as a festive centerpiece during weddings, feasts, and holidays. Modern interpretations of cassata incorporate innovative twists while honoring traditional flavors and techniques. Authentic cassata can be found in specialized bakeries, with top spots located in cities like Los Angeles and Philadelphia. Making cassata at home requires specific ingredients and equipment, and following a step-by-step guide can help avoid common mistakes. The Origins and Evolution of Cassata Cake Tracing the Roots of Cassata The cassata cake is a testament to Sicily's rich history, where diverse cultures have interwoven to create a dessert as complex as its past. Legend has it that this iconic dessert traces its roots back to ancient times when Sicily was a melting pot of cultures, each leaving its own indelible mark on the island's cuisine. While the exact origins of cassata are shrouded in mystery, it is believed to have evolved from a simple sweetened cheese dish to the elaborate and colorful cake we know today. The Arab introduction of sugar and the Spanish influence of candied fruit are just a few of the many contributions that have shaped cassata into a symbol of Sicilian identity. Arab rule (9th-11th century): Introduction of sugar and almonds Spanish rule (15th-17th century): Introduction of chocolate and candied fruit Italian unification (19th century): Cassata becomes a national symbol Each era brought with it new ingredients and techniques, culminating in a dessert that is both a feast for the eyes and the palate. Cassata Through the Ages: A Historical Perspective The journey of cassata cake through history is a testament to the cultural melting pot that is Sicily. It is believed to have originated in Sicily, Italy, and was influenced by various cultures, including Arab, Spanish, and Norman. The cake's name itself suggests a rich history, derived from Arabic or Latin origins. Over the centuries, cassata has evolved from a simple sweet into an elaborate dessert that symbolizes celebration. The traditional recipe has been adapted and enriched, reflecting the changing tastes and influences of the times. Today, cassata remains a beloved dessert, often served during special occasions and holidays. Its layers of sponge cake, creamy ricotta, and candied fruit continue to delight palates, while its ornate decorations showcase the artistry of Italian confectioners. Modern Twists on a Classic Sicilian Dessert The timeless Cassata cake has been reimagined in countless ways, embracing new flavors and ingredients that cater to contemporary palates. Boldly infusing traditional recipes with modern sensibilities, chefs and home bakers alike are crafting variations that honor the essence of the original while delivering novel taste experiences. Saffron-infused Cassata offers a rich, exotic aroma that transforms the dessert into a luxurious treat. Biscoff Cassata introduces a caramelized, spiced biscuit flavor that complements the creamy ricotta. Coffee Cassata merges the robustness of espresso with the sweetness of the cake, perfect for coffee lovers. These modern interpretations not only add diversity to the dessert's profile but also ensure that Cassata continues to be a beloved choice for dessert aficionados around the world. Cassata Cake: A Culinary Delight The Art of Crafting the Perfect Cassata The journey to creating the perfect Cassata begins with understanding its components. Each layer of this Sicilian masterpiece plays a pivotal role in its final taste and presentation. The base is typically a light and airy sponge cake, soaked in sweet liqueurs, providing a delicate foundation for the rich and creamy ricotta filling that follows. To finish, a layer of marzipan or a similar almond paste is draped over the cake, and the entire creation is adorned with colorful candied fruit, symbolizing the vibrant Sicilian culture. The final touch, a glaze of sugar icing or a dusting of powdered sugar, adds an irresistible allure to this culinary delight. Select the finest ricotta for a creamy, indulgent filling. Infuse the sponge with liqueurs for a moist, flavorful base. Decorate with candied fruit for a traditional Sicilian appeal. Remember, the secret to a sublime cassata is in the details. Each element must be crafted with care and precision, ensuring that every slice is a harmonious blend of Sicilian tradition and confectionery art. Decoding the Layers: Sponge, Ricotta, and Fruit The cassata cake is a symphony of textures and flavors, each layer playing a crucial role in creating the final masterpiece. The base layer, a moist and airy sponge cake, provides a delicate foundation that absorbs the intermingling essences of the other components. Above this lies the heart of the cassata: a rich and creamy ricotta filling, often sweetened and studded with chocolate or candied fruit. To finish, a vibrant layer of candied fruit adds not only a burst of sweetness and color but also a delightful chewiness that contrasts with the softness of the sponge and the creaminess of the ricotta. Here's a simple breakdown of the layers: Sponge Cake: The base that sets the stage for flavors to come. Ricotta Filling: The star of the show, often enhanced with chocolate or candied fruit. Candied Fruit: The crowning glory, adding sweetness and a jewel-like appearance. The Role of Cassata in Italian Cuisine and Culture Cassata holds a special place in the heart of Italian cuisine, particularly within Sicilian culture where it is not just a dessert but a celebration of local flavors and traditions. The intricate preparation and combination of flavors, such as the creamy ricotta and the light sponge cake, make it a symbol of Sicily's cultural and culinary heritage, as highlighted in the article Taste Tradition: Classic Italian Food Dishes Everyone Must Try. In contemporary Italian society, cassata continues to be revered, often featured in festive occasions and family gatherings. It is a dessert that carries with it the essence of Sicilian sweetness and lightness, a perfect end to any meal. Here is a snapshot of how cassata is perceived in different cities: Los Angeles, CA: A mix of traditional appreciation and modern interpretations, with some finding it just okay while others adore the rich flavors. Philadelphia, PA: Searches for cassata cake indicate a sustained interest in Italian bakeries and Sicilian desserts. Celebrating with Cassata: Occasions and Traditions Cassata as a Festive Centerpiece The cassata cake, with its vibrant colors and rich flavors, often takes center stage at Italian celebrations. Its ornate decoration and sumptuous taste make it a showstopper at any event, from intimate family gatherings to grand festive occasions. During festive seasons, the cassata is more than just a dessert; it's a symbol of tradition and joy. Here's how it graces various celebrations: Easter: Adorned with green pistachios, symbolizing the spring season. Christmas: Decorated with candied cherries, evoking the festive colors. Weddings: Embellished with intricate icing and sometimes personalized with the newlyweds' initials. The cassata's role in these festivities is a testament to its enduring appeal and its ability to adapt to the spirit of the occasion. Weddings, Feasts, and Holidays: Serving Cassata Cassata holds a special place in the hearts of Sicilians and has become a staple at various celebrations. The divine taste of Cassata Ricotta Cake makes it a sought-after dessert for weddings, where its layers symbolize the richness and sweetness of a couple's future life together. During feasts and holidays, the cake is often the centerpiece, reflecting the joy and abundance of the occasion. Weddings: A symbol of prosperity and happiness. Christmas: A festive treat that brings families together. Easter: Represents renewal and joy. Saints' Feast Days: Honors tradition and local patron saints. Cassata Cake in Contemporary Celebrations Cassata cake has transcended its traditional roots to become a versatile dessert for various contemporary celebrations. The cake's rich history and delightful flavors make it a sought-after treat for any special occasion. From intimate family gatherings to grand weddings, the cassata cake adds a touch of Sicilian charm to the table. In today's culinary scene, the cassata cake is often customized to suit the theme and taste preferences of the event. Whether it's a twist on the classic recipe or a fusion with other popular desserts, the possibilities are endless. Here's a quick list of modern adaptations you might encounter: Cassata cupcakes for a casual party Mini cassata cakes as wedding favors Vegan or gluten-free versions for dietary restrictions Cassata-flavored gelato for a summer event As the popularity of cassata cake grows, so does the creativity of bakers and chefs in presenting this iconic dessert. It's not just about the taste; it's about the experience and the memories that come with every slice. Finding the Finest Cassata: A Guide to Bakeries Top Spots for Cassata Cake in Major Cities When searching for the finest cassata cake in major cities, the options can be overwhelming. However, certain spots stand out for their exceptional offerings. In Los Angeles, Angelini Osteria is renowned for its authentic Italian flavors, while LB Cake Stop is a go-to for those seeking a modern twist on the classic dessert. For those in Philadelphia, Isgro Pastries offers a delightful experience with its almond rum square, a nod to the traditional cassata. Each bakery brings its own unique touch to this Sicilian masterpiece, ensuring that every slice is a celebration of flavor and tradition. What to Look for in an Authentic Cassata When seeking an authentic Cassata, the harmony of its components is paramount. Look for a well-balanced blend of textures and flavors that honor the traditional Sicilian recipe. Here are key elements to consider: Sponge Cake: It should be moist and light, providing a delicate base for the layers that follow. Ricotta Filling: The hallmark of Cassata, this creamy layer must be rich yet not overly sweet, often containing chocolate chips or candied fruit. Marzipan: A thin layer of marzipan often enrobes the cake, contributing a subtle almond flavor. Candied Fruit: The top should be adorned with colorful candied fruit, a nod to the cake's festive origins. While the appearance of Cassata can be quite elaborate, don't let ornate decorations distract from the quality of the cake itself. An authentic Cassata should not just look the part but also deliver a taste that transports you to the heart of Sicily. Customer Reviews and Recommendations In the age of digital exploration, customer reviews have become a cornerstone for gauging the quality of culinary experiences. Navigating through the sea of opinions can be overwhelming, but it's essential for finding the finest cassata. A well-reviewed bakery not only assures you of the authenticity of the cake but also of the service and ambiance that come with it. When searching for the perfect cassata, consider the following points from customer feedback: Quality of ingredients: Freshness and flavor are paramount. Authenticity: Does the bakery adhere to traditional recipes? Customer service: Friendly and knowledgeable staff can enhance the experience. Atmosphere: The setting in which you enjoy your cassata contributes to the overall enjoyment. For instance, Vito's Bakery in Charter Township of Clinton has garnered attention on platforms like Restaurant Guru. Patrons highlight the importance of viewing the menu, checking prices, and observing the ambiance through photos before making a visit. Making Your Own Cassata: Tips and Techniques Ingredients and Equipment You'll Need Before embarking on your cassata-making journey, it's crucial to have all the necessary ingredients and equipment at hand. Gathering everything beforehand will streamline the process and help you avoid any mid-recipe surprises. For the cake, you'll need basics like eggs, sugar, and all-purpose flour. The distinctive flavors come from the three milk mix, which includes full-fat milk, Rooh Afza for that unique taste, liquid whipping cream, and condensed milk. Don't forget the sweetened whipped cream, which adds a light, airy touch to the dessert. When it comes to equipment, a hand whisk, electric or stand mixer, and a silicone spatula are indispensable for achieving the right texture. A 6" cake pan is the perfect size for a traditional cassata. Ensure you have these tools ready to create your masterpiece. Step-by-Step Guide to Making Cassata at Home Embarking on the journey to create your own Cassata cake at home can be a delightful and rewarding experience. Begin by assembling all necessary ingredients, ensuring you have the freshest ricotta and the most vibrant candied fruits available. Following a traditional recipe, start with the sponge cake layer. If you're short on time or prefer convenience, consider the snippet from a related recipe: Make it easy on yourself and buy a pound cake. This can serve as a suitable base for your Cassata, allowing you to focus on the rich and creamy ricotta filling that is the heart of this dessert. Remember, the key to a perfect Cassata lies in the balance of flavors and the quality of ingredients. Take your time to perfect each layer, and you'll be rewarded with a dessert that's not only a treat for the palate but also a homage to Sicilian tradition. Common Mistakes to Avoid When Making Cassata Crafting the perfect Cassata requires attention to detail and an understanding of the delicate balance of flavors and textures. Avoiding common mistakes is crucial to achieving the authentic Sicilian experience. Overcomplicating the flavors: Cassata should have a harmonious blend of the sponge, ricotta, and fruit. Resist the temptation to add too many additional flavors that can overpower the classic taste. Using low-quality ricotta: The ricotta cheese is the heart of Cassata. Opt for high-quality, fresh ricotta to ensure a creamy and rich filling. Neglecting the sponge cake: A dry or overly dense sponge can ruin the dessert. Aim for a moist and airy sponge that complements the creamy ricotta. Finally, be mindful of the decoration. Traditional Cassata is adorned with candied fruit and royal icing, but a heavy hand can make it too sweet. Strive for a balance that pleases both the eye and the palate. Conclusion The journey through the world of Cassata Ricotta Cake has been a delightful exploration of taste and tradition. From its creamy layers of ricotta icing to the light and spongy texture of the sponge cake, Cassata stands out as a dessert that not only satisfies sweet cravings but also adds a touch of elegance to any special occasion. Whether you're in Philadelphia at Isgro Pastries or in Los Angeles at Angelini Osteria, the quest for the perfect slice of Cassata is a testament to its enduring popularity and the joy it brings to those who indulge in its divine flavors. As we've seen, whether it's a traditional recipe or a modern twist, Cassata remains a beloved treat that impresses guests and evokes the rich culinary heritage of Italy. So, the next time you're looking to delight your palate or celebrate with something truly special, remember the Cassata Ricotta Cake—a dessert that is as heavenly as it is historic. Frequently Asked Questions What is cassata cake? Cassata cake is a traditional Sicilian dessert that consists of layers of sponge cake moistened with liqueur or fruit juice, filled with ricotta cheese and candied fruit, and covered with a shell of marzipan, pink and green pastel colored icing, or whipped cream. What occasions is cassata cake typically served? Cassata cake is often served during festive occasions such as weddings, feasts, and holidays, particularly in Italy. It's a celebratory dessert that can be enjoyed at any special event or as a delightful treat. Can I find authentic cassata cake outside of Italy? Yes, authentic cassata cake can be found in various cities around the world, especially in bakeries that specialize in Italian or Sicilian cuisine. Look for places with good customer reviews and recommendations for the best experience. What are some modern variations of cassata cake? Modern twists on cassata cake might include different flavors of sponge cake, a variety of fruit mix-ins, unique liqueurs for soaking the cake, or creative decorations that deviate from the traditional marzipan and candied fruit topping. How do I make cassata cake at home? To make cassata cake at home, you'll need basic ingredients like sponge cake, ricotta cheese, candied fruit, and marzipan. Follow a step-by-step guide, and be sure to avoid common mistakes such as overmixing the ricotta filling or not allowing the cake to chill properly. Where can I find the best cassata cake in Los Angeles or Philadelphia? In Los Angeles, Angelini Osteria is known for its cassata, and in Philadelphia, Isgro Pastries is a popular spot. Be sure to check out local bakery reviews and customer recommendations to find the top places for cassata cake in these cities.
- "Indulge in the Decadence: How to Make the Perfect Blackout Cake at Home"
The Blackout Cake is a decadent dessert that has captured the hearts of chocolate lovers everywhere. This article delves into the intricacies of creating the perfect Blackout Cake, from selecting quality ingredients to mastering the art of frosting. Customization tips, serving suggestions, and storage advice will ensure that your cake is not only delicious but also presented and preserved in the best way possible. Key Takeaways Incorporate chocolate chips or nuts into the batter for added texture and flavor, and consider drizzling the cake with warmed peanut butter for a unique twist. Opt for a lighter frosting like chocolate whipped cream and apply it just before serving to prevent the cake from becoming soggy. For a non-traditional approach, serve the cake without frosting, dusted with powdered sweetener, as a breakfast or snack option. Experiment with different extracts like coconut, almond, or orange to explore a variety of flavor profiles in your Blackout Cake. When storing leftovers, ensure freshness by avoiding common storage mistakes and serve any remaining slices with a new element, such as unsweetened coconut flakes. The Art of Crafting the Perfect Blackout Cake Choosing the Right Ingredients The foundation of a delectable Blackout Cake begins with selecting high-quality ingredients. For the cake itself, essentials include large eggs, unsalted butter, and a sweetener such as stevia glycerite or granulated sugar. The choice of almond flour and natural unsweetened cocoa powder is crucial, as they contribute to the cake's rich flavor and tender crumb. In addition to the base ingredients, consider the subtle yet significant impact of vanilla extract and kosher salt. These elements enhance the chocolatey essence and balance the sweetness. For those looking to customize, espresso powder can be an optional addition for an intensified chocolate experience. Below is a list of core ingredients to keep in mind: Large eggs Unsalted butter (melted and slightly cooled) Sweetener (stevia glycerite or granulated sugar) Vanilla extract Almond flour (blanched, finely ground) Unsweetened cocoa powder (natural, not Dutch-processed) Kosher salt Baking soda (or baking powder as an alternative) Remember, the quality of these ingredients will ultimately dictate the success of your Blackout Cake. Mixing and Baking Techniques The journey to a perfect Brooklyn blackout cake begins with the mixing process, which sets the foundation for a fluffy and moist texture. Start by whisking together the eggs, melted butter, stevia, and vanilla extract in a large bowl. This initial step is crucial for incorporating air and ensuring a light crumb. Next, the dry ingredients come into play. Gradually add the almond flour and cocoa powder, whisking them into the wet mixture. The addition of kosher salt and baking soda is not just a formality; it's a chemical reaction waiting to happen, which will give your cake that desirable rise. After baking, patience is key. Allow the cake to cool completely before attempting to cut it into squares. This waiting period prevents the cake from crumbling and ensures clean, sharp edges that make for an elegant presentation. Cooling and Cutting for Optimal Texture Achieving the perfect texture in a blackout cake is as much about the cooling process as it is about the baking. Allow your cake to cool completely before attempting to cut it; this patience pays off in clean slices that showcase the cake's dense, moist crumb. A cake that's still warm may crumble or fall apart, so resist the temptation to rush. When it's time to cut, use a serrated knife with a gentle sawing motion. Here's a simple guide to follow: Step 1: Wait for the cake to reach room temperature. Step 2: Run a knife around the edge of the pan to loosen the cake. Step 3: Invert the cake onto a plate, then lift off the pan. Step 4: Transfer the cake to a wire rack to finish cooling. Step 5: Once cool, use a serrated knife to cut the cake into layers or servings. Remember, the goal is a blackout cake with a texture that's both tender and stable, ready to be layered with rich frosting and fillings. Customizing Your Blackout Cake Incorporating Nuts and Chocolate Chips To elevate the classic Brooklyn Blackout Cake to new heights, consider the delightful crunch and flavor that nuts and chocolate chips can add. Here's how to incorporate these ingredients effectively: Add a handful of chocolate chips or chopped unsalted nuts directly to the batter for an unexpected texture and taste. For a nutty aroma that complements the chocolate, drizzle the cake with warmed peanut butter just after frosting. Enhance the cake's appeal by scattering unsweetened coconut flakes over the frosting while it's still moist. Experiment with extracts to tailor the flavor profile of your cake. Replacing vanilla extract with coconut, almond, or orange extract can introduce a unique twist that will surprise and delight your guests. Exploring Flavor Variations with Extracts When it comes to personalizing the flavor of your Blackout Cake, the use of extracts can be a game-changer. Extracts, ranging from vanilla and almond to more exotic options like orange blossom and lavender, offer a simple yet effective way to infuse your cake with a distinct taste profile. Here are some popular extract options to consider: Vanilla: A classic choice that provides a warm, rich base. Almond: Adds a nutty, marzipan-like flavor, perfect for complementing chocolate. Orange Blossom: Imparts a floral, citrusy note that can brighten up the dense cake. Mint: Offers a refreshing twist, ideal for a summer dessert. Coffee: Enhances the chocolate flavor, making it deeper and more intense. Experimenting with these extracts allows you to tailor your dessert to the occasion or your personal preferences. Whether you're aiming for a subtle hint or a bold statement, the right extract can make all the difference in your culinary adventure. Creative Toppings and Drizzles The final flourish on any blackout cake is the creative use of toppings and drizzles that not only enhance the visual appeal but also add layers of flavor and texture. Experimenting with various toppings can transform your cake into a unique masterpiece. For a simple yet elegant touch, consider a dusting of powdered sweetener or a drizzle of warmed peanut butter. These additions provide a subtle sweetness or a rich, creamy contrast to the dense chocolate cake. If you're aiming for a bit of crunch, sprinkle a handful of chocolate chips or chopped unsalted nuts into the batter before baking. For those who enjoy a bit of tanginess, topping the cake with fresh berries, especially raspberries, can create a delightful balance between sweet and tart flavors. This combination is not only delicious but also visually striking, making it perfect for special occasions. Here's a quick guide to some popular topping combinations: Powdered sweetener dusting for a minimalist finish Warm peanut butter drizzle for a nutty flavor Chocolate chips for added texture Chopped nuts for a crunchy element Fresh berries for a burst of tartness Remember, the key to an exceptional blackout cake is in the details. Each topping or drizzle should complement the cake's rich chocolate base, elevating it to new heights of dessert perfection. Serving and Pairing Suggestions Complementing Beverages for Every Occasion The perfect slice of blackout cake deserves a beverage that enhances its rich flavors. For a morning indulgence, pair your cake with a robust coffee or a smooth cold almond milk. On warmer days, an iced coffee or iced tea can provide a refreshing contrast to the cake's decadence. For those who enjoy a keto-friendly option, this cake pairs wonderfully with a tall glass of cold almond milk, offering a creamy complement without the added sugars. Remember, the key is to match the intensity of the cake with the beverage, ensuring a harmonious balance between the two. Topping with Berries for a Tart Contrast The addition of berries to a blackout cake not only introduces a vibrant burst of color but also provides a delightful tart contrast to the rich chocolate layers. Fresh raspberries, in particular, are a favorite among enthusiasts, as they offer a balance to the sweet cake that is simply fantastic. When selecting berries for your cake, consider the following points: Freshness is key; choose berries that are bright, firm, and free of blemishes. Wash and dry the berries thoroughly before use to avoid sogginess. Strategically place the berries on the cake to achieve an appealing aesthetic. Remember, the berries are not just a garnish but an integral component that can transform your blackout cake into a culinary masterpiece. Experiment with different berry combinations to find your perfect match. Enjoying as a Breakfast or Snack Option While not a traditional breakfast, a slice of blackout cake can be a delightful treat to start your day or to enjoy as a mid-afternoon snack. Pairing it with a cup of coffee or tea can balance its richness and provide a moment of indulgence. For a quick breakfast, consider a smaller portion to keep the meal balanced. As a snack, blackout cake can be a satisfying pick-me-up, especially when shared with friends or colleagues. Nutritional information per serving can vary, but here's a general breakdown for a standard slice of blackout cake: These values are based on a 2000 calorie diet and should be used as a guideline. Adjust portions accordingly if you're enjoying the cake as part of a meal or a lighter snack. Mastering the Frosting Game Choosing Between Rich and Light Frosting When it comes to frosting your blackout cake, the choice between a rich frosting and a light one can significantly affect the overall taste and texture. Rich frostings, like a classic chocolate buttercream, provide a decadent, creamy layer that complements the dense cake beneath. On the other hand, lighter options such as chocolate whipped cream offer a more delicate touch, allowing the cake's flavors to shine without overwhelming the palate. For a rich frosting, consider using ingredients like unsalted butter, heavy cream, and cocoa powder, which contribute to a thicker, more indulgent layer. Lighter frostings can be achieved by using less butter and incorporating airier components like whipped cream. The subtle difference between buttercream and regular frosting lies in the preparation and ingredients. French buttercream is noted for being both extremely rich and very light, since it's beaten until it forms a foamy consistency and uses plenty of egg yolks. Whether you choose a rich or light frosting, ensure it harmonizes with your cake for the perfect balance of flavors. Timing Your Frosting Application The moment you choose to apply frosting to your blackout cake can be just as crucial as the frosting itself. Ensure the cake layers are completely cool before beginning to frost. This prevents the frosting from melting and maintains its intended texture. A common mistake is to rush this step, leading to a less than perfect finish. Here are a few tips to time your frosting application perfectly: Allow the cake to cool in the pan for about an hour after baking. Transfer the cake to a wire rack to cool completely, which can take several hours. If in a rush, you can place the cake layers in the refrigerator to speed up the cooling process, but do not frost until they are at room temperature. Remember, chocolate always tastes better at room temperature, and the same principle applies to frosting. By following these guidelines, your blackout cake will not only taste great but also look professionally made. Decorative Techniques for a Stunning Presentation Once you've mastered the basics of frosting, it's time to elevate your Blackout Cake with decorative techniques that will captivate your guests. From delicate piping to the use of fondant shapes, the possibilities are endless. A well-decorated cake is not just a treat for the taste buds but also a feast for the eyes. Start with simple patterns and progress to more intricate designs. Use a variety of tips and tools to create different textures. Experiment with color contrasts for a dramatic effect. As highlighted in the title 'Cake Decorating Techniques: A Visual Guide to Artistry in Baking', cake decorating is indeed an art that requires a blend of culinary skills and creativity. By taking the time to add those final decorative touches, your Blackout Cake will not only taste delicious but will also become a centerpiece that commands attention. Storing and Preserving Your Cake Best Practices for Freshness To ensure your Blackout Cake remains as delectable as the day it was made, proper storage is key. After the cake has completely cooled, it's crucial to wrap it tightly in plastic wrap or place it in an airtight container. This minimizes exposure to air, which can dry out the cake and compromise its texture. Here's a quick guide to storing your cake: Room Temperature: Up to 3 days, tightly wrapped or in an airtight container. Refrigerated: Up to 5 days in an airtight container. Frozen (unfrosted slices): Up to 1 month, wrapped in plastic wrap and then foil. Remember, chocolate and frosting both taste better when not too cold, so allow your cake to sit out for about an hour before serving if it's been refrigerated or frozen. Avoiding Common Storage Mistakes Proper storage is crucial to maintaining the freshness and flavor of your Blackout Cake. Avoid storing the cake in the refrigerator uncovered, as this can lead to dryness and the absorption of unwanted odors. Instead, use an airtight container or wrap the cake tightly in plastic wrap. Temperature: Room temperature is ideal for short-term storage, while the freezer is best for long-term preservation. Location: Keep the cake away from direct sunlight and heat sources to prevent melting or spoilage. Humidity: High humidity can make the cake soggy, so store it in a cool, dry place. Serving Leftovers with a New Twist Transforming leftover cake into a delightful new dessert can be a creative and satisfying endeavor. Repurposing cake scraps into trifle layers not only minimizes waste but also provides an opportunity to experiment with flavors and textures. For instance, a simple yet delicious Chocolate Trifle can be assembled using layers of crumbled blackout cake, chocolate pudding, whipped cream, and a sprinkle of toffee bits for added crunch. Crumble leftover blackout cake into a serving dish. Layer with chocolate pudding and whipped cream. Top with toffee bits or your choice of garnish. Another innovative idea is to incorporate cake pieces into a breakfast dish, such as a sweet bread pudding. This can be a delightful way to start the day or serve as a unique brunch option. Remember, the key to a successful transformation is to keep the moisture and flavor of the cake in mind, ensuring that your new creation is just as enticing as the original. Conclusion In conclusion, the Blackout Cake stands out as a versatile and indulgent treat that can be enjoyed in various forms. Whether you choose to serve it unfrosted as a breakfast or snack cake, or you lavish it with a rich chocolate whipped cream frosting for a decadent dessert, this keto-friendly delight made with almond flour is sure to satisfy your sweet cravings. The cake's adaptability extends to serving suggestions and storage, making it a convenient option for any occasion. With the ability to add personal touches like chocolate chips, nuts, or a drizzle of peanut butter, this Blackout Cake recipe offers a delightful balance of simplicity and gourmet pleasure, perfect for those following a gluten-free or low-carb diet. Frequently Asked Questions Can Blackout Cake be served as a breakfast or snack? Yes, when not frosted and dusted with powdered sweetener, Blackout Cake can serve as a breakfast or snack option. What frosting is recommended for a lighter Blackout Cake? A chocolate whipped cream frosting is excellent for a lighter touch. However, it should be applied immediately before serving to prevent the cake from becoming soggy. How can I customize the Blackout Cake batter? You can add chocolate chips or chopped unsalted nuts to the batter for extra texture and flavor. What is a unique way to top Blackout Cake? For a unique twist, drizzle the cake with warmed peanut butter or scatter unsweetened coconut flakes on the frosting immediately after application. What are some serving suggestions for Blackout Cake? Blackout Cake pairs well with coffee or a tall glass of cold almond milk. It's also delicious topped with raspberries or other berries for a tart contrast. How should I store leftovers of Blackout Cake? To maintain freshness, store the cake in an airtight container. If not frosted, it can also be spread with peanut or walnut butter for a tasty snack later on.
- The Ultimate Guide to Making Gooey Butter Cake: Tips and Recipes for a Decadent Treat
Gooey Butter Cake, a beloved dessert hailing from the Midwest, has captured the hearts of sweet tooths everywhere with its rich, decadent layers. This article delves into the cake's storied past, provides a guide to making your own, and explores various ways to enjoy and celebrate this unique treat. With a perfect balance of textures and the option for creative variations, Gooey Butter Cake is more than just a dessert; it's a culinary experience. Key Takeaways Gooey Butter Cake is a rich dessert featuring a dense cake base and a creamy, gooey topping, often finished with a dusting of powdered sugar. The cake has historical roots in the American Midwest, with St. Louis, Missouri often credited as its birthplace, and has gained widespread popularity. Variations like the Gooey Strawberry Cheesecake Butter Cake offer modern twists on the classic, incorporating fruit layers for added flavor. National Gooey Butter Cake Day on August 12th celebrates this indulgent treat, highlighting its cultural significance and enduring appeal. Beyond the traditional cake, innovative spin-offs such as Gooey Butter Cookies have emerged, showcasing the versatility of the cake's signature flavors. The Origins and Evolution of Gooey Butter Cake Defining the Gooey Butter Cake The Gooey Butter Cake is a dessert that epitomizes indulgence with its rich, creamy texture and sweet, buttery flavor. Originating from the heart of the Midwest, this cake is a beloved treat that has captured the taste buds of many, including celebrities like Drew Barrymore. At its core, the Gooey Butter Cake consists of two distinct layers: a dense and slightly chewy cake base, topped with a luscious, gooey cream cheese layer that often forms a delectably crisp crust as it bakes. While the traditional recipe calls for simple, wholesome ingredients, the Gooey Butter Cake has inspired a myriad of variations, each adding a unique twist to the classic. Whether it's the addition of fruit, chocolate, or even a sprinkle of powdered sugar, the possibilities for personalizing this dessert are endless. Historical Roots and Regional Popularity The gooey butter cake, a St. Louis culinary icon, has a rich history that is as decadent as the dessert itself. Originally a mistake by a local baker, the cake quickly became a regional specialty, with its popularity soaring in the mid-20th century. It's a testament to the city's love for comfort food, as highlighted in the article The Top 8 Foods You Have to Try in St. Louis, which places gooey butter cake alongside other local delights. While the original recipe remains a closely guarded secret, variations have spread across the country, each adding a local twist to the traditional flavor. Here's a glimpse at how the gooey butter cake has been embraced in various locations: St. Louis, MO: The birthplace of the original gooey butter cake. Southern Illinois: Known for a version that uses a yellow cake mix base. Texas: Some bakeries offer a 'Texas-Style' gooey butter cake with added pecans. Nationwide: Artisanal bakeries and home bakers alike have created countless variations, including chocolate, pumpkin, and even vegan options. Variations and Modern Twists The gooey butter cake, a beloved dessert, has undergone numerous transformations over the years. Modern bakers have embraced creativity, introducing a variety of flavors and ingredients to the classic recipe. For instance, adding a hint of almond extract can infuse a subtle, nutty essence into the cake, while swapping water for bourbon or rum in the glaze offers a boozy kick that appeals to adult palates. Chocolate lovers aren't left out either; mini chocolate chips can be sprinkled into the batter for a delightful chocolatey surprise. These twists not only enhance the flavor profile but also cater to diverse taste preferences. Here's a quick look at some trending variations: Chocolate with White Chocolate Chips and Macadamia Nut Chocolate Covered Peanut Butter Fudge Brownie Cookies Oatmeal Chocolate Chip with Cranberry These variations showcase the cake's ability to evolve while still providing the comfort and nostalgia of the traditional gooey butter cake. Crafting the Perfect Gooey Butter Cake Essential Ingredients for Authentic Flavor The quest for the quintessential Gooey Butter Cake begins with a selection of simple, yet high-quality ingredients. The flavors are the soul of the cake, and each component plays a pivotal role in creating the authentic taste that has charmed dessert lovers for generations. Butter: Opt for unsalted butter, melted and slightly cooled. It provides the rich, creamy base that defines the cake's texture. Sugar: Granulated sugar sweetens the cake and contributes to the gooey texture. Eggs: A combination of a whole egg and an additional yolk at room temperature ensures a dense and decadent consistency. Vanilla Extract: A teaspoon of pure vanilla extract adds a subtle, aromatic flavor. Flour: All-purpose flour, spooned and leveled, forms the structure of the cake. Leavening Agents: Baking powder is essential for the cake to rise properly. Salt: A pinch of salt balances the sweetness and enhances the overall flavor profile. Step-by-Step Baking Instructions After preparing your ingredients, the process of crafting the perfect Gooey Butter Cake begins with preheating your oven to 350°F (180°C) and lining a 9x13-inch baking pan with nonstick spray or parchment paper. Ensure the pan is well-prepared to prevent sticking. Next, follow these steps to assemble your cake: Mix the cake base ingredients until well blended and spread the batter evenly in the pan. For the topping, beat cream cheese with eggs and vanilla until creamy, then gradually mix in powdered sugar. Carefully spread the cream cheese mixture over the cake layer. Once cooled, a dusting of powdered sugar adds the final touch to this decadent dessert. Remember, patience is key—letting the cake cool completely ensures the perfect gooey texture. Tips for a Gooey and Delicious Outcome Achieving the perfect gooey texture in a butter cake is an art that requires attention to detail. Do not overbake the cake; it's essential to remove it from the oven when the center is just set but still wobbly. This ensures the signature gooeyness that makes this dessert so irresistible. Use room temperature ingredients to ensure even mixing and a smooth batter. Be gentle when combining the cream cheese layer with the cake base to maintain distinct layers. Allow the cake to cool for at least 20 minutes before serving to let the gooey layer set slightly. Gooey Butter Cake: A Culinary Delight Texture and Taste Profile The Gooey Butter Cake offers a unique sensory experience that is both indulgent and comforting. The flavor profile is a delightful symphony of sweet, buttery, and a hint of tanginess, often attributed to the cream cheese used in the filling. The base of the cake is typically light and airy, providing a pleasant contrast to the dense and creamy filling that defines its gooeyness. To fully appreciate the nuances of this dessert, consider the following aspects: Sweetness: Predominantly sweet with a rich, caramel-like undertone. Buttery Flavor: A pronounced buttery taste that melts in the mouth. Tanginess: A subtle tang that balances the sweetness, often from the cream cheese. Texture: A combination of a tender crust and a viscous, sticky filling. Pairing with Other Desserts and Beverages The rich and decadent texture of Gooey Butter Cake makes it a versatile dessert that pairs wonderfully with a variety of other sweets and drinks. Bold flavors in beverages can complement the cake's sweetness, creating a balanced and indulgent experience. When considering dessert pairings, think about textures and flavors that contrast or enhance the gooey butter cake. Here's a list of potential companions: Fresh fruit and whipped cream for a light and refreshing contrast Warm with a scoop of ice cream for a classic combination Chocolate Peanut Butter Cups for a rich and satisfying duo For those who enjoy a tipple with their dessert, wine can be an excellent choice. A sweet white wine such as Barsac or Sauternes pairs beautifully, cutting through the richness of the cake. Here's a succinct pairing guide: Serving Suggestions for Different Occasions Gooey Butter Cake is incredibly versatile when it comes to serving, making it a perfect dessert for various events and celebrations. For a casual family gathering or a cozy winter evening, serve it warm with a scoop of vanilla ice cream to complement its rich, buttery flavor. During the summer months, pair it with fresh berries for a refreshing twist. For more formal events, consider presenting the cake in individual portions, garnished with a dusting of powdered sugar and a sprig of mint for a touch of sophistication. Here's a quick list of occasions where Gooey Butter Cake can shine: Seasonal celebrations: Thanksgiving, Christmas Special days: Mother's Day, Valentine's Day Personal milestones: Birthdays, Graduations Themed parties: 4th of July BBQs, Halloween gatherings Remember, the key to a memorable dessert experience is to tailor the presentation and accompaniments to the occasion, ensuring that the Gooey Butter Cake remains the star of the show. Celebrating Gooey Butter Cake National Gooey Butter Cake Day Every year on August 12th, sweet tooths and dessert aficionados come together to celebrate National Gooey Butter Cake Day. This day is dedicated to the rich, decadent dessert that has been tantalizing taste buds since its accidental creation in the 1930s. Originating from St. Louis, Missouri, the gooey butter cake has become a beloved treat across the nation. To honor this day, many bakeries and households whip up their own versions of the classic cake. Here are some fun ways to partake in the festivities: Bake your own gooey butter cake using traditional recipes or experiment with new flavors. Visit a local bakery to indulge in a professionally crafted gooey butter cake. Share your gooey butter cake creations on social media using the hashtag #NationalGooeyButterCakeDay. Host a gooey butter cake tasting party with friends and family. Whether you're a seasoned baker or a first-time cake maker, this day is the perfect excuse to enjoy and share the love for gooey butter cake. Let's raise a fork to this delightful dessert and the joy it brings! Incorporating Gooey Butter Cake into Festivities Gooey butter cake, with its rich flavor and decadent texture, is a versatile dessert that can elevate any celebration. Incorporating this sweet treat into your festivities can add a touch of indulgence and nostalgia. Whether it's a birthday, anniversary, or a casual get-together, there's always room for a slice of gooey butter cake. For birthdays, consider the playful twist of Birthday Cake Gooey Butter Cookies, which offer the same delicious taste in a bite-sized form. During the holidays, a Turtle Gooey Butter Cake, complete with caramel and pecans, can serve as a luxurious centerpiece. National Gooey Butter Cake Day on August 12th is the perfect excuse to indulge and share this St. Louis classic with friends and family. Remember, the presentation of your gooey butter cake can be just as important as the taste. A simple dusting of powdered sugar or a hidden layer of strawberries can transform this traditional dessert into a show-stopping confection. Creative Presentation and Decoration Ideas When it comes to presenting your gooey butter cake, creativity can transform this classic dessert into a visual feast. Consider the occasion and choose a theme that complements it. For a birthday, vibrant colors and playful toppers can add a festive touch. During the holidays, a dusting of powdered sugar might mimic a snowy scene, perfect for a Christmas treat. Here are some decoration ideas to inspire your next gooey butter cake masterpiece: Edible flowers for a spring garden party Seasonal fruits for a fresh summer look Caramel drizzle and toasted nuts for an autumnal flair Peppermint pieces and chocolate shavings for a winter wonderland theme Remember, the key to a stunning presentation is in the details. A well-chosen cake stand or platter can elevate the overall appearance, making your gooey butter cake the centerpiece of any gathering. For those looking to add a personal touch, custom decorations such as monogrammed fondant letters or bespoke cake toppers can make your dessert truly one-of-a-kind. Beyond the Traditional: Gooey Butter Cake Innovations Gooey Strawberry Cheesecake Butter Cake Recipe Combining the richness of gooey butter cake with the freshness of strawberries, this recipe offers a delightful twist on the classic dessert. The Gooey Strawberry Cheesecake Butter Cake is a layered confection that promises to satisfy any sweet tooth. The process begins with a simple cake base, followed by a luscious strawberry filling, and is crowned with a creamy, gooey topping. Each layer is designed to complement the others, creating a harmonious blend of textures and flavors. Here's a quick guide to the essential steps: Prepare the cake batter, ensuring the butter is well-incorporated. Spread the batter evenly in a lined springform pan. Layer with the strawberry filling. Top with the cream cheese mixture. Remember, the key to a successful Gooey Strawberry Cheesecake Butter Cake lies in the balance of its gooey top and soft cakey bottom. Enjoy the process and the delicious outcome! Gooey Butter Cake Variants for Every Sweet Tooth The versatility of gooey butter cake ensures there's a variant to satisfy every type of sweet craving. From the classic St. Louis style to inventive twists like the Gooey Strawberry Cheesecake Butter Cake, the possibilities are endless. Here's a taste of the variety available: Chocolate Coca Cola Cake Lemon Blueberry Gooey Butter Cake Turtle Gooey Butter Cake Strawberry Gooey Butter Cake Each variant brings its own unique spin to the traditional recipe, whether it's through the addition of fruit, chocolate, or even soda. The Strawberry Gooey Butter Cake, for instance, layers a simple cake base with a pie-inspired strawberry filling, all topped with a creamy cheese mixture. Remember, while these cakes are on the sweeter side, they are designed to be balanced. The sweetness from the sugar and fruit complements the tanginess of the cream cheese, creating a harmonious dessert experience. Gooey Butter Cookies and Other Spin-offs The innovation in the world of gooey butter treats doesn't stop at the cake; it extends to a delightful variety of spin-offs that cater to every sweet tooth. Gooey Butter Cookies have emerged as a fan favorite, offering the same rich, buttery flavor in a bite-sized form. These cookies often feature creative twists, such as the addition of birthday cake flavor and colorful sprinkles, making them irresistible treats that are perfect for any celebration. Here's a glimpse at the array of gooey butter-inspired confections available: Birthday Cake Gooey Butter Cookies Pumpkin Gooey Butter Cookies Chocolate Chip Gooey Butter Cookies Each variant brings a unique twist to the table, with prices typically starting at $36.00 for a dozen. These cookies not only satisfy cravings but also serve as a delightful gift, packaged in signature boxes that add a touch of elegance to the sweet experience. Conclusion The gooey butter cake, a delightfully rich and decadent dessert, has proven to be a favorite among those with a sweet tooth. Its unique texture, combining a dense cake base with a lusciously gooey cream cheese topping, makes it a standout treat. Whether you're celebrating National Gooey Butter Cake Day on August 12th or simply indulging in a homemade slice, this cake's versatility allows for variations like the strawberry cheesecake version, adding a fruity twist to the classic. Remember, while it's tempting to go all out with the powdered sugar topping, a pinch of salt is essential to balance the sweetness. If you're looking to impress at your next gathering or just want to enjoy a slice of sugary heaven, the gooey butter cake is sure to satisfy your cravings. Frequently Asked Questions What exactly is Gooey Butter Cake? Gooey Butter Cake is a dessert that features a dense cake base with a rich, gooey cream cheese topping. It typically consists of two layers: a bottom layer made from cake batter that's thicker than usual, and a top layer that's a soft and loose cream cheese mixture, sometimes with additional flavors like strawberry. How do I make Gooey Butter Cake? To make Gooey Butter Cake, you'll need ingredients such as a yellow cake mix, eggs, butter, cream cheese, vanilla extract, and powdered sugar. You start by blending cake mix with an egg and butter to form the base, then press it into a pan. The cream cheese layer is made by combining cream cheese, eggs, vanilla, and powdered sugar, which is then poured over the base and baked. What's the secret to a perfectly gooey topping? The secret to a gooey topping is getting the right ratio of cream cheese to powdered sugar and not overbaking the cake. The cake should be removed from the oven while the center is still slightly wobbly to ensure a gooey texture once it cools. Can I add flavors to my Gooey Butter Cake? Absolutely! You can incorporate flavors like strawberry for a Gooey Strawberry Cheesecake Butter Cake, or experiment with other fruit fillings, extracts, and toppings to create your own unique twist on the classic recipe. When is National Gooey Butter Cake Day? National Gooey Butter Cake Day is celebrated on August 12th. It's a day dedicated to enjoying and sharing this rich and decadent dessert with friends and family. Are there any variations of Gooey Butter Cake I can try? Yes, there are many variations of Gooey Butter Cake, including different recipes like Gooey Strawberry Cheesecake Butter Cake, and spin-offs such as Gooey Butter Cookies. Each variant offers a unique take on the classic dessert, catering to all kinds of sweet tooths.
- "The History and Recipe for the Classic Lady Baltimore Cake"
Lady Baltimore Cake is a distinctive Southern dessert that carries with it a rich tapestry of history and tradition. This article delves into the origins, preparation, and cultural significance of this beloved cake, exploring everything from its historical roots to its modern-day presence in popular culture and competitions. Whether you're a seasoned baker or a curious food enthusiast, this exploration of Lady Baltimore Cake promises to offer a delectable blend of culinary art and cultural heritage. Key Takeaways Lady Baltimore Cake has a storied history with significant ties to Southern American culture, often associated with charm and elegance. The cake's traditional recipe includes distinctive ingredients and a unique baking process that have been passed down through generations. Variations and modern adaptations of the recipe reflect its enduring popularity and the creativity of contemporary bakers. Lady Baltimore Cake frequently appears in popular culture, including literature and media, highlighting its influence on Southern cuisine. Cake competitions and heritage events often feature Lady Baltimore Cake, showcasing its role in community celebrations and memory-making. The Origins of Lady Baltimore Cake Historical Significance The Lady Baltimore Cake holds a special place in the annals of American culinary history. Originating in the early 20th century, this cake quickly became a symbol of Southern elegance and refinement. Its unique combination of flavors, including maraschino cherries, pecans, and chopped pineapple, set it apart from other desserts of the time. While the exact origins are somewhat shrouded in mystery, the cake's popularity surged after being mentioned in Owen Wister's 1906 novel, 'Lady Baltimore'. Since then, it has been a staple in Maryland's culinary scene, often associated with genteel society and festive occasions. Geographical Roots The Lady Baltimore Cake, with its delicate flavors and rich history, is deeply rooted in the Southern United States. Alabama, in particular, has a special connection to the cake, with local competitions celebrating its legacy. The Birmingham Historical Society has noted the cake's presence alongside other iconic Southern desserts in cultural events, such as the cake walk, which has ties to Afro-American history. Alabama's geological history, marked by a tapestry of fossils, provides a unique backdrop to the state's culinary traditions. The diverse landscape, from tropical seas to coal-forming swamps, has influenced the local cuisine, including the ingredients available for such historic recipes. The state's rivers and fossils not only tell a story of the past but also enrich the present, including the culinary arts. The cake's geographical roots are not just about the physical location, but also about the community and traditions that have preserved and celebrated it through the years. From the Fruity Wonders Cake Competition to the preservation of local gardens and weather history, the cake is a sweet reminder of Alabama's heritage. Cultural Impact The Lady Baltimore Cake, beyond its delightful flavors, has woven itself into the fabric of Southern society. Its presence is felt in various cultural expressions and festivities, reflecting the region's rich culinary heritage. The cake's significance is often celebrated in events that honor American culinary traditions, such as those dedicated to Greek, German, and American heritage, where it stands as a symbol of the South's gastronomic contributions. In Baltimore, a city with a history of working-class roots and surrounding affluent suburbs, the Lady Baltimore Cake bridges social divides, gracing tables in diverse settings. This dessert has become a part of the city's identity, much like the historic and cultural spaces that are cherished and preserved by local societies. The cake walk, a tradition with deep roots in Afro-American history, has evolved into a joyous event where the community comes together to showcase their baking prowess. The Lady Baltimore Cake often features as a prized reward, echoing the celebratory spirit of the original cakewalks. This connection to the past enriches the cake's cultural resonance, making it a meaningful part of social gatherings and heritage celebrations. The Art of Baking Lady Baltimore Cake Traditional Ingredients The Lady Baltimore Cake is a testament to the elegance of simplicity in baking. Its traditional ingredients form the foundation of its delicate flavor and texture. A typical recipe includes: Cake flour, for a fine, tender crumb Granulated sugar, to sweeten and stabilize Unsalted butter, for richness and moisture Eggs, which provide structure and leavening Milk, to moisten the batter Each ingredient plays a pivotal role in creating the cake's signature lightness and subtle sweetness. It's important to use room temperature ingredients to ensure a smooth batter and even baking. While the classic recipe is revered, many bakers enjoy adding their own twist, such as a dash of salt or a hint of vanilla, to enhance the flavors. However, the core ingredients remain unchanged, a nod to the cake's storied past and enduring appeal. Step-by-Step Baking Process The journey to creating the perfect Lady Baltimore Cake is a dance of precision and patience. Begin by preheating your oven to 350°F and meticulously preparing your baking pan. The foundation of the cake starts with a harmonious blend of dry ingredients: flour, baking powder, and a symphony of spices including cinnamon, ginger, and nutmeg. Next, in a separate bowl, cream together the butter, granulated sugar, and brown sugar until the mixture is light and fluffy. This is followed by the careful addition of eggs and vanilla, ensuring each is fully incorporated before proceeding. The art of the cake continues as you alternate adding portions of the flour mixture with milk to the creamed butter, mixing just enough to combine. Once the batter is ready, it's time to spread it evenly in the prepared pan and bake until a pick inserted into the center comes out clean. Patience is key as the cake must cool completely on a wire rack before the next step. Variations and Modern Twists The Lady Baltimore Cake, a Southern belle of desserts, has seen numerous variations and modern adaptations over time. Bold flavors and innovative combinations have taken the stage, offering a fresh take on this classic confection. From the incorporation of exotic fruits to the infusion of contemporary culinary trends, the cake's evolution is a testament to its versatility. Exotic Fruit Infusions: Mango, passion fruit, and guava offer a tropical twist. Alternative Flours: Almond and coconut flours for gluten-free options. Boozy Additions: Bourbon or rum can add a spirited kick. Vegan Variants: Substitutes like flax eggs and plant-based creams. While purists may argue for the sanctity of the original recipe, the beauty of baking lies in the freedom to innovate. Whether it's a moist caramel mud cake or a vibrant lemon-raspberry layer, each new version adds to the rich tapestry of this dessert's history. Lady Baltimore Cake in Popular Culture Literary Mentions The Lady Baltimore Cake has not only been a staple in Southern kitchens but has also found its way into the literary world. The cake's unique charm and regional popularity have made it a symbol of Southern hospitality and tradition in literature. One notable mention is in the book Queen of the Turtle Derby and Other Southern Phenomena, which celebrates the distinctiveness of Southern food and culture, placing Lady Baltimore cake among the iconic dishes of the South. The literary journey of the Lady Baltimore Cake reflects its status as a cultural icon. Here's a glimpse into its presence in literature: Queen of the Turtle Derby and Other Southern Phenomena highlights the cake as part of the Southern culinary landscape. Numerous Southern novels and memoirs reference the cake, often evoking a sense of nostalgia and heritage. Cookbooks and culinary guides sometimes feature the Lady Baltimore Cake, not just for its recipe but also for its storied past. Appearances in Media The Lady Baltimore Cake has graced various forms of media, often symbolizing Southern elegance and tradition. Its presence in film and television has helped to cement its status as a culinary icon. From period dramas to modern cooking shows, the cake's intricate layers and distinctive frosting are instantly recognizable. In period dramas, the cake is frequently used as a prop to signify opulence and the genteel lifestyle of the South. Cooking shows and baking competitions have featured the Lady Baltimore Cake, challenging contestants to recreate this masterpiece. Lifestyle and travel programs often highlight the cake when exploring Southern cuisine and traditions. Influence on Southern Cuisine The Lady Baltimore cake, with its delicate flavors and rich history, has become a symbol of Southern charm and culinary tradition. This dessert is not just a treat to the palate but also a testament to the region's dedication to preserving its cultural heritage through food. In the kitchens of the South, the Lady Baltimore cake is often seen as a bridge between the old and the new, incorporating both traditional ingredients and modern interpretations. Executive chefs like Garret Fleming, with roots in Charleston, S.C., have been known to seek out the quintessential version of this cake to feature as a signature dish in their restaurants, highlighting its significance in Southern cuisine. Southern cooking is known for its comfort and heartiness, and the Lady Baltimore cake fits perfectly within this narrative. The cake's Southern comfort appeal makes it a sought-after dessert for those looking to experience the essence of Southern hospitality. Its presence on menus across the region underscores the cake's role in shaping the identity of Southern gastronomy. Competitions and Celebrations Cake Contests and Heritage Events The Lady Baltimore Cake has found a special place in the hearts of many, particularly in the Southern United States where it is a staple at various competitions and heritage events. The Birmingham Historical Society (BHS) Heritage Cake Contest is one such event where this cake shines. Held annually at the Birmingham Botanical Gardens, the contest invites enthusiasts to present their childhood favorite cakes, with the Lady Baltimore being a cherished contender. Participants eagerly await the announcement of winners in categories such as Best Overall Cake, Most Vintage Recipe, and Most Beautiful Cake. The event not only celebrates the art of baking but also serves as a gathering for the community to share stories and memories associated with these treasured recipes. Winning Strategies for Bake-offs Success in cake competitions often hinges on understanding the judging categories and tailoring your cake to meet these criteria. For Lady Baltimore Cake, this could mean focusing on categories like Best Flavor Profiles or Best Memory Statement, ensuring your cake not only tastes exceptional but also evokes a sense of nostalgia or personal connection. When preparing for a bake-off, it's crucial to remember the basics: Preheat your oven to the correct temperature, typically around 350°F. Follow the recipe steps meticulously, ensuring ingredients are added in the proper order and combined just right. Presentation is key, so take time to perfect the visual appeal of your cake, aiming for awards like Most Beautiful Cake or Best Visual Presentation. Lastly, don't forget the practicalities. Fill out any necessary forms and bring them along to the event. And remember, the joy of baking comes not just from the competition, but from sharing your creation with others and making new memories. Sharing Memories Through Cake Lady Baltimore Cake, with its delicate flavors and rich history, often serves as a centerpiece at gatherings where stories and traditions are passed down through generations. Baking and sharing this cake becomes a ritual, a way to connect with our past and celebrate the present. At events like the Birmingham Historical Society Cake Walk, participants are encouraged to bring cakes that hold special significance to their childhood memories. The contest categories, such as 'Best Overall Cake' and 'Most Vintage Recipe', highlight the importance of personal history in baking. Best Overall Cake Most Vintage Recipe Most Unusual Cake Most Beautiful Cake Best Memory Statement In cities like St. Louis, cake-related events have become a part of the cultural fabric, with initiatives like 'Cakeway to the West' celebrating history through confectionery art. These events not only showcase baking prowess but also foster community spirit and collective memory. Recipes and Resources Finding the Perfect Recipe Embarking on the journey to create the quintessential Lady Baltimore Cake can be as delightful as savoring the final product. Finding the perfect recipe is a crucial first step that sets the tone for the entire baking experience. When searching for that ideal recipe, consider the source's credibility and the reviews from other bakers. Recipes with high ratings and positive feedback often yield the best results. Here's a quick checklist to guide you: Look for recipes with clear, detailed instructions. Check the ratings and read reviews for personal tips and adjustments. Ensure the ingredient list is complete and authentic to the traditional cake. Pay attention to the preparation and cooking times to fit your schedule. Once you've selected a recipe, gather your ingredients and prepare your kitchen for the magic of baking. With patience and passion, you're well on your way to creating a masterpiece that pays homage to the storied tradition of the Lady Baltimore Cake. Online Communities and Forums In the digital age, online communities and forums have become invaluable resources for bakers of all levels seeking advice, inspiration, and camaraderie. Websites dedicated to culinary arts often feature sections where enthusiasts can share their experiences with Lady Baltimore Cake, exchange tips, and offer support. Clients From Hell Stories Historical Research, Publishing, and Education Free Programs and Social Media Engagement Contributor Updates and Site Navigation These platforms not only facilitate the exchange of recipes and baking techniques but also foster a sense of community among those who share a passion for this classic dessert. Whether you're a novice baker or a seasoned pro, engaging with these online spaces can enhance your baking journey. Cookbooks and Culinary Guides For enthusiasts eager to perfect their Lady Baltimore Cake, a wealth of resources is available. Cookbooks and culinary guides are treasure troves of wisdom, offering not only recipes but also insights into the art of baking. These guides often include tips on cookware and equipment, ingredient substitutions, and even kitchen tips for specific appliances like the Instant Pot or Air Fryer. A particularly notable mention is found in the archives of OLD LINE PLATE, where a 1900 cookbook titled "Miss Olive Allen's tested recipes" is highlighted. This collection, which includes over 200 recipes gathered from around the world, features the Lady Baltimore Cake among its prized selections. When diving into the world of baking, it's crucial to have a reliable guide. Below is a list of categories commonly found in culinary resources that can help bakers at all levels: Dinners and Main Dishes Meals for Various Occasions Ingredient-Specific Recipes Kitchen Tips and Tricks News and Trends in the Culinary World Conclusion The Lady Baltimore Cake, with its rich history and decadent layers, is more than just a dessert; it's a cherished part of Southern culinary tradition. From the bustling kitchens of Charleston to the competitive spirit of bake-offs, this cake has stood the test of time, delighting taste buds and igniting passions among bakers and cake enthusiasts alike. Whether it's the centerpiece at a spring fling, the subject of a historical society contest, or a potential signature dish for a restaurant, the Lady Baltimore Cake embodies a sweet slice of Americana. Its intricate flavors and textures, often passed down through generations, continue to captivate those who have the pleasure of savoring it. As we conclude our exploration of this beloved cake, we are reminded of the power of food to connect us to our past, to each other, and to the simple joys of a well-baked treat. Frequently Asked Questions What is the origin of Lady Baltimore Cake? Lady Baltimore Cake is believed to have originated in the Southern United States, specifically Charleston, South Carolina. It gained popularity in the early 20th century and is known for its delicate flavor and distinctive frosting that includes nuts and dried fruits. What are the traditional ingredients of a Lady Baltimore Cake? The traditional Lady Baltimore Cake is made with all-purpose flour, sugar, butter, eggs, and milk. The distinctive frosting typically includes unsalted butter, granulated sugar, dried fruits, nuts, and sometimes a touch of bourbon or brandy. Can I find Lady Baltimore Cake outside of the Southern United States? While Lady Baltimore Cake is a Southern specialty, it's possible to find it in bakeries outside the South or by using online recipes to bake it at home, regardless of your location. Has Lady Baltimore Cake been featured in any competitions? Yes, Lady Baltimore Cake has been featured in various cake contests and heritage events, such as the Birmingham Historical Society Heritage Cake Contest. What are some modern variations of Lady Baltimore Cake? Modern twists on the Lady Baltimore Cake include different types of nuts and dried fruits in the frosting, the addition of spices such as cinnamon or nutmeg to the batter, and even incorporating flavors like chocolate or citrus into the cake or frosting. How has Lady Baltimore Cake influenced Southern cuisine? Lady Baltimore Cake is a cherished part of Southern cuisine and has influenced the region's culinary culture by embodying the tradition of elaborate and celebratory desserts that are integral to Southern hospitality and family gatherings.
- "Exploring the Delicious Tradition of Mooncake: A Culinary Journey"
Mooncakes are a traditional Chinese delicacy, deeply rooted in the culture and history of China. They are most famously consumed during the Mid-Autumn Festival, a time for family reunions and moon gazing. This article delves into various aspects of mooncakes, from their cultural significance and evolving varieties to their place in modern commerce and considerations for health and dietary restrictions. Key Takeaways Mooncakes hold profound cultural significance, particularly during the Mid-Autumn Festival, symbolizing reunion and prosperity. Traditional mooncakes have evolved, with innovations like snow skin mooncakes and fillings with less fat to cater to modern tastes. Health-conscious adaptations and alternatives for dietary restrictions are influencing mooncake ingredients and availability. Commercialization has led to a variety of purchasing options, including high-end mooncakes and custom orders for personal and business gifting. Mooncakes are not only a festive treat but also a reflection of Chinese culinary artistry, adapting to contemporary demands while retaining traditional essence. The Cultural Significance of Mooncakes Mid-Autumn Festival Traditions The Mid-Autumn Festival is a time for reunion and thanksgiving, celebrated with great enthusiasm across various Asian cultures. Central to the festivities are mooncakes, which are not just a delicacy but also a symbol of togetherness. Families and friends gather under the moonlight, sharing stories and mooncakes, embodying the festival's spirit of unity. In many communities, the preparation of mooncakes is a communal activity, where recipes are passed down through generations. Traditional fillings like lotus seed paste and salted egg yolk are encased in a tender pastry, each bite a blend of sweet and savory flavors. The festival is also marked by the display of lanterns and the exchange of mooncakes, which are often presented in elaborate packaging, signifying respect and good wishes. While the festival's customs may vary regionally, the essence remains the same: a celebration of harmony and prosperity. It's a time when the past is honored, the present is cherished, and the future is bright with hope. Symbolism and Mythology Mooncakes are not merely a treat; they are steeped in rich cultural symbolism. The round shape of mooncakes is a representation of the full moon and signifies completeness and reunion, making them an emblem of family unity. During the Mid-Autumn Festival, these pastries are shared among family and friends, reinforcing social bonds and expressing the wish for togetherness. In addition to their shape, the intricate designs on mooncake surfaces often carry significant meanings. Common motifs include the moon, the rabbit (associated with the moon in Chinese folklore), and characters for longevity or harmony. Here is a list of common symbols found on mooncakes and their meanings: The Moon: Eternal femininity and cyclical renewal The Rabbit: Cleverness and self-sacrifice Flowers: Growth and flourishing Characters for Longevity or Harmony: Wishes for a long and peaceful life Modern Gifting Practices In recent years, the tradition of gifting mooncakes has evolved into a sophisticated market with a focus on presentation and personalization. Gift boxes have become a popular choice, reflecting the importance of aesthetics in modern gifting culture. These boxes often come in various styles, from traditional Asian designs to contemporary luxury packaging, catering to diverse tastes and occasions. Regular packaging: Individually wrapped pastries in a standard box. Premium gift boxes: Individually wrapped pastries in a deluxe, seasonal gift box. The rise of online commerce has also streamlined the gifting process, with services like same-day delivery and free click-and-collect options enhancing convenience for buyers. Customer reviews on platforms like Etsy highlight the satisfaction with quality and shipping, indicating the value placed on reliable service in the mooncake market. Varieties and Evolution of Mooncakes Traditional Fillings and Flavors Mooncakes are a traditional Chinese delicacy, with a rich history of flavors and fillings that have been passed down through generations. The most classic mooncake fillings include lotus seed paste, red bean paste, and a variety of mixed nuts and seeds, often accompanied by salted duck egg yolks to symbolize the full moon. These ingredients not only provide the distinctive taste but also carry cultural significance. Over time, mooncake artisans have experimented with a plethora of fillings to cater to diverse palates. Fillings including honeydew, litchi, and pineapple have been introduced, making this traditional dessert healthier and more appealing to modern tastes. Additionally, unconventional fillings such as chocolate have found their way into mooncake recipes, offering a Western twist to this Eastern classic. Here is a list of some traditional and modern mooncake fillings: Lotus seed paste Red bean paste Mixed nuts and seeds Salted duck egg yolk Honeydew Litchi Pineapple Chocolate Innovations in Mooncake Design The evolution of mooncake design has been marked by both aesthetic and practical innovations. Bakeries have experimented with various fillings, reducing the oil content to create lighter, less fatty mooncakes. This response to consumer health concerns has led to the introduction of fruit-based fillings and the use of white lotus paste, which debuted in 1963. The crust of mooncakes has also undergone significant changes, with the snow skin mooncake being a notable example. Unlike the traditional baked crust, snow skin mooncakes have a tender, mochi-like texture and are often served chilled. Below is a list of some key innovations in mooncake design: Introduction of white lotus paste Use of fruit fillings to reduce fat content Development of snow skin mooncakes with a soft, chewy crust Incorporation of secret messages into mooncake pieces These innovations reflect the dynamic nature of mooncake design, as it adapts to modern tastes while preserving its cultural essence. The Rise of Snow Skin Mooncakes The introduction of snow skin mooncakes marked a significant departure from traditional mooncake recipes. These non-baked delicacies quickly became a favorite due to their chewy, mochi-like texture and cooler serving temperature. Unlike their baked counterparts, snow skin mooncakes are kept refrigerated, offering a refreshing alternative to the dense, rich fillings of classic mooncakes. The popularity of snow skin mooncakes has led to a surge in creative fillings and flavors, often incorporating elements from different culinary traditions. Here's a brief overview of the most sought-after fillings: Durian Matcha Chocolate Fruits like mango and strawberry As the demand for these modern mooncakes grows, so does the variety, with pastry chefs and mooncake manufacturers constantly experimenting to captivate the palates of adventurous consumers. Nutritional Considerations and Adaptations Traditional Ingredients and Allergens Mooncakes are a traditional Chinese pastry with a rich history, and their ingredients are a testament to their cultural heritage. The primary components of mooncake pastry include flour, sugar, and lard, while the filling may consist of various pastes made from lotus seeds, taro, black sesame, mung bean, dates, or red beans. Allergens present in mooncakes can pose a risk for individuals with dietary sensitivities. Common allergens found in mooncakes are wheat, eggs, peanuts, soybeans, and sulfur dioxide. It's crucial for consumers to be aware of these ingredients, especially when purchasing mooncakes for themselves or as gifts. Here is a list of typical allergens found in mooncakes: Wheat (gluten) Eggs Peanuts Soybeans Sulfur Dioxide For those with dietary restrictions, it is important to seek out specialized mooncake varieties that cater to their needs, such as vegan, vegetarian, or halal options. Health-Conscious Variations In response to growing health awareness, mooncake manufacturers have introduced health-conscious variations to cater to the modern consumer. These variations often feature reduced sugar, alternative sweeteners, or incorporate nutrient-dense ingredients such as nuts and seeds. For those seeking plant-based options, vegan mooncakes have gained popularity, with flavors like Lotus Seed and Red Bean being particularly sought after. Reduced Sugar: Less sweet, but still satisfying. Alternative Sweeteners: Utilizing ingredients like stevia or monk fruit. Nutrient-Dense Additions: Incorporating nuts, seeds, or whole grains. Vegan Options: Plant-based fillings and pastry, free from animal products. The market has seen a rise in specialized offerings such as the Vegan Mooncake/pastry Box flavors of Your Choice for the Lunar New Year. These products not only cater to dietary preferences but also add a personal touch to the festive gifting tradition. Dietary Restrictions and Mooncake Alternatives As mooncakes continue to be a cherished part of celebrations, there is a growing need to accommodate various dietary restrictions. Innovative mooncake options now cater to a wider audience, including those who are vegetarian, vegan, or gluten-free. This inclusivity ensures that the tradition can be enjoyed by all, regardless of dietary limitations. Mooncake producers have responded to health concerns and dietary preferences by offering alternatives that maintain the spirit of the traditional treat. For example, fillings made from fruit or less oil are becoming popular for those seeking mooncakes with less fat. Additionally, ingredients such as white lotus paste are being used to create new, lighter varieties. For those with specific dietary needs, here is a list of common mooncake alternatives: Vegetarian mooncake with plant-based fillings Vegan mooncake without any animal-derived ingredients Gluten-free mooncake made with alternative flours Reduced-fat mooncake utilizing fruit fillings and less oil These adaptations not only provide options for individuals with dietary restrictions but also introduce new flavors and textures to the mooncake palette. Mooncakes in Commerce Commercialization and High-End Varieties The commercialization of mooncakes has transformed them from a traditional festival delicacy to a luxury gift item. Businessmen and families now commonly exchange high-end mooncakes as a symbol of goodwill and respect. This shift has led to the emergence of premium varieties that cater to a more discerning clientele, emphasizing quality and exclusivity. Mooncake vendors have adapted to this trend by offering a range of packaging options to enhance the gifting experience. For instance, GraceCakeUS provides two distinct packaging styles: Regular: Individually wrapped pastries in a USPS priority small flat rate box. Gift box: Individually wrapped pastries in a traditional Asian style seasonal gift box, accompanied by a USPS priority medium flat rate box. The pricing of these mooncakes reflects their status as premium products, with assortments often starting at $35.00 and reaching up to $39.95 for a sampler or tasting box. Customer reviews, such as those for GraceCakeUS, indicate a high level of satisfaction with both the product quality and the shipping process, underscoring the importance of customer service in the mooncake commerce sector. Packaging and Presentation The presentation of mooncakes is almost as important as their taste, with packaging playing a crucial role in their appeal. Gift wrapping and packaging options vary widely, reflecting the importance of mooncakes as a traditional and thoughtful gift. For instance, individual wrapping ensures freshness and a premium feel, while traditional Asian style seasonal gift boxes convey cultural respect and festivity. Mooncake vendors often offer a range of packaging options to cater to different occasions and preferences: Regular packaging typically includes individually wrapped pastries, often shipped in standard boxes. Gift boxes provide an elevated experience with individual wraps and more elaborate, culturally significant boxes, suitable for special occasions or as corporate gifts. Proper packaging is essential not only for aesthetic reasons but also to ensure the product arrives in perfect condition. Returns due to improper packaging or damage can affect customer satisfaction and the brand's reputation. Purchasing Options and Custom Orders With the advent of online shopping and the increasing demand for personalized products, mooncake purchasing options have diversified significantly. Consumers can now easily order mooncakes from a variety of online platforms, ranging from large e-commerce websites to specialized bakery stores. For instance, Sheng Kee Bakery offers a rich heritage of Asian desserts, including mooncakes, which can be ordered online with the assurance of quality and tradition. Custom orders have become a popular trend, allowing buyers to tailor their mooncakes to specific tastes or dietary needs. Many bakeries provide the option to customize mooncakes, whether it's selecting unique fillings or designing intricate patterns on the mooncake surface. Etsy, a well-known marketplace for handmade items, extends Purchase Protection to its customers, ensuring a worry-free transaction for custom and personalized mooncake orders. For those seeking a more immediate gratification, some bakeries offer same-day takeout or a minimum preorder period, ensuring that even last-minute celebrations are catered for. It's important to note that online orders often require advance notice, and customers should be aware of shipping policies, as delivery times can be affected by external factors such as weather conditions. Conclusion The mooncake, a traditional Chinese pastry with a rich cultural heritage, has evolved significantly over time. From its origins as a symbol of the Mid-Autumn Festival to its modern iterations with less fat and innovative fillings like fruit and snow skin, mooncakes continue to be a beloved treat. They are not only a delicacy enjoyed during festive seasons but also a token of appreciation and connection, often given as gifts during important celebrations. Despite the changes in ingredients and styles, the essence of the mooncake—representing unity and prosperity—remains unchanged. As we reflect on the various aspects of mooncakes, from their historical significance to their culinary variations and the meaning they hold in Chinese culture, it's clear that this iconic pastry will continue to be cherished for generations to come. Frequently Asked Questions What is the cultural significance of mooncakes? Mooncakes are traditionally eaten during the Mid-Autumn Festival and symbolize reunion and completeness. They are linked to the mythology of Chang'e, the Moon Goddess, and are a customary gift that represents blessings and well-wishes. What are some traditional fillings and flavors of mooncakes? Traditional mooncake fillings include lotus seed paste, red bean paste, and mixed nuts. Flavors may also feature salted egg yolks, representing the full moon. Innovations have introduced less oily options and fruit fillings. What are snow skin mooncakes? Snow skin mooncakes are a non-baked version of mooncakes with a soft, chewy skin made from glutinous rice. They are often served cold and have become popular due to their variety of flavors and lighter texture. Are there any health-conscious variations of mooncakes? Yes, some bakeries offer mooncakes with reduced fat content, using less oil and healthier fillings like fruit. Snow skin mooncakes are also considered a lighter alternative. Can mooncakes accommodate dietary restrictions like vegan or halal diets? Traditional mooncakes may contain ingredients not suitable for vegan, vegetarian, or halal diets. However, there are specialty mooncakes available that cater to these dietary restrictions, using alternative ingredients. How are mooncakes presented and sold commercially? Mooncakes are often sold in beautifully designed gift boxes, especially during festive seasons like the Mid-Autumn Festival and Chinese New Year. They can be purchased as individual pastries or in assorted gift boxes, with options for custom orders.